ZBrushCentral

Mega Man X Sculpting Techniques

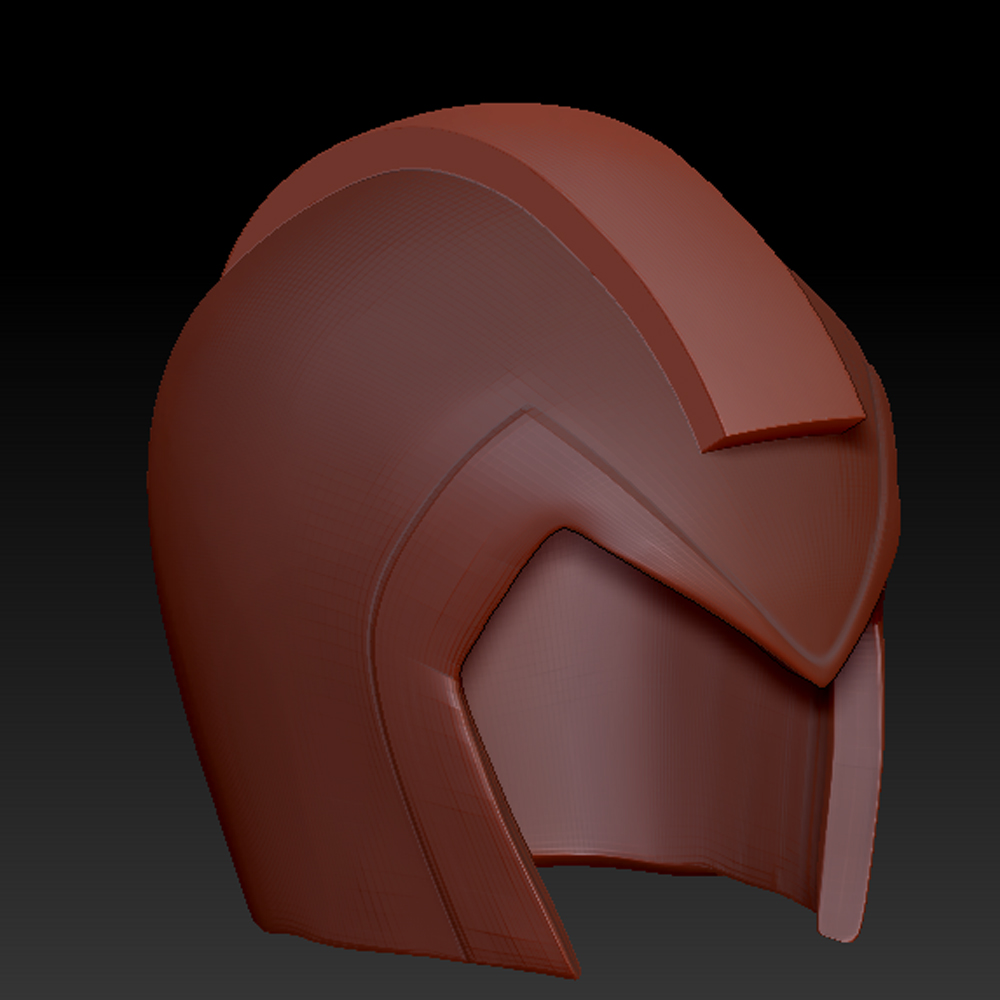
So I figured it was time to see what Mega Man X would look like in a high resolution sculpt and realistic texture painting.

But I am having a terrible time trying to get the hard surface techniques in Zbrush down. Here is a picture of what I have sofar.

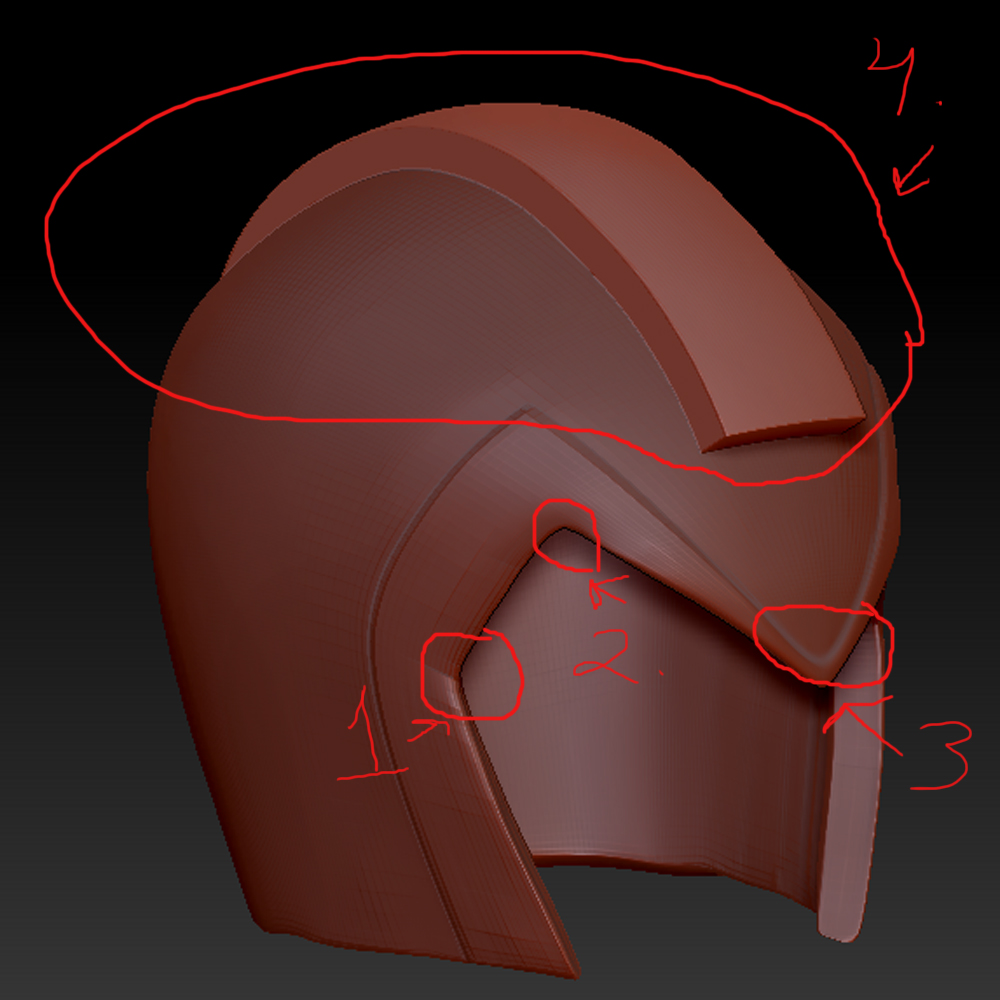
1 and 2 are pretty much the same. How can I get these edges nice and sharp. The clipping burshes do not work well on this kind of complex shape. Not that I can do at least. I figure just clip that entire frint piece right from the point down to where the helmets opening is. But I am not having any luck.

  1. I find the part where the two halfs make a triangle to be way to round. Needs to be sharp, again, clipping brushes were not helpful, atleast for me.

  2. is what made me put the pen down after 3 hours of troubleshooting and contact the community for advice and techniques. I need these to have a mechanical perfect bevel. I was using the trimdynamictrails. But it is way to free form. Back track wont follow the shape I am sculpting on.

Following the eat 3d zbrush hard surface techniques gave me good ideas, but I could not get them to work for me. Do not even get me started on shadowbox. damn thing wont let me paint masks. I was using the clipping brushes, extract, dynamesh. I really can not stand messy meshes. SHould I jsut say screw it and work with the messy meshes as well? How would you all go about getting the proper shapes and mechanical detail for this helmet?

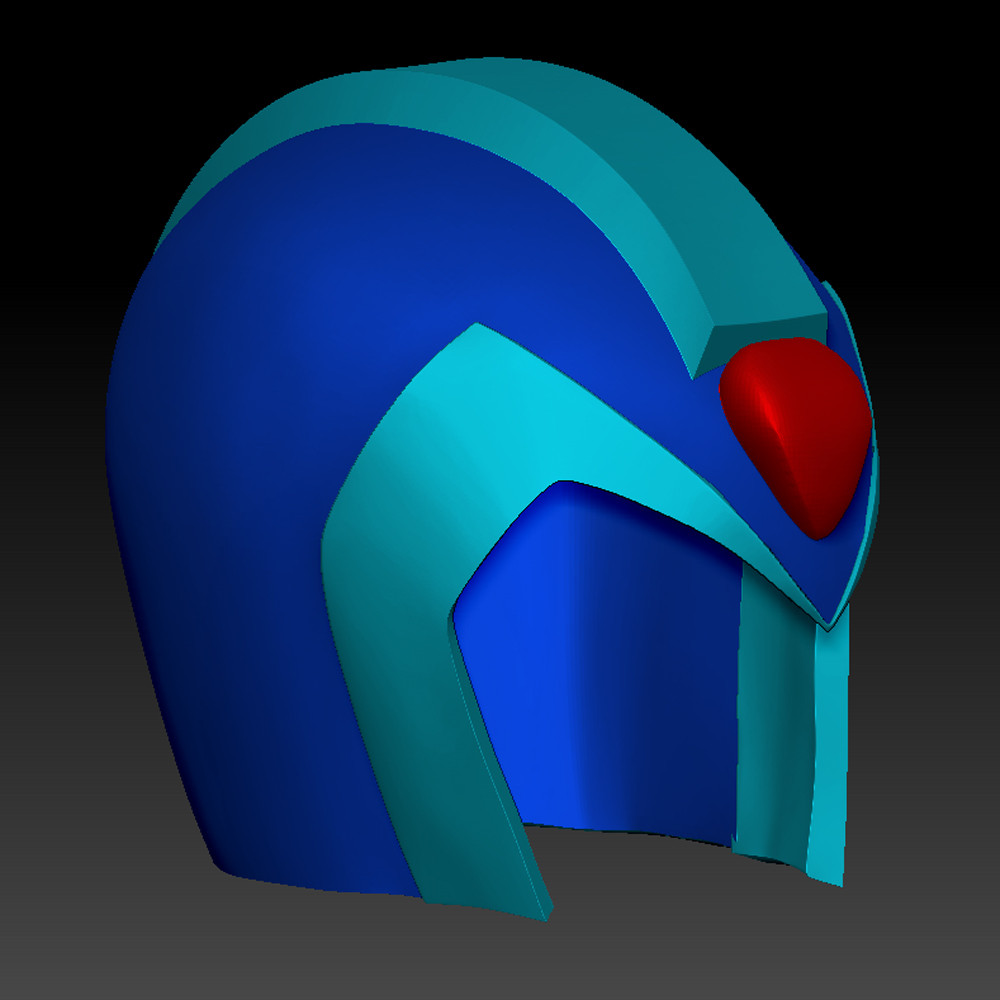
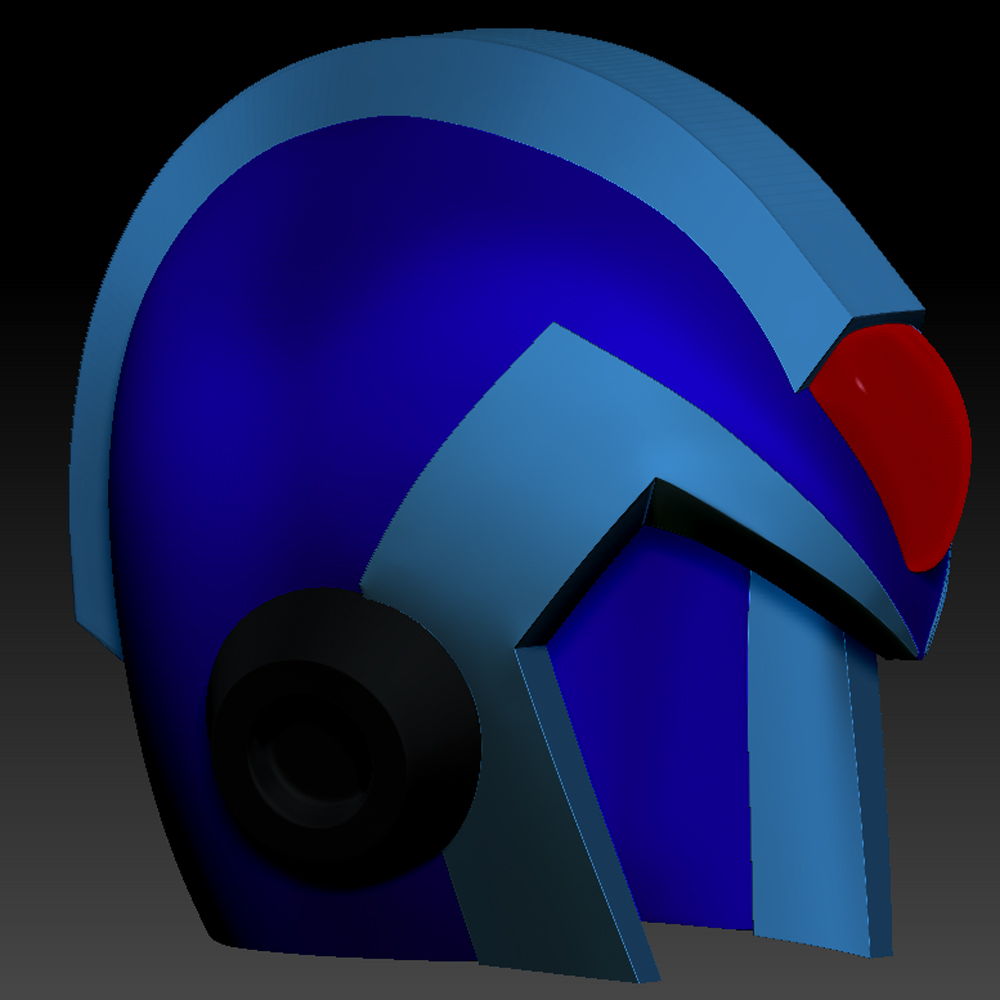
here is a good image of the shapes I am looking for. http://www.bing.com/images/search?&q=mega+man+x&qft=+filterui:imagesize-large&FORM=R5IR3#view=detail&id=D9EDE1E67251C518F2573E6837DB576512FCF998&selectedIndex=133

Attachments

helmtest2.jpg

helmnotes.jpg

I’d recommend taking a day and spending it reading up on, watching videos of, and experimenting around with:

Every single thing under Tool: Geometry: Edgeloop
Every single thing under Tool: Geometry: Crease
And everything about Polygroups, especially when dealing with how the above features can work with them, as well as the various Polish Deformations (Polish by features, polish by groups, polish crisp edges).

I think those things are key for working with hard surface shapes in zbrush. There’s a lot of power there, and they all tie together. Once you get the hang for that, you’ll start to see the strengths of certain tools such as zsphere retopology/the retopology brush/general extractions which can give you clean extrusions with great polygroups ready to be polished and beveled. Or the slice curve brushes which can help cut the mesh up into the crisp edges that you need for this while also creating polygroups for you (vs the clipping brush, which can only push and cram existing verts back to the surface). Polygroup Automasking, etc.


I really can not stand messy meshes. SHould I jsut say screw it and work with the messy meshes as well?

I think you’re going to have to bite the nail on that one if you wish to create hard surfaces this way. Sculpting programs like zbrush are meant to handle models that have millions of verts, so don’t worry too much about how they look (the only concern is how the surface looks). Otherwise clean subdivision meshes are better created the old fashion way; while here you sacrifice that pretty wireframe for speed and a bit more artistic flare behind the creation process.

Thank you sir. I will look at all of that today before work. I also went ahead and used Max to go back and create some of the meshes again. Atleast I got mor practice in Max haha. But I am excited to learn about wha you pointed out to me.

I am looking up all the info I can. DO you have any suggestions on where I can find the best info for all of what you mentioned?

So, using some of the techniques you mentioned I was able to get some good shapes. I actually went back to 3D Studio Max, and created different meshes. One for the Helmet base, one for the front trim, one for the top trim, one for the “ear” parts (not shown), and then used shadowbox to create the red gem. Instead of adding loops in Max where I wanted edges to stay sharp, I split the top trim up into poly groups. The sides, the top, the fron trapazoid and the back trapezoid. Then used Crease on each poly group, and that helped keep the beveled look I need, and keep the hard edges.

I am so used to in Max using the Quick loop tool when trying to do hard edges. Having Crease is a great tool. Saves on poly count and weird deformations when dividing a mesh.

I was not able to get sharp corners though on the front trim yet, they are sharper than before, but not sharp enough for my liking.
MegaManX_Test001.jpg

So, I figured it out. Using the same technique of spliting the mesh into poly groups, I then isolated the corners, creased them, and BAM! Sharp edges I am looking for. After some smoothing, the sirface detail looks beautiful.

I can’t see that. Screenshot required :stuck_out_tongue:

How could I let you not see Tetsuoo haha. Here is what I was able to accomplish so far. I am likeing it a lot.

MegaManX_Test002.jpg

The next hard part is gong to be getting the ring of cut-ins on the ear pieces. Radial symmetry is not working. You can see what I mean in this picture. Any ideas? http://images2.fanpop.com/image/photos/13800000/MegaMan-X-photos-megaman-13825738-372-467.jpg