I thought I should share our current work flow. Images from meshes developed by Dotnamestudios & Peter Minister . If anyone looks at this and has improvements or developments of this work flow please share.
Level: Medium to Advanced
Workflow outline:
Use Zbrush with sub-tools to sculpt out base mesh using zspheres, retopologise the mesh inside Zbrush, export to maya to UV, detail in Zbrush, rig in Maya render out of maya ( mental ray ) or zbrush.
Why the chosen work flow ?
Doing too much outside zbrush is a little like swimming upstream, I have found the perfect mesh for zbrush can only be built inside zbrush, even the neatest quad mesh from Maya can’t be taken to as high a level as the equivilant built in zbrush. Zbrush really needs not only quads but perfect squares for high subdivision levels.
That said, if you want the ability to export and import your mesh to UV in another program or create morph targets for animation and so on you would want to be able to bring your mesh in and out of zbrush rather than have a one way work flow.
You might also want to rig your mesh in a program like maya and then render it out of zbrush.
Current issue:
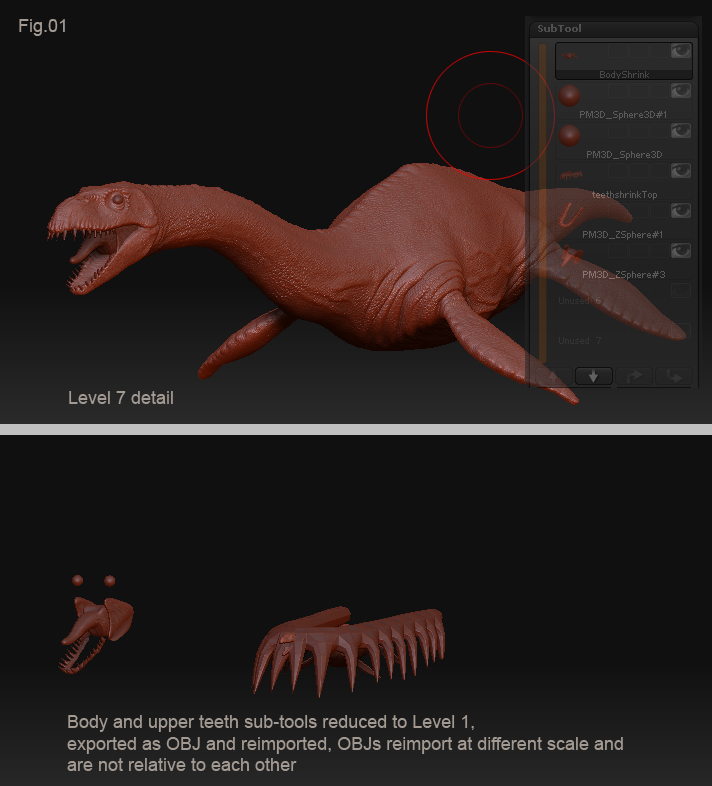
A mesh containing sub-tools that has been created in zbrush cannot be exported and reimported and maintian scale and position relitive to the other sub-tools. See fig01
Solution:
The perfect world isn’t here yet so you can’t sculpt your various sub-tools to differnt levels, export them at L1 and re-import them without them jumping. If anyone can figure it out please share, the scale bug might be corrected in 3.5 but until then here is our workflow:
Mocking up shape
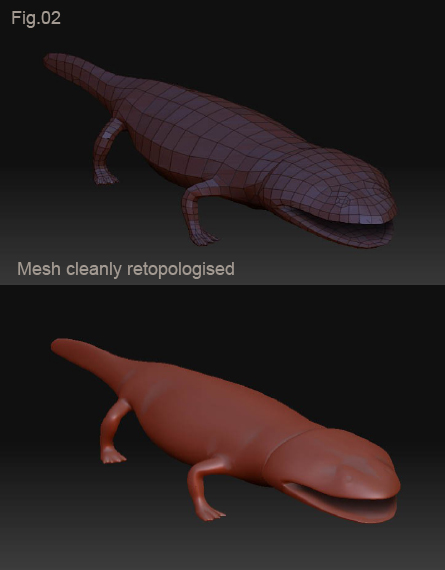
Do a quick twenty minute sculpt with Zspheres, to get the basic shape, then retopologise within zbrush to get a neat mesh with sensible edge loops and mesh flow.
( If you want to go much further detailing before retopologising I suggest you read up on all the threads; to sum it up it is possible, but with limited success, you can’t project very high detail methods and you are likly to experience many crashes and heart ache along the way )
Retopologise
Subject to many tutorials itself, suffice to say- think about how you want the mesh to be able to bend or animate.
Fig02
Subtools
Create or import eyes, teeth, spikes, sunglasses whatever your mesh might require but only to level 1. If you are competant in Maya it might be easier to generate simple objects requiring little sculpture such as dinosaur teeth in a later step.
Export merged mesh
Download a plug-in called Sub-tool master if you don’t already have it and merge all your subtools into one mesh. Export it as an OBJ.
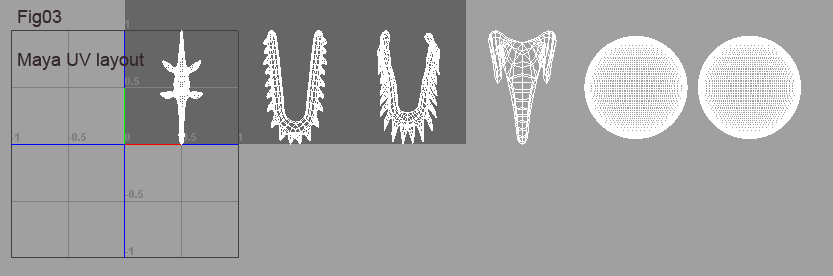
Maya
Import OBJ, add rows of simple teeth or anything else you prefured not to do in Zbrush. Separate each mesh you want as a subtool into a separate UV block ( 0-1 ; 1-2 ; 3-4 ) see fig03.
The UVing is simple projection for now and is temporary. Final UVing can be done later at any stage. Personally I use a combination of Headus and Maya to create UVs and I would do it at this point; I just havn’t for this tutorial.
Merge and export
Back in Zbrush
Import OBJ into a new zbrush scene.
Tool < Polygroups < UV Group
Tool < SubTool < GrpSplit
Detail
You can now detail to your hearts desire on the various sub-tools. They can now be exported and imported to UV or rig as you require and re-import back into Zbrush in the correct scale and position.
No doubt this work flow could only be classed as a work around to avoid the scale bug, but it provides a good base to work from once set up and use the various strangths of differnt applications.
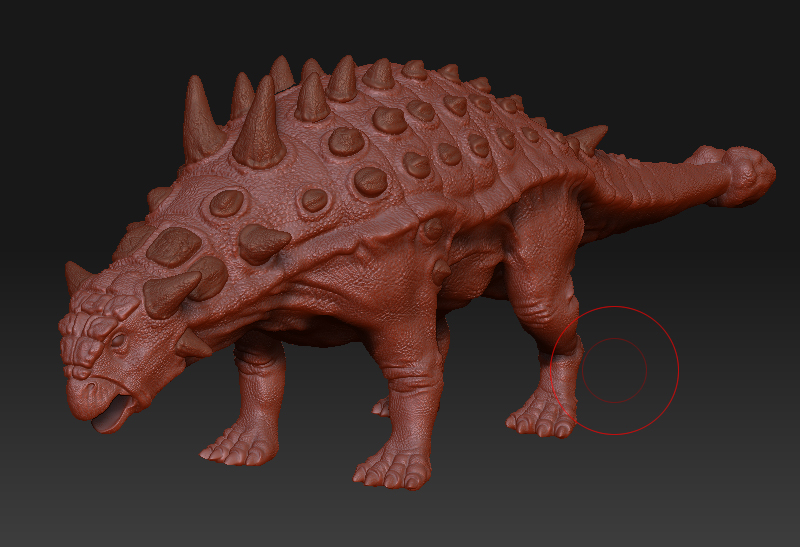
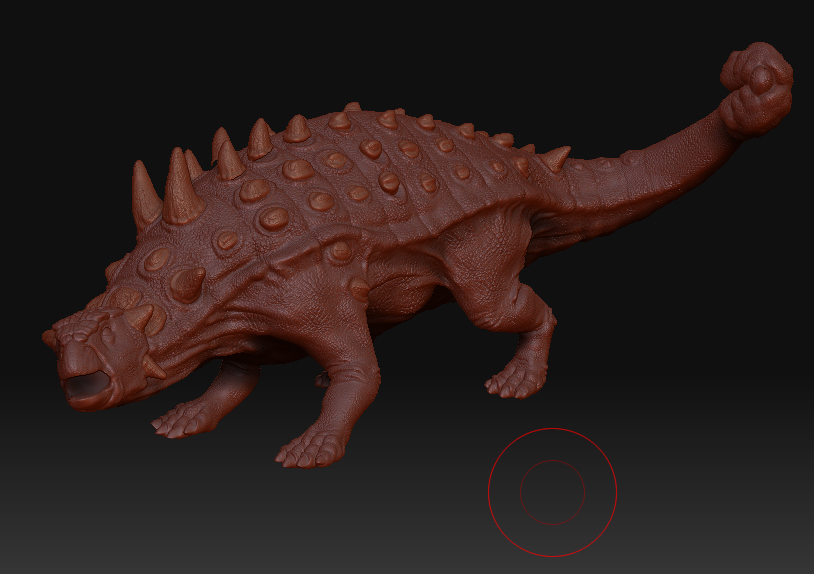
An example of this work flow solving problems is Fig04. & fig5 Here we have the many spiked dinosaur Euoplocephalus where it is clearly advantages to have the spikes as sub-tools, but in order to position it in an action pose you may choose to rig it in maya and reimport it. Certainly a maya rig is much more powerful than what you could achive in with transpose or prehaps you would want to create morph targets.
Andrew
www.dotnamestudios.com
Images copyright to Peter Minister and Dotnamestudios
Attachments