I know this has been asked numerous times, however, I’ve yet to find a definitive answer/solution. Specifically, there seems to be a problem with how ZBrush is exporting displacement and texture maps, and how they are correctly applied inside Maya. (currently running Maya 2012 on OS X)
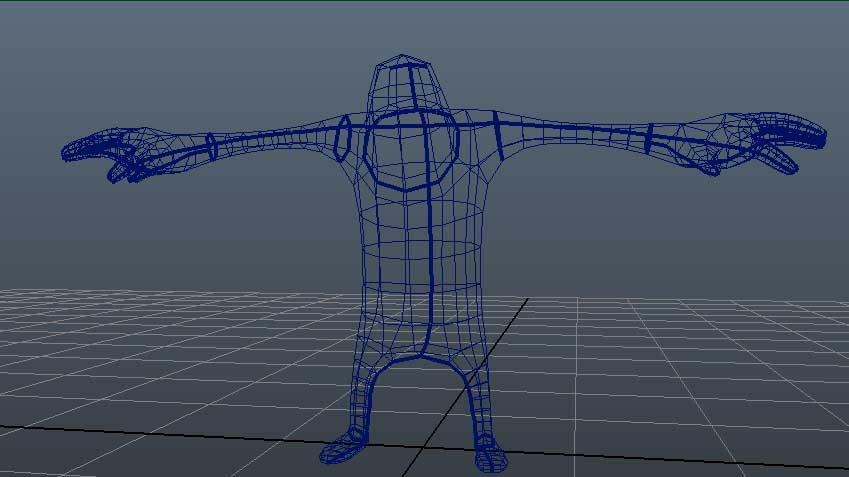
The first time through I used GoZ to spit the model out from Maya, and used UV Master to create the UVs. After GoZ back to Maya, the seams reared their ugly head.
Next, I decided to re-lay out my UVs again, and re-generate the texture and displacement maps with Multi-Map exporter, bypassing GoZ and manually updating the textures.
After corresponding a bit with Scott Spencer about this, the suggestion was there may be a problem with the CCMesh attribute in the mentalraySubdivApproximation1 node, however, toggling this on and off did not solve the problem.
The two issues I’ve been able to narrow down:
- There is definitely a UV border issue with the displacement map.
I’ve tried a few different combinations creating the dMaps with Adaptive on and off, and Smooth UV on. If I turn all the bells and whistles on, I seem to get a smoothed out, hi-res dMap. However, I’m still experiencing seems at the UV borders. There must be a secret handshake combination I need to set inside Maya for this to render correctly?
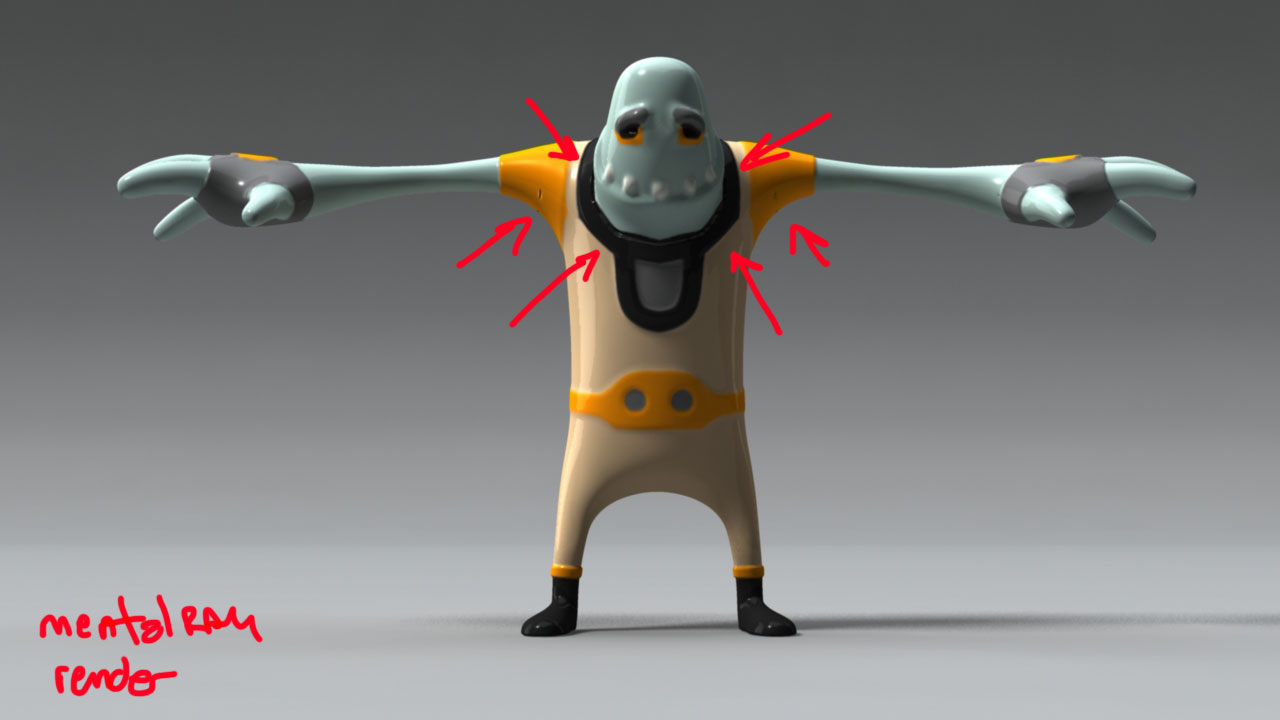
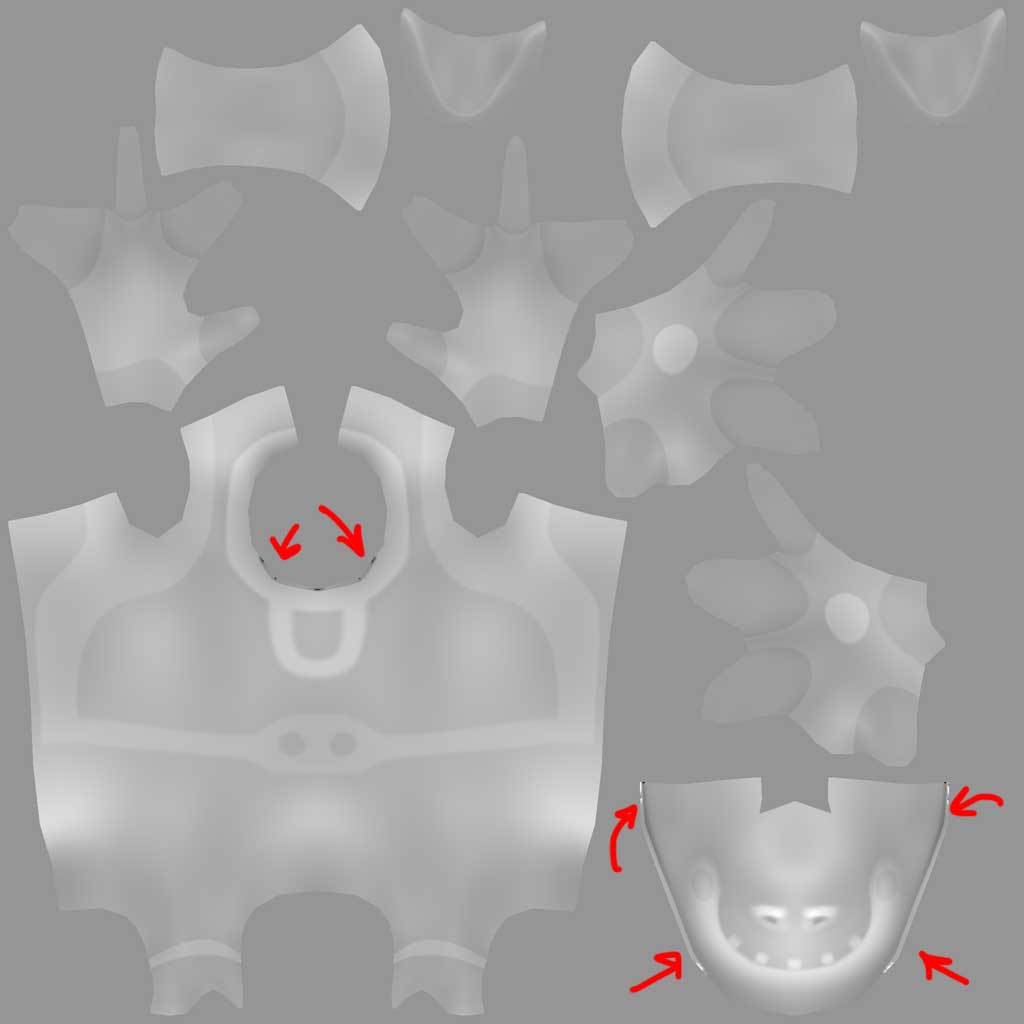
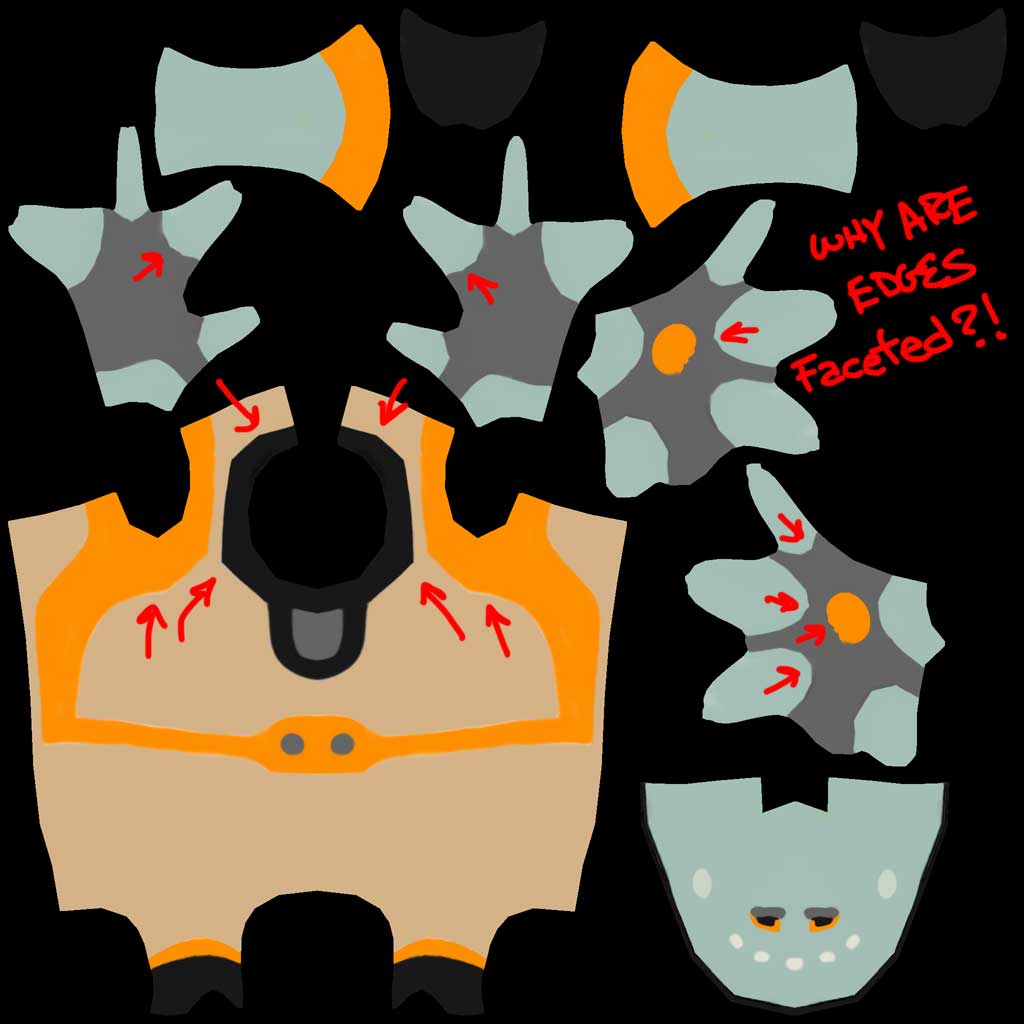
- The texture map generated from the highest subdivision level (I poly painted at level 7) is NOT creating smooth curves where expected. See attached images - the ZBrush preview clearly shows a smooth curve around the neck collar, but the texture map is faceted.
There’s always been this issue in Maya when smoothing geo whether or not UV Smooth should be on or off. It seems to make sense that it would be on, so then you would think you’d want to create smooth UV’s inside ZBrush. I can’t find anyplace to set this when creating the texture map. I do see an SUV tab and ReUV tab in Geometry, but trying these out, then regenerating the texture didn’t seem to make a difference.
So, you can specify Smooth UVs when generating a displacement map, but not when generating a texture map? (please, correct me if i’m wrong!)
The burning question remains: What are the magic numbers to use for generating the required maps, then setting them properly within Maya?!
GoZ get’s you 90% there (thanks for creating the shading network and proper hook ups) but the renders never come out 100% as expected. 
Thanks in advance for any clarification/suggestions/solutions.
-Steve
P.S. The last image was from my first attempt (notice the seam errors are in a different position from the original UV layout before I re-generated 'em)
Attachments