ZBrushCentral

Maya and Zbrush

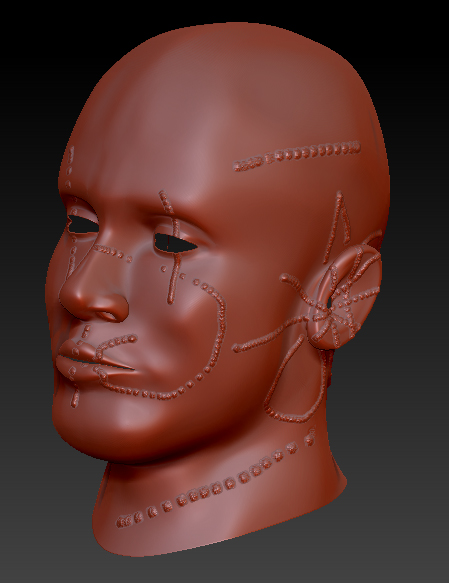
People i dont know what to do, i had tried every thing but i keep having troubles with my renders…
maya2010.jpg

the exactly procedure i used:
1.- create the model in maya and uv mapping (maya 2010)
2.- export obj file to zbrush 3.5R3
3.- export 32bits 2048x2048 displacement map (adaptative on, 32 bit on, dpsubpix 4, 3 channels, flip v)
4.- import obj in level 1 with single object selected.
5.-create aproxximation subdvi with max 5 min 3 and leng 0.01 (Spatial)
6.- create a lamber material and assing the *.map texture (converted tif texture to map with imf function)
7.- filter off the texture
8.- alpha gain 2.2 and alpha offset -1.1
9.- change the render to mental ray and hit render…

if its needed i can upload the maya file

PLEASEE HELP ME

:cry: :cry: :cry:

Attachments

zbrush35.jpg

Untitled-2.jpg

Bad Uv’s… too stretchy in the top of the head (the place where the artifacts are appearing)

I have already solved part of the problem; I also need to fix my UV. thanks to ISK-86. But I got a new issue… I discovered that the displacement map created in zbrush with smooth option on doesn’t fit to the model in maya because of the subdivision approximation of mental ray… Mental Ray generates uv smooth different than zbrush so the texture doesn’t match… Also if I generate my displacement map without smooth option on my renders have troubles like showed in the pictures below.
Thanks for your help

uv1.jpg

Attachments

uv2.jpg

why not just use normal maps, it’ll save a lot of head aches lol.

I tried with normal maps too but i got the same problem… UV smooth from zbrush doesnt match with my model with subdiv aproximation :(:(:frowning: 
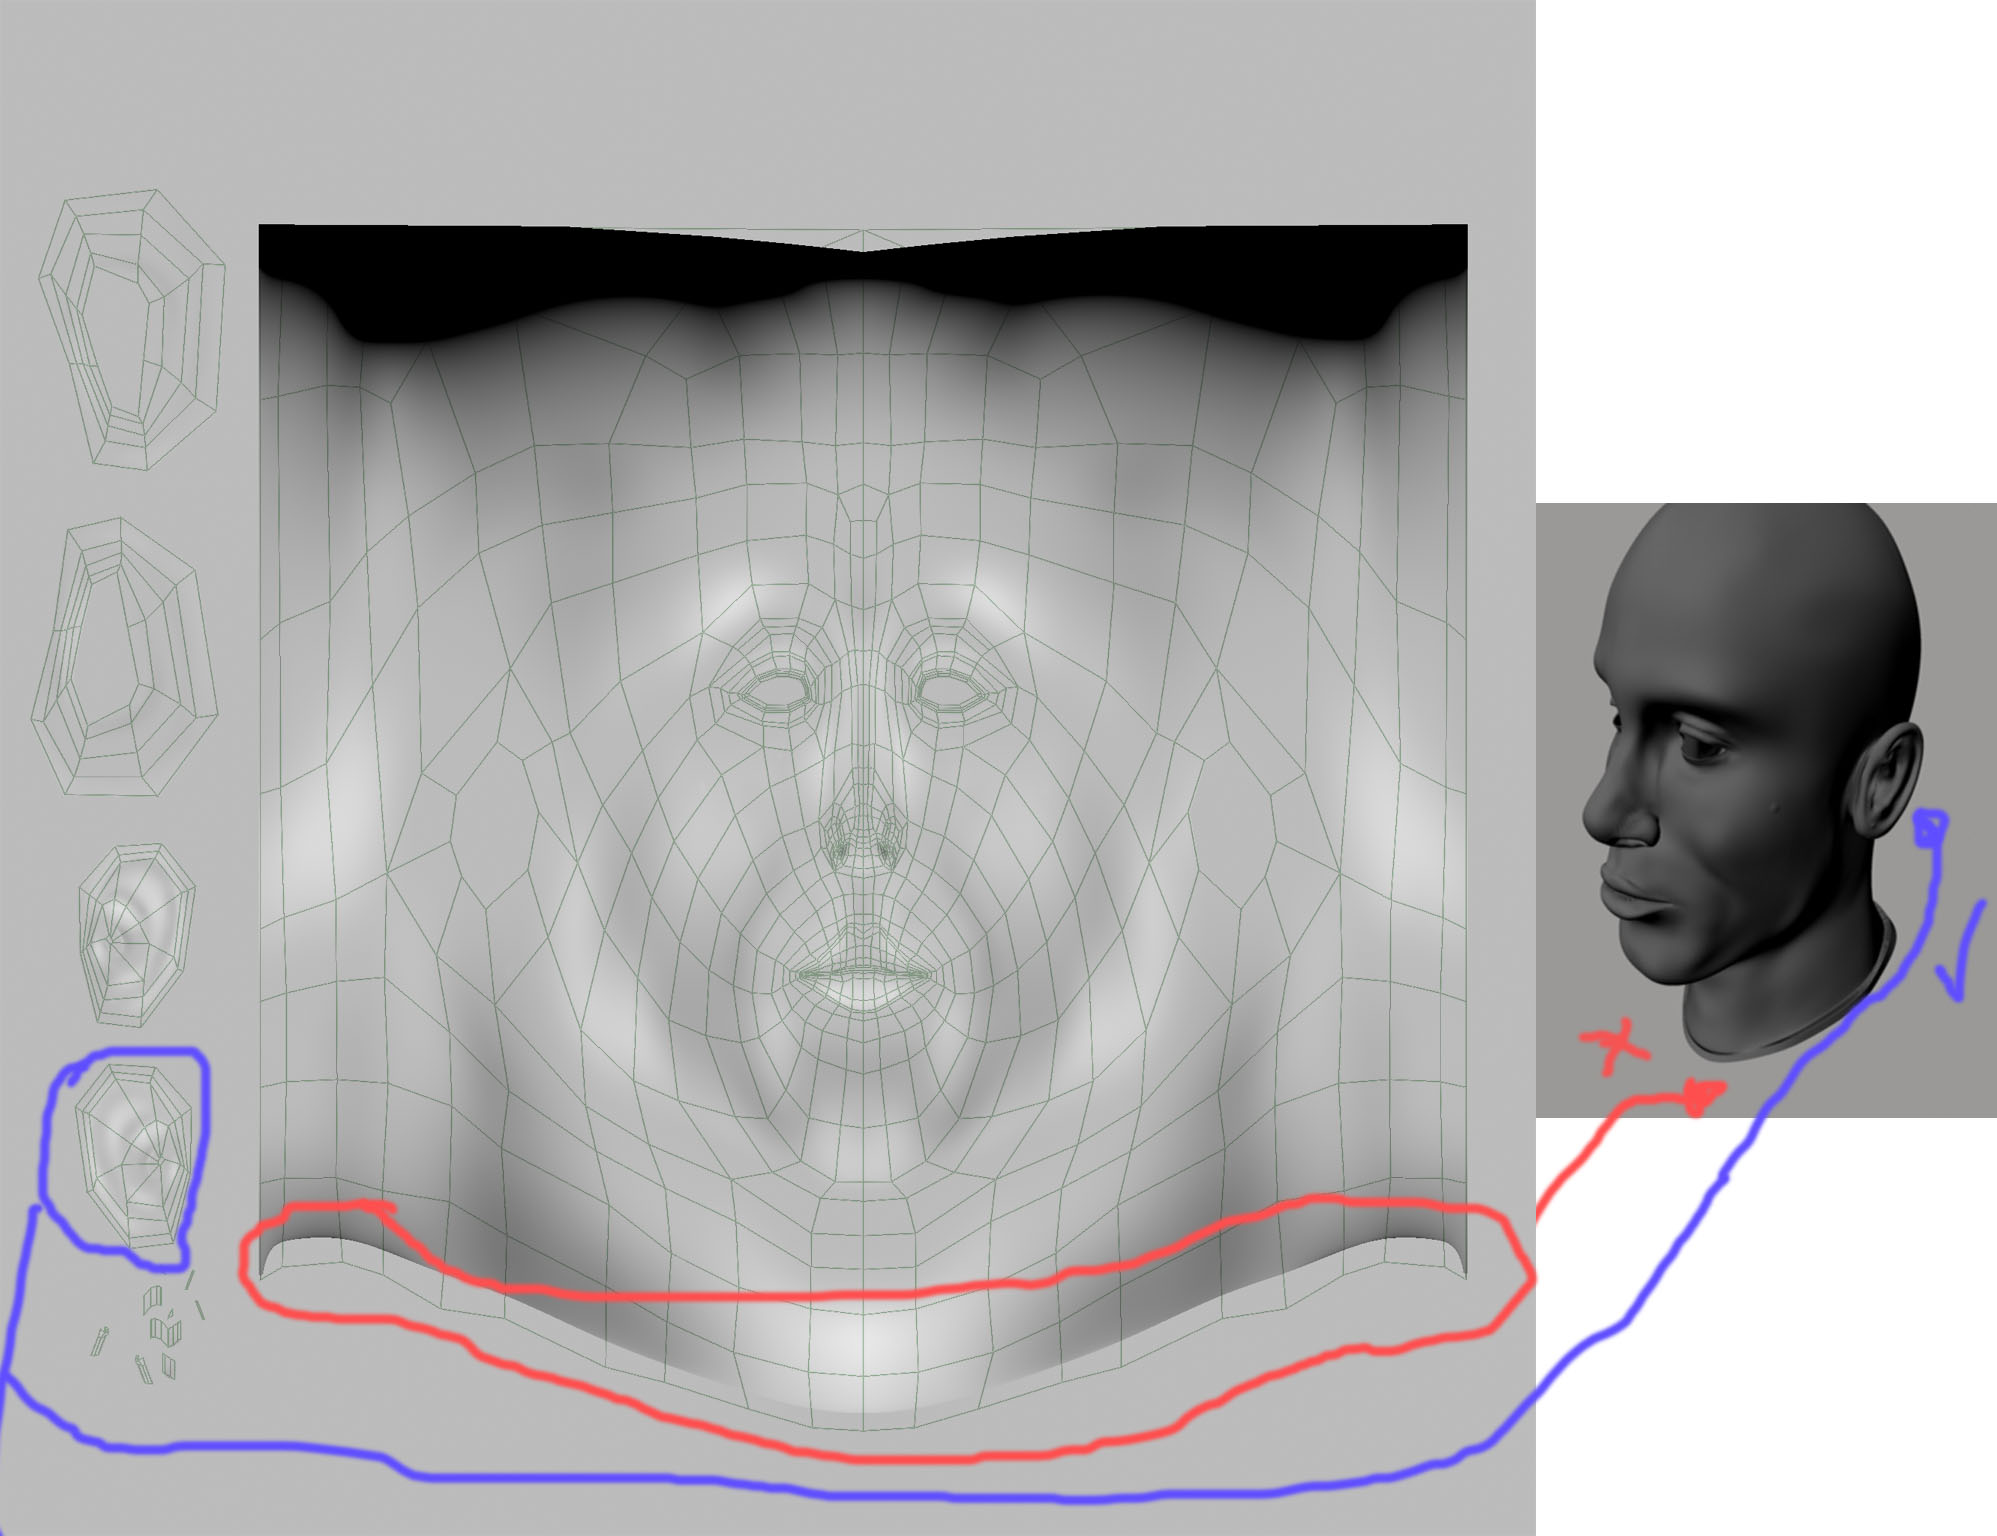
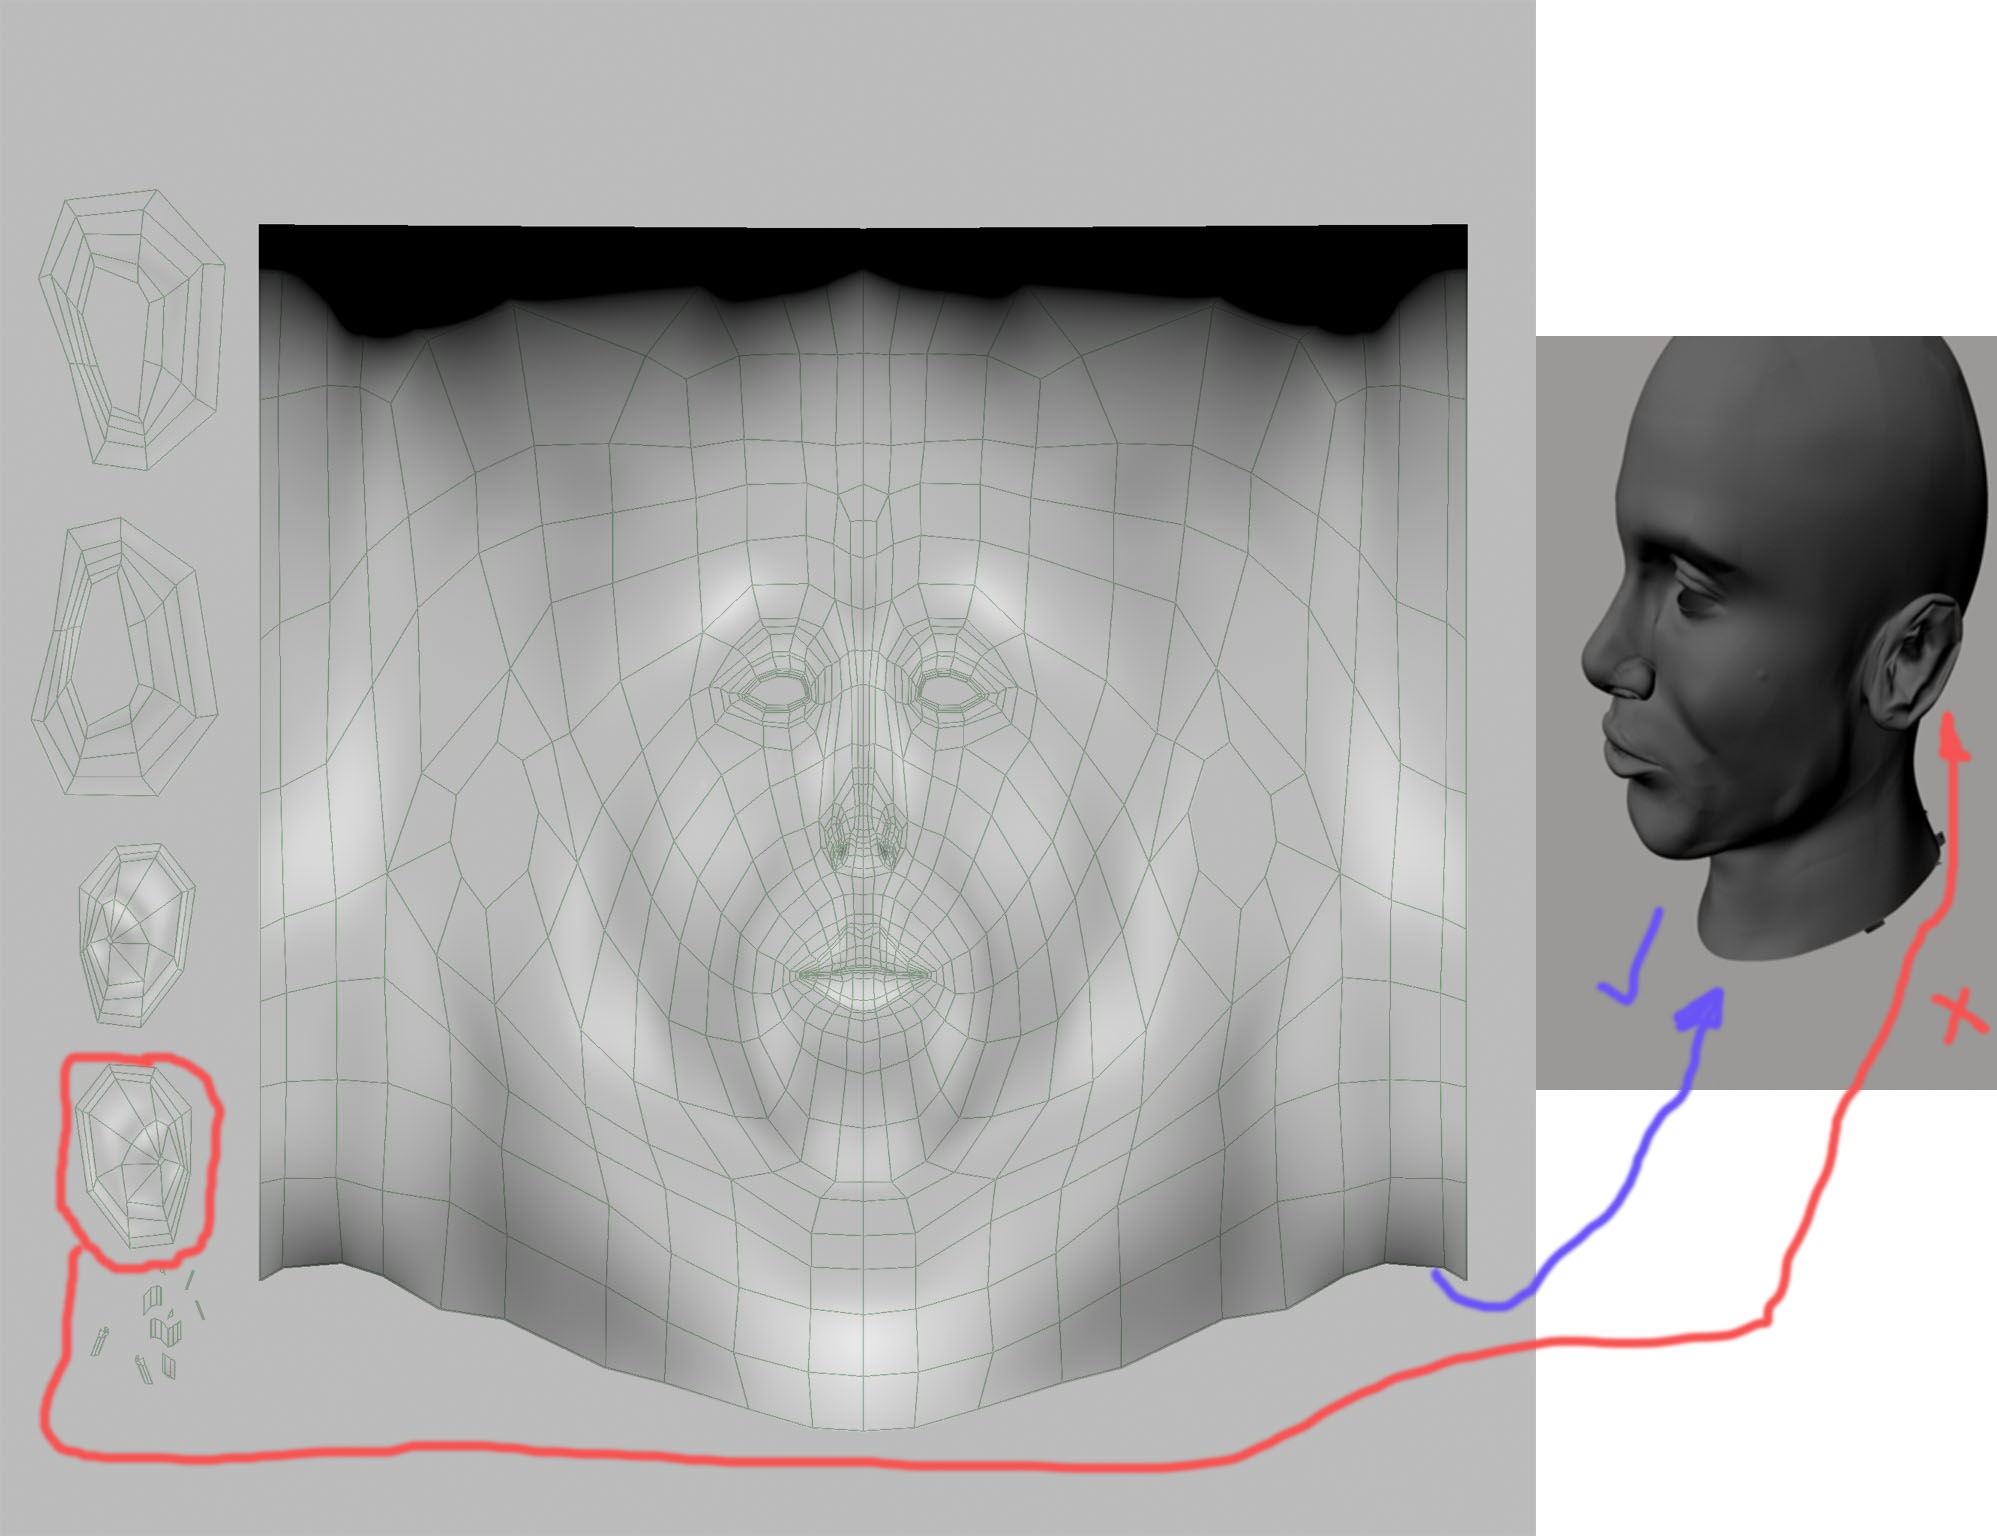
… I dont know what to do… i think the problem is the uv. it must exist an option in maya or in zbrush so the uv match when using aproximation subdiv

Try adjusting the UV Map boarder with the good ear image within Zbrush under Tool: UV Map. Itll keep your uv’s centered while painting away the “seams” on the edges. If that doesn’t work, it wouldn’t hurt to consider using UV Master to re-uv the head. Hope that helps.

RiVvenGuard your are a Genius :+1: with Master UV displacement map match perfectly, but now i have a big question… i wanted to modify some uv points in maya after generated them in zbrush with master uv. When
reimported the model from maya it totaly change my displacement map… i did some experiments generating the uv
in MASTER UV and i have got a perfectly match displacement map , but when i export the obj with mrg on and then
reemport the model without any change on it my displacement map generates the unwanted smooth in the neck area

I’m far from one but thanks. I just bug everyone on the forums lol. It sounds like your UV information is different from your models. Every time you modify your uv’s in Maya/Max or whatever, you should always transfer the UV information back into Zbrush, then redo the displacement/normal maps.

Export subtool into maya
modify uvs
export/import back into Zbrush on subdivision 1
create displacement/normal map

You also might have to flip the map on vertical after you create it so try that first. It could also be your approximation settings too but I’m not certain. Hope this helps.

I dont think its the aproximation subdiv from mental ray, it must be zbrush becouse even if i generete my uv with UV MASTER and export the .obj file and reinport the same model in level 1 without any change it makes the displacement map with smooth in the neck… if i generate the displacement map just after i have created the uv with UV MASTER it generates the displacement map perfectly… it must be an import or export trouble from zbrush…