Here’s the promised Zbrush screenshot 
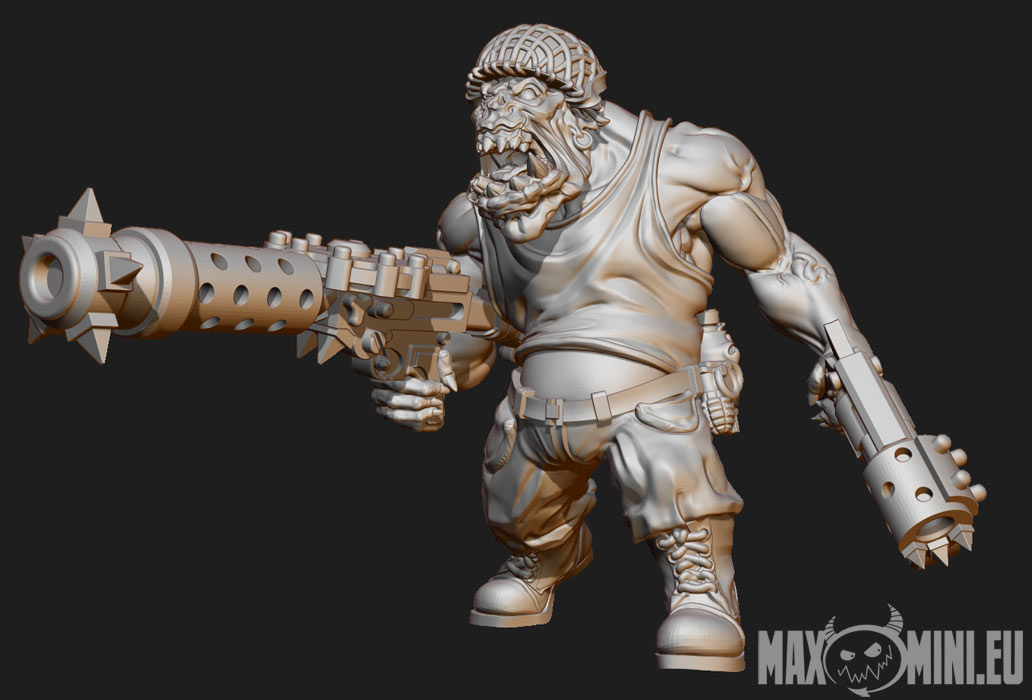
Thanks for the post on your FB wall Pixologic  !
!
As the launch of The Green Alliance Army crowdfunding campaign gets closer I’ve written a short article on progress so far:
While working on it I did a quick (occlusion effect based) render of some of the basic models in Modo. As usual all the sculpting done in Zbrush, with modeling of some assets and vehicle done in Rhino:
You’re welcome 
I guess you will post an update in this thread when you will launch the Kickstarter campaign?
If that’s not against forum rules that would be awesome Totyo.
I’ve been asked to clarify one thing - each time I’ve written that something has been done by Pawel I meant Pawel Kazube Laskowski.
As soon as it involved really ZBrush in the Kickstarter project, it’s not a problem. Right now, another kickstarter project is in progress, involving ZBrush, and it has been shared on our social medias 
Hi looks great, I was wondering what kind of 3D printer they used for your model.
The resolution is amazing !
@Totyo - that’s awesome! I’ll propably ask before posting, just to make sure  .
.
@Ronald - in the studio we have a Solidscape printer (as mentioned a couple of times in this thread  )
)
In a meantime - another 3d print straight from printer, just after dewaxing (so the model is still wet). Sculpted entirely in ZBrush  .
.
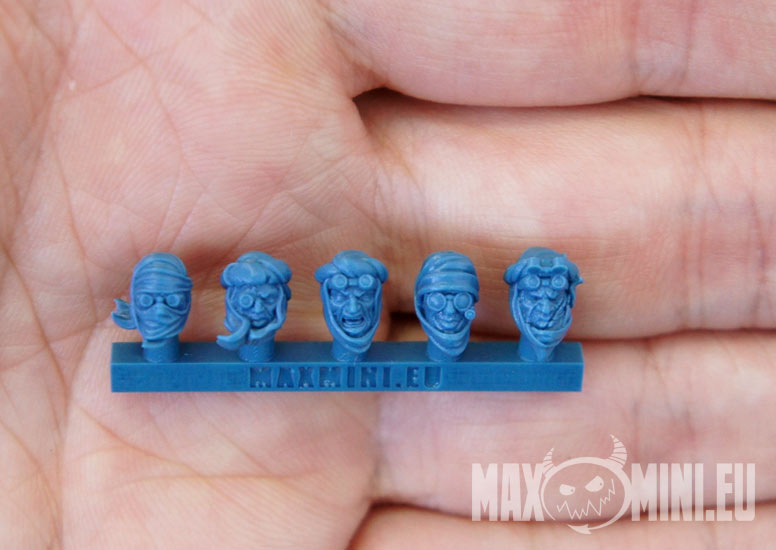
Very nice sculpts! I really love to see these come to life in the 3D prints.
I do have a question about the size of the connector support structures, are those the final sizes that ship to the consumer? If so is the consumer suppose to cut the sculpts from the support structures and then assemble them? I don’t doubt that this is the process but where they connect to the base seems rather large to me in comparison to me for model kits that I have used in the past. (I really haven’t messed with too many.)
So I am just curious about your thoughts on how to assemble things correctly as an artist when you are making kits like this that will become consumer goods.
Again, really nice sculpts!  And thanks for sharing process information with us all!
  Very kind of you!
@nickz: my apologies for not getting back to you sooner.
The sprues on those bits won’t be an issue. A cylindrical sprue connects to a ball joint (not visible on the pic) as many of the models have ball sockets. Even if you cut a tad too much it won’t cause any issues as the area will be hidden in the ball socket:
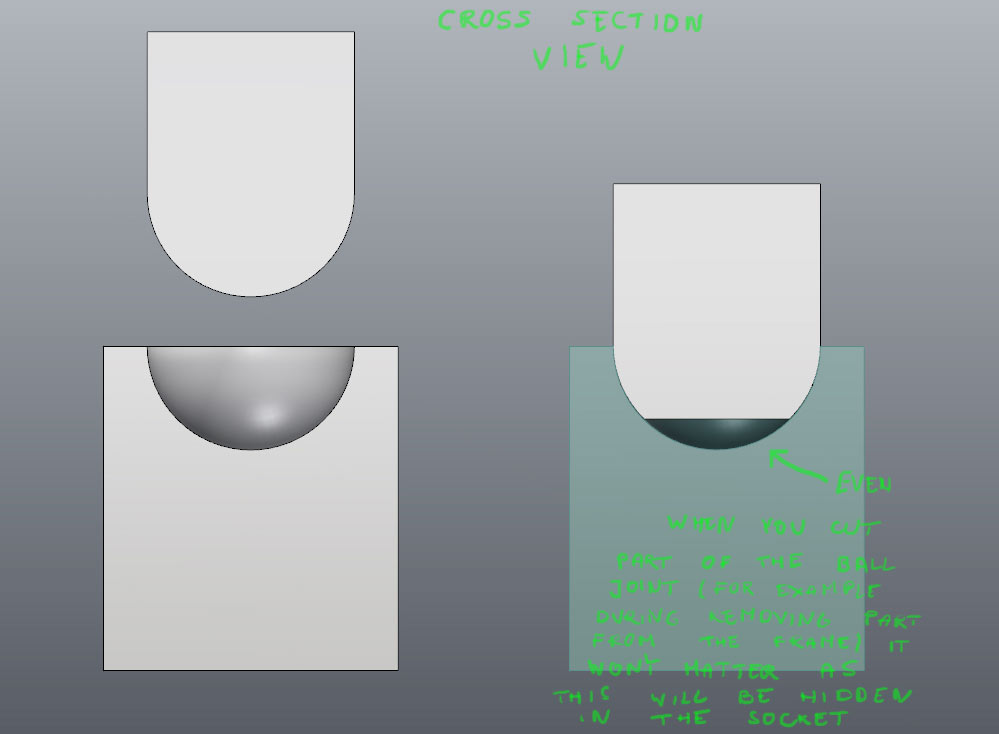
The sprues should be big enough to let the material (resin / plastic etc) flow nicely and fill the mold cavity.
So it is not down to howto make smallest sprues possible. All in all it all comes to figuring out howto connect sprues and plan split lines so they won’t cause issues on the final model and will be hidden as much as possible.
Some minor places to cleanup are unavoidable , but assembling models, preparing them, painting are parts of the fun. In this matter miniatures hobby , no matter whether we’re talking about miniatures for collectors or for wargames, are not different from scale models  .
.
It has been a while - super busy working on our orc army project.
We had a time for a slightly wacky set of conversion bits - sonic guns. Tricky at first , but as soon as we settled on the ideas for those they were a blast (at least Konrad seemed to enjoy them  ) . I also had a good laugh browsing for the sound when I’ve been sorting out the turntable:
Sculpting as usual done in Zbrush (even though I have to admit that this time we should have used Modo or Rhino - but even with this hardsurface items Zbrush went through like a champ).
Oh, and I promised a turntable of Desert Dweller heads that should show sprues placement better:
Hehehe - 2 years ago I wouldn’t have guessed what we will be doing now. Not only working on a models using computer software was rather new for us majority of projects have been done for our own use . Now it seems we’re involved in increasing number of projects for various customers. On a good side it is nice to have additional income stream and still most of the projects are really enjoyable for us (miniatures for tabletop games, boardgames, collector items, jewelry). On a bad side we are often bound by nda agreements, thus it takes a while before we can show anything.
Luckily this has not meant our projects were left catching dust. Some of them… matured  . That’s the case of the Green Alliance Orc army project - which finally launch in Kickstarter tomorrow :).
As usual we split the work inside the team - majority of tech items were done in Rhino and Modo (Kuba is super efficient with Rhino) while Konrad worked on sculpts inside Zbrush.
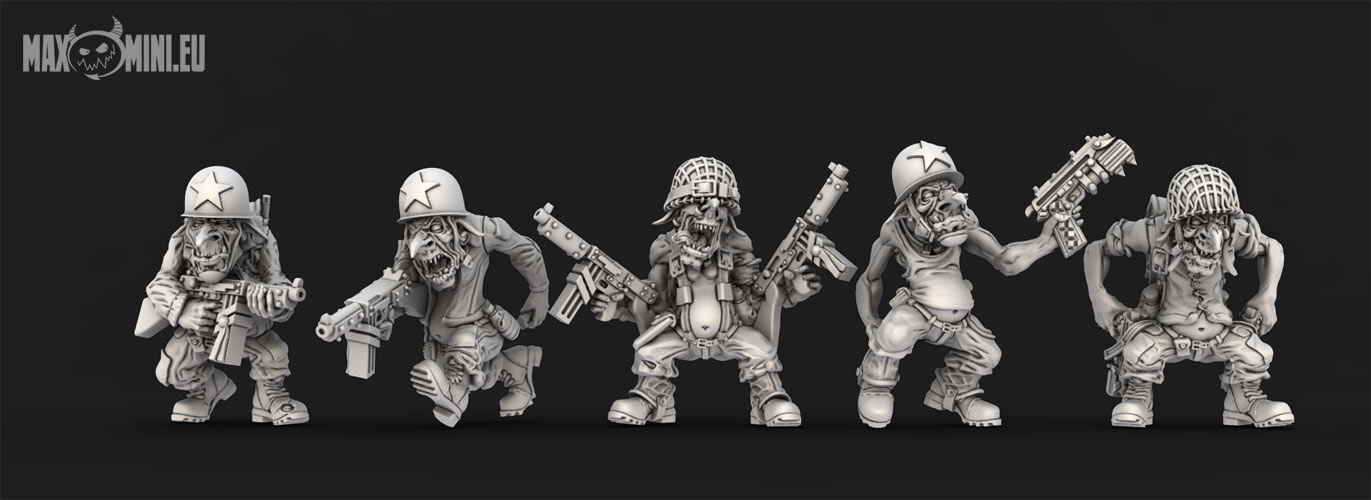
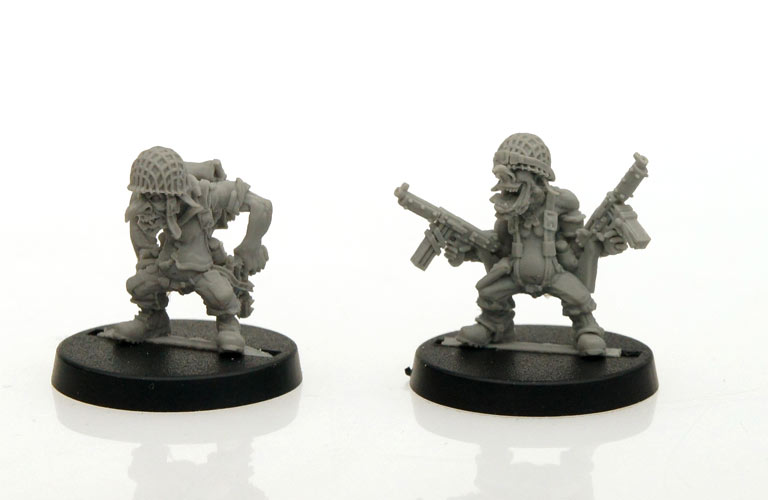
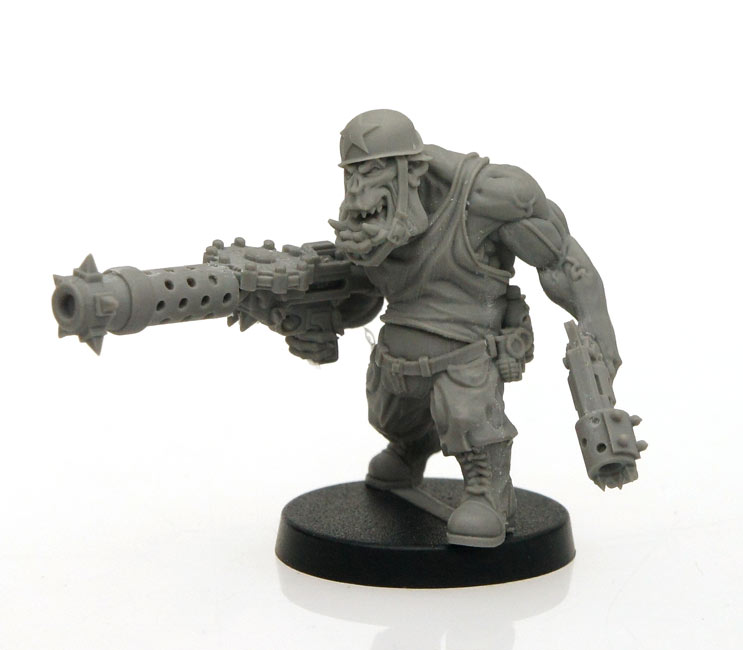
Here are pics of the basic 2 units alongside pre-production prototypes:
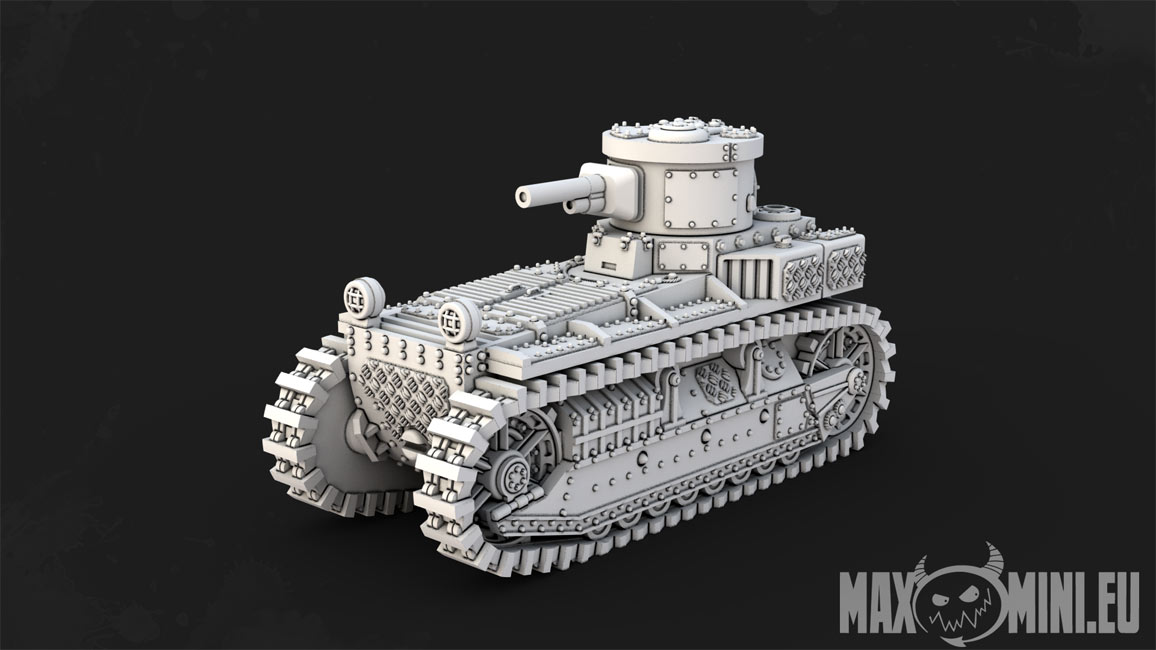
Just to credit Kuba too here’s one of the tanks he has worked on:
Damn, I wonder how our first campaign will turn out - especially considering it is not the last one I have in mind

Attachments

Our new 3d printer is up and running :). Opens new options - during the test we’ve scaled up one of Konrad’s sculpts and turned it to bust:

Also more and more models for our Kickstarter are getting finalized and new casts land on my desk. Here’s a quick pic of some of the recently made vehicles:

Very nice.
Love the bust.
If you don’t mind me asking, what printer are you guys utilizing to get those quality of prints?
Looking good! No post pro? What printer do you have now?
We have 2 machines - super precise (and super slow  ) Solidscape T76+ and B9 Creator.
All the “blue” items on the pics are straight from the printer, no post pro. Other (for example bust) are prints coated with primer or resin casts made from printed master model.
Basically quality comes from 2 factors - good equipment and knowledge howto work with it. I’ve mentioned it a couple of times but working on real life objects is a tad different. You have to take into account things such as scale, castability etc. Something that looks good on the screen may not work in real life.
For example when sculpting gaming miniatures (~30mm+ models , with heads around 5mm) you have to make each important feature more prominent , to the point of overdoing those - otherwise the detail will be too small to be noticeable in real life.
Everything just look simple but isn’t 
I think you could have an army of B9 in exchange of Solidscape. Why do you use both? Is B9 really compareable with Solidscape?
Rz***261;dzicie 
B9 is not there yet - but really close. And as you mentioned it is much cheaper (also found it fun to use as I’m not afraid to tinker with the tech). Atm you can’t achieve the same quality on B9 that you can get on Solidscape. It is still very good though. And simply put we have both first of all because when we got the 1st printer there was no B9 :D. Still, even if there was, I think we would need one more machine for the most detailed and demanding jobs (very detailed 30mm miniatures for example). We use B9 for items such as vehicles, scenery etc.
So all the head swaps etc you see in this topic are made on Solidscape.
dzieki  !
!
Fantastic Job !! you can show how you do the cuts and pegs for molding ?
Thanks
Really fantastic work!
It’s great to see another B9 user here. I have the original 1.1 model that I have modified to resolve some of the early hardware problems the 1.1 had. It was a bit frustrating at first but after I got the mod in place and got past the learning curve of the software and the resins it’s been a great machine. I actually just started a print on it just a few hours ago 
If you don’t mind me asking are you guys running the 1.2 with the HD projector? and what type of resin are you using?
The detail from that Solidscape T76+ is crazy
m0delista: sure, I’ve asked Konrad to write a short guideline - his will be much better than mine. I also recommend this post :
http://www.zbrushcentral.com/showthread.php?174566-Cuts-and-key-in-zbrush-4r4
Also note that we add some of the things (but rarely keys/ joints), for example tabs for slot bases in external apps. We scale the model first in real world units then add those things that need specific dimensions in CAD (usually Rhino as I simply love it  ).
).
Think of it as - design in sculpting app, prepare for manufacturing in industrial CAD .
@burnsjt: we have 1.2 version. So far I used mostly stock B9 resins (cherry/red) - as I don’t have to fiddle much with the settings. But I’ve started playing with Spota resins - so far they seem nice. In the initial batch I’ve overpigmented it , so I had to ramp up cure times and I haven’t got this tiny little bit of “light bleeding” that makes surface look smoother , but overall I think when pigment ratio and cure times gets worked out it will be a viable substitute.
And yeah , I know what do you mean when it comes to 3d printing being frustrating at times. At this moment this is not a plug&play process. Even when you buy crazy expensive machine you should expects some bumps - so far it is only a matter how many and how often  .
.

