lol me again. 
- http://www.pixologic.com/docs/index.php/Materials_and_SubTools
I copied some phrases of this page in case you still can´t open the link:
Ok, you’re creating a complex model with lots of subtools. Now you’d like each subtool to have its own material. But every time you select a new material, it is applied to every subtool rather than just the selected one. What do you do?
[…]
If you’re already familiar with PolyPainting, then you already know how to assign materials to your subtools. You just might not know that you know it! With PolyPainting, you simply select a color and then fill the object with that color (using Color:Fill Object).
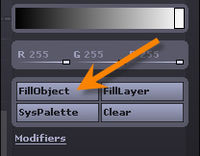
As Figure 2 shows, these buttons are also found on the top shelf in the standard interface layout.
- Draw:Rgb fills the object with color, only.
- Draw:M fills the object with material, only.
- Draw:Mrgb fills the object with material and color, both.
It should be noted that M has a caveat: Any subtool with a material assigned to it must also have a color assigned. So if you’re filling the model for the first time and just have
Draw:M selected, ZBrush will fill the object with both material and color. The color used in this case will be white, regardless of what color is currently selected.
Step by step [Note by Moni-Poroni: This is an example]
With the basic concept covered, let’s put it into action.
- Load the DemoSoldier model. Make sure that the body is selected. Go to Tool:SubTool and select the top subtool (called “DemoSoldierCopy1”).
- Select the MatCap Skin05 material. All of the model’s subtools will now have this material applied. That’s because no individual materials have been assigned to them yet.
- Activate Draw:Mrgb. We COULD just use M here, but as mentioned above the model will still get assigned a color with the first fill. It’s good to get in the habit of choosing Mrgb right off the bat.
- Press Color:Fill Object
That’s everything that’s necessary to assign a material to a subtool. Of course, nothing will appear to have changed yet on the canvas. But if you take a look at the SubTool menu you will see that this subtool now looks different from the others as shown in Figure 3. Let’s move on to other parts of the model.
- Select the Shirt subtool.
- Choose the FastShader 2 material. Now you’ll see all the subtools update to show the new material, except for the body (which has already had a material assigned, so now operates independently of the rest of the model).
- Let’s give him a navy blue t-shirt. Use the Color menu to select something appropriate.
- Draw:Mrgb is still selected, so go ahead and press Color:Fill Object. The preview in the SubTool menu updates to show this change.
- Repeat this process with the remaining subtools. Choose an appropriate material (such as the Basic Material) and color for each. You’ll finish with something like Figure 4.
Note: If you wish to reselect a color or material that you’ve already used for another part of the model, it’s a snap! Click on either the color or material thumbnail (depending on what info you want to get) and while the mouse button is still held down, drag out onto the canvas. The pointer becomes a Picker. When you release the mouse button, ZBrush will select the material or color that happens to be under the picker at that moment. […]
2) I told you my opinion.
- Hm… I think with the mask/rotate/move/scale functions it´s very easy to pose your model and also the quickest way I know.
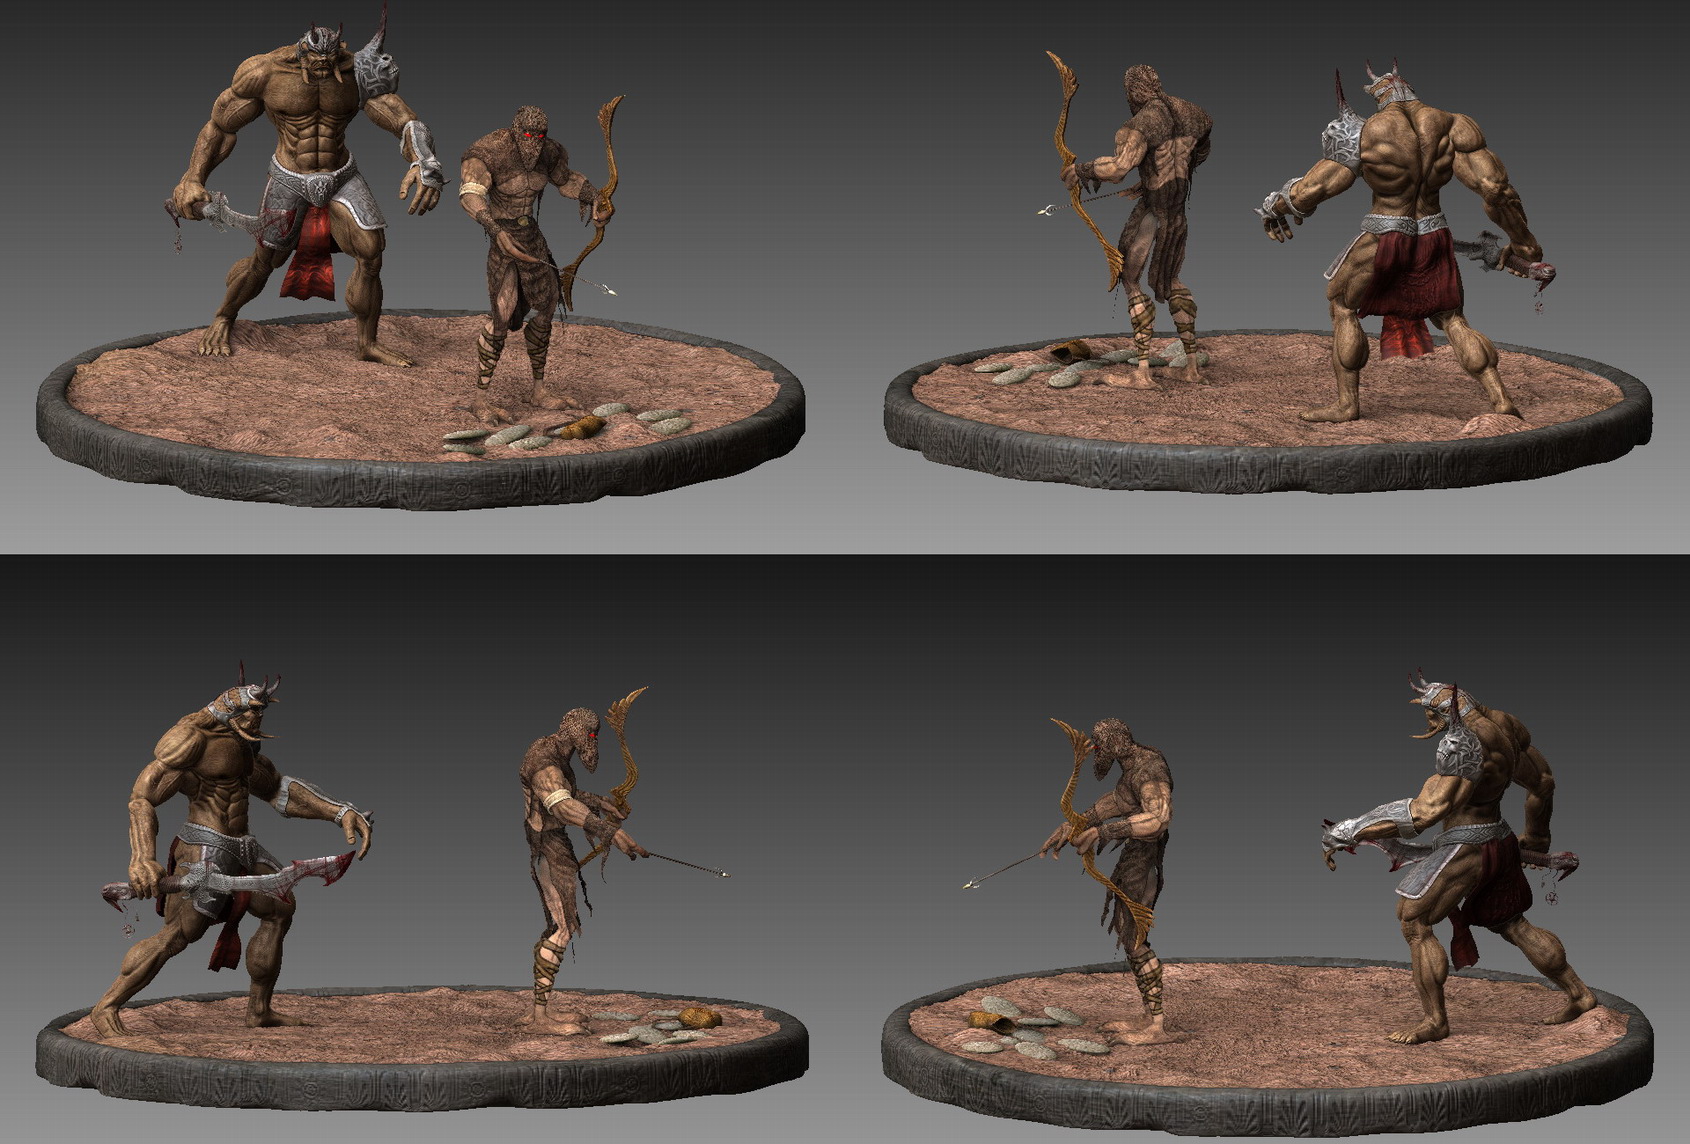
Attachments

 small_orange_diamond
 , no questions there,promise:)