ZBrushCentral

Mannequins video Pt 2- unable to reproduce effect [Answered]

I have searched the other posts about this and can’t find the answer.
another post asked asimilar question but the answer is not the same as the video. The answer in the other post produces a different result to the one in the video.
Problem:
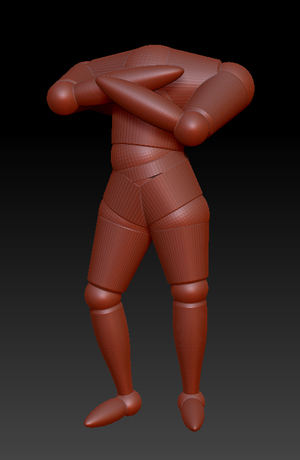
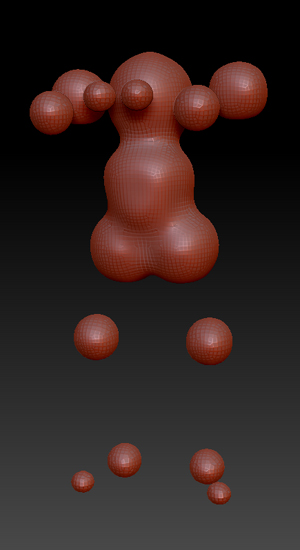
I take a mannequin, reposition it (Like the video) follow the steps as exactly as what is seen and said on the video. (i have “classic skinning mode off”). I even tried it with the dog in the video. Someone please help me before i go insane. I have tried this so many times.
And this is what it looks like before and after.

Attachments

standing test.jpg

standing test-result.jpg

Make sure you are in Adaptive Skin preview mode (press ‘A’ on the keyboard) before pressing the Remesh All button.

Thank you. That works. However, where i have the arms almost folded- the new skin attaches the arms together- like a connecting web - even though they are not touching. is there a way to dial back the sesitivity, or do i need to place the arms further apart to avoid an unwanted connection?

i should probably ask this quesstion in a new thread.

It’s really part of the same question, so in this instance it’s fine to ask the new question in this thread.

You can get better detail by increasing the remesh resolution. However, there’s a different way of achieving the same thing, and this may work better for when the pose has parts that are close together:

  1. When you have posed and adjusted the mannequin to your satisfaction, turn off ‘Classic Skinning’ in the Tool>Adaptive Skin menu.
  2. Preview the mesh if you wish by pressing ‘A’, then create a skinned mesh by pressing Tool>Adaptive Skin>Make Adaptive Skin. (The skinned mesh will appear in the Tool palette but won’t automatically be selected.)
  3. Press ‘A’ to turn off the preview, turn ON ‘Classic Skinning’ and then press ‘A’ again to preview the mesh.
  4. In the Tool>SubTool menu, press Append and pick the skinned mesh (called ‘Skin_ZSphere’ or similar). This adds the skinned mesh to the same subtool list as the zsphere mannequin.
  5. Select the skinned mesh in the subtool list. Subdivide once to make a denser mesh.
  6. With both subtools visible and the skinned mesh selected, set the ProjectionShell distance and the press Tool>SubTool>Project All.

Thanks, That worked well.