ZBrushCentral

Make 3d. Need sharper results.

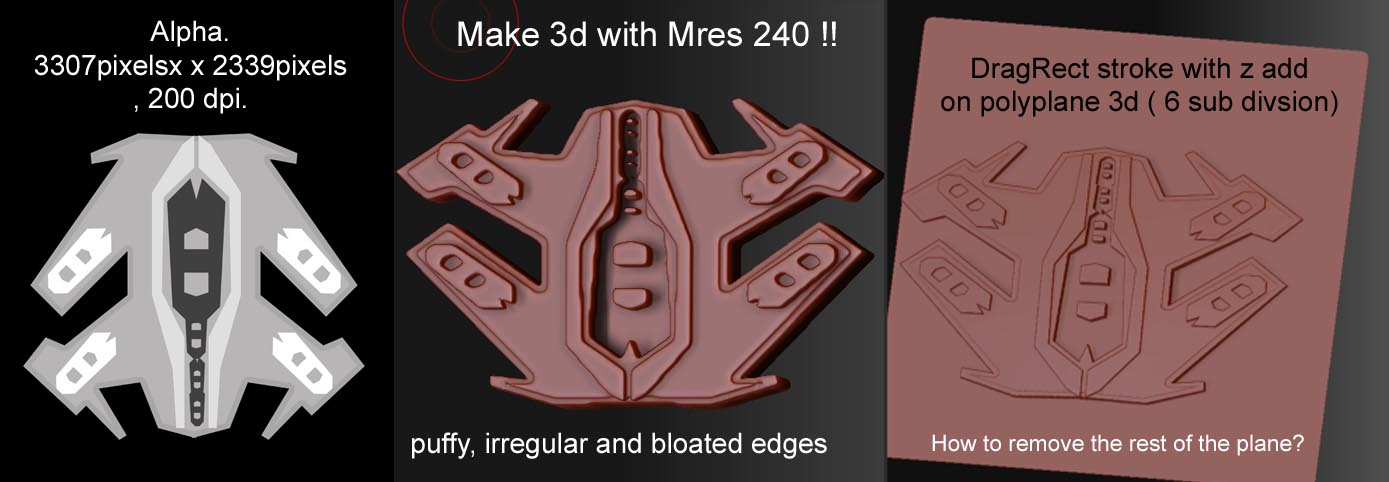
Hi! I want to use alphas created in Photoshop, to make hard surface polygonal meshes in Zbrush. The make 3d option in the alpha palette gives a puffy mesh even after a high resolution, sharp edged alpha is used.Adjusting the Mres, Mdep, Msm settings in the alpha drop down menu didn’t yield ideal results.

However, when I subdivide a polyplane tool several times, and use the DragRect stroke brush to draw the alpha with z add turned on, I get a sharp result. but this technique doesn’t create a shape cut out. It just creates a good deformation on the plane.I need to get rid of the rest of the plane.

so basically.

  1. Is there a way I could use the make 3d option more efficiently to get the meshes to be as sharp and precise as the alphas.

  2. Alternatively, how can I use the plane 3d object as the base to cut out my shapes? I want to use the Stencil tool for this.Somehow ,I can’t paint a mask ( for hiding and deleting geometry )through the stencil. Perhaps that’s because the stencil itself is a mask. :eek: Using the dragStroke brush to create the mask doesn’t work too well either.

Some tips and techniques will be greatly appreciated. :slight_smile:

Attachments

Make 3d question.jpg

The best you’ll get is MRes at 256 and MSm at 0. This is the highest resolution with the least smoothing.

Alpha skinning isn’t a perfect solution, since ZBrush has to construct polygons on the sides. With a deformation like you did with the plane, nothing is done to the sides. They’re just stretched polygons. It’s a different process, which is why you get different results.

How about this approach:


  1. Select the Plane3D and divide it enough for a nice, clean mask.
  2. Mask the model.
  3. Use the Extract feature to extract a subtool from the mask. You can adjust the results with the Thick, E Smt and S Smt sliders in the SubTool menu.
  4. The catch at this point is that you’ll have a single depth. Extraction doesn’t respect mask gradiation. So enable UV’s and apply planar mapping to the model.
  5. Mask the model again. You’ll probably need to invert the mask, and then also rotate to the side and mask off the back of the mesh.
  6. Now use the Tool>Deformation>Offset Z to further expand the lighter areas of the mask.
I just used this technique to get the following mesh, created from one of the textures included in ZBrush.

NewAlphaSkinning.jpg

Thanks Aurick. Haven’t yet tried your technique, but I soon will.Hope it works for me. :slight_smile: