ZBrushCentral

Lucy: Human Model Study (Nudity) WIP

It is my Personal project.

I started it one and a half years ago in my freetime with C4D and ZBrush.

Later I divided the model to separate pieces in order that I could work the body parts out in a higher resolution in ZBrush.

I’m working on a corset and jacket (with silo) and on the textures.

I hope you like it.

DispTest_2.jpg

Attachments

textest2.jpg

Untitled-2.jpg

hair_test1002.jpg

render3_600.jpg

shader_test_600.jpg

very nice indeed… i love how you’ve done the clothing - i was doing a similar thing a while ago, but didin’t think of splitting her up so i could get the needed resolution. How do you intend to put it back together again?

as you can see, i only got as far as a swim suit (and not very good at that)

woman_hair.jpg

lovely modeling, and like the way your clothing is done. i would also like to know how your going to put this back together.:+1:small_orange_diamond:+1:small_orange_diamond:+1:small_orange_diamond:+1:small_orange_diamond:+1:

looks like real Lucy Liu
my crits - need more freckles

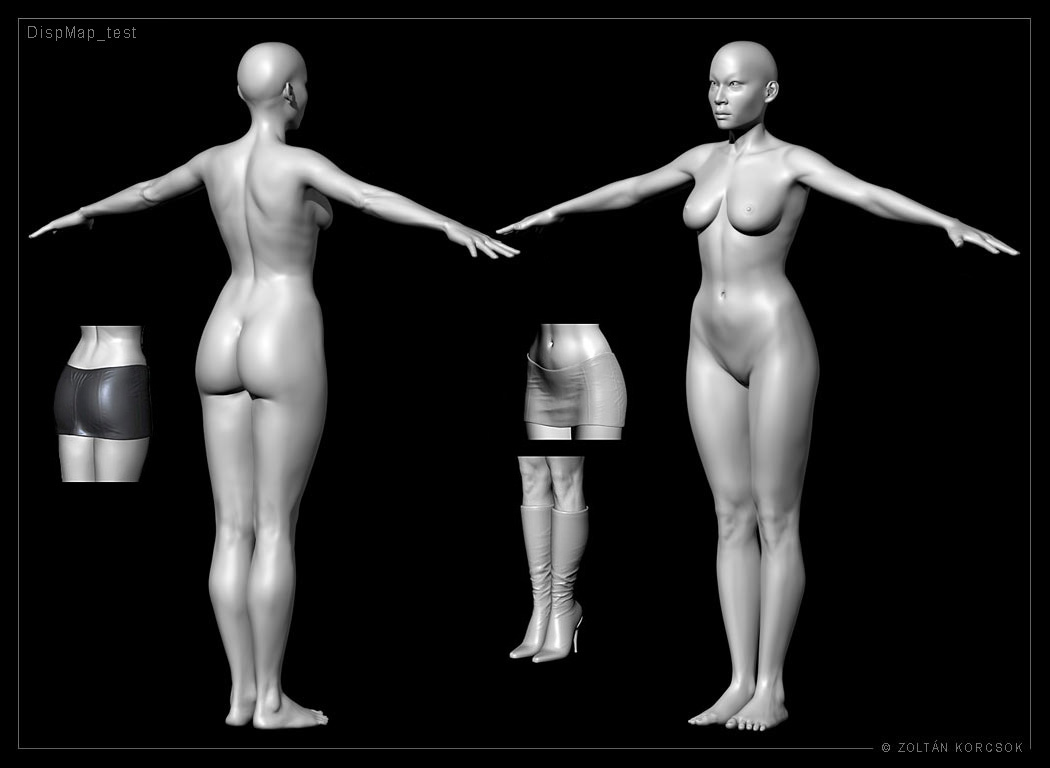
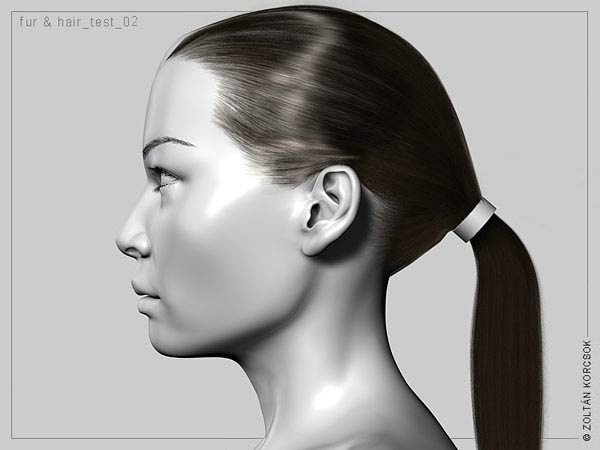
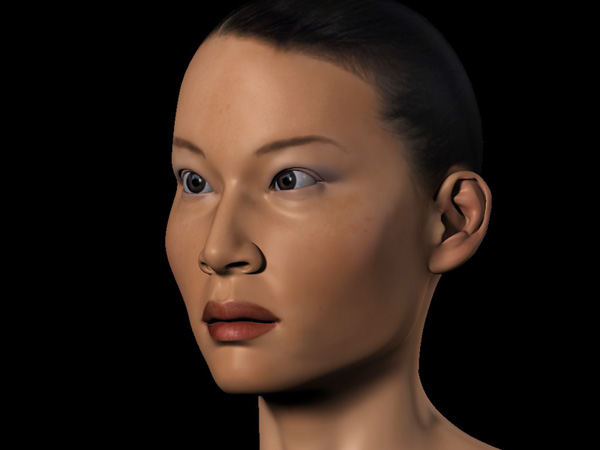
Hello Trurl. I’m just wondering, how did you get those very fine details onto your model in Zbrush? Did you subdivide to a certain level and added them really onto the mesh, or did you use Bumpviewmaterial and made a displacement map from it, or normal?

If you did it with only the use of bumpviewmaterial, how did you do that? I’m wanting to only exclusively work with bumpviewmaterial. To get very fine details, but I do not know how to apply those very fine details to the bumpviewmaterial. (And I do not know what is meant by the grayscale palette? Where’s that located?) When I pick-up the item again, fromout Projection Master- I don’t get the details like I drew with the brush whilst in PM.

Thanks for your help! If you reply. :smiley:

Dude that is AWESOME! Fantastic job! Dunno why, but I think the knees look very nice and the most realistic. As for the freckles, they look like merely part of the textures to me, rather than actual geometry.

How did you start your base mesh? I am always left astounded by people that seem to somehow manage to bap their zsphere head into a perfectly shaped head.

Looking good so far, but I think it would help if she wasn’t so cross eyed.
Her chin is a bit too square maybe - she looks manly in the front view. The hair looks awesome though!
Keep at it - I look forward to the next posts.

Nice Model.

Just a tip on the eyeballs: They never face exactly forward. They angle out slightly to capture as much visually as possible.

I remember an old Lightwave head tutorial of Taron’s that made mention of this.

I don’t know that exact angle but experiment and see what looks right.

Good luck

Cheers,

Revanto :stuck_out_tongue:

Immediatley recognizable. Very nicely done. The anatomy is wonderful. My only crit would be that she looks cross-eyed. Keep posting the updates. I look forward to seeing the final model.:+1:small_orange_diamond:+1:small_orange_diamond:+1:small_orange_diamond:+1:

Thanks for your replies and critics.

mullet: nice model

aversive: I divide what I can into separate meshes (e.g.: clothes, parts of the body) so I can work with them in a higher resolution in ZBrush. Here is a link about the use of bumpwiewmaterial (I hope this will help.): none-beta image by jelee

Nii: The base model wasn’t created with ZBrush, but with Cinema4D. However, this model was made with ZBspheres: Monster

update:

base models with corset base model (i’ve just started working on it in ZBrush):

with_corset_skirt.jpg

Awesome modeling. Looks just like her too, even without textures.
They are very right about the cross-eyedness. I think it’s only a matter of widening the nasal area, relaxing the that area, pulling the eyes back to the outer edges of the head. I think she’s just wider in the head and it pulls the eyes more apart and gives more room to the inter eye whites.

Hate to admit, but I just happen to be downloading pics of her beauty last nite. :wink:

OTOH, I could be wrong, I’m only starting to do more realistic 3D heads myself. Never crit such fantastic work before.

thanks for your reply trurl - so what you mean is you take your naked body model, isolate a section of it (say mid waist to just above the knees for a skirt) delete the rest of the body and then up the res and sculpt away (to make a skirt)… if so, how to you put it back together - in a app like maya or xsi?.. aplogies if i’m being dumb, but sculpting clothes from a naked body (to fit it) has been getting my goat!