ZBrushCentral

Let's Compare ZSphere Skeletons

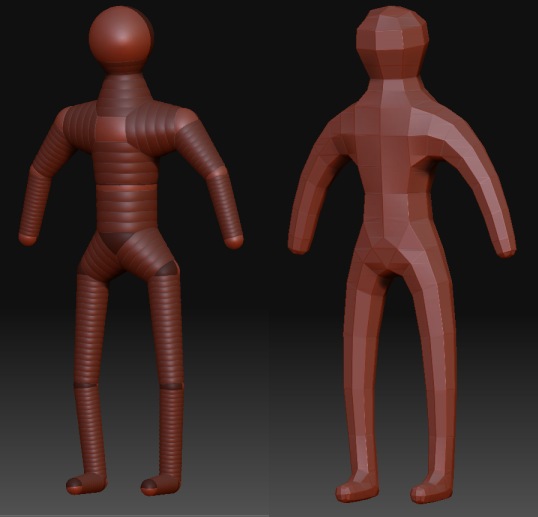
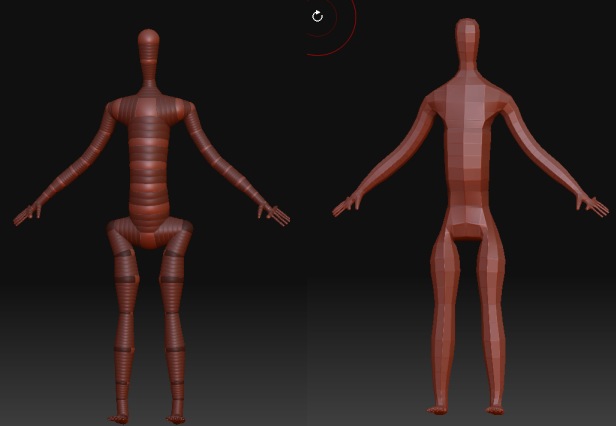
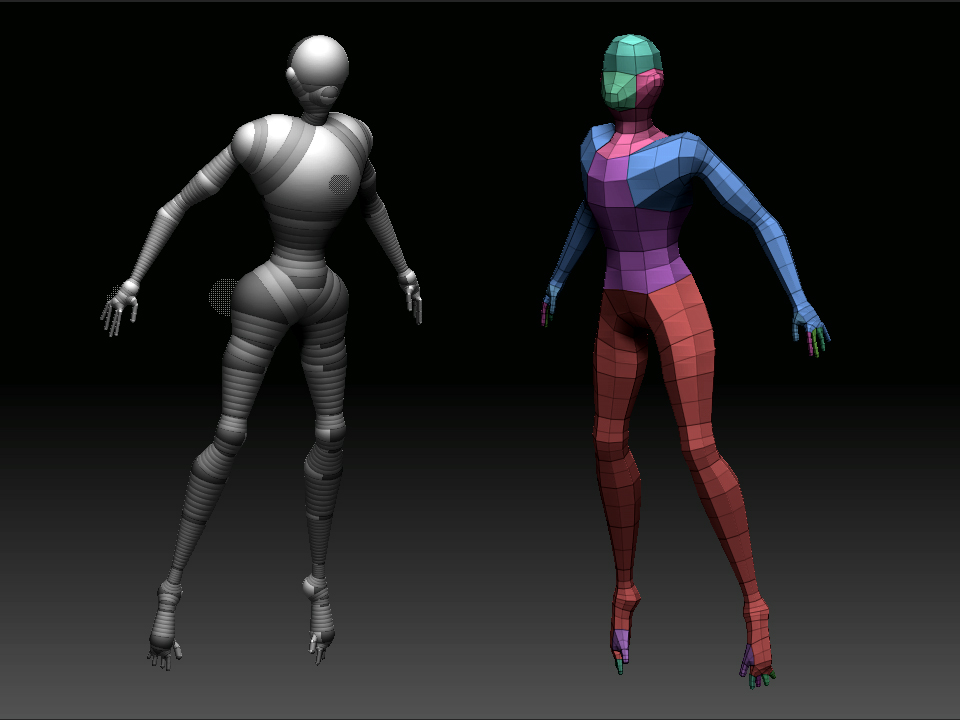
So you decide to create a humanoid model in Zbrush. You start with a ZSphere skeleton. Let’s post our ZSphere skeletons in this thread to compare different starting -point styles.

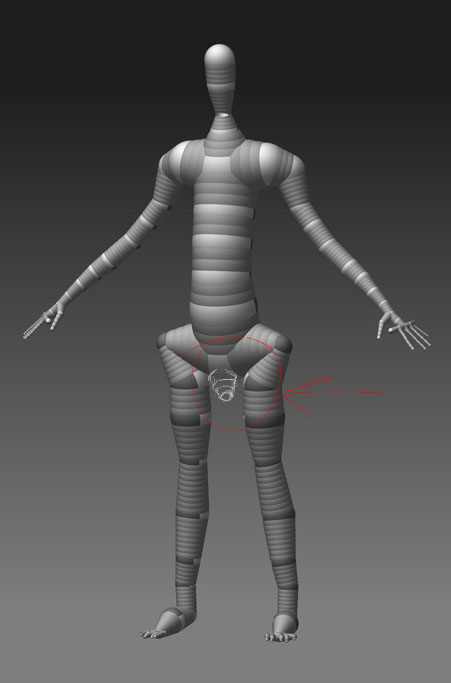
I use the one influenced by a tutorial on the official zbrush site. But I’m not fully satisfied with how it handles hips. On the tutorial page the resulting mesh has a nice gap in the crotch area, but mine, even though very similar, doesn’t produce a good crotch to work with. So… it’d be nice to see other people’s ZSphere-body models.

I tend to follow the KISS principle, keeping the ZSphere model really simple:

[[attach=76099]Fig1.jpg[/attach]]Fig1.jpg

…and edit the mesh from there.

G.

But…I’ve once pushed it to here. This one based on Rimasson’s ‘Birth’ Tut’.

NOTE: Retopo was still required, mainly to fix the hands. There ARE better
(?) or at least cleaner ways to build hands from ZSPhere’s hiding in these
forums somewhere, but they rely on changing the mesh resolution on
individual ZSpheres, a trick that is made easier by a ZScript - XYZAdjust?
I’m not even sure that it runs under ZB3.0.

Has anyone out there tried XYZAdjust on ZB3?

[[attach=76100]Fig2.jpg[/attach]]Fig2.jpg

You don’t need xyz adjust you can just go in and change the Zsphere resolution in the Transform menu. See this thread

http://www.zbrushcentral.com/zbc/showthread.php?t=23136&highlight=change+res+zscript

marcus_civis also has a really great zscript somewhere called change res that has a very simple method for making hands, but I cant find it.

Hi,

This topic is fun. Ok, here is the one I creat for my first erercise.
you can compare it to the finish model at my post - Exercise One Male Character Study

Zsphere.jpg

grey32,

If you look at the Rimasson’s Birth Tut, you will see that even though our models closely resemble that of his, his crotch area is cleaner. I’m trying to figure out why. The space where the legs connect to the hips is thinner and is squeezed in. When you start modeling and pushing that space out, things get a bit awkward. Does anyone have a solution to correct that? It would be really nice to have the mesh that is displayed in the “Birth” Tutorial:

Pay attention to the hips:

Why aren’t our Zsphere-skeletons have the same result?

Thanks Harmonic. I’ll check it out.

gregsf - I’m afraid I don’t know the answer. After a while trying to follow the tutorial stuff, I realised that they were all written on beta versions of ZB
that didn’t really match the final 3.0 release (let alone 3.1). So I gave up trying to match the results. Sorry.

If I get time I’ll revisit the second model and try to get closer to the tut’.
I’ll let you know if I find anything.

G.

grey32, at least that makes sense.

It seems that to achieve that result with the current ZBrush build, we could add an additional hip sphere/span to the existing one (in our ZSphere models) and stretch them out a bit. Example:

|
s
/
s s }— all this is the upper hip structure (pushed up into the torso bit)
| |
s s
x x }— continue legs
x x

Instead of :

| s

/
s s }-- hips
\ /
s s
x x }---- continue legs
x x

Ah Ha!

gresgf - I think it’s just “Membrane Curvature”. The ‘mbr’ slider under the
Adaptive Skin palette. A value of around 60 gets you closer to the target.

G.

Try placing a zsphere pointing down from the pelvis sphere.
this will give good edge loops to start with.
:+1:

Attachments

zsphere.jpg

DeusEx: I’ll see what that does when I get home from work tonighy
grey32: I think that’s it.

J.J, that’s an excellent Zspheroid (Zsphere humanoid)