I like how its done and the steps you did to get there,awesome work.
Brilliant!
i was so amazed by this pic that she was a REAL beauty for an alien ! can’t wait to get the 3dartist mag ! 
and i will soon post a new 3D work i’m doing for a while, i’m hoping you will give me some feedback on it 
edit : i just got THE magazine you mentionned and i can say it was quite worthly to buy ! i’m happy that it did offer 5 hours of zbrush training from digital-tutors ! going to watch it in my new home in fews days !
Really great work. I loved the article in 3D artist. Gave me a lot of good ideas on improving my workflow. Was just bummed that the digital version didn’t include a link to your brushes and tools 
Still an awesome article though. Look forward to seeing more.
great job! do you render that in mental ray with sss or in zbrush
Really nice work!!! reminds me of the Clone race from Stars Wars, any inspiration taking from there??
The model from the magazine is amazing! You are really talented but I am guessing you know that already.
Amazing Sculpt. Lovely gesture and detail.
Hey everyone! Thank you so much for all the kind words and support, it really does mean a lot to me. Glad that everyone was liking the article so much, and that is helping some people out.
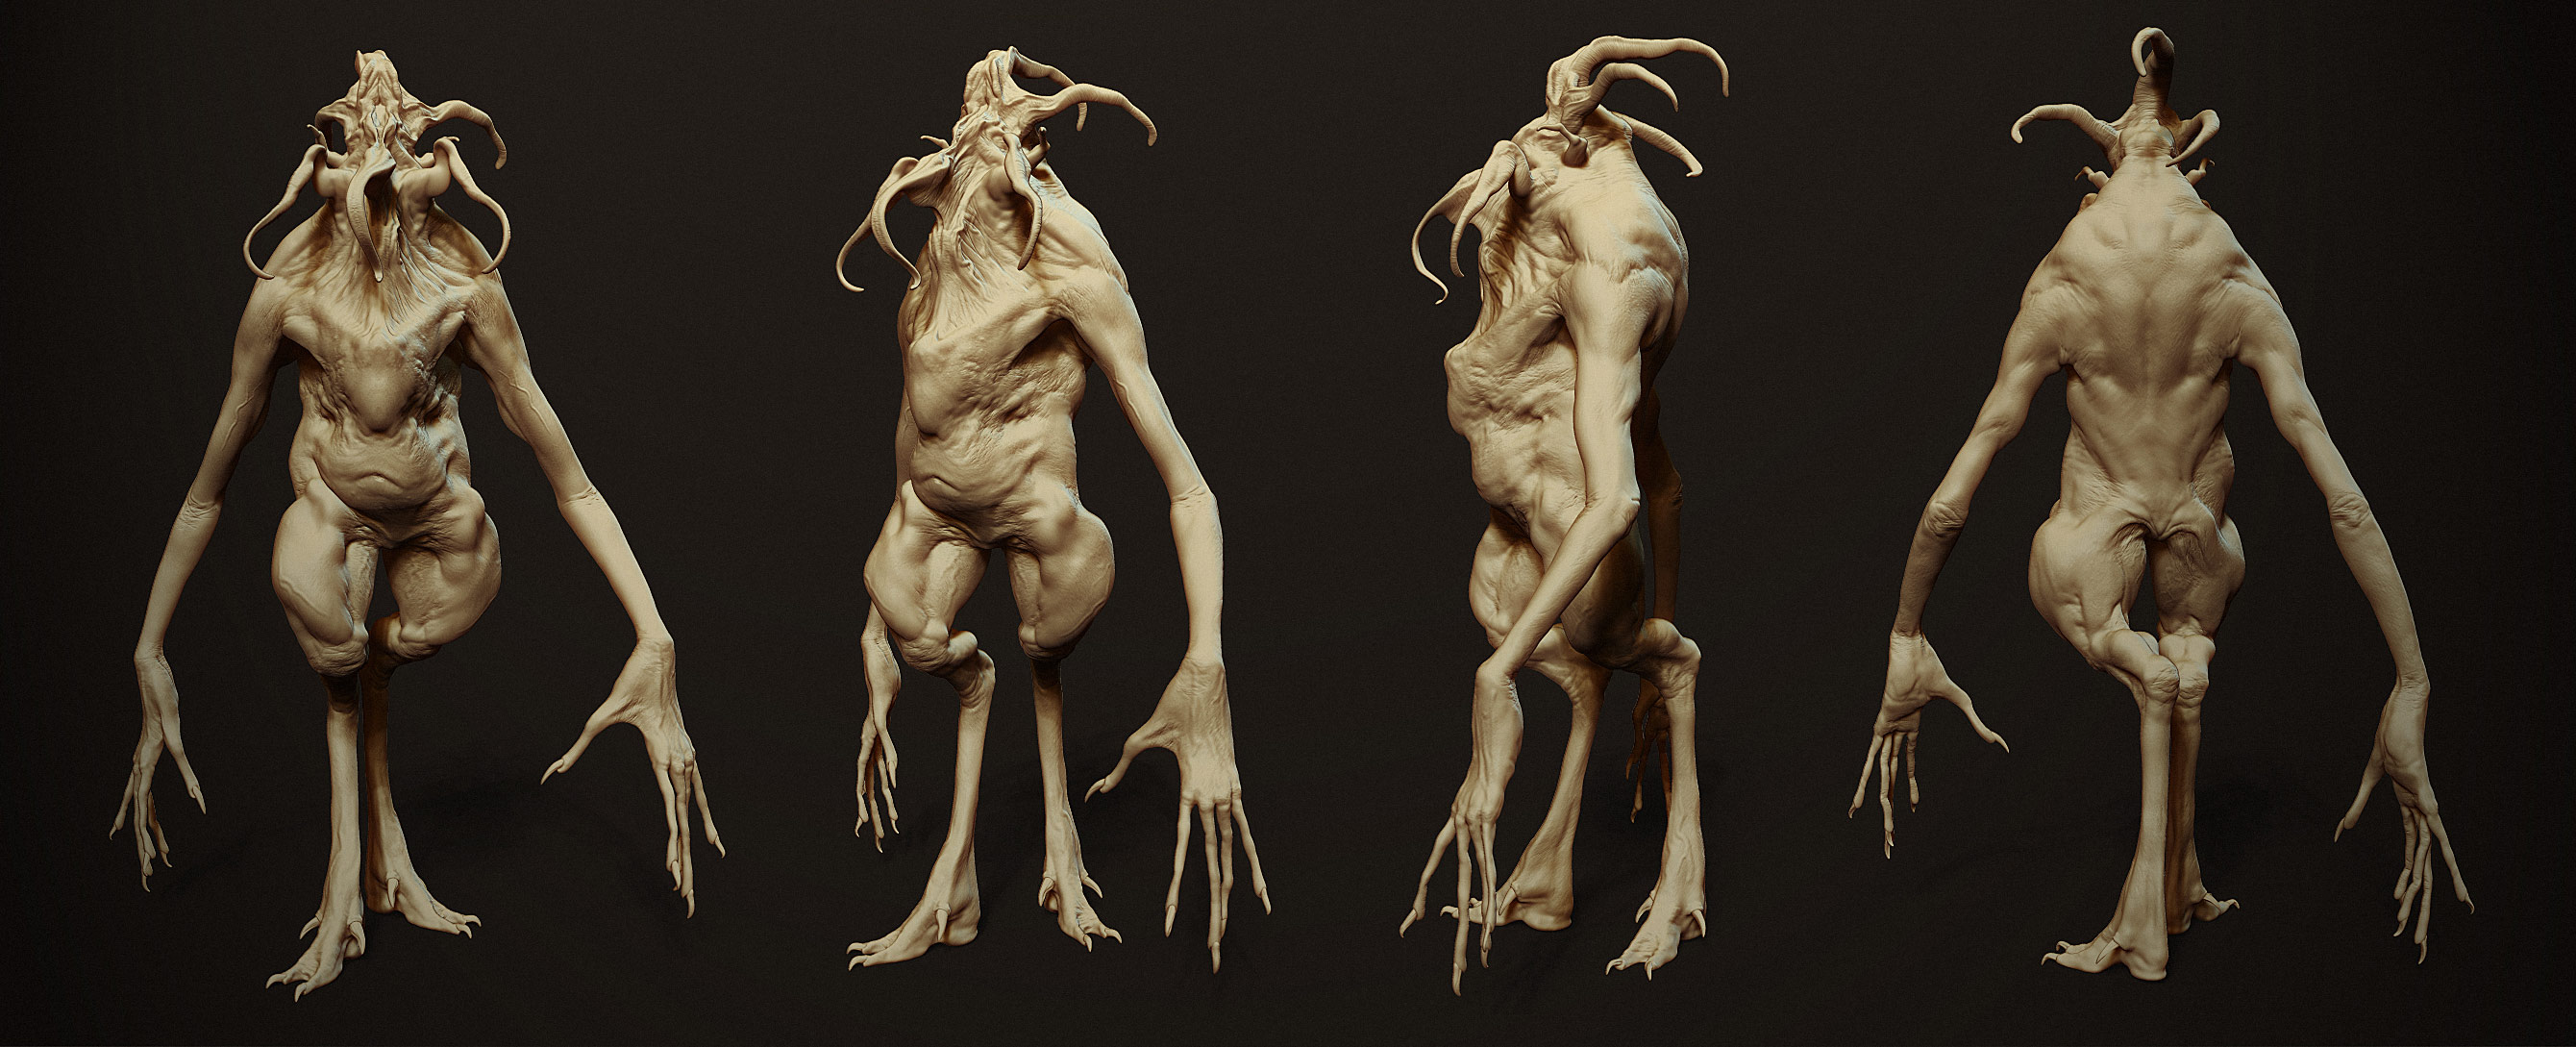
Here is something new, his/her name is Tentacle Head!
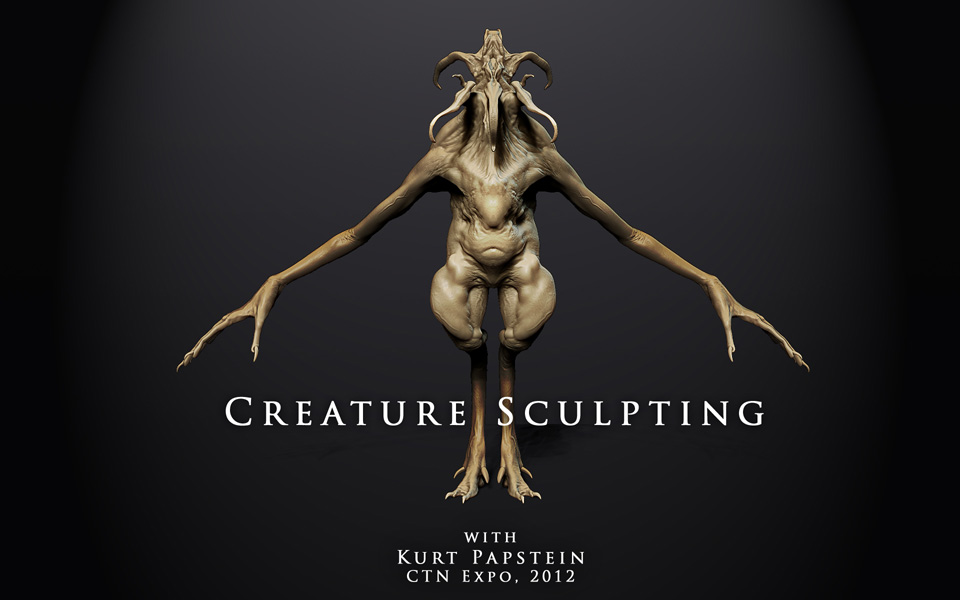
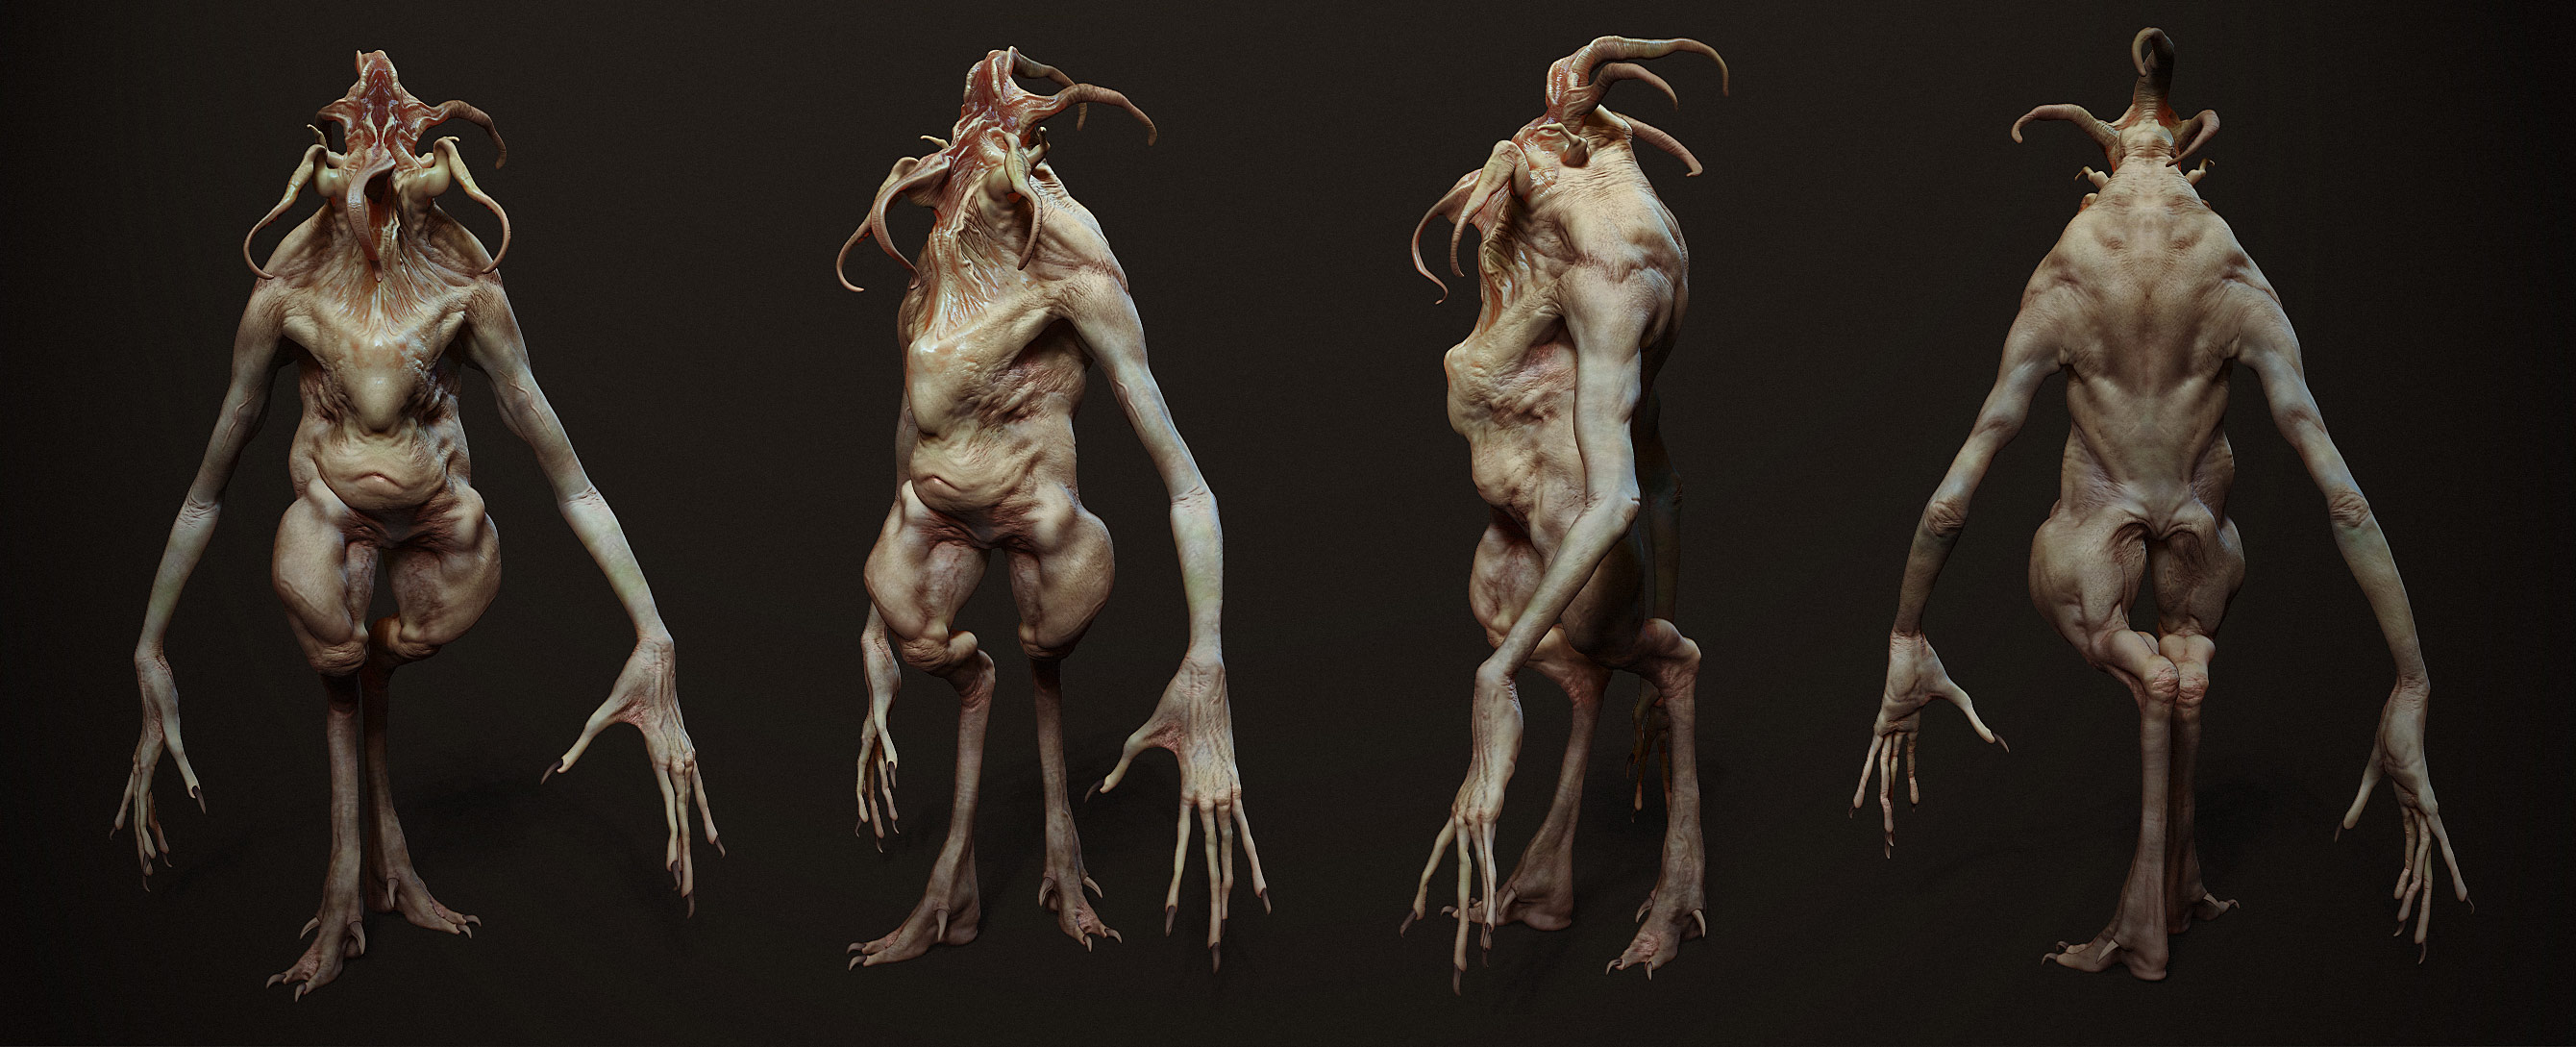
Done for CTN Animation Expo in Burbank CA. I did a few demos for the great folks at Pixologic over the convention weekend, talking about my process of concepting, digital maquette sculpting, and presentation. Here are some renders and breakdowns for everyone to check out.
Some videos on my sculpting process will be uploaded shortly. Check back here on ZBC and the Pixologic blog
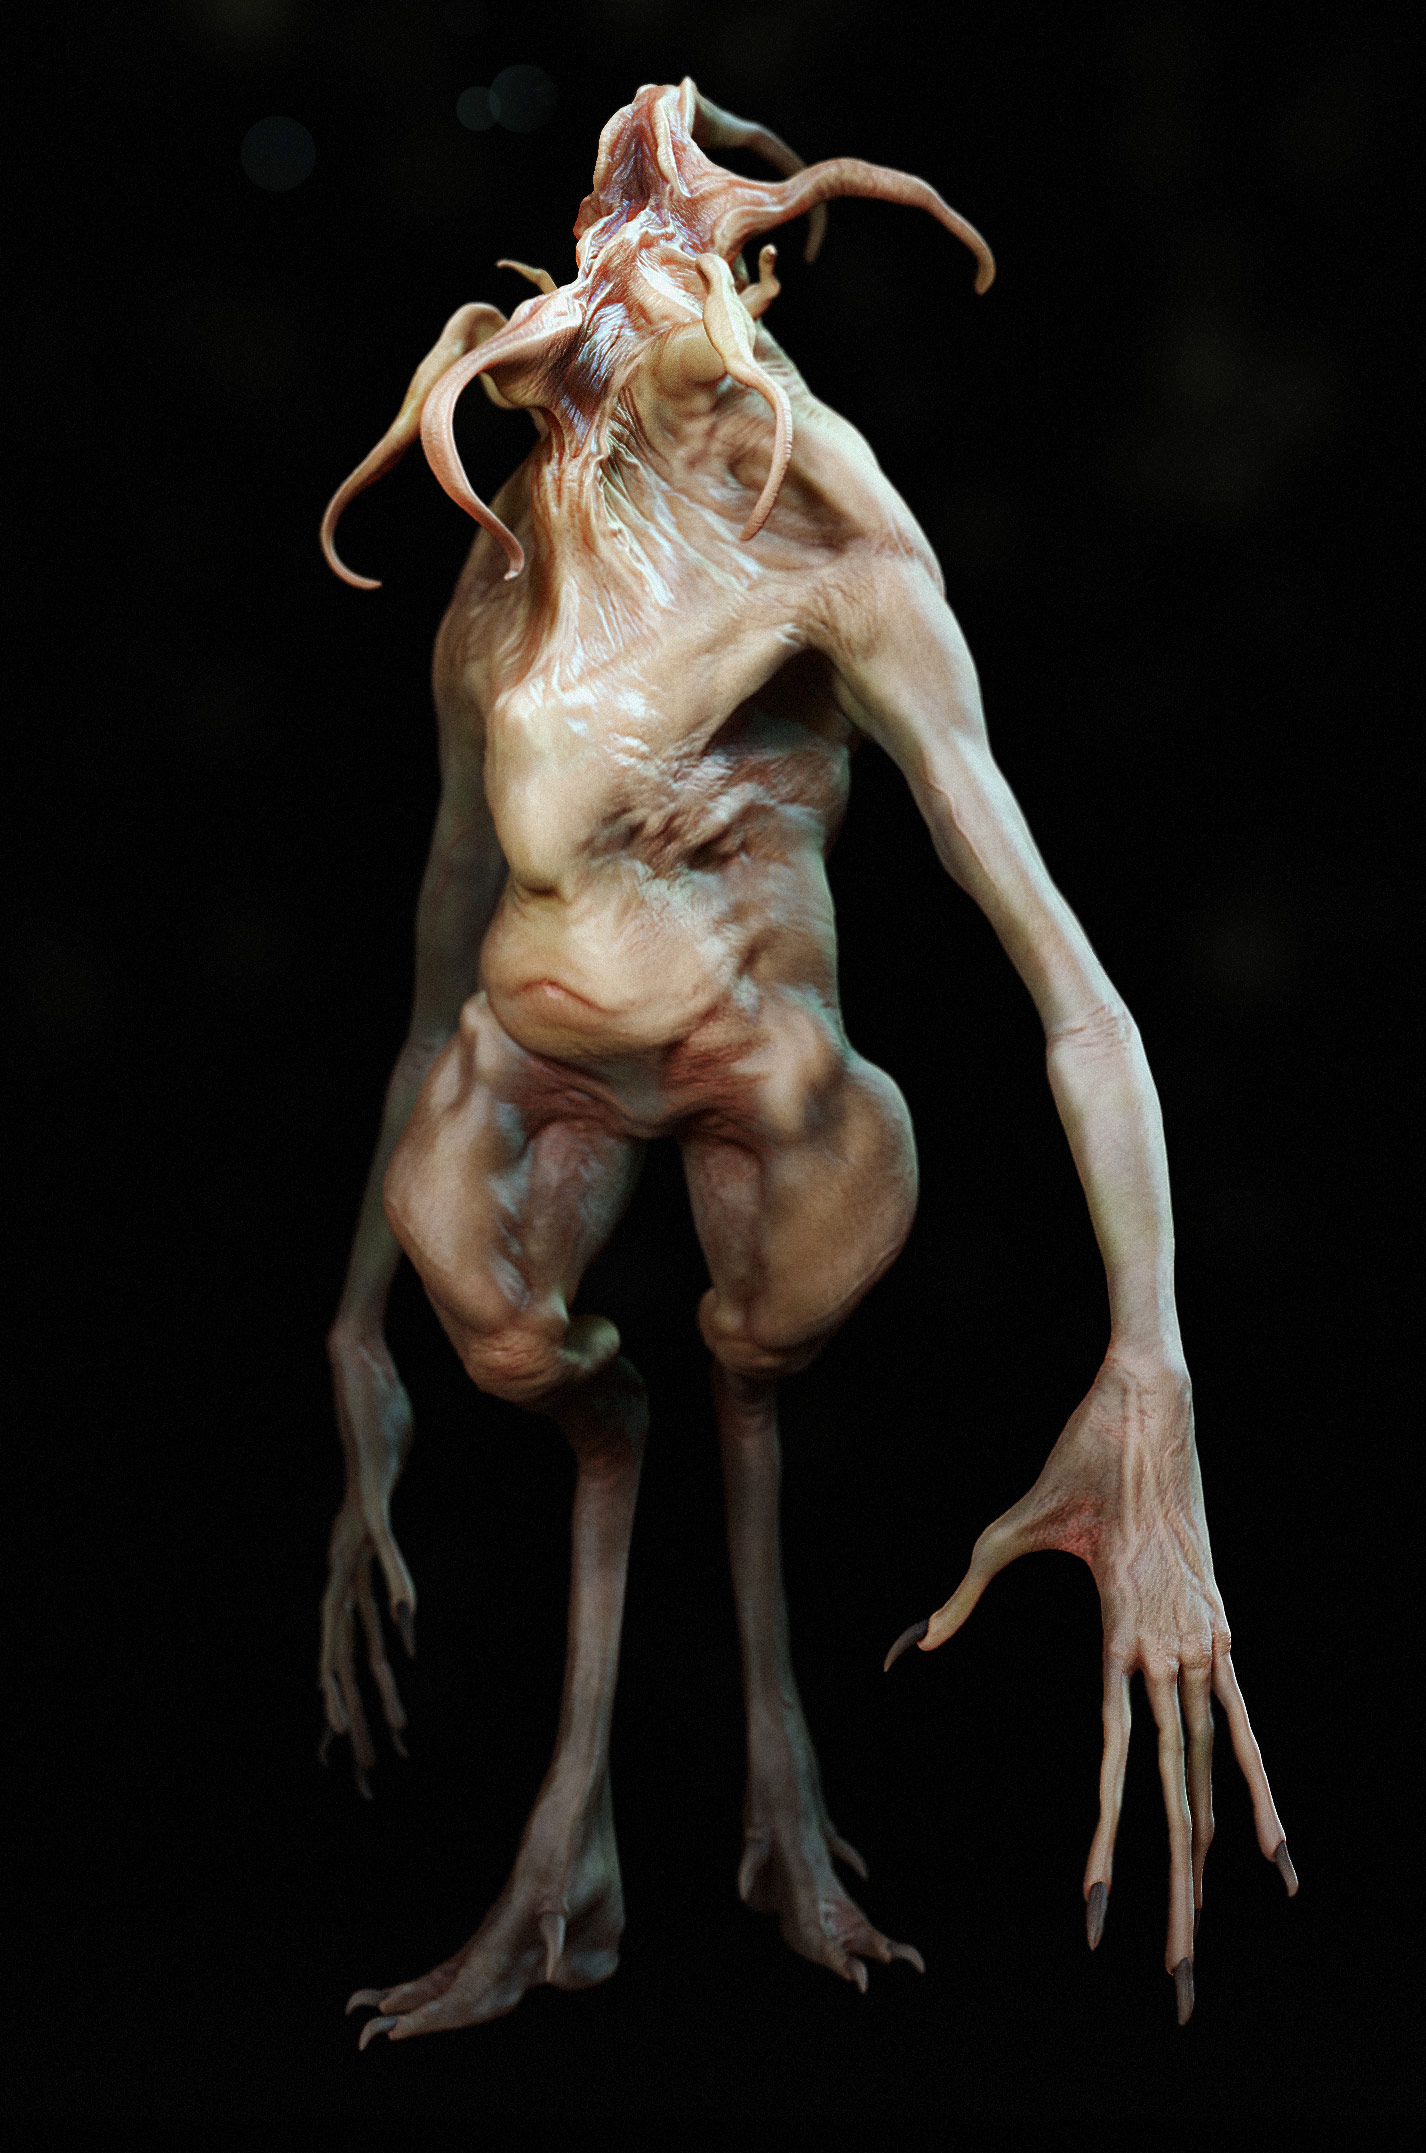
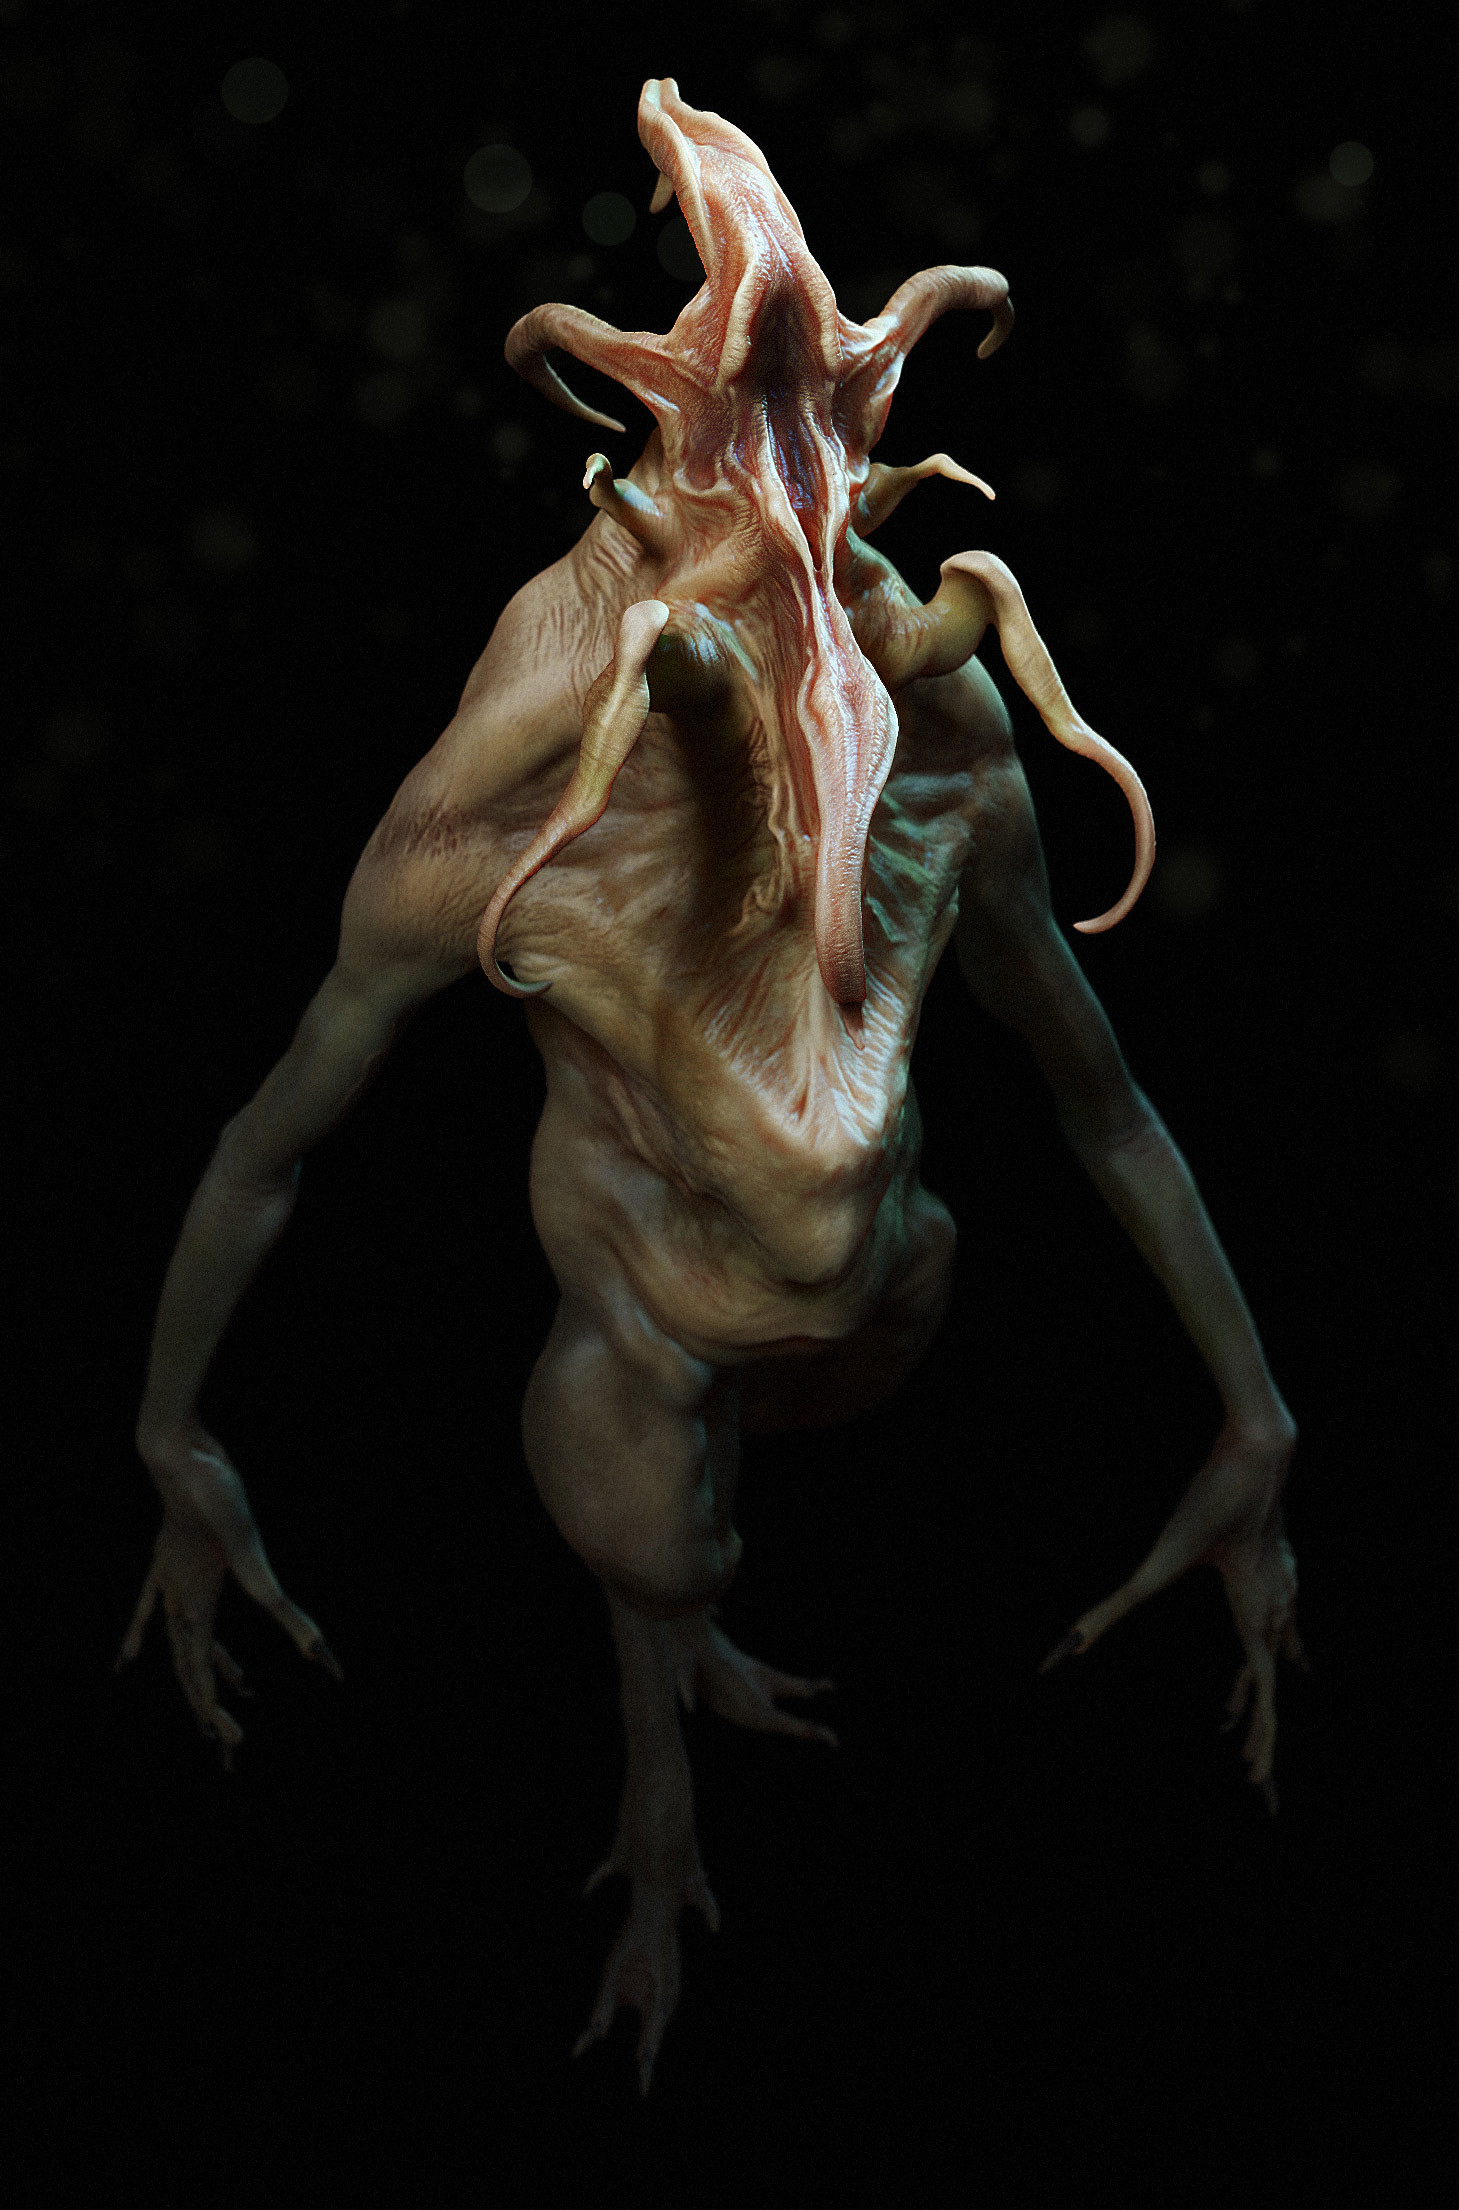
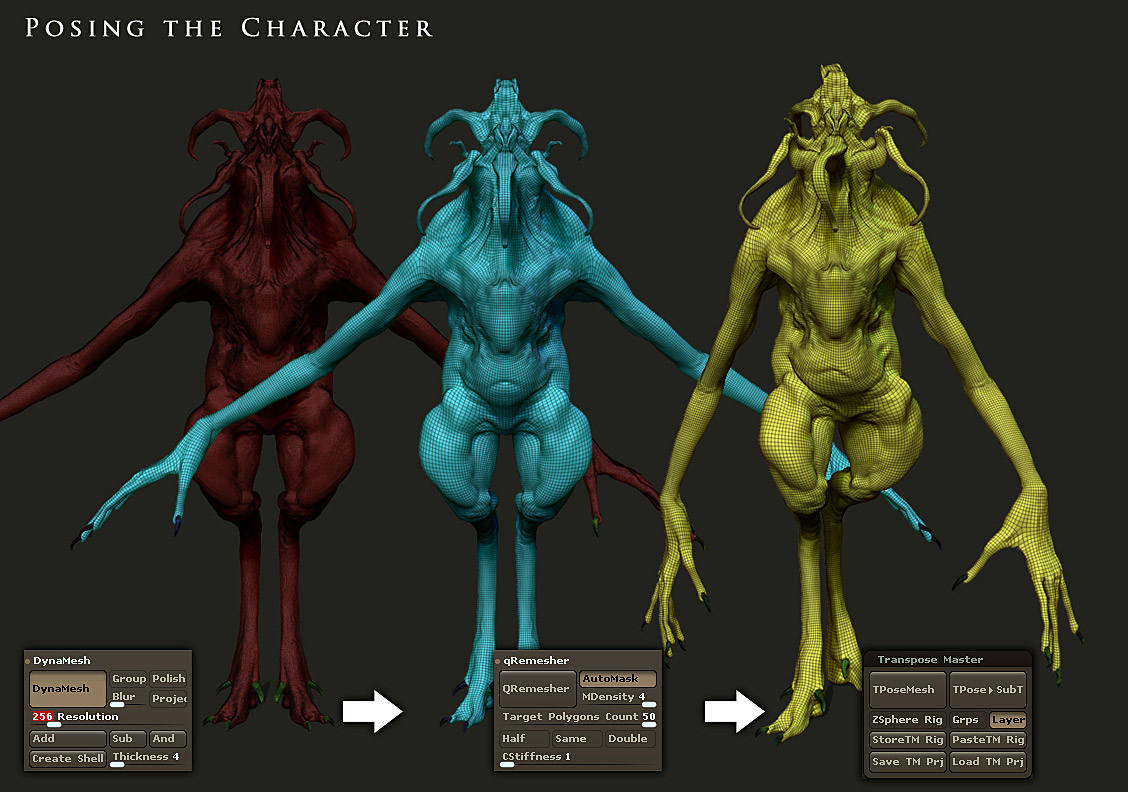
The pose was done by creating a new base mesh and projecting all my detail and polypaint to it, one subdivision at a time. Having a lower base mesh (50k triangles), I was able to paint smooth masks and was much easier to control. Having the pose be applied to a layer, I can then switch back and forth from symmetrical to asymmetrical.
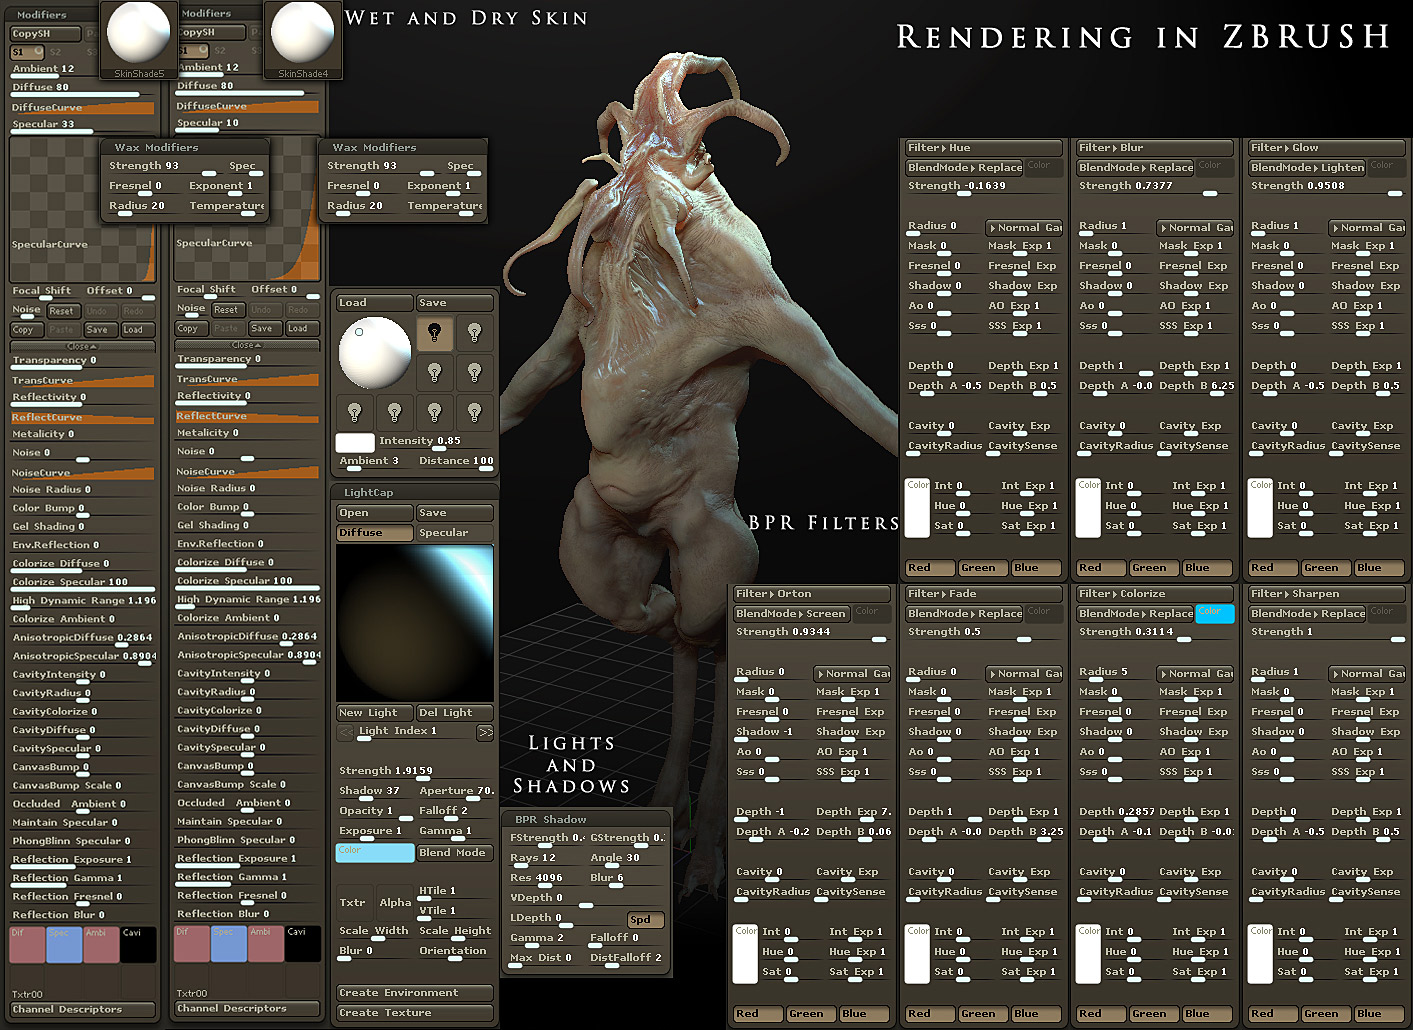
Below is a breakdown of the compositing that I do later in Photoshop. You can see I get it pretty far along in just ZBrush using the filters and BPR (below). All I really do is play with the curves and enhance the depth of field with a Lens Blur (referencing my ZDepth render in my Alpha channel 1). Final touch is a Filter>Render lights to pop some of the levels and force a dimensional feel to the lighting.

And here are the lights, lightcaps, shadows, and BPR Filter settings. Videos on this process coming very soon!
Attachments
awesome work - top row stuff here to !! small_orange_diamond
Excellent sculpting.
Very nice, enjoyed the demo at CTN!
Awesome !!!
Beyond the Awesomeness…
Very impressive. It’s one thing to get a good render out of ZBrush with complex materials and lighting, but it’s another to do it with just a 1 channel Standard Material, clever filtering and a little PS.
And the model itself of course is really good.
Congrats!
Woah what a cutie! I’m diggin Tentacle Head’s design fa sho!
The skin turbulence is nice, like how you kept it selective instead of all over , and renders are sick. Thanks for the info/settings much appreciated, I will try these next time I do some thing cool
Excellent! look like avatar.
good job!
so glad I had sub to this thread! This thread is the first thing i saw after i woke up and I just can’t t hank you enough for showing me how to render in zbrush. I desperately need this to present my models now and the future!
Hell I would pay for stuffs like this, and you actually hand them out like candies in halloween for free!
This got to be top row man…
Very Cool Creature, I am really happy you explained your render flow, as I too like to make light caps for each piece… Deke
Thats cool !!!