ZBrushCentral

Koro's::Trooper Concept, First ZBrush Project

Hello to all,

This marks the first time I have posted to ZBC, and I would like to get crits and advice from others here on the form. In Advance, I’ll thank you for any advice as I am trying to gain more experience from 2D to 3D. I’ve had some close experience with working as a 2D cinematic/concept designer in the Games industry in Japan, but was never really responsible for generating 3D assets myself. Now back in the U.S., I’ve delved into ZBrush heavily.

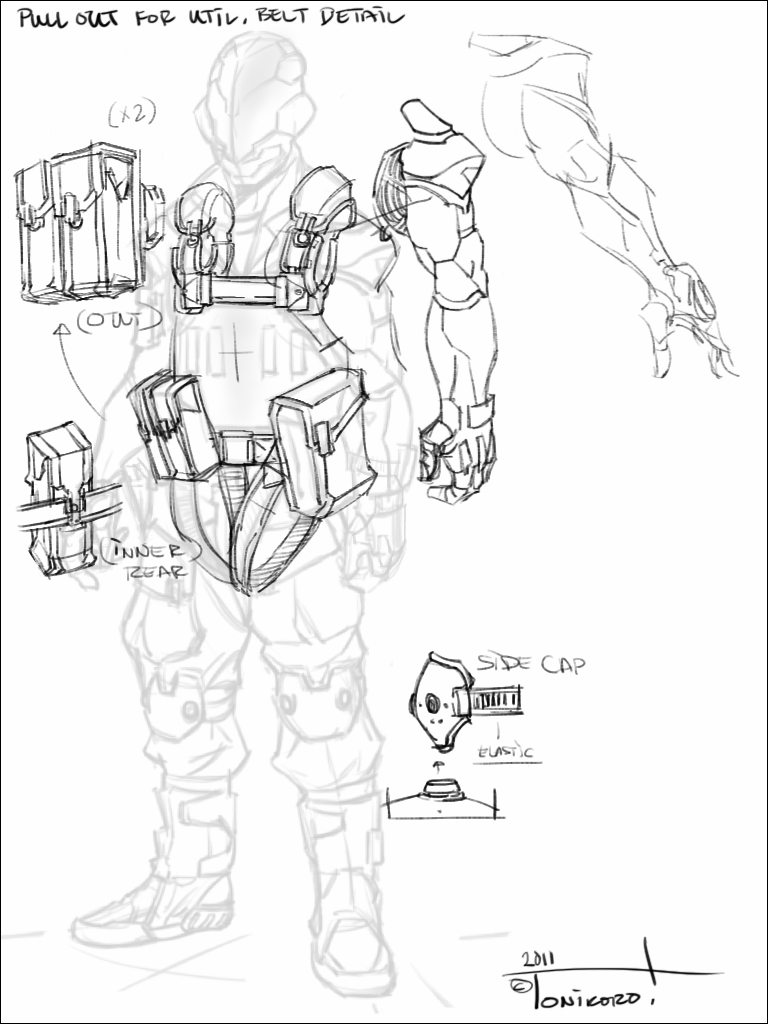
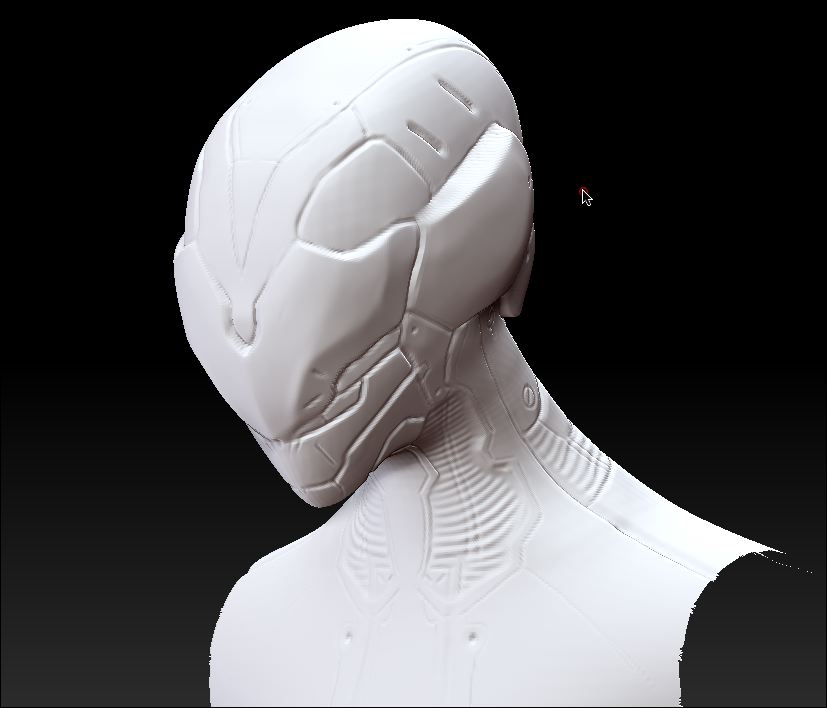
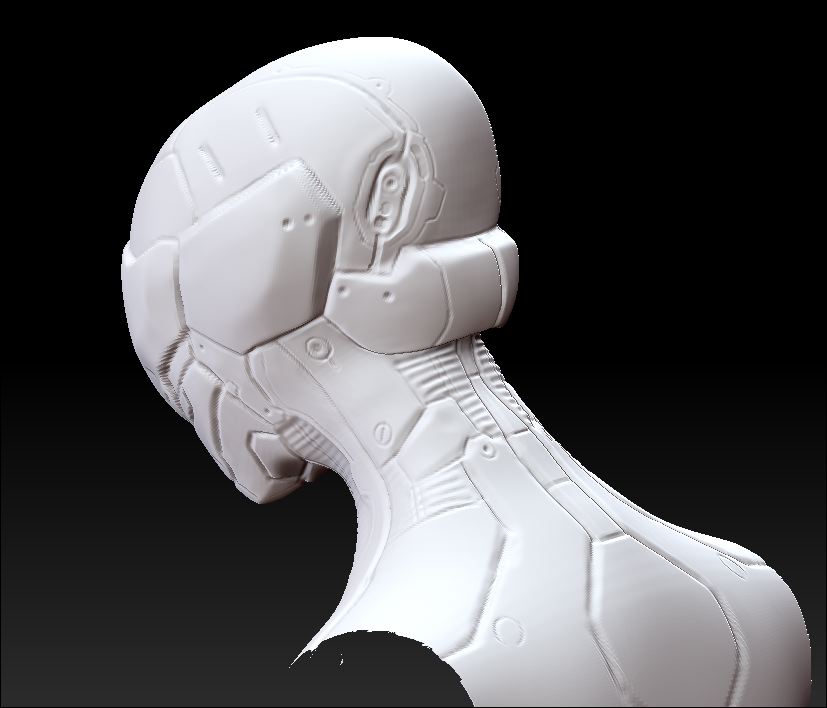
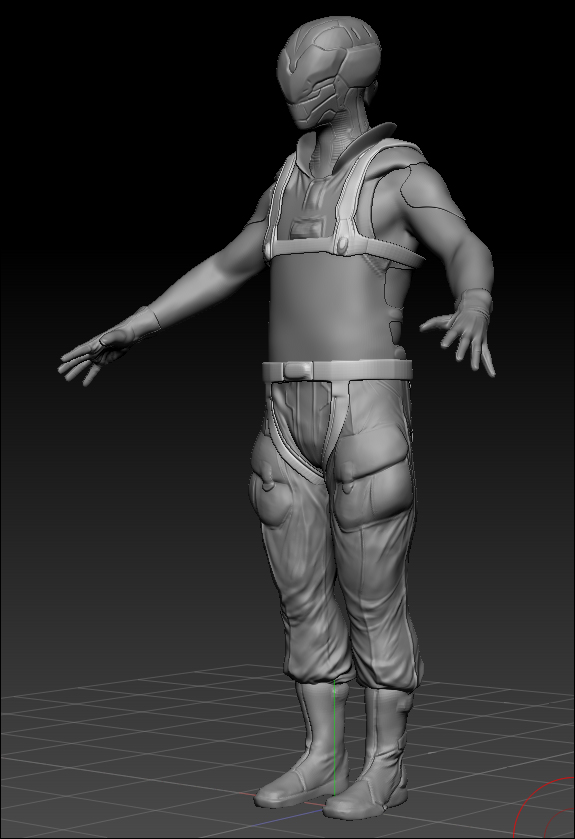
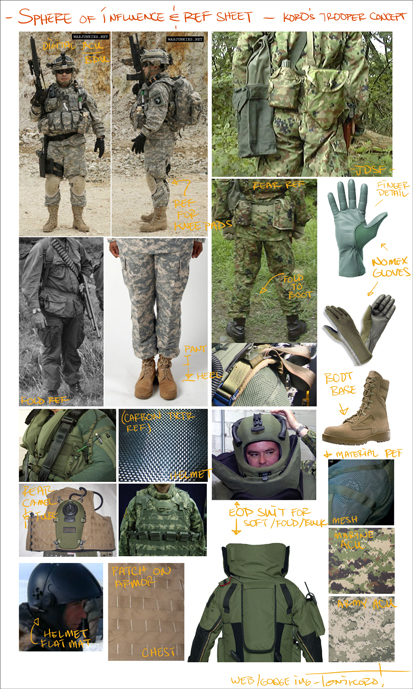
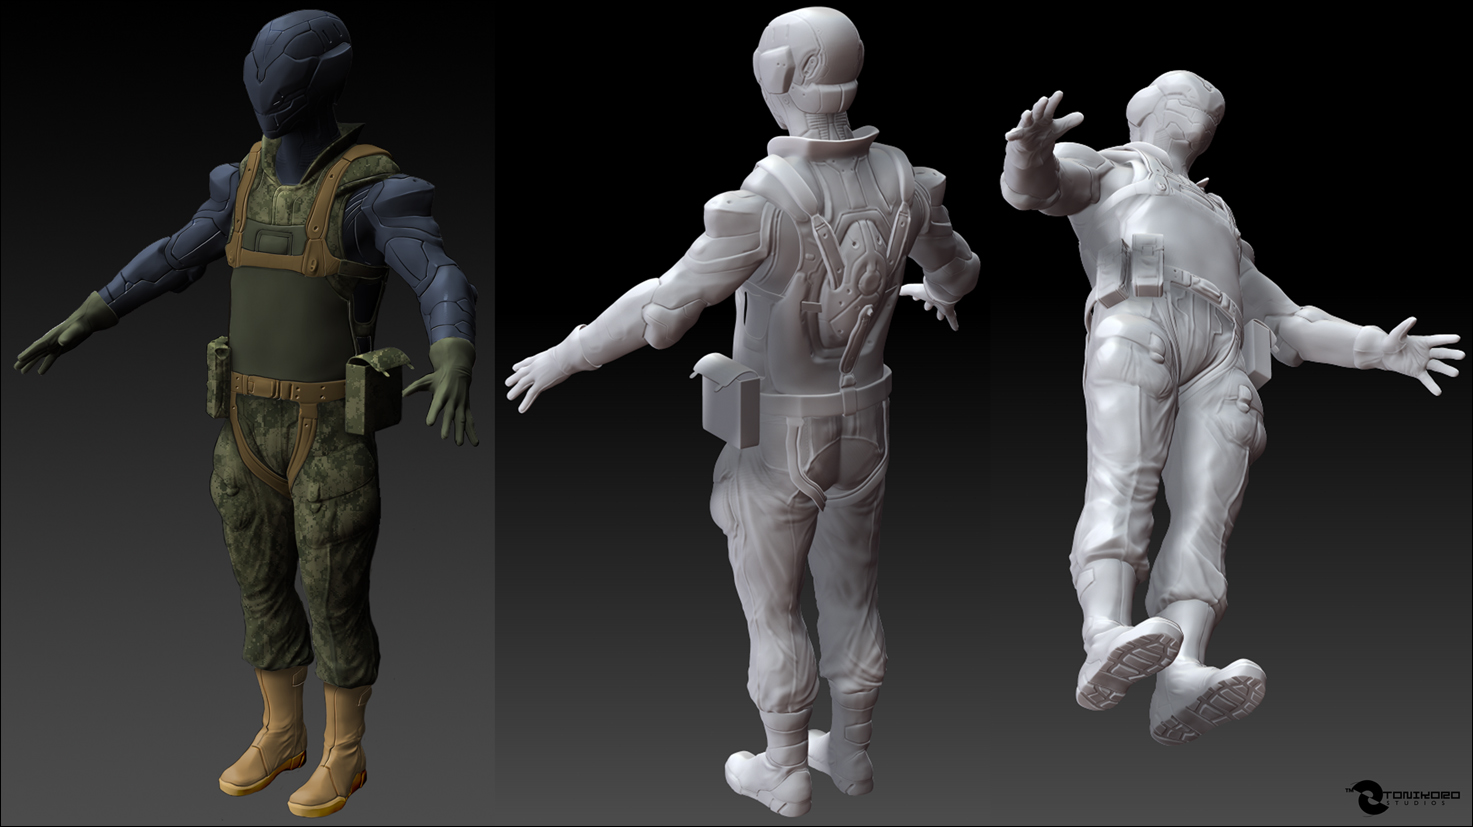
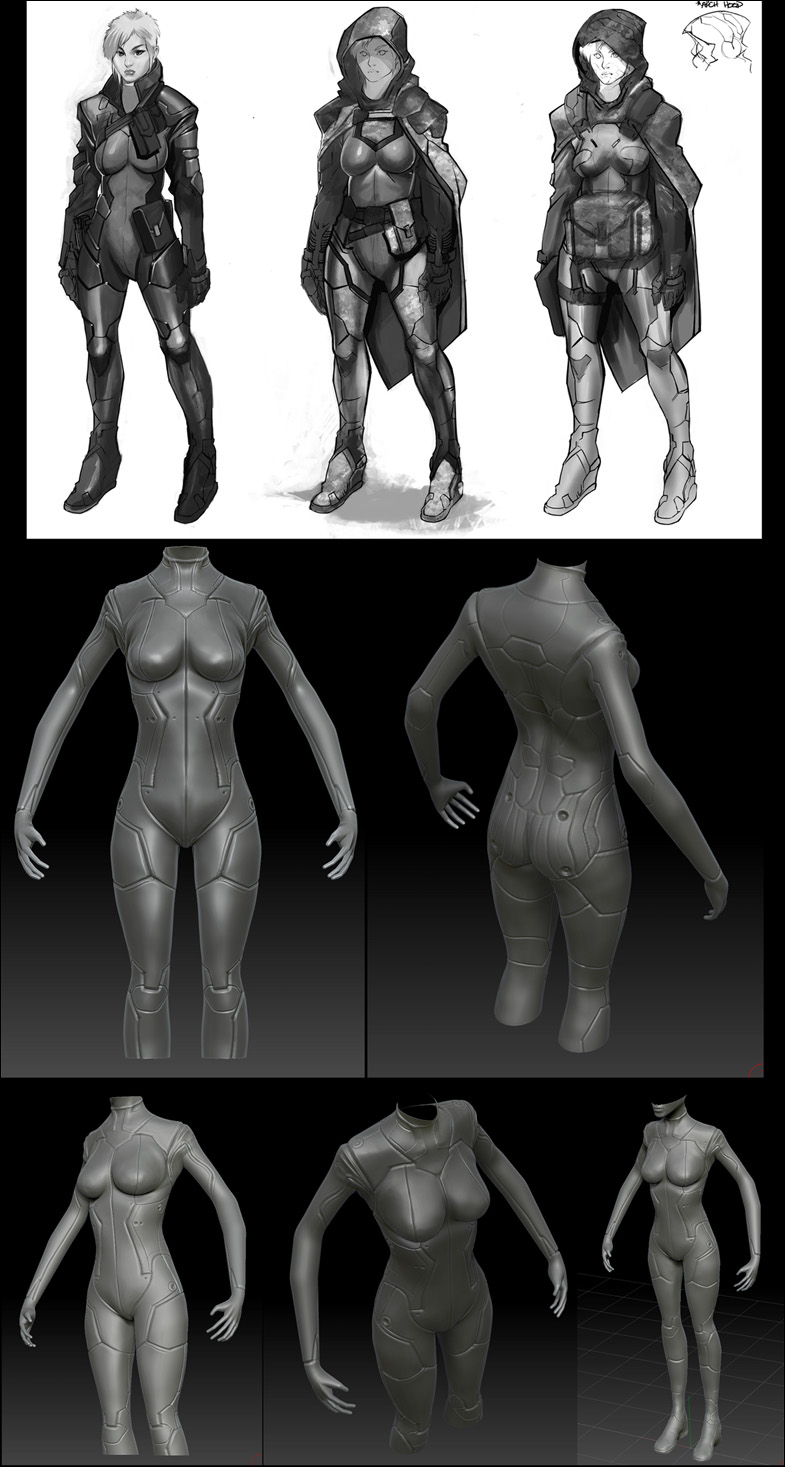
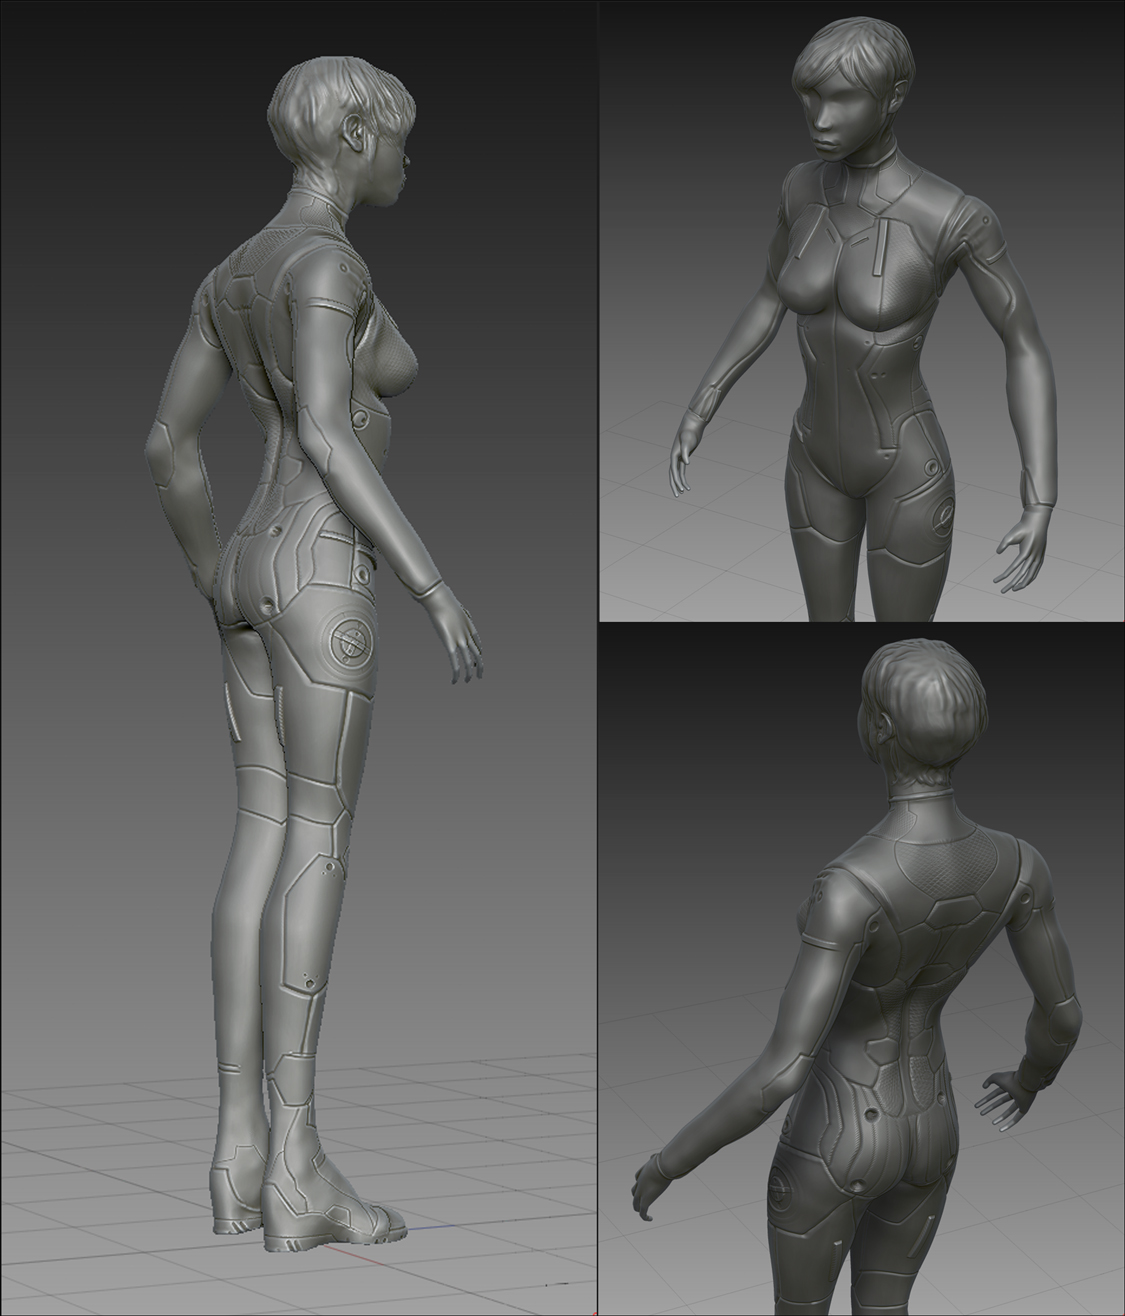
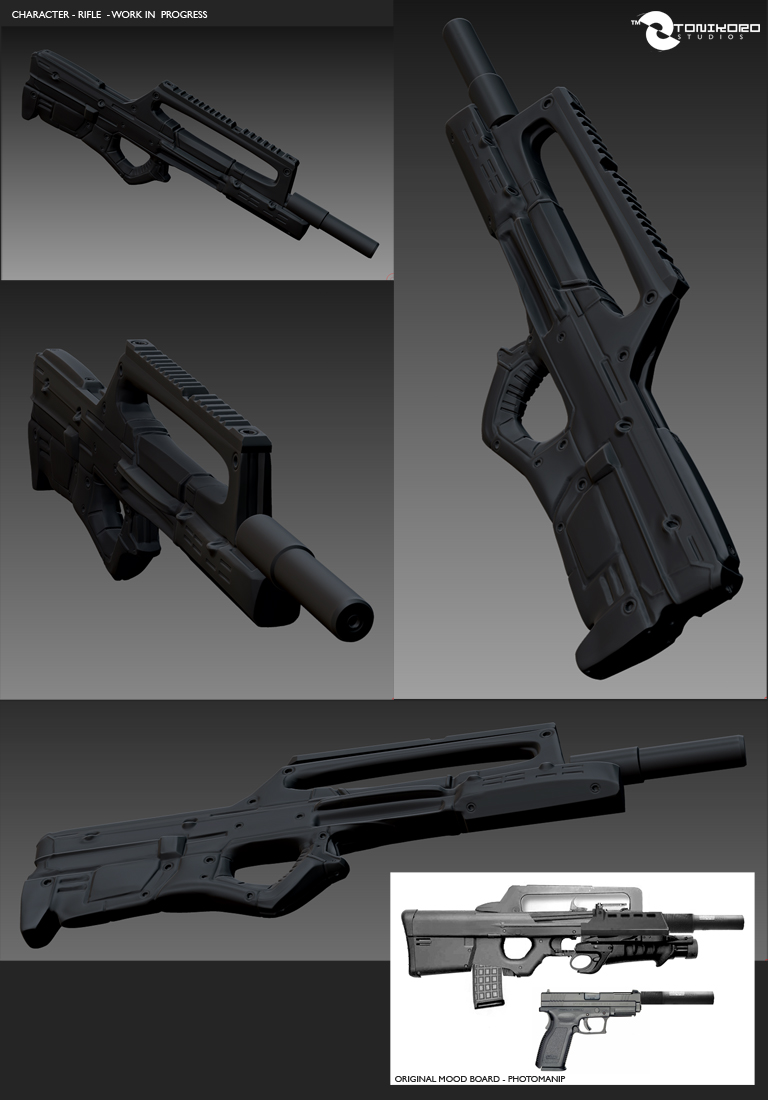
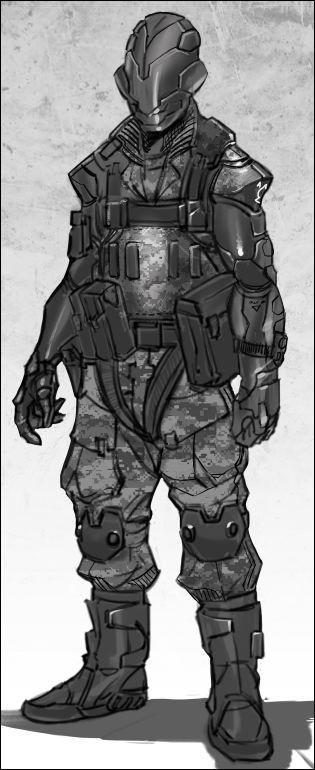
First, I thought it would be cool to take some of my own personal concept sketches to act as a visual to this project…

koro-concept_illo-to_Zbrsh.jpg

Crits are welcomed and appreciated, and again thanks!

Attachments

Koro-concept-img2.jpg

koro-head-sculpt-vers2-a.jpg

koro-head-sculpt-vers2-a-back.jpg

koro-trooper-detail-wip_a.jpg

koro-trooper_ref-sht-sml.jpg

trooper-key-visual-render.jpg

Hello, All.

I have a question… I am in the middle of doing a remesh-retopo of my model, but I was wondering, is it better to remesh all the individual subtools, or is it okay to remesh one mesh with all the clothing subtools together?

trooper-retopo-8.1.2011.jpg

Hey Koro!
Nice first post, keep it up!

For retopologizing, I think the answer to your question depends on what you want from the final result or how your workflow is. Let’s say you will need seperate geometries for those subtools in texturing, rendering etc. It might be a good idea to seperate those in retopology.
Basically, if you will need seperate geometries later on for some reason, you might want to remesh your subtools seperately.

I hope this answers your question

Very nicely done Koro! Love the progression!
Keep at it! =]

qoyun
Thanks for thoughts on my question. I think there are two things I need to think about, one is creating a high res- high poly model where all subtools will be retopo’ed, an then a more singlar mesh for game optimization. I have more characters lined up for this project, so it should be interesting as a learning experience!

Mahlikus

thanks a lot, in some of my next steps, I am looking forward to using some of you freebies to good use!

Do it to it! That’s why they are there.
Enjoy!

Small update for the night, before going on to some other areas of the model, I came home and tried out the Spotlight texturing features and polypaint. Still feel like I am going to have to check the unwrap of the UV’s and also figure out a better texture for the main body skin, which I was hoping for a sort of matte rubber-shiny black and carbon fiber touch…

trooper-txtr-test-8.5.JPG

Looks like a good start man. The concept feels a lot more bottom heavy than what you have currently. Texturing looks great though.

Thanks, sitting here on a Sat afternoon trying to fix a lot of things before I start adding more items on the straps. The poly painting process takes more involvement than I thought it would, but it is slowly shaping up. I have a lot to do on the head, and as you mentioned, yes the original seems more bottom heavy. Thinking as I was building it, to shape the concept up, I seemed to be in the mind of streamlining some of the concept as I went along, adding touches that made it more “real world” in my mind, so it thinned down a bit and ended up not as bulky. In a line up of classes, I am thinking this is my “rifleman/grenadier” class… I have others in this line up as well (Character wise) that I will post later…

Well, it’s been a few since I’ve posted any progress on the trooper. And I was a bit bummed after somehow screwing up the Original dated file of the tool. Had an error after doubling the Doc size, and I think I drew on the canvas after that forgetting to hit edit and toasted the texture/polypainted file… (Sad Face)

However, taking a break to add some other assets from the characters I’d like to make plus some weapons for Hard Surf Modeling. I’d like to shout out and thank any of the Eat 3D guys on the board for the really awesome tuts! In particular the Hard Surface Tutorial really really helped!

koro-fem-combatant-trooper-wip1a.jpg

Attachments

female-trooper-concept-wip2.jpg

Trooper-Rifle-wip-board-8.16.11.JPG

It’s been some time since I have posted more progress on this thread, but I had a question for all of you that seems to stump me at the moment.

I have gone in and started the sculpt for the cowling on the female trooper, which was shaped from a 3D Plane in Zbrush and shaped around the figure. When I began sculpting it out, I turned on “Double” sided under the Display Properties so that I could see the reverse of the plane (only) while sculpting.

My question to anyone knowledgeable is, is it possible to bake the outside of the cloak, smoothing out the inside of it? As well as being able to thicken the material? Or, should I project the detail onto a new piece of geometry by using the Retopology tools?

Fem-trooper-wip-v2 copy.jpg

As you can see, even thought the nice sculpt is on the outside of the cloak, the impression of all the details are flipped on the inside.
Would love some help to improve if anyone has a solution.

turning on your brush’s backface auto-masking should solve that problem. Character looks great by the way. I look forward to seeing her finished :slight_smile:

Awesome work! Personally, it’s a dream of mine to work in Japan on games/concept art/what have you (though the outlook isn’t very good for me… >_< )

Anyway, the option you want is located in Brushes-> Auto Masking -> Backface Auto Mask (it essentially masks off the opposite faces of a thin mesh.) In terms of retop, you can try it, but it may be more work than you really need to do, it all depends on needs, I imagine, especially if you’ll find that you have to retop anyway. In terms of making the cloth thicker, there are many ways to do it, probably the simplest being “Inflat” under deformation. You could probably play around with the polygroups and get what you are looking for that way, too. Good luck!

Thanks for the info!

I found the backface auto masking pallet, and I will try it out, but as far as the thickness, I tried inflation and it made the geometry a bit wonky. It would not be that hard to try it using the Retopo, I seem to remember there being a thickness setting there and with the projection tools, I could get the sculpt right back on it I suppose.

There are a few things with the shape of the hood covering over the head, the slight visor area over the forehead where I tried to use the clip curve tool and it made some funky adjustments, where I will need to go in and fix. Lower subdiv work to the caped area to pull it down a bit more naturally…