Thanks Darukin  , working on tha katana right now…
Will post soon… :lol:
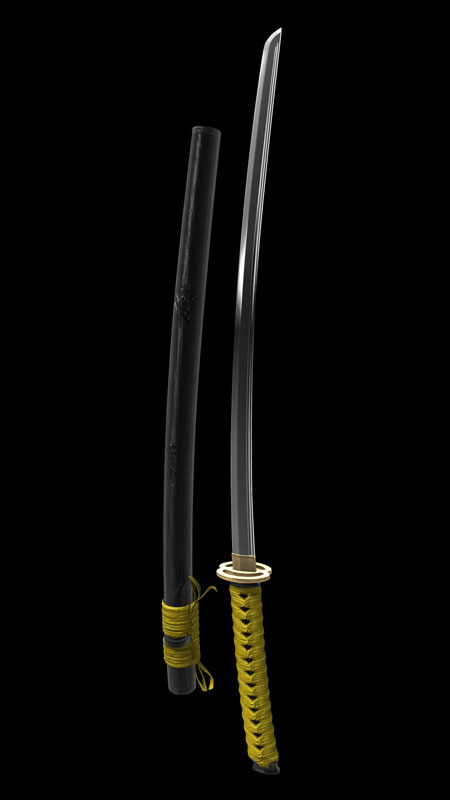
Ok, this is the katana with the normal map added and rendered in Maya.
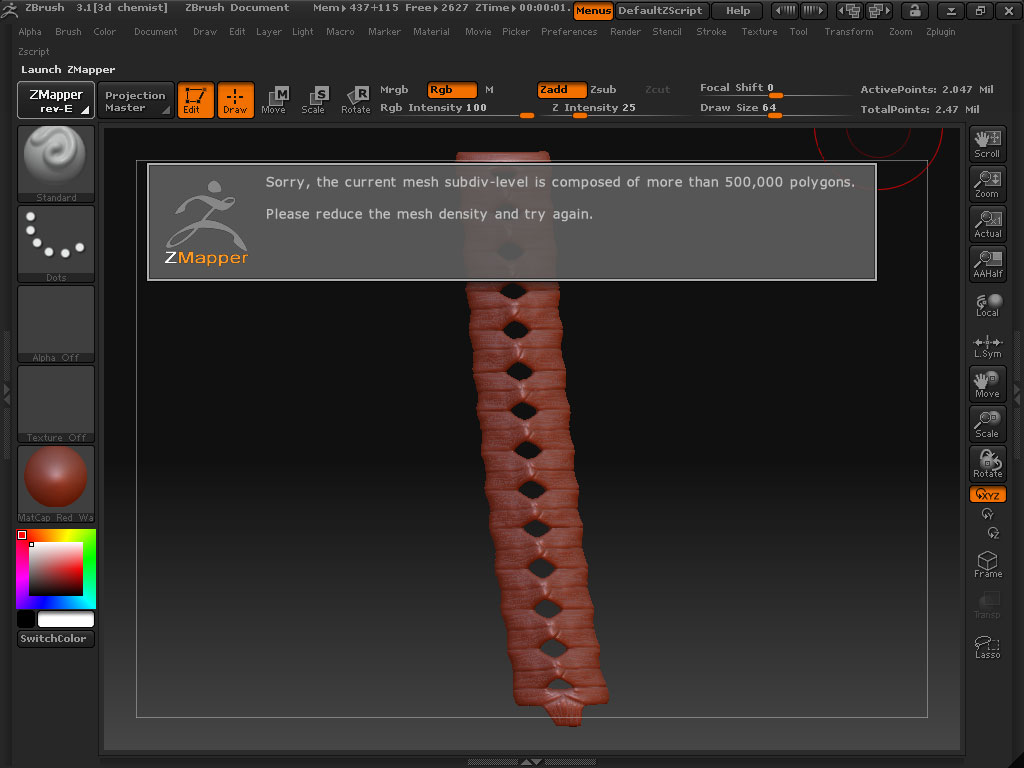
Normal map was added in ZBrush. I did the high poly in ZBrush, low poly in maya, and using ZMapper I tried to do the normal map, but I found difficulties while doing it with ZMapper, it seems I cannot go bigger than 500k polys :(.
The normal map for this rendered images was done part by part. Then, I edit those normal map pics with photoshop.
[attach=111041]Katana.jpg[/attach]
Is that because of my PC is lack of memory or other problem???
I’m running 4gb memory with xeon quad core 2,4ghz.
[attach=111043]Error.jpg[/attach]
Need help, thanks for the answer anyone  .
.
By the way, comments are always welcome…
Attachments
It’s been a week with no progress
Here’s the latest…
Geez, it’s really difficult, especially the folds… 
I understand with the symmetrical issue, I’ll fix that later…
Hopefully can finish before end of this year…
As usual, comments and critiques are welcome
Attachments
were you trying to create your normal map on the object with it at its lowest SubD? if you have a 500,000 mesh then you don’t need a normal map anyway. normal maps are to make it look like 500,000 polys on less.
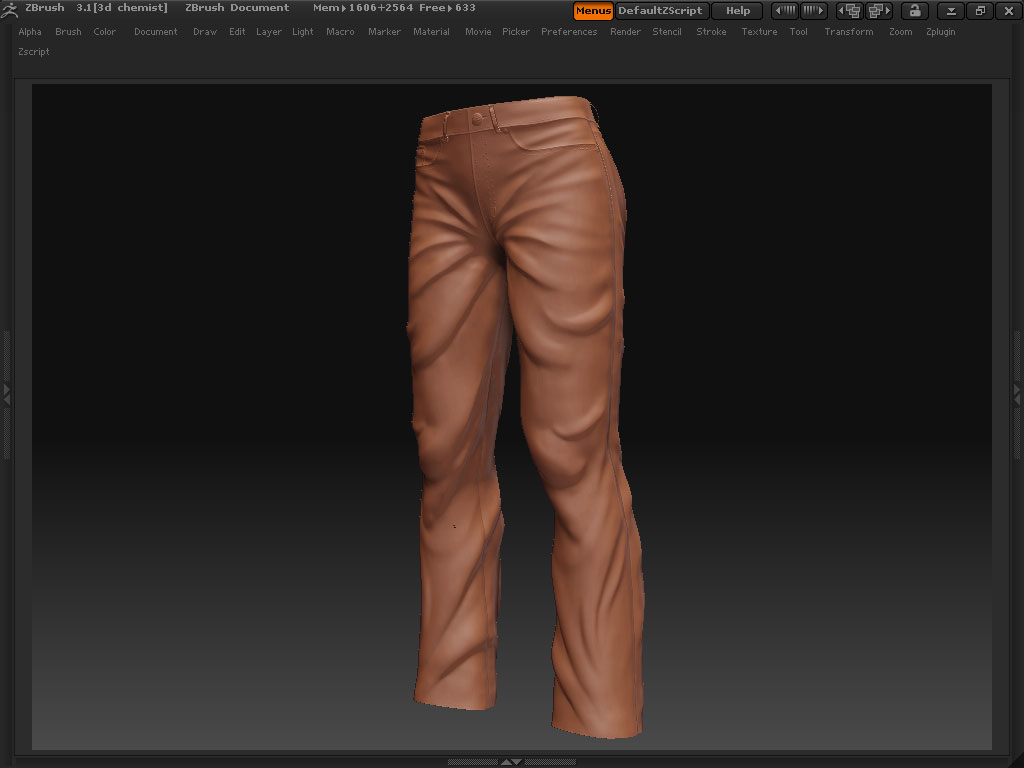
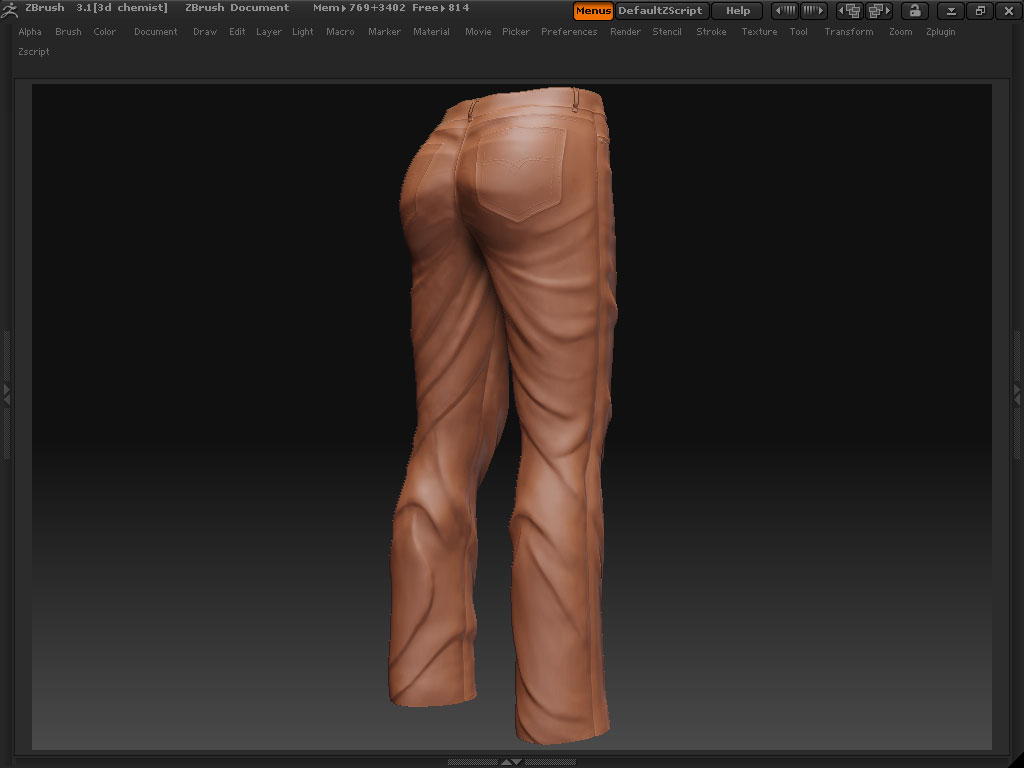
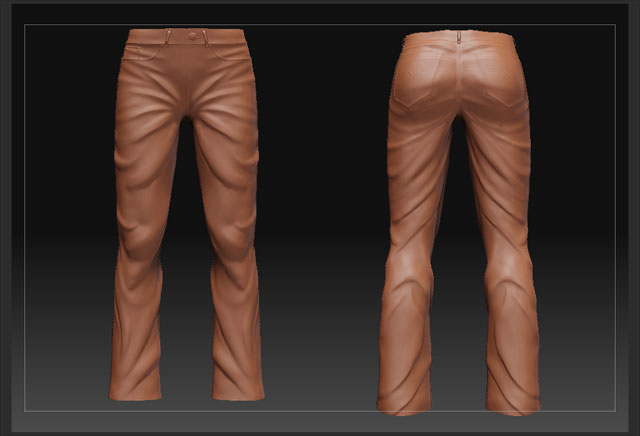
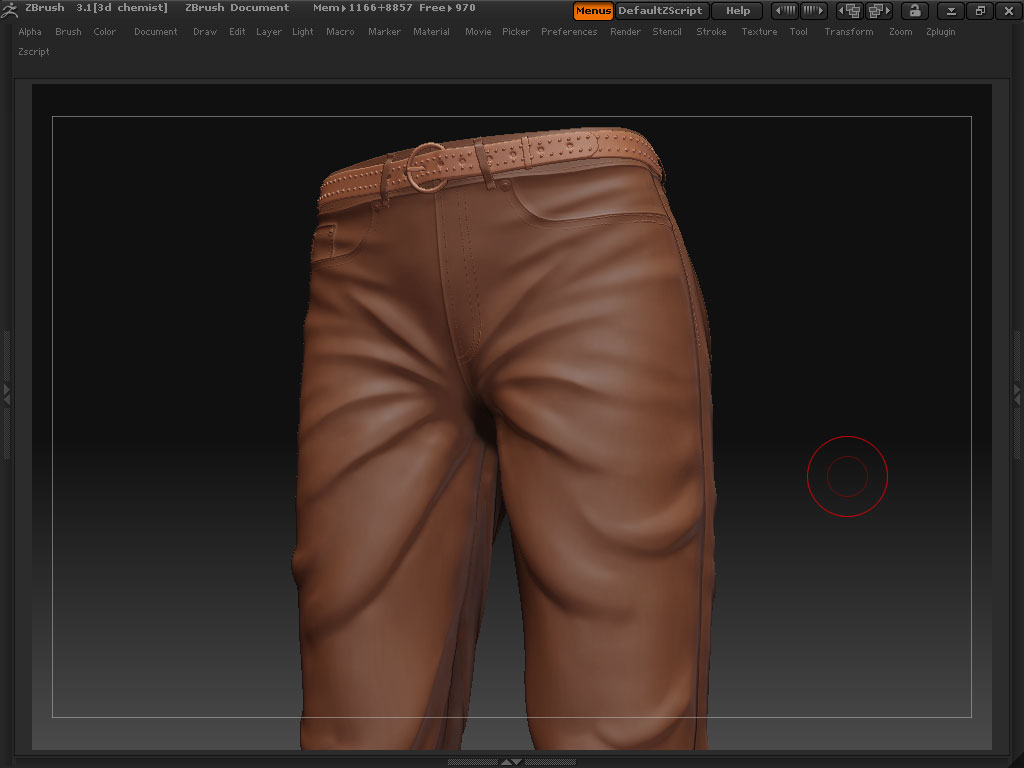
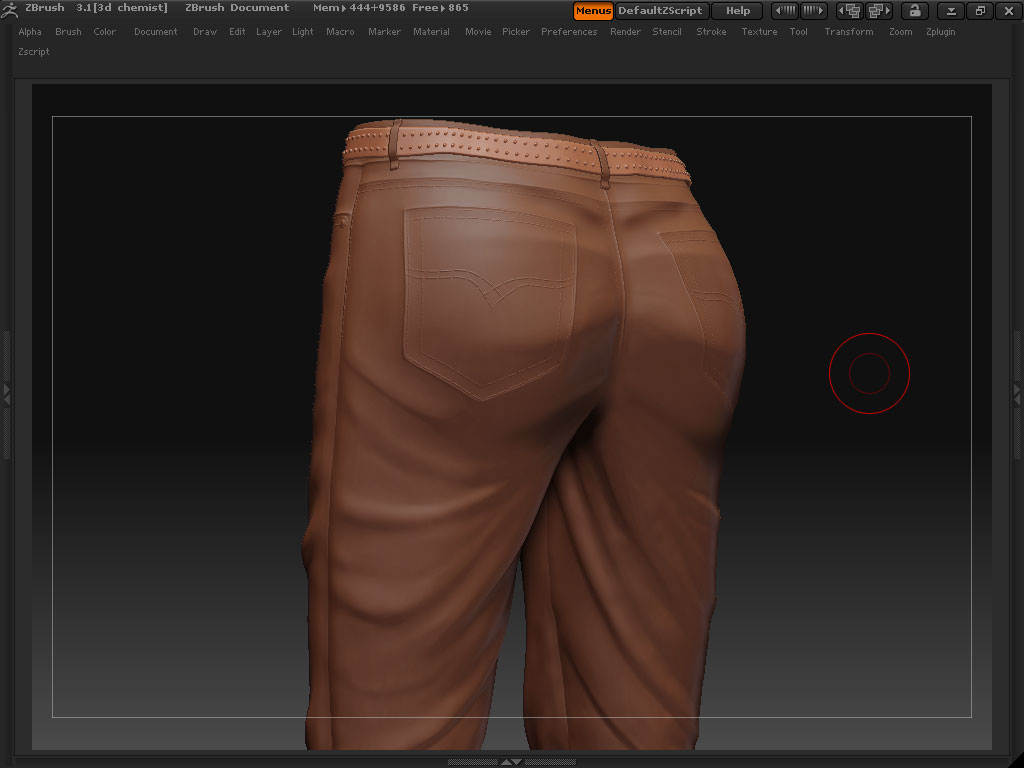
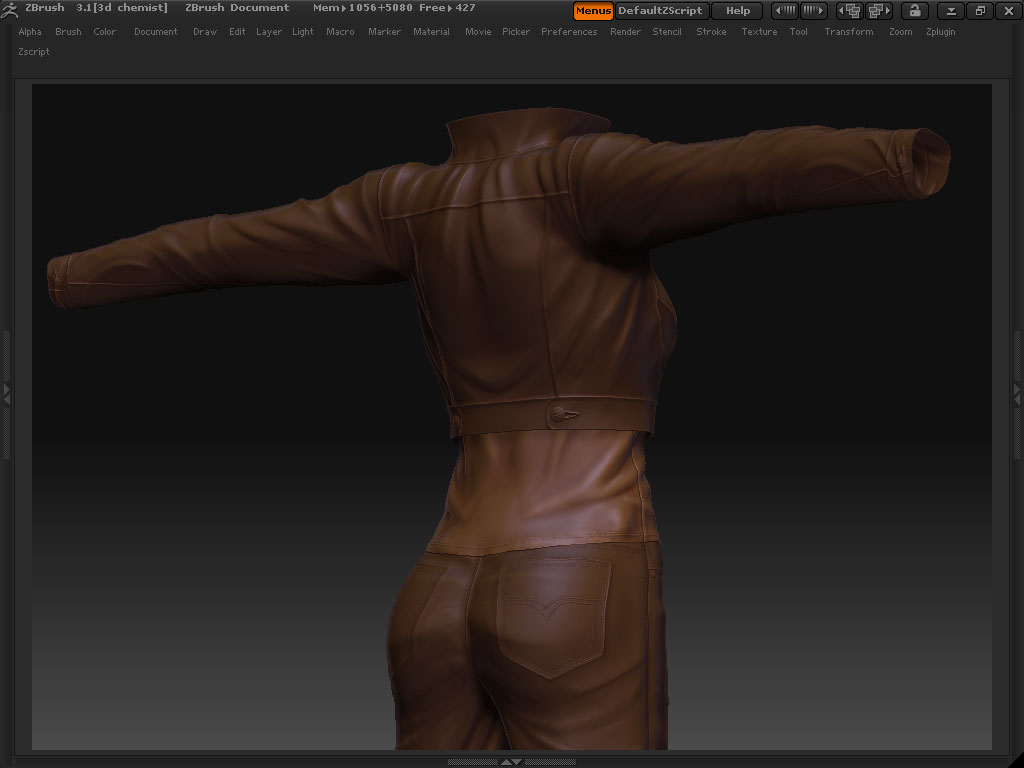
How did you sculpt the belt strap area, fly button, pockets and seams? Also is the base mesh created in zbrush? I have a lot of trouble sculpting those areas of pants, and you did a fantastic job here. Could you post a front and back view of the pants?
>goast666
Nope, it’s different mesh…
But don’t worry, problem has solved
>womball
Thanks womball…
As requested…
[ ]
]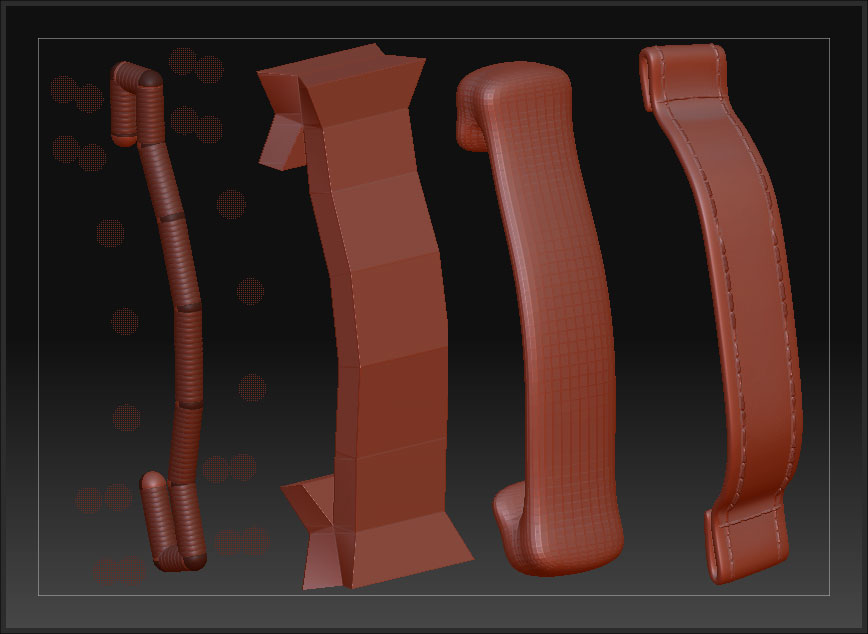
I did the buttons with alpha, I took a picture and in photoshop start to remove the highlight and shadow area, convert to grayscale, adjust the brightness and contrast, then just use the drag rectangle in zbrush and start pulling the buttons…
And the same for the seams, use the stitch1 from default brush, I just change the alpha…
The pockets I did with maddam brush, u can find it here in the forum, sorry I forget the link :D, but u can search…
The base mesh I just extract it from the lowest subdivision of the body…
and sorry for my english :lol:
hey night…
like teh way ur model is cuming out…
if u would smoothen those leg musle out a bit it will look slick and cool…i guess u have don justice to all the body parts but i guess the leg is bit muscular…
and i dont need to tell u but the jeans are looking the coolest…
wel…hope to c the updates soon…
best of luck
zain a.k.a NEOZERAHAN
…
my sketch book… (pls do me a favour of not going through the first page )
http://www.zbrushcentral.com/zbc/showthread.php?t=63054&page=7&pp=15
Hi, thanks neoz…
Don’t worry 'bout the legs, in the end, they will covered by the jeans …
But, I’ll fix that, thanks…
This, is the new progress, not much :lol:
[ ]
]
Man, the progress is so slow
Next, I’ll do the t-shirt…
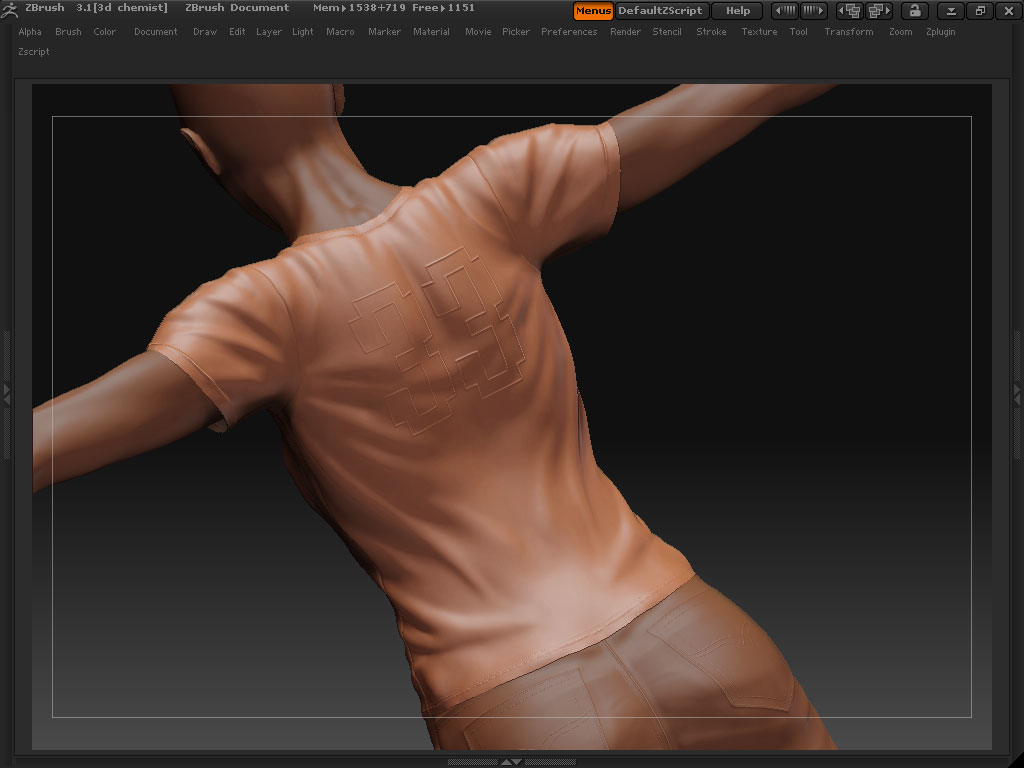
Ok, this is what I did so far…
T-shirt
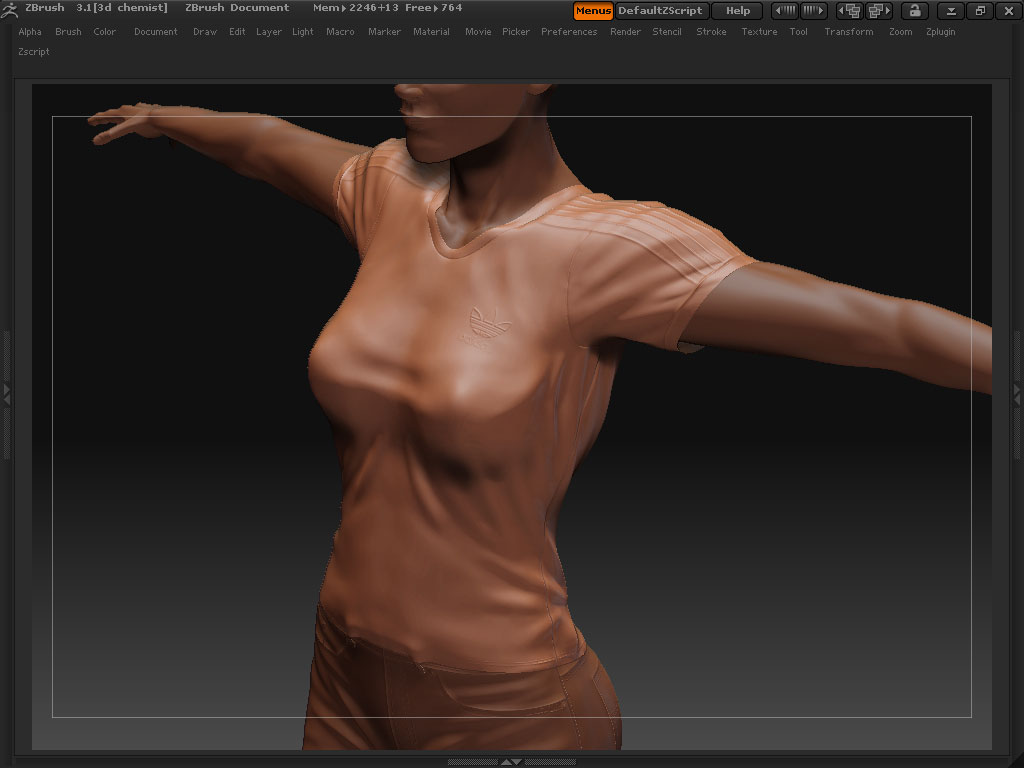
The patterns of the tee it’s not the same as the concept sketch, I improvise it a bit, and since the shoes already an adidas brand, why don’t I did the same as the tee… Basically I love that triple strips brand :lol: hahaha…
Again, forgive the symmetry issues, I’m just trying to put all the parts together, cos will I have for the final pose :lol: , but I’ll fix in the end, I’m planning to have the figure retopologized too, so I’m still searching for the correct workflow…
Waiting for comments…
Attachments
You should disable symmetry when you’re working on cloth folds/wrinkles.
-Dustin
Keep up the good work. I just looked at your site, and under Awards it says “in progress”? I’m sure its just your english, but that is soo funny. I mean no disrespect at all, it just sounds great on a website.
Hi everyone…
>infamouskiller
>dustinbrown
I will sir :lol:
>BetaRayBill
Thanks…
It’s an old one, I’m planning to update it, but I don’t know anything about codes and scripts :lol:
And for the awards? :lol: I wish I had one :lol:, I’m a dreamer :lol:
English??? Wahaha… :lol: I wish I can go back to the past, I didn’t pay attention to the teacher, d’u want to know what I’m doing during the lesson those days? I drew, my books those days full of unused picture coming for my mind, better than slept, I thought…
Now, I realize how important it is 
Btw, thanks for visiting…
Here’s the progress…

Now, I’m working on retopologizing the figure, I feel like some area is not detail enough, especially on the head, no inner mouth, eyes, lips etc. So, I’m going back to the character, and see what I can do. I’m planning to have this figure animated, so having the correct topology is a must (I think :D), but I’m not going to low-poly (maybe later :lol:). And I’m going to retopo all the outfit also.
Hopefully by using project all, I can manage time and reduce amount of work of resculpting. After that, I’ll fix the symmetry for the folds and wrinkles…
Phew, a lot of things to do :lol:
Attachments
Oh ’ the topmost.

hey,
nice thread! nice progress!
just saw, you replied on my thread, so i just took a look in your signature.
and wow! really nice! keep on working!
especially the clothing is nice.
very nicely made brother…
realy like it…but dont u think its to smytrical…a lil bit of a symetry wil bring more aesthetic feel to ur model…
but very cool!!!
Thanks aho_cn, wethand, neozerahan 
I’ll remove the symmetry
I’m doing retopo right now, it’s difficult …
Hope there’s easiest way
Man, really struggling, I need to find a learning curve for this…
Hey shocker, retopo really isn’t that hard, I thought so as well but after reading everything about it on the wiki: http://www.pixologic.com/docs/index.php/Topology_and_Reflow_Lab It became much more transparant. There really isn’t that much to learn.
Another even easier way is to export your model at the lowest subD level (or the level you want to retopo) to Maya (or another 3D program of your choice) retopo it there with the tools you know and then import it back into ZBrush. You then load your old model (just the subtool you’re retopo-ing, clone it if you have to) and append your retopo-ed, imported model. Then under the Tool -> Subtool menu there is an option projectAll and that projects all your old models detail onto your newmodels geometry. It’s magic And you don’t need the same amount of poly’s or anything. Check it out!
Happy retopo-ing! Let me know how you’re doing.
Cheers, M
wow!! i like all your work, incredible detail
i love the katana
very nice work
Hi, thanks for the kind words…
>Maxim_fleury
I don’t know, it’s just doesn’t work with me  , but I’ll try hard…
It’s a been long time with no post :lol:
Maybe I jump a little bit, since I’m boring with retopo stuff :lol: , but it’s almost finish, only about half of the figure.
Here’s a quick render while doing retopo stuff.

It still need a lot details and I plan to revise the model a bit, like the eyes, mouth shape, nose, ears, forehead, jaw etc. I just grab the texture from internet and paint it with zProject, it’s not the final looks for the texture, instead just a trial, maybe I’ll change the texture again…
Rendered in Mental Ray using SSS.
Hope u like it…