ZBrushCentral

Jagged edges on alphas in Noisemaker

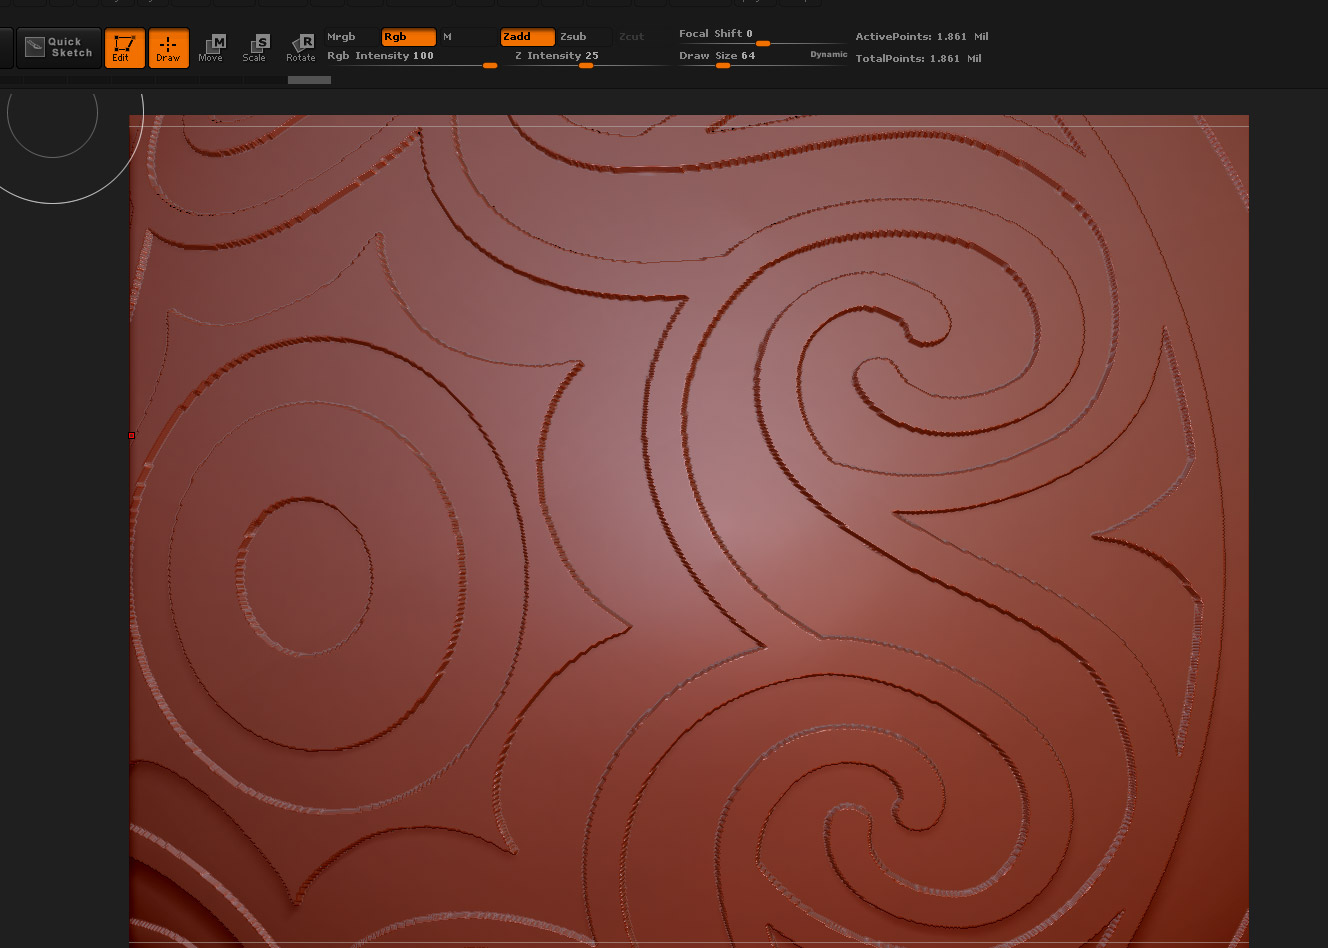
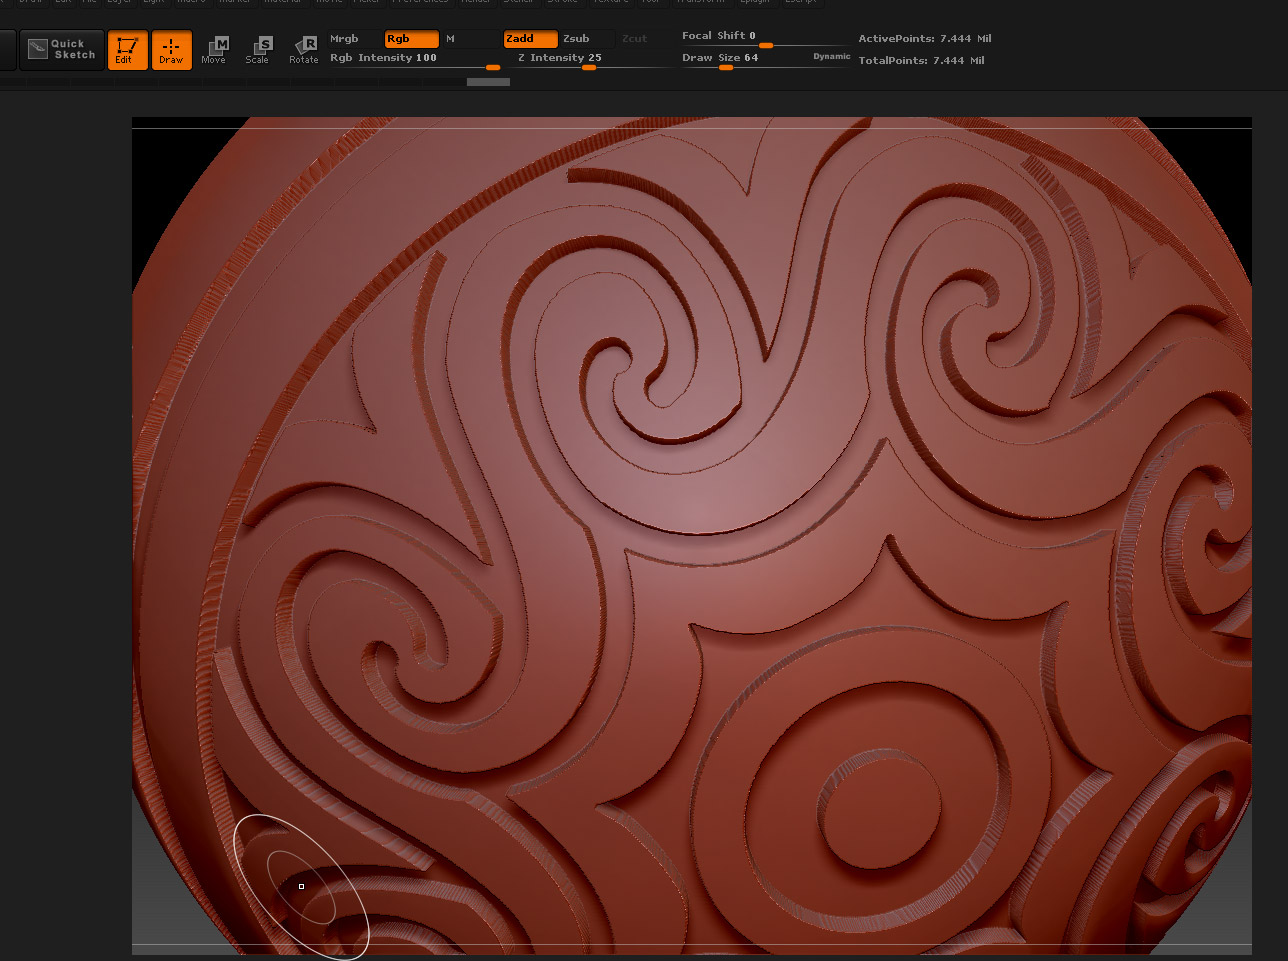
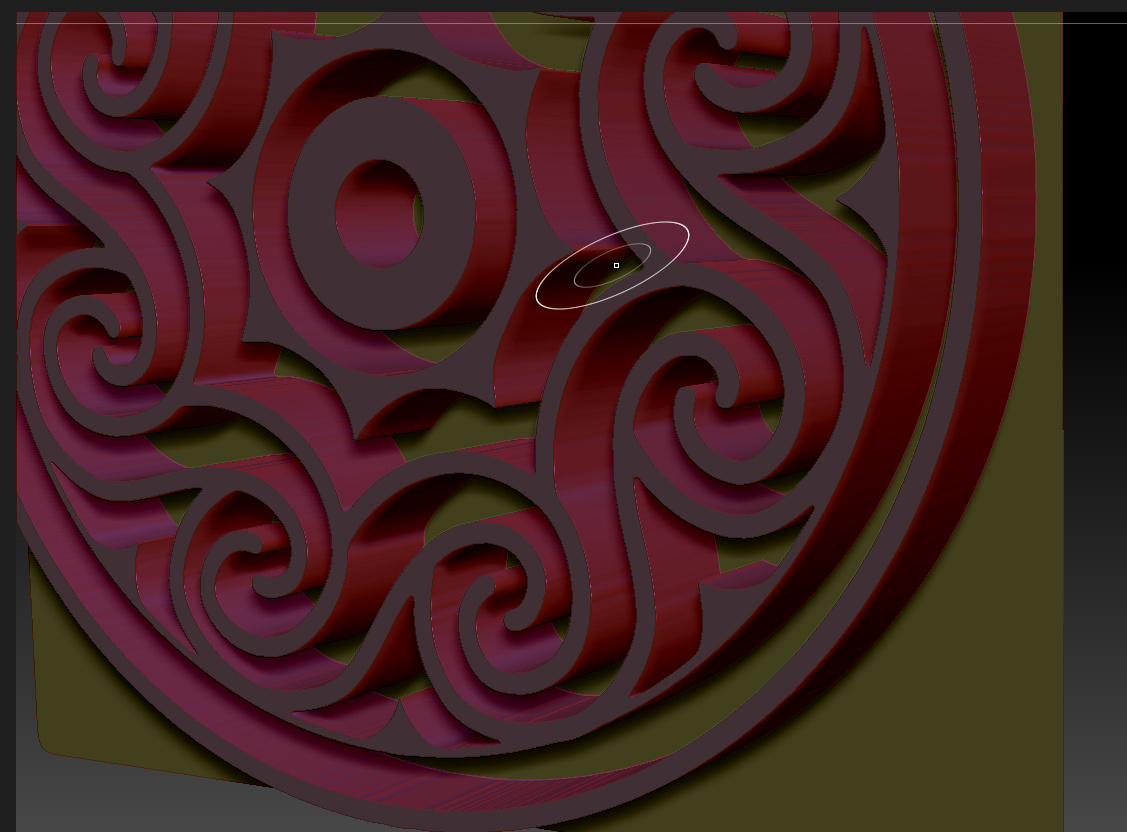
Some help for a beginner, please: I’m trying to use Noisemaker with a custom alpha to apply my own pattern to a mesh, but whenever I do so, the result has a distinct jagginess along its edges. I applied an alpha to a sphere in the example here to illustrate the problem. The sphere has 1.8 million polygons, and the alpha is a 16-bit grayscale .psd file (68 MB), so I would think both the mesh and the alpha have adequate resolution, but these jagged edges persist. How do I get rid of them?

Thanks in advance for any help in solving this problem…

Attachments

alpha_jaggies.jpg

Have you tried subdividing further? The most likely explanation is there’s not enough resolution. You’d really need a lot to give smooth lines as the design is fighting the topology.

Thanks for your reply, Marcus. Here is a screen shot of the same alpha applied to a sphere with 7.4 million polygons. I still see significant jaggedness on the edges. I too am surprised that the problem is not solved by adding resolution.

Attachments

jaggies_7million.jpg

There are a number of things to consider:

  1. How big is your alpha? Obviously the pixel resolution will affect the result.
  2. Masking in ZBrush - which is involved in the Noise function - is on a per-point basis. This means that a polygon can be partially masked. (Masking has to work this way as polygons share points.) This may affect the results.
  3. As a rough guide you’ll need the same number of polygons as pixels in the image - so a million polygons should look OK with a 1K alpha. In practice you’re likely to need more than that.

When viewing the result you need to take into account that the jagged edges are more visible in a 3D model. But they will be there in the alpha image too. It’s simply a question of viewing distance as to how visible they are.

You’ll never get rid of the jaggies completely unless the topology actually follows the design.

This shows a different approach. The alpha I used was 1024 pixels square and the plane has 1.115 million points. I used the Groups Loops feature to get the topology to follow the shape. You can see that the sides still show some stepping but the profile is smooth. The steps were:

  1. Create a polymesh from the Plane3D and sub-divide to just over a million.
  2. Delete the lower subdivision levels.
  3. Import the alpha into the Alpha palette.
  4. Press Tool>Masking>Mask By Alpha.
  5. Press Tool>Polygroups>Group Masked Clear Mask.
  6. Press Tool>Geometry>GroupsLoops (with Loops = 4, GPolish = 10 and Triangle on).
  7. Shift+Ctrl+click on the fleur-de-lis polygroup to isolate.
  8. Set the Tool>Deformation>Offset slider to offset by -20 on the Z axis.
  9. Press Tool>Geometry>Edge Loop.
  10. Shift+Ctrl+click background to show whole mesh.

HTH,

Attachments

Groups-Loops.jpg

Wow, thanks very much for this detailed explanation of how you did this, Marcus. I will give this a try sometime this week when I have an opportunity, and I’ll let you know the results.

Marcus: Your method worked quite well! Thanks for giving these detailed instructions.

Attachments

success.jpg

Great!