I designed a character very similar to yours around 15 years ago but never found the time to revisit him in a 3d program.
His name is Woolly Davis, plays for the Green Bay Pachyderms on the Frozen Tundra.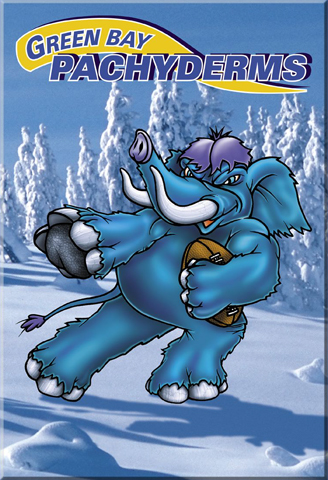
I designed a character very similar to yours around 15 years ago but never found the time to revisit him in a 3d program.
His name is Woolly Davis, plays for the Green Bay Pachyderms on the Frozen Tundra.
you did great work!! thank’s for your explanations on hard surface 
I like elephants very much, and this one looks awesome. Only 1 thing with his back. Its like he is younger in front and older in back. But 
Awesome stuff!
I see you updated your website.
Great work. Thanks for sharing.
Awesome!
Thanks everyone for taking the time to comment and go through some of the previous posts!
@ George - Hah, I think you might be right. I was trying to give the impression that the skin and muscle were hanging off him equally, but because of the fat in front it was pulled tighter. Maybe I should have found a middle ground.
@Killah - Thanks for checking out the site! I got tired of the hassle of updating the portfolio template site. It works well for a limited number of pieces, but it’s a pain to update, especially after I tweaked it. I also wanted to get in and figure out how the wordpress thing works. What do you think? Does it look cool?
I put this together for the art students at FIEA , where I went to school. Enjoy!
Videos of the high poly sculpt:
This is the final result from the zbrush sculpt. I used clay tubes, flatten with square alpha, inflate, slash3, standard, and move brushes.
This is the low poly, done in topogun. BOSS TIP: If you have a slightly asymmetric model, wait until after the reproject to add it in. I could have saved myself some time on this if the ears were the same.
UV’s done in 3DS Max. This is where I put the seams. Done using the pelt mapper tool.
Once the UV’s were done, I imported the low poly mesh, projected the detail, and deleted the original zsphere mesh. This is the before and after. Now I can begin to create and export the texture maps.
For the diffuse, I imported a shot from the movies as a color reference. You can sample colors directly from this image. You need to import the texture, assign it to a plane with a white material, and position it on the canvas. Then click off edit, drop your high poly, and begin the sampling magic. A really important thing to keep in mind when doing the diffuse is NO LIGHTING INFORMATION should end up in your color. You’ll add that stuff in automagically in the next step.
To create the final diffuse, I combined the polypaint, ambient occlusion, and displacement map in photoshop. There are a million ways to generate the shadow maps and the combine them with the raw diffuse. Some people like to generate them from the normal map in xnormal or crazy bump. Some use the Render To Texture (RTT) feature in 3DS Max. The only thing that matters is the end result. The layer combination info is what worked in this case. This is just to give an idea of how to approach this. It’s always different.
Here is a link to directions on how to generate the AO mask in zbrush.
For the spec map, I desaturated the diffuse, bumped up the contrast, and added noise. The normal map was exported directly out of zbrush.
Here’s the final. ~2000 tris, texture res is 1024. Screen grab from max view port with three spots.
Thanks for taking a look!
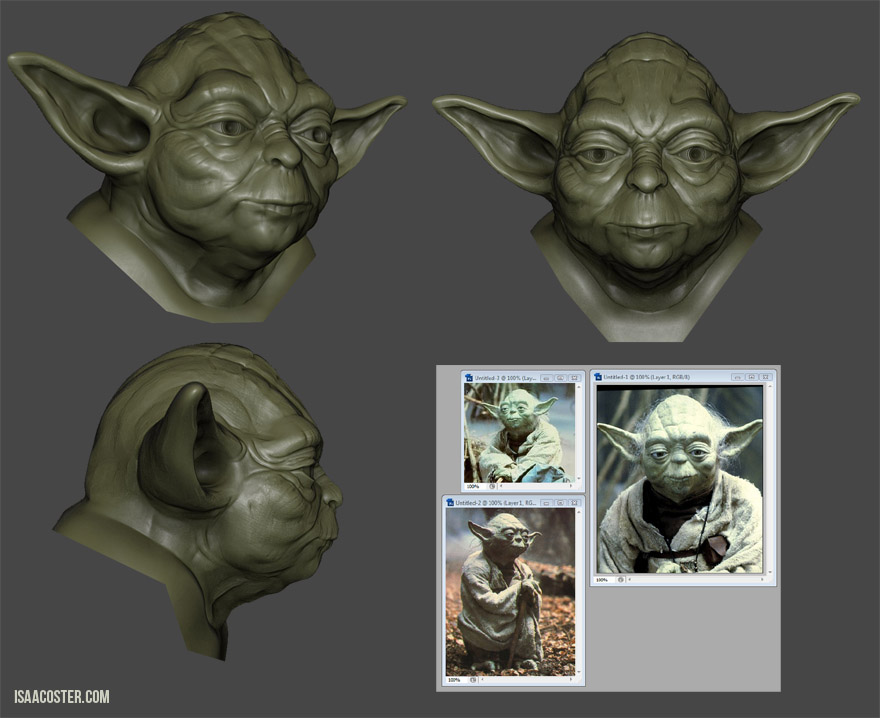


I think you’ve done a great job on Yoda, the sculpt is great, but the maps aren’t working that great, a lot of detail is missing, and it really shouldn’t with both displacement and normal maps on.
You may be right - I should have mentioned this was speed sculpt - 8 hours from start to finish. This was more of a process demo; I really didn’t spend any time noodling at all. I think he looks pretty cool 
EDIT - sorry I misread your post. This is a real time render - The displacement map is only processed in a software render (if I understand correctly) - the displacement map was baked into the diffuse.
awesome!!
Looks great, nice tutorial.
Elephant hominid looks awesome, too!
Awesome, great tutorial!
I just graduated from IADT-Orlando with my BFA in game design and was really debating wether or not I should go to UCF to get my Master or just work on my skills and keep trying to get a job. I can honestly say that this video is very persuasive. Thank you for posting.
Thanks for the compliments letohb31!
To Tyrone70 - shoot me a link to your portfolio. FIEA is a great program, especially if you have a good foundation in 3D. It’s really hard to get up to speed in a year and half if you’re starting from zero. People do it, but if you already know your way around the Maya UI and have some traditional art chops, you’re in great shape. If I remember correctly, some of the better art students came up through your program. I can put you in contact with some of them if you like.
If I can make one suggestion - try to get a job as an entry level contractor somewhere. Student loans are for real, and most of what I posted above I learned on the job. If the job market doesn’t pan out, then take a very hard look at FIEA. Consider job placement rates, starting salaries, and what your loan payment will be. Will you likely have enough left over to pay rent and eat food? Also, be very honest with yourself about your portfolio - they aren’t miracle workers. If it’s rough, there’s no magic bullet to fix it. You may want to spend a year working privately, going through tutorials and getting free feedback from forums like this one. It’s a lot cheaper than going through FIEA under-prepared.
If you feel like you’d have a hard time staying focused outside of school, then that should be a red flag. If 3D art isn’t one of your default leisure activities, this might not be the right career. The technology changes drastically. For example, half of my favorite zbrush brushes and workflow didn’t exist when I was in school, the part of the workflow that did exist was completely backward from how I do it now. Topogun was just a tinkle in someone’s eye. I have a feeling 3D Coat and similar software are about to completely change it again. It takes a lot of work just to stay current. You gotta love it.
I can say with absolute conviction that I would not have the dream job I have now with out FIEA. Just make sure it’s the right choice for you.
Feel free to ask follow up questions. Again, send me a link to your portfolio.
Isaac
We had a snow day on Friday, so I took advantage of the long weekend and built this. I guess it’s like an evil salad shooter or something.
Started using zsketch, refined with hpolish and slash 3, retopologized in topogun (didn’t want to but symmetry issues forced my hand), props built in max. Post done using elements of Vitaly Bulgarov’s process here.
I’ll post a more detailed break down of the process if there’s enough interest.
Thanks for looking!
Your Elephant Man looks awsome really like the clean style
Very cool design, Isaac.
Very cool. 5*'s
Hi, quick project from yesterday. The whole thing was really just a pretext for playing with the rake brush. Thanks for looking!
