ZBrushCentral

Is this a side effect

of scaling your mesh, so as you can paint finer displacements.
It seems this is the only difference I’ve made and when i create a displacement map it comes out very strange, nothing like before, almost washed out.
see attached images, anyone suggest why this might be happening, is there a workaround.
My displacements settings are
Adaptive, DPRes 2048, Intensity 8, Mid 50, Mode ON.
before.jpg

Attachments

after.jpg

When you scale your mesh to be able to reduce the size of the brush relative to the size of the model, you then need to resize it back to original before you change subdivision levels again.

Here’s a good way to work:

When sizing the model up, use Tool>Deformation>Size at 100. That way, you can easily reverse the effect with Tool>Deformation>Size at -50

If you use Size 100 twice, then you can return to normal in one shot with Size -25

After that, the math gets complicated. :wink: But you probably won’t need to go bigger than four times the original size anyway.

Thanks Aurick, tried that, but to not much avail Im afraid, whats stranger I noticed is I tried without scaling the model at all, and I noticed the finer details I put on with projection master are’nt coming out at all in the displacement map when i apply it back in my 3d package maya, which makes me wonder if Im missing something, same displacement settings as above, not sure why this is.

Could you describe the exact steps that you’re following between when you finish your high resolution modeling and when you export the displacement map to Maya?

Also, are you opening the displacement map in Photoshop or another image editor?

Ok.

After importing as an obj,

1). I’ve scaled the model, and not scaled the model, if I have scaled it I have scaled it four times at 100, then brought it down in increments of -25 writing out displacement maps at each increment to see what i get, until i get to a point where the last time i scale it negative the tool just dissapears, so i can’t go any further with the negative scale.
Then i crank it down to the lowest subdived level.
By the way I’ve subdived it 5 times. cant go any higher, memory.
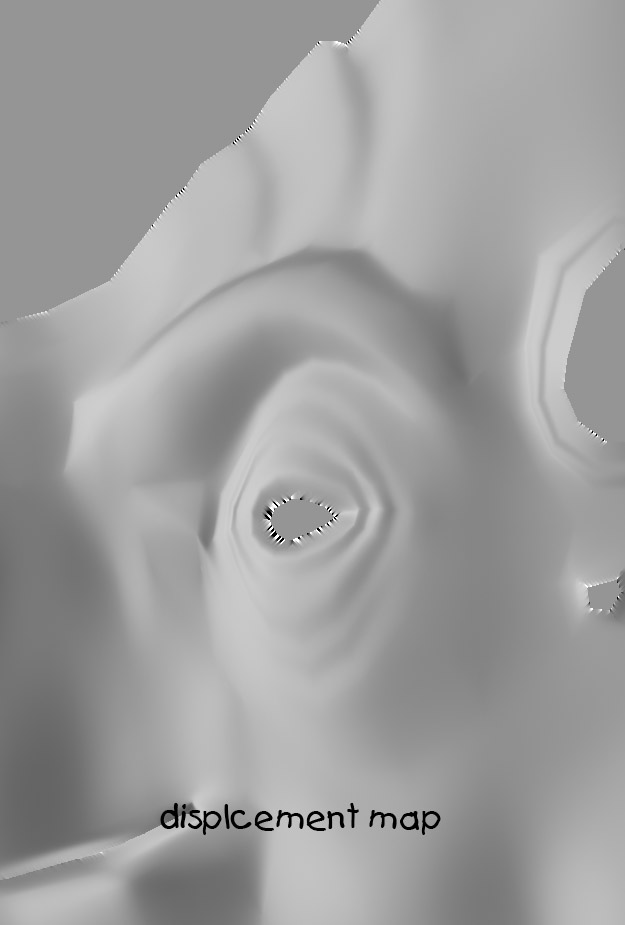
Then I write out a displacent map, with the settings.
Adapative, DRes 4096, Intensity cranked all the way up to 8, mid 50, Mode On.
After it writes it out, i flip it in zbrush vertically.
save out as a tif.
take it into photoshop, convert it to rgb, its already a 16bit.
Sometimes check to see what I got just looking at it using the levels in photoshop, helps see image better, but i dont set it to anything other than what zbrush put out.
Then I take it into maya, tried using different renderers, Im at the moment using renderman, then i play with the height/depth levels of the displacement to see what i get.
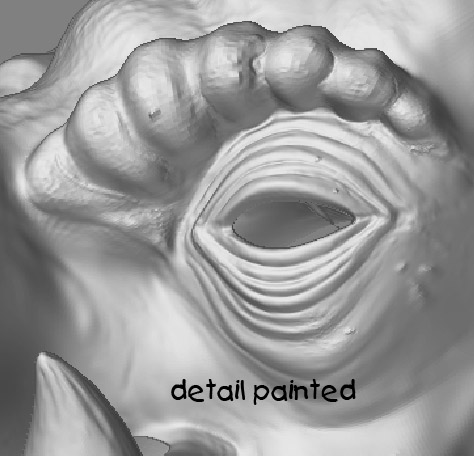
After much experimentation, I’ve notice I can’t seem to get the finer details to come out, like wrinkles, bags under the eyes, i just seem to get the bulky displacements, but even then not very well, if Itry crank up my displacement height/depth levels, to try see if i can display the finer detail, it does’nt show any of it, and the bulky displacements get to bulky.
I can only assume its something to do with the quailty of my displacement map, I’ve even sat there for all the hours not using adaptive, and cranking DPSubPIx all the way to the top.
So thats about it, does it sound like Im missing anything.
:o

Well, it’s very important to restore your unsmoothed mesh at level 1 before you calculate the displacement map.

Basically, ZBrush creates the map based on the differences between your highest level and WHAT YOU SEE IN FRONT OF YOU. If you don’t restore the original mesh, then your map is not being calculated for the mesh that it will be applied to.

After returning to level 1 you should either switch to a morph target that you stored before first dividing the model, or import the original unsmoothed mesh back into itself. Then you create the displacement map.

I see, if i stored it as a morph target, and had sceled up for detailing, would I still have to scale it down, then restore with the morph target.

Actually if I told you I was going to scale it up four times, (4x100), could you give me the exact procedure, starting from storing morph target, thatda be great

before.jpg
On thing I also noticed when i scaled it down, that I saw some nasty vertices had been strangly pull out from there original place in the body where I had’nt painted.
Sigh! this is doin my head in…
:confused:
heres the painted detail and what im now getting in the displacement map.

Attachments

after.jpg

ANyone hELP???:cry: