Hey Guys N Gals,
Top:
[ ]
]
Cheers,
Nate Nesler
Hey Guys N Gals,
Top:
[]
Cheers,
Nate Nesler
Hi MatrixNAN,
You could try recording your zbrush session into a zscript. It just records all the movements you make with your mouse and all the buttons you push. And then it will play them back. No video required 
ernia
Hey Ernia,
Cheers,
Nate Nesler
Sounds good, MatrixNAN. I’ll be interested to see you work using zscript.
Another set of bones for the living?! Man, you’ll have to buy an external 160GB drive just to store all these polys
Btw, did you happen to catch my bone post? It’s here if you didn’t.
http://www.zbrushcentral.com/zbc/showthread.php?t=33461
ernia
Hey Ernia,
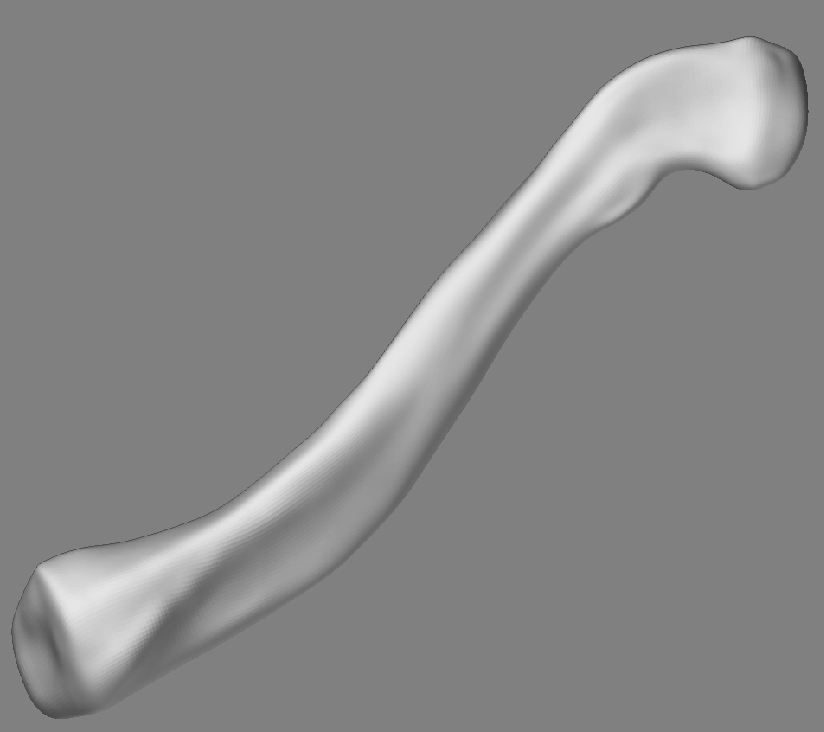
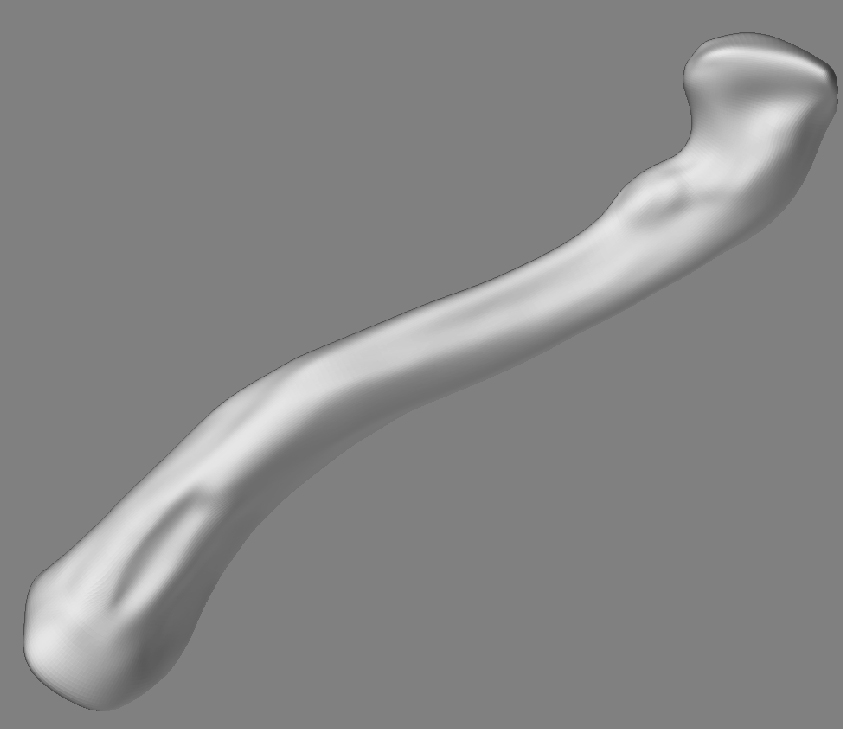
Nice bones they look really good. I thought you did a great job defining hte Sacrum and the Os Coxae and the Femur. I didn’t think the muscle looked as real as the bones. Although its a lot harder to get good reference images of actual muscle tissue. lol  I was thinking of going with an SSS shader for my bones in XSI and Houdini along with an SSS on the muscles and tendons also. I think it will make them look a lot better. More real anyhow. Some bones are a bit translucent if they are thin enough in parts.
As for the hard drives yeah I plan on buying about 3 300 to 500 gig Sata 2 industrial grade hard drives. Learned the hard way about consumer grade hard drives. The industrial grade ones are not that much more in cost and they last at least 10 times longer if not more. I have burned up more hard drives than I can count. I run them pretty hard. Just one of my projects is about 60 gig so I need a lot of space. This one I don’t even want to think how big it will be in the end but I am guessing it will be huge. I aslo going to be modeling the cartilage too because that is really important and has a large influence on the body. There are several cartilage joints in the neck which I think are important and I am going to model them. I am almost done with the Clavical I have just gotten bogged down with other things in the last several days to where I have not had much time to play with it. I have to go back to work tomarrow. So yeah that will slow me down again.
Cheers,
Nate Nesler
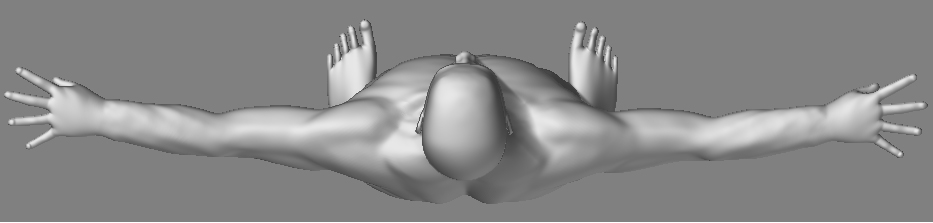
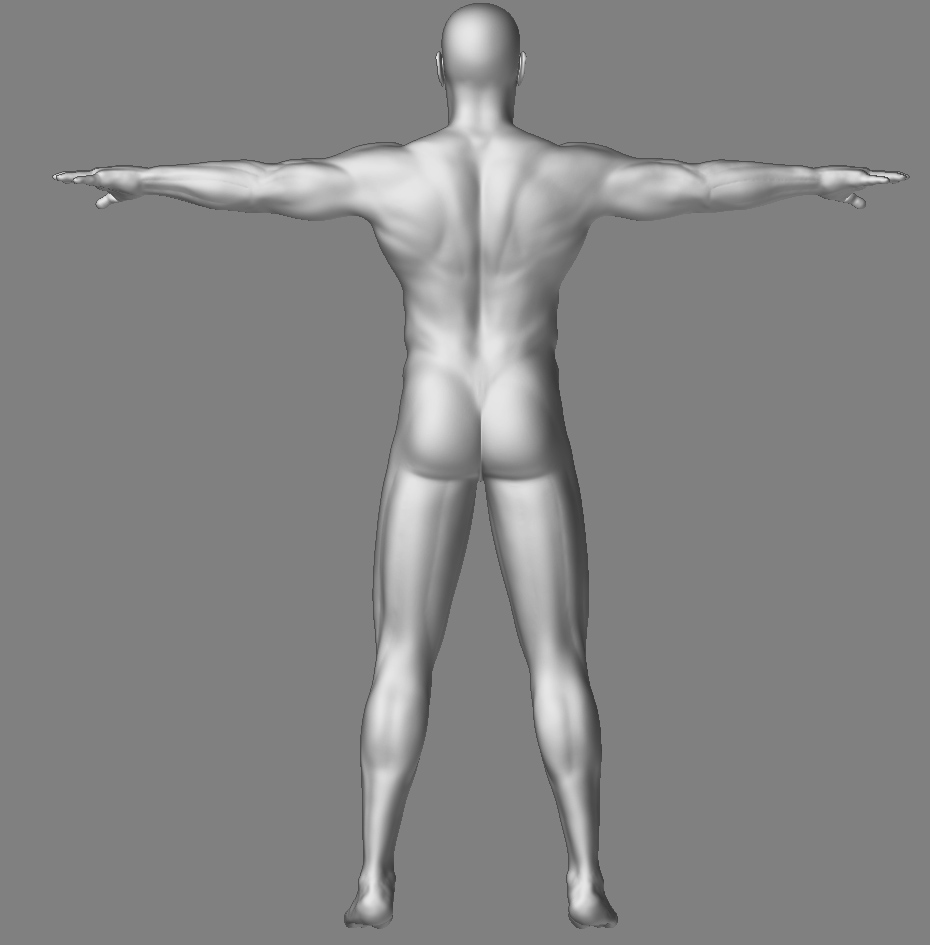
Hey All,
Model is 3.67 Million Polys and still not enough. lol
[ ]
]
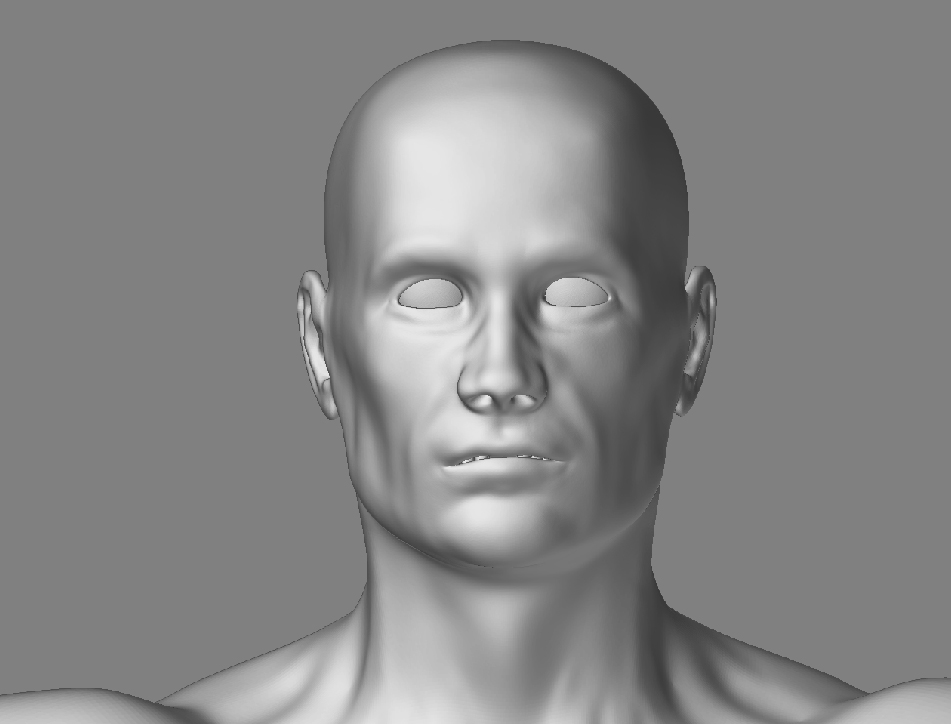
Looks like the muscle going from the Mandible wrapping under the Zygote bone is shaped right and going quite in the right direction. Needs to be going a bit diagonally forward to me. Also is it just me or does the the cheek bones need to come out more on the face coming out forward to match up with the nasal lavial fold?
Cheers,
Nate Nesler
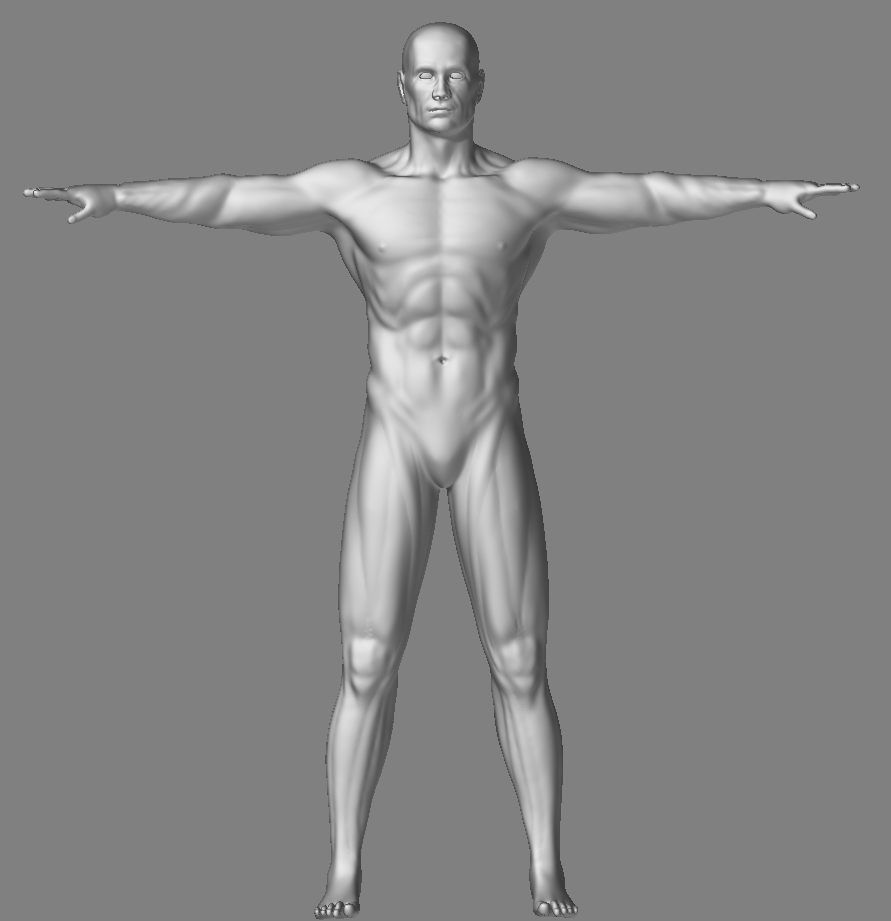
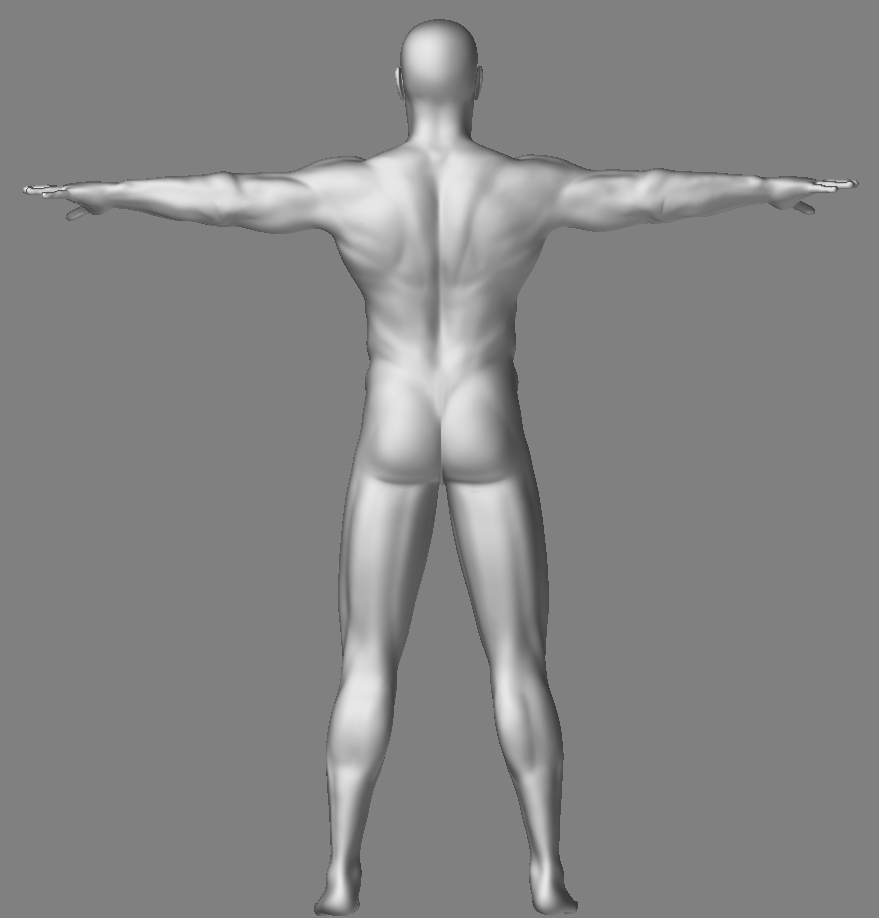
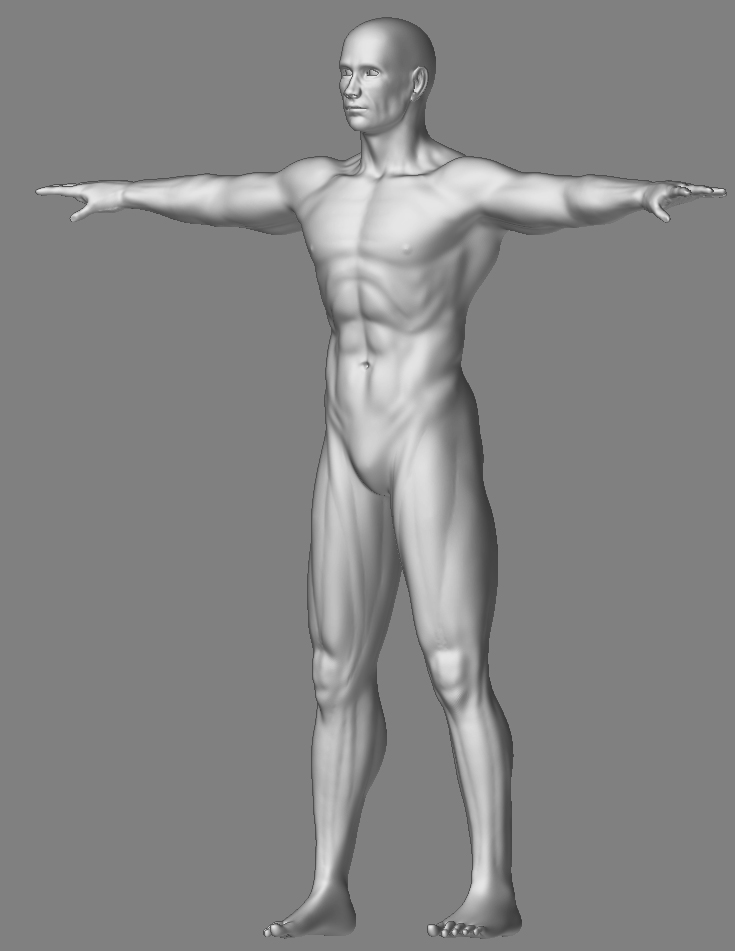
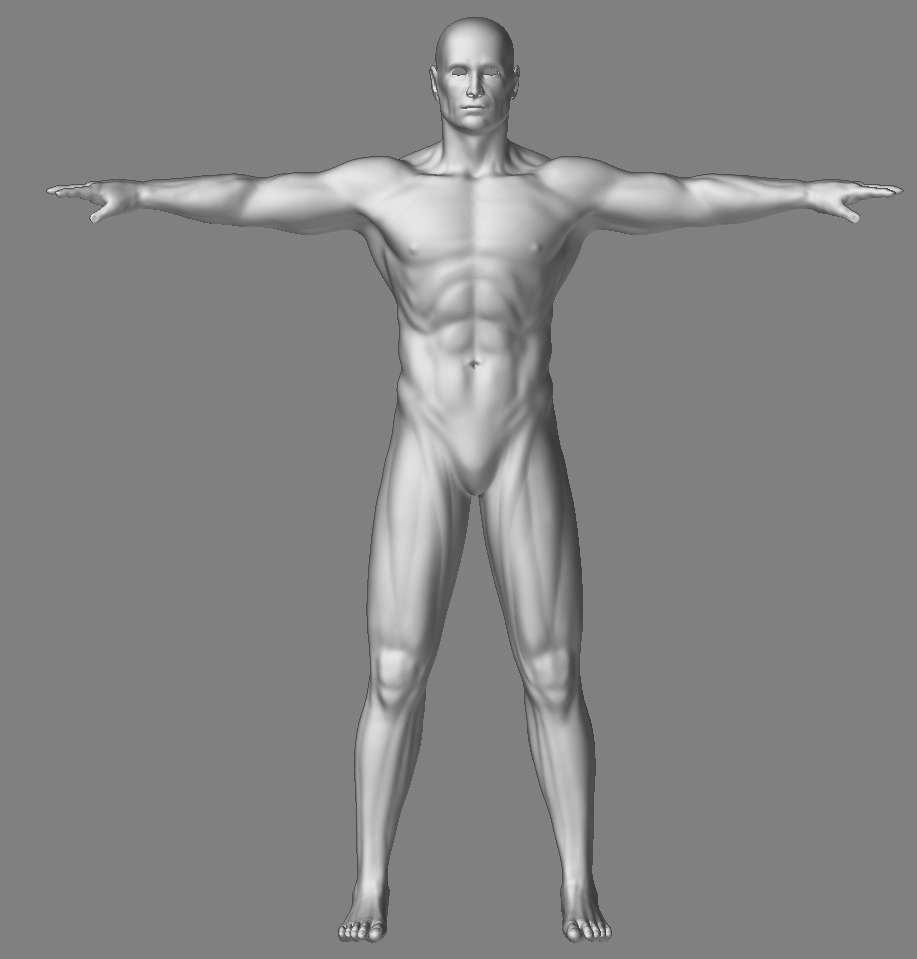
Hey Guys N Gals,
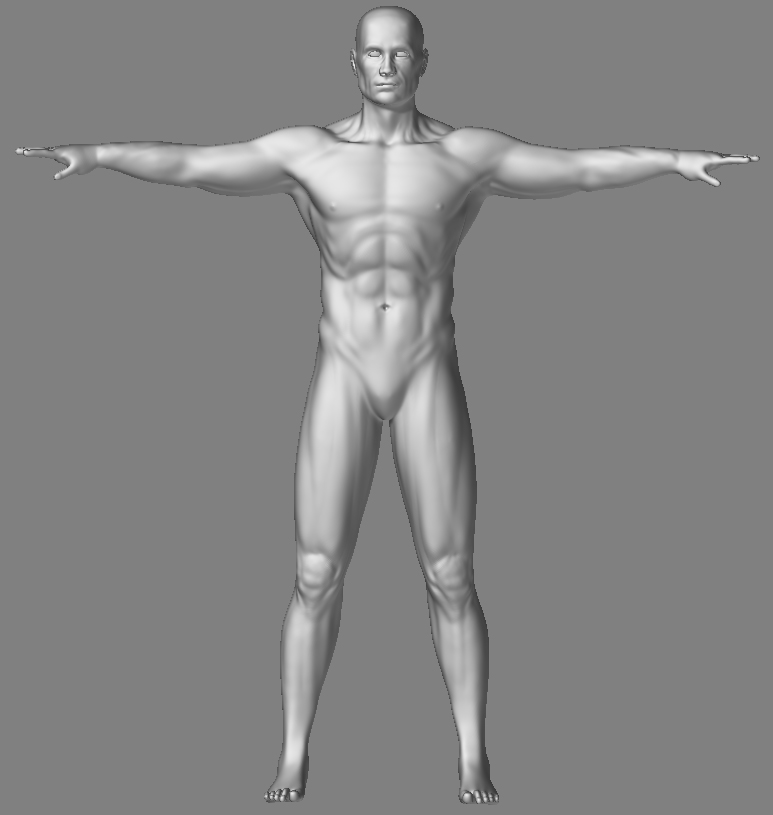
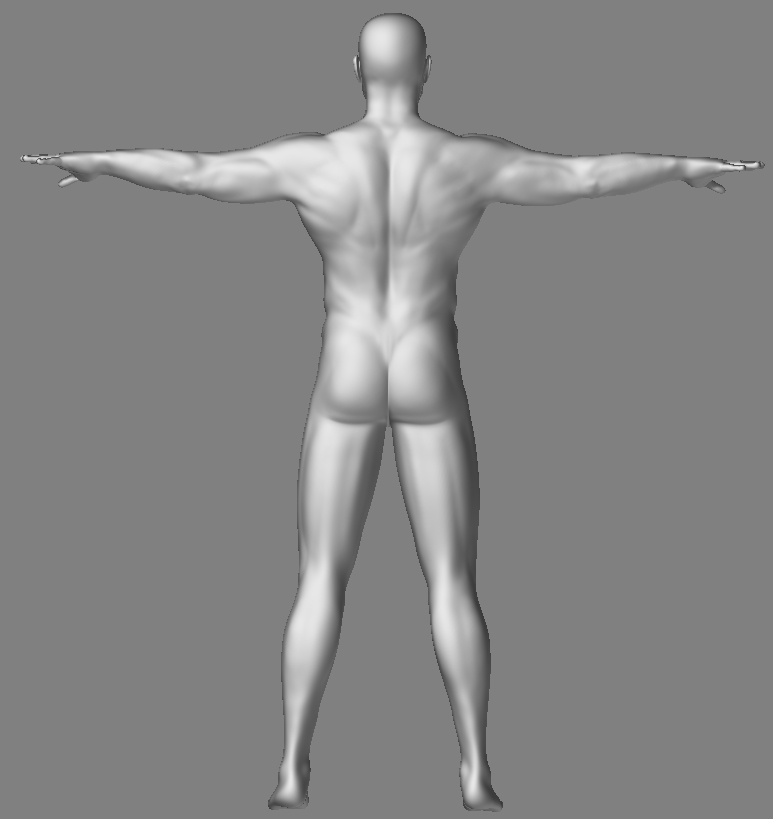
Here are the Updated Images So far I have spent about 4 days solid on this character man:
[ ]
]
Cheers,
Nate Nesler
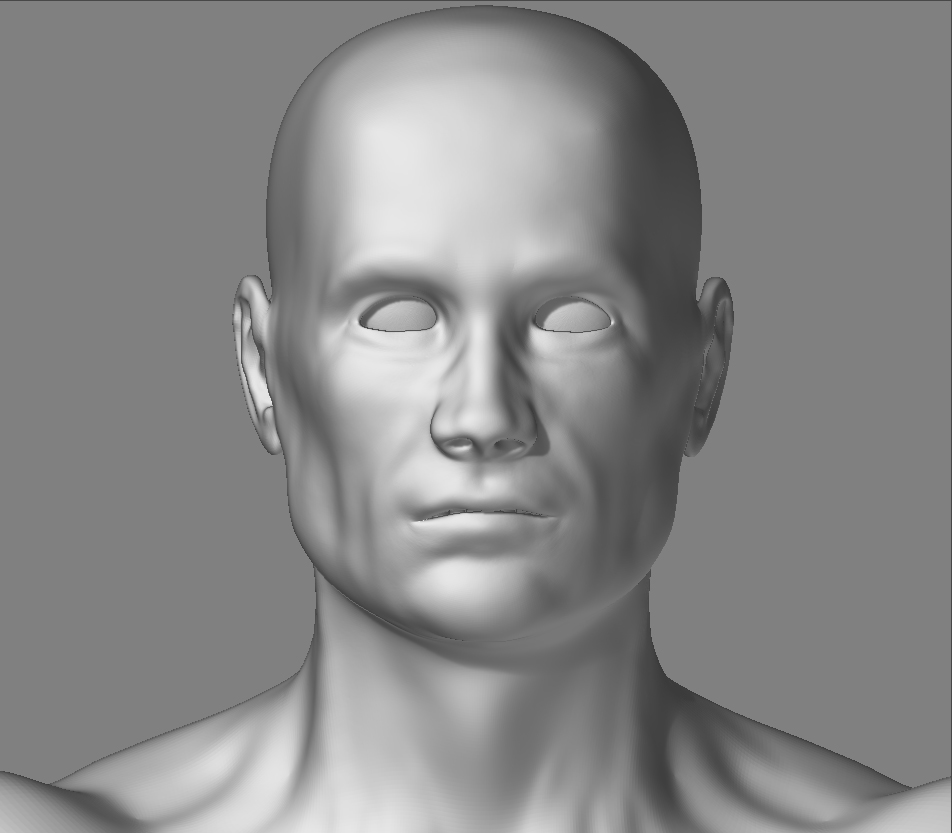
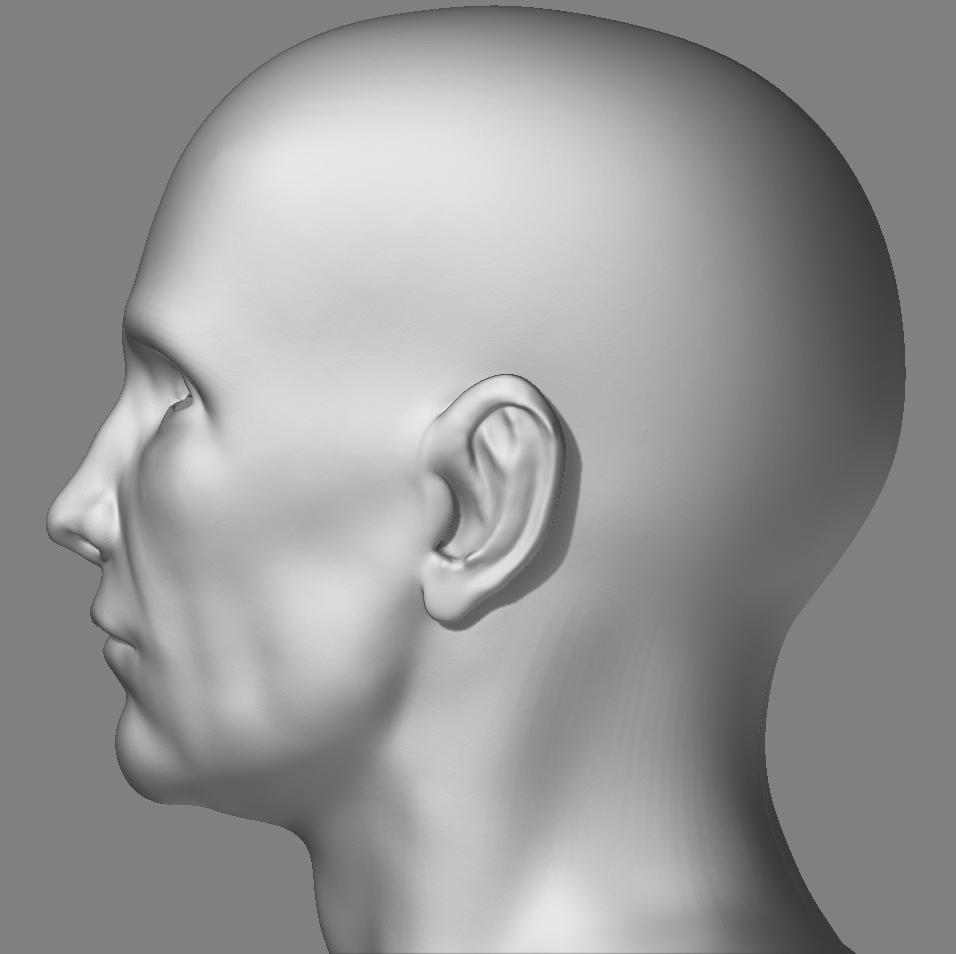
Man, you are a machine, MatrixNAN!
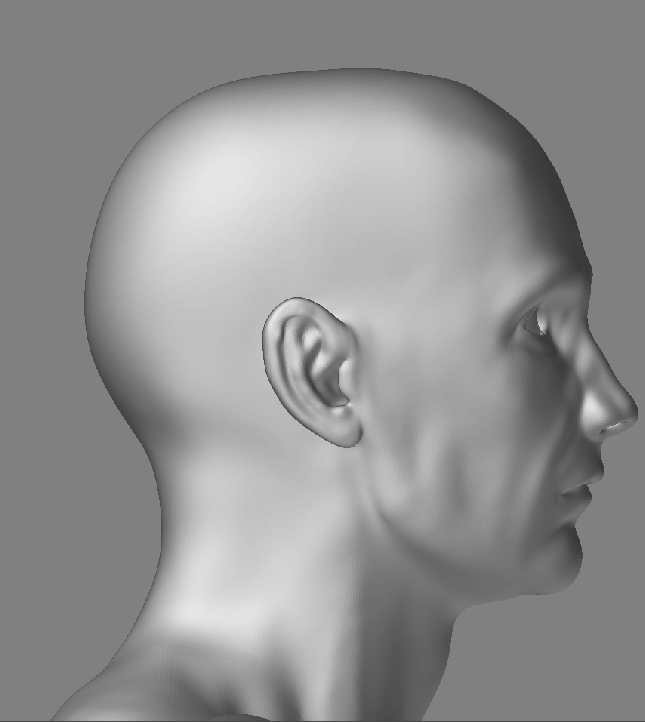
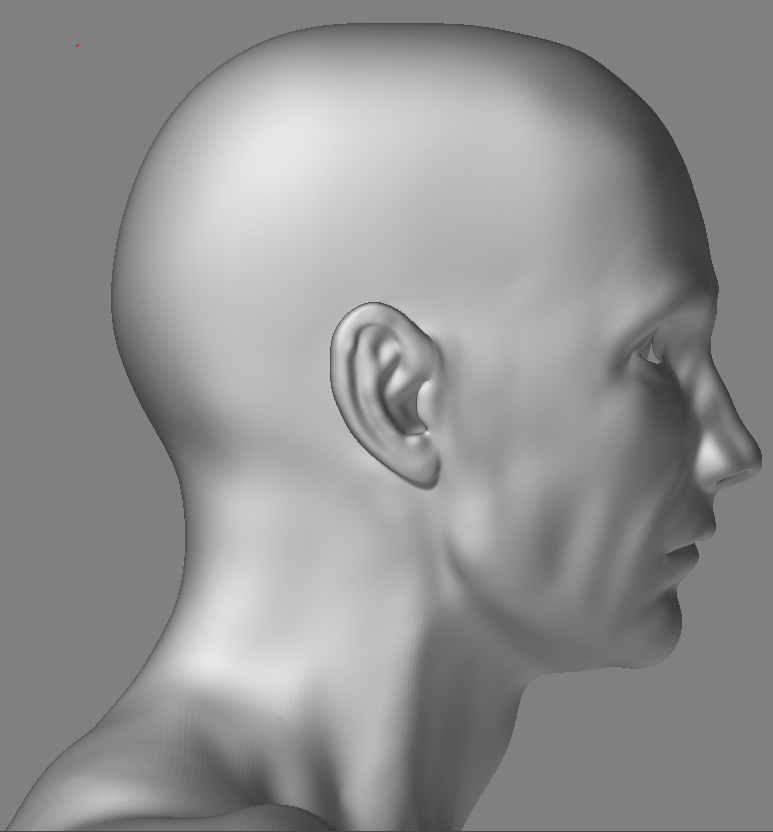
Looking good to me so far. The side view of the head looks a bit odd. I don’t know if the ear is too small or the head is too deep. Torso looks good.
Keep it coming!
ernia
Hey Ernia,
Thanks that was the major thing the head needed for an adjustment. Thank you thank you. I need to probably tweak the nose at some point and time for doing more of a detail pass on it on the underside of the nostrals. I have not gotten around to it yet. I am only part machine, cyborg if you will. lol Sucks when going through metal detectors at the airport. I always get the wand.
I am going to do another 2 day blitz this weekend on it hopefully I will have the hands and feet done too. Female model to come after this one.
Cheers,
Nate Nesler
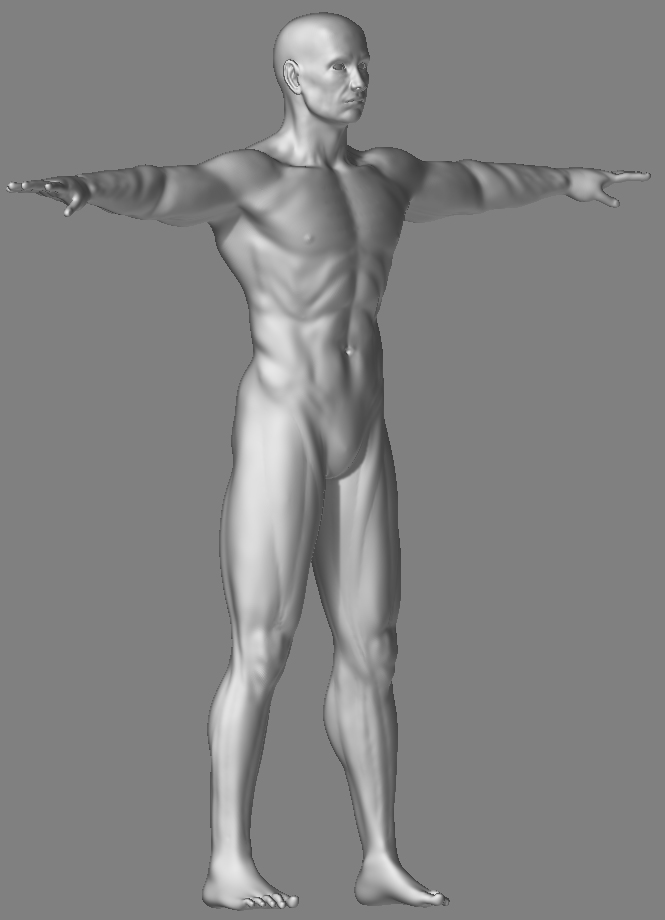
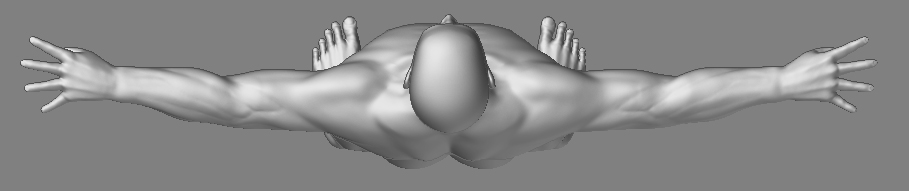
Hey Guys N Gals,
[ ]
]
Cheers,
Nate Nesler

have you checked out this model zach petroc put up for download a while back? It should really help you see how to deal with the arm connections.
http://www.zbrushcentral.com/zbc/showthread.php?t=20709
while not exactly proportionally perfect- it really helps out on some of the muscle areas.
Also- if you havent seen his dvd i think its the single most helpful zbrush dvd out there. the man is phenomenal with anatomy.
Hey Defago,
Cheers,
Nate Nesler
I hear you on that rotation ordeal.
It helps with the lack of twisting, but most importantly- Im sure you’ve seen enough medical shots- I’ve yet to see one with the palms rotated downward.
Im too busy at the moment to sketch overtop of some models- but hopefully tommorrow evening I’ll have time.
What really helped me was focusing on the elbow first and finding the muscles origins. Once that confusing mass of muscle and tendons is taken care of, its much easier to follow the muscles around to their insertions toward the wrist.
Just to throw out some more references (that you’re probably aware of):
freedom of teach dvd (he does just what you’re doing, but in maya)
goldfinger’s anatomy for the artist.
Hey Defago,
Yeah I saw the sample videos from that work, and I know maya along with XSI, Houdini, Max, Lightwave, Blender, and ZBrush so it was not a problem translating it into another program. I was eyeing the medical sculpture more so though. Thats what I really want to get in a few months along with the new Primal Pictures DVD set. If you have not checked out the primal pictures series do so it is really awesome. Best medical reference that I have seen yet. I can spin the models in 3D also. I do still have the should CD and they have the elbow on that CD however it stops right and the elbow so I can’t see where the muscles lead beyond.
I have the goldfinger book its pretty good but I have been relying on the Atlas of Human Anatomy for the Artist by Stephen Rogers Peck more so than goldfingers. Although the 2 of them make up my 2 major references. I also look at at Burne Hogarth too from time to time because some times it helps to look at the generalised form to help see the large shapes and bulges formed by all those little muscles. Some times I find it easy to get lost in defining all those muscles and forget about the over all shape and those books help put it back in perspective.
I have to get that Primal Pictures set that has been my best resource now and man I am missing not having all of it. Thanks again.
Cheers,
Nate Nesler
Hi Nate- thought I would bring my contributions to the conversation into the forums instead of limiting them to the Hallowed Halls of Academia 
Before:
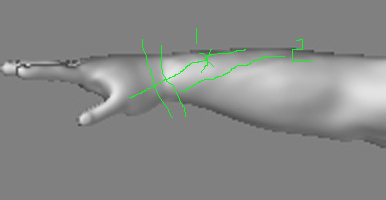
In the earlier arm, you had the brachioradialis rotating naturally from the lateral origin at the distal humerus to the lateral carpals. This produced a smooth and believable rotation over the whole length of the radius. The new arm has the brachioradialis looking like it is wrapped around the arm a complete 360 degrees (like the juice bottle). You have the angle of the pollicis group (overlapping the distal radius superior to the thumb) mostly correct but the group only has 2 muscles. The distal end of the brachioradialis passes under the pollicis group and forms a smooth delta in the middle of the forearm there. I can only guess that you added those extra bumps after noting the pronator and the flexor pollicus down there? Those muscles are relatively deep and wouldn’t show up nearly as developed as you have them- nor as long.
Take a look at Plate 48 inside of Fritz Schider’s “An Atlas of Anatomy for Artists” (http://www.amazon.com/gp/product/0486202410/ref=sr_11_1/102-3262112-3488915?%5Fencoding=UTF8). Despite how errr… RUSTIC… some of the images are, this is an excellent reference for an anterior rotation of the forearm and the effect on the involved muscles.
EDIT: There’s a copy of Plate 48 in your In box.
Cheers yourself, kid.
Chris

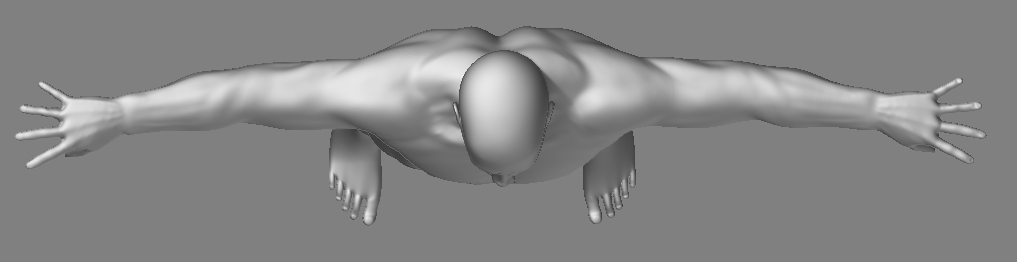
Hey Guys N Gals,
[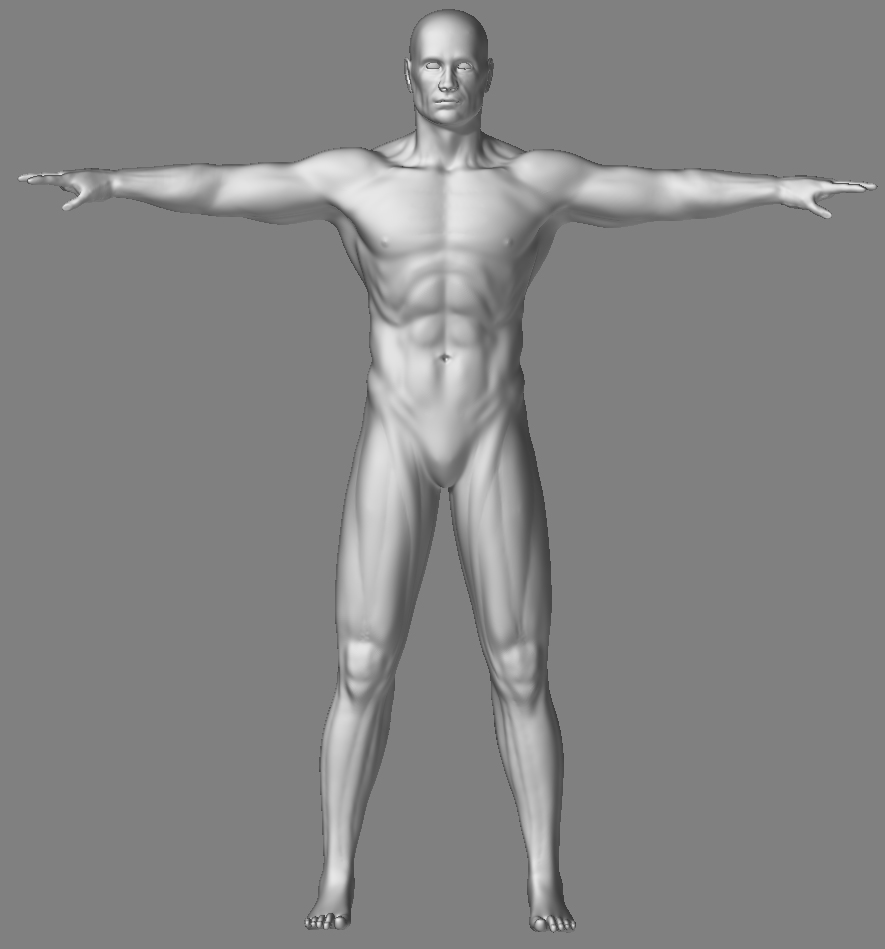 ]
]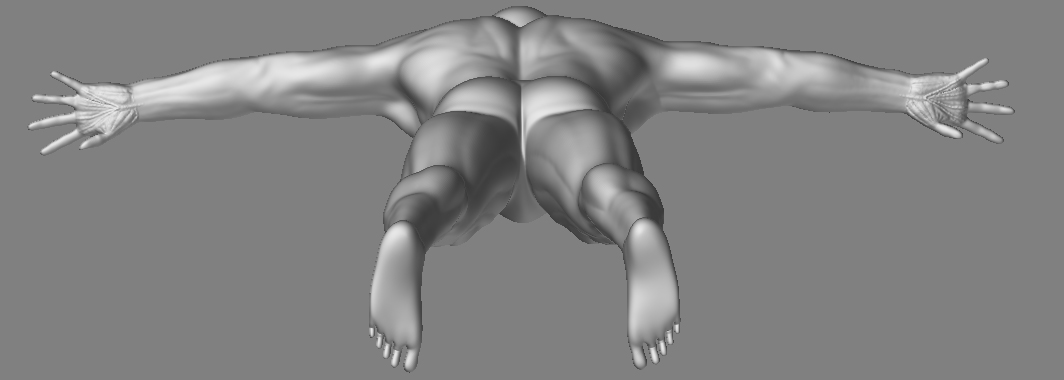
Cheers,
Nate Nesler


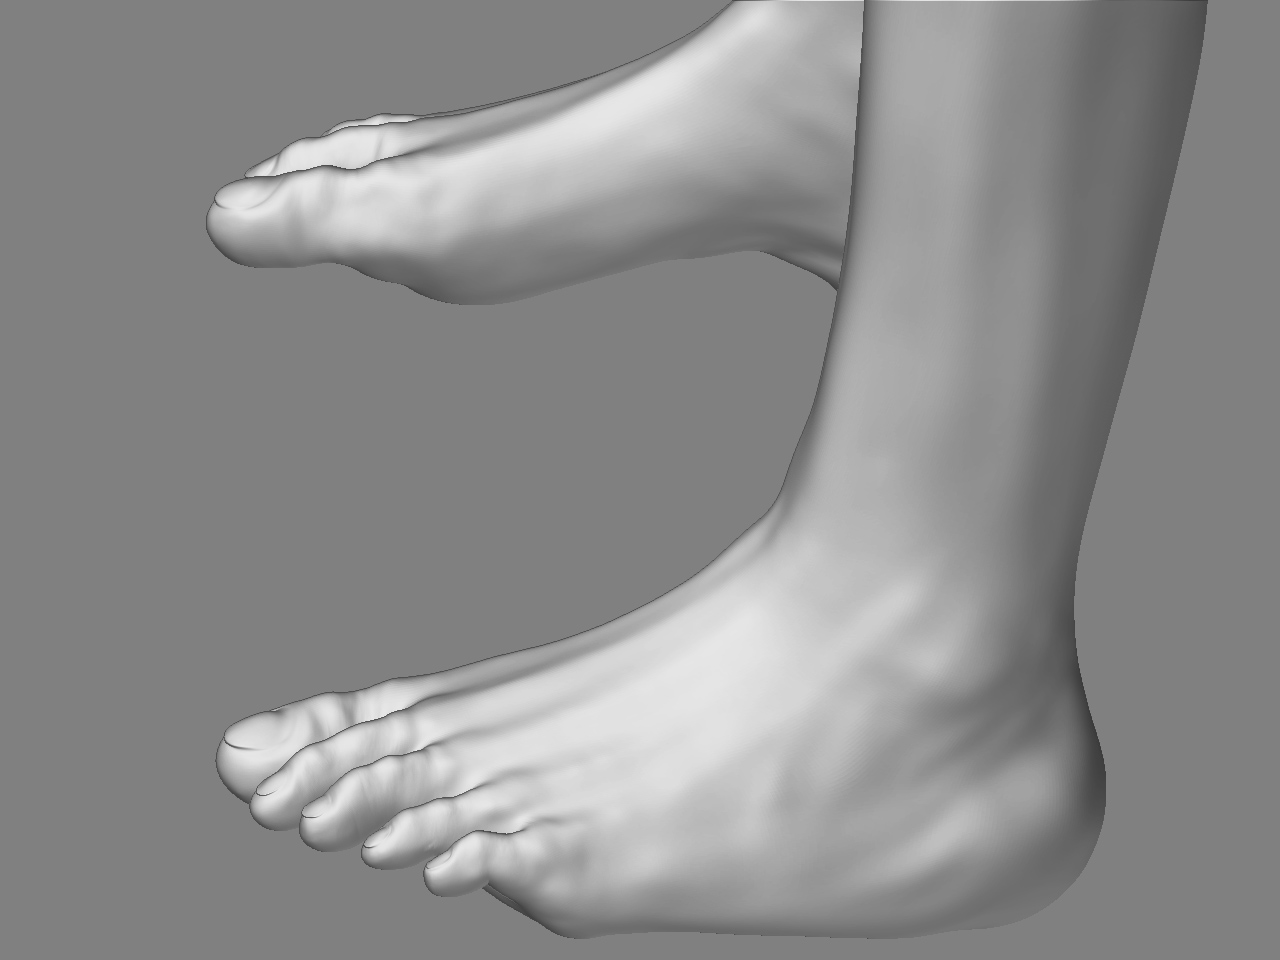
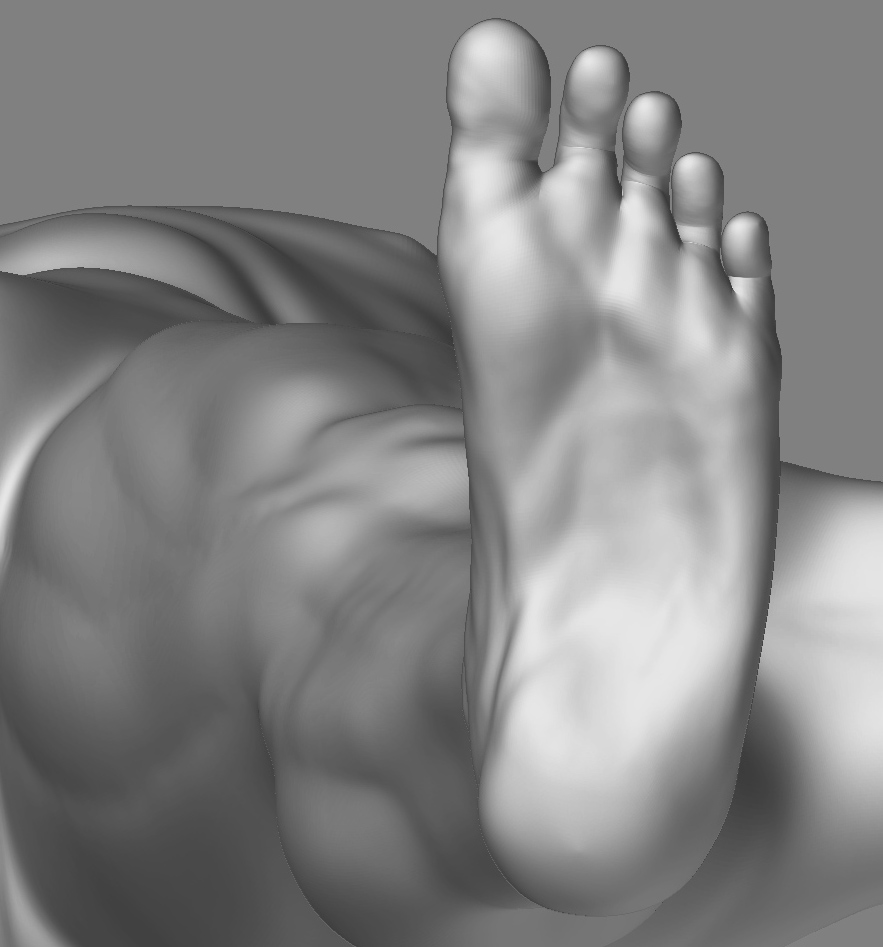
Hey Guys N Gals,
[ ](javascript:zb_insimg(‘36386’,‘CharacterManFeetBottom_01.jpg’,1,0))
Cheers,
Nate Nesler
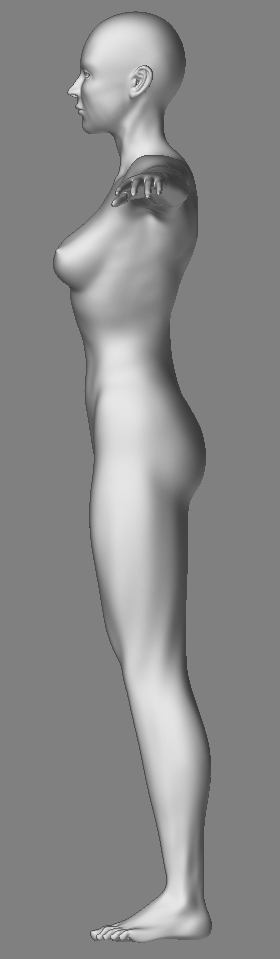
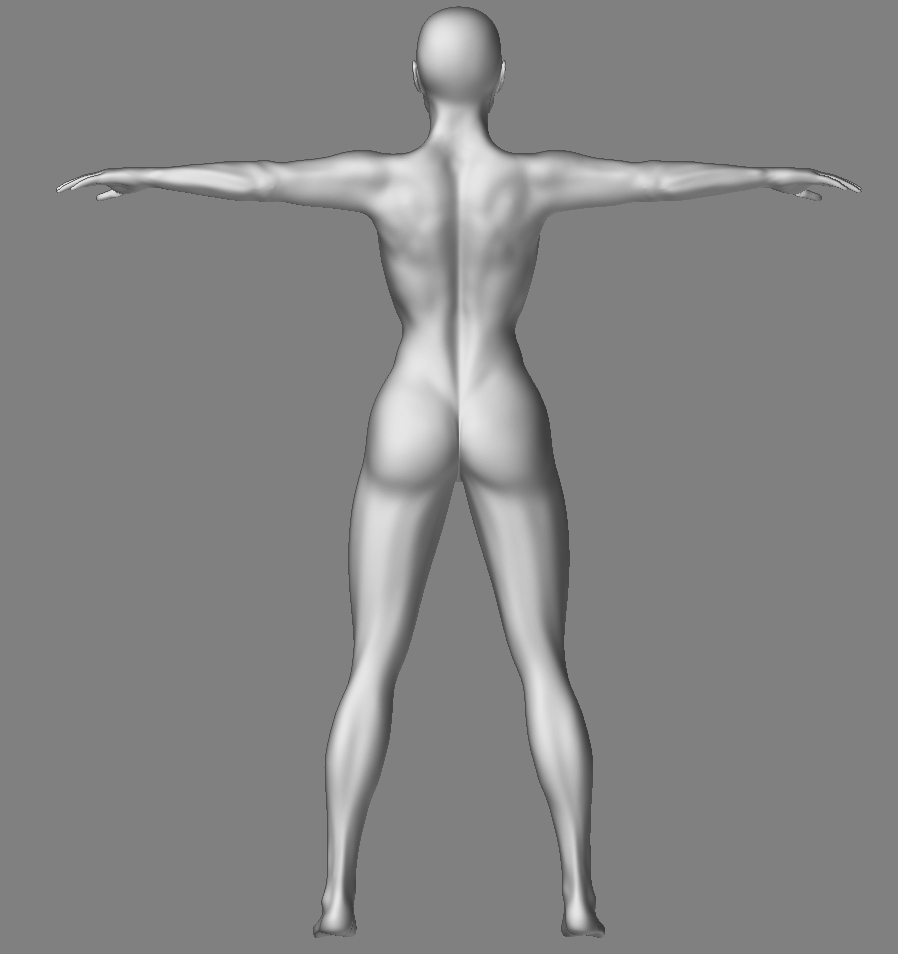
Hey Guys N Gals
WIP Female Study this one has a very long ways to go but I am doing it much faster after working on my man so much.
Current Progress:
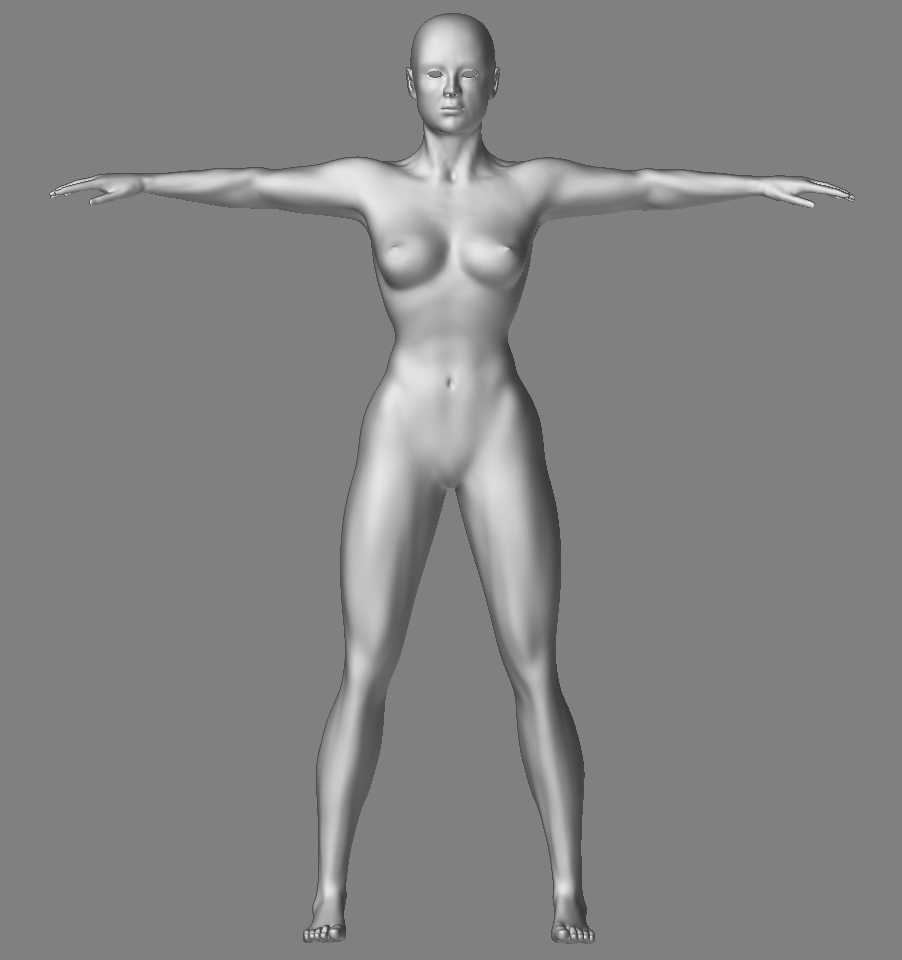
Cheers,
Nate Nesler
Hey Guys N Gals,
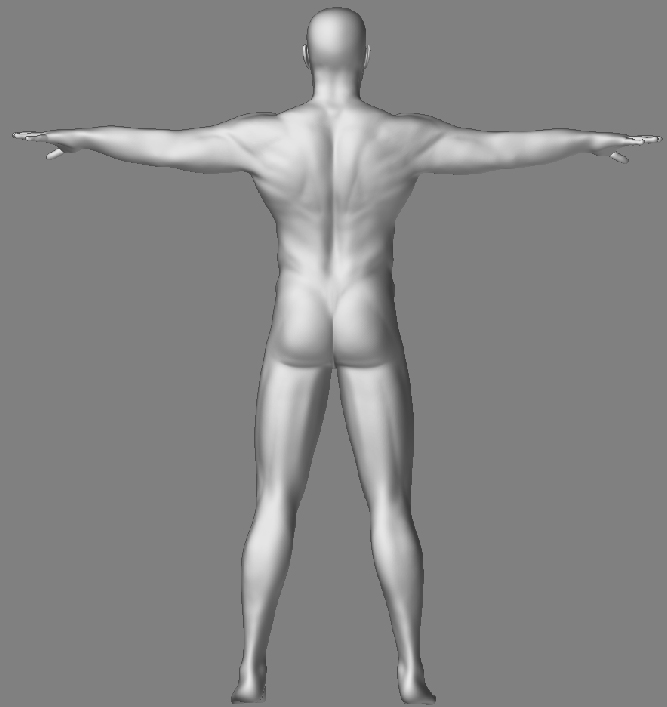
I’m doing something similar with a full body male anatomy study, just haven’t posted the work here yet. Some areas that I think would improve your model:
The hands are too thick, as are the fingers. I’d suggest forcing the bones out more than you think is necessary. Than smoothing it out slightly. Also the whole arms look too puffy, I think they could be scale down a bit y-axis wise. And they seem too short. My arms go to about halfway down my upperlegs. Yours goes about to the hips. I think it looks awkward to have heavy muscles and short limbs.
Does the model have skin or not? Its not apparent since on the face it looks like he has the start of older man’s face with drooping skin in the cheeks. His body looks like its hinting at a muscle study since your showing some of the muscle attachment points to the bones. This is very apparent in the knees. I don’t think you usually see the complete Sartorius muscle on weight lifters.
The lower eyelid is jutting out too far and should cling closely to the eyeball. Also trying using z-sub of 25 intensity. Mark your lines out on a higher division level than smooth those lines.At the edges of the lines you can than use a z-inflate tool with a intensity of 5 and puff up the muscles slightly. Just keep in mind that muscles are stretched and interlock with one and other frequently.