Hi ZBrushers!
I posted this in the Other Questions and Troubleshooting Forum to help somebody out and I thought I would post it here also. If you are new to ZBrush, the Image Plane plugin can be a bit confusing. The Image Plane plugin can be found in the Texture menu.
Setting Up Reference Views in Image Plane
Don’t miss any steps and do them exactly as written and start with an empty canvas. I use a ZSphere tool here as an example.
1. Import the images you want to use via the ‘Texture’ menu. For example “Front View” and “Right view”.
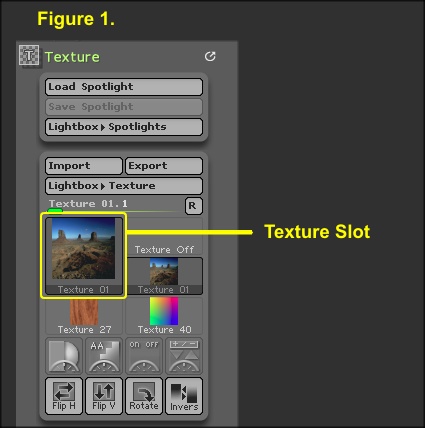
2. Select the “Front View” image so it is in the Texture slot (see Figure 1 below).
3. Open ‘Image Plane’ plugin, Reference Views and with the ‘Front’ button enabled, click ‘Load Image’
4. Select the ZSphere from the ‘Tool’ palette and draw it on the canvas and enable ‘Edit’ mode.
5. In ‘Image Plane’ plugin, click ‘Store View’
6. Go back to Texture menu and select the “Right View” image so it is in the Texture slot.
7. In ‘Image Plane’ plugin, Reference Views, select ‘Right’ button and then click ‘Load Image’. At this point, the ZSphere will disappear.
8. It’s important that you click on the ‘Tool’ icon and select the ZSphere again from the ‘3D Meshes’ palette. When selected, draw it on the canvas and enable ‘Edit’ mode.
9. In ‘Image Plane’ plugin, click ‘Store View’ You are now set up for Front and Right views.
10. In ‘Image Plane’ plugin, Reference Views, click ‘Save/Load’ and save the views so you don’t have to do all this all over again in case you have to continue the project at a later date.
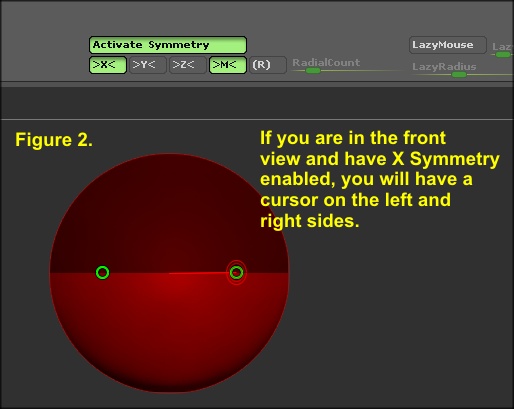
11. Once you start to edit the ZSphere, you will have to orientate the zsphere to the front and right views. You can turn on X Symmetry to determine which is which (see Figure 2 below). For example, hold down Shift and rotate/snap the view for the front view and with ‘Front’ button selected in ‘Image Plane’, click ‘Store View’. Select the ‘Right’ button in ‘Image Plane’ and repeat the proceedure for that view. Now just select ‘Front’ and ‘Right’ buttons in ‘Image Plane’ to change the views.
The Flat Color material will be selected, so you can change that if you want.
Hint: Use the ‘Model Opacity’ slider in Texture > Image Plane > Reference Views to make the model transparent.
I should also mention that if you are working on a Tool in Edit mode, then you decide you want to use ‘Image Plane’ and load an image and the Tool suddenly disappears when you do, then just open the Tool palette and select something else first like another primative, but don’t draw it on the canvas, then reselect the Tool you were working on and draw it on the canvas.
Basically, what is happening when the Tool disappears, as far as I can tell, is if you have a Tool in Edit mode and you load an image into ‘Image Plane’, it puts you into 2.5D mode. So, the currently selected tool you were working on will now be drawn in 2.5D and to get out of that you have to select a different Tool.
Well, that is basically it. It shouldn’t be to hard to figure out what to do if you want to use more than 2 views.
Happy ZBrushing! 
Attachments