ZBrushCentral

How to create a surface like this? (Ghost in the Shell)

Hey everyone :wave: I’m new to the community and to ZBrush. :slightly_smiling_face:

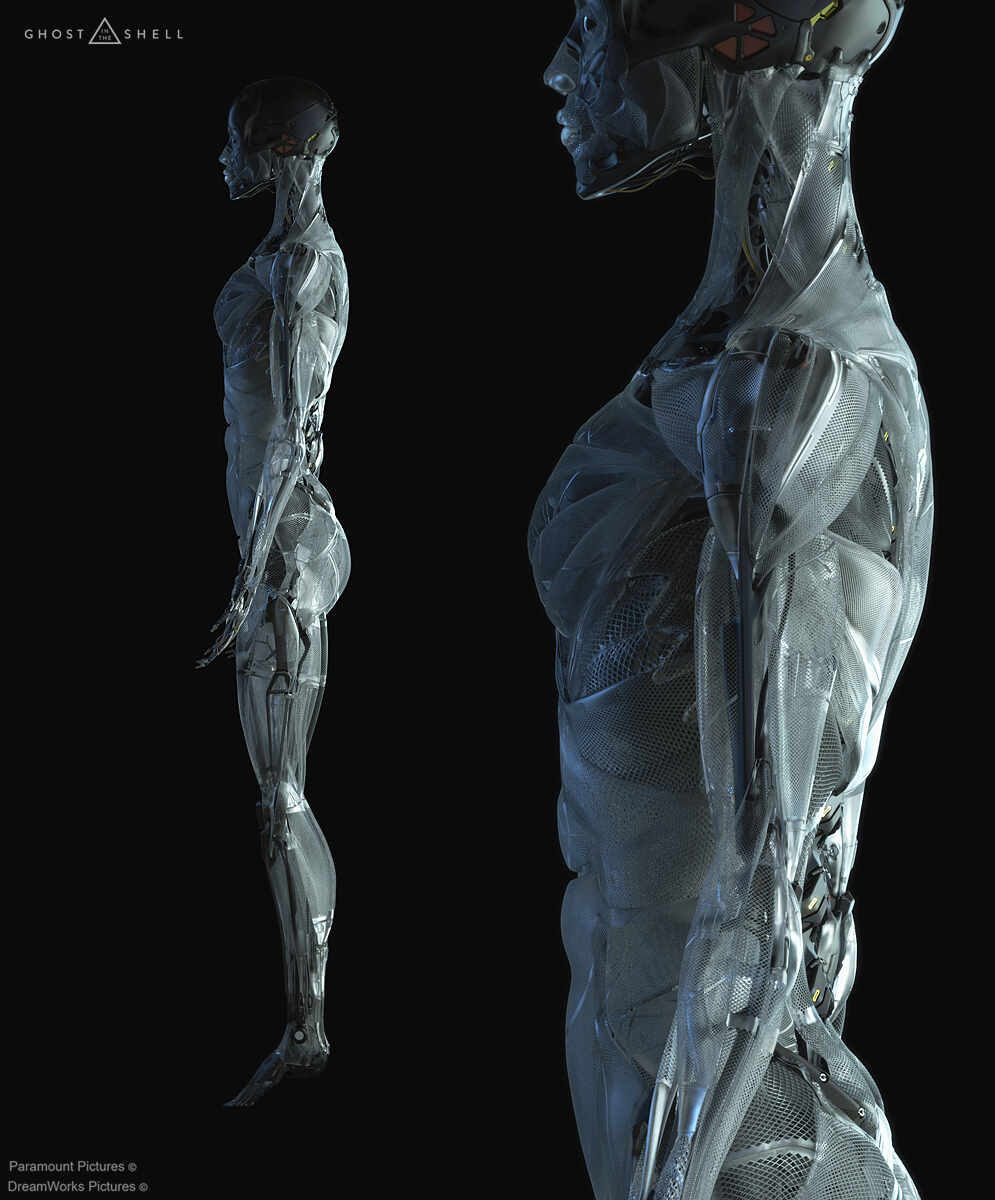
I’m working on a project where I’m trying to create a surface like the transparent muscle tissue / mesh pattern of Major from Ghost in the Shell (Vitaly Bulgarov).

Any ideas/suggestions as to how this was done? Is it geometry based using a MicroPoly? Or surface noise applied to a DynaMeshed model using UV’s? Or something else?

Here’s an image for reference. Thanks so much for any help/advice! :pray:

P.S. If I’ve posted this in the wrong place, please let me know!

150914_CHAR_MajorMuscles_VB_12

Dropping a comment so I can see how to do this too. I’ve tried but using a nano mesh to pull it off and I can’t get it how it is in this example. Like, the angle and flow of the the polys dont flow the way I need them to, to get this same look.

Idk, maybe its done with an alpha. Or maybe, with maps.

I think you can achive it by Dinamic micropoly.
Don’t think you this model in one mesh.
You can stack thin plains, and apply micropoly each of them.
You need to make good topology flow plains to control nanomesh direction.