ZBrushCentral

How do you apply Alpha to Morphed UV polygroups?

I have a polygroup that when I create UV’s by polygroup and then Morph UV… I want to apply my Alpha to create mesh on the flattened polygroup, and then click Morph UV again to make it go back into the whole shape but the mesh I created is no longer there.

I’m trying to apply an alpha while the polygroup is flat because it is the inside of a ring.
How can I do this, please?

Unfortunately I don’t think you can sculpt on the mesh when it is flattened using Morph UV.

One way that you may be able to do what you want is by using Live Boolean. Create a centre cylinder for your ring, perhaps by booleaning it out of a copy of your ring, so it fits snugly. You could then create your design in reverse on the outside of the cylinder before using boolean to subtract it from the inside of the ring.

HTH,

You could create a blank white texture, and apply it to the morphed tool. Drop to the document with Projection Master, then use your Alpha to paint on some black and white RGB data. When you pick the model up from Projection Master, this data should be converted to the texture map. You can then mask by the color intensity, and use a deform such as Inflate.

Thank you both, gentlemen. I will have to read more and study what you suggested but this is what I did on my own before I read your suggestions.

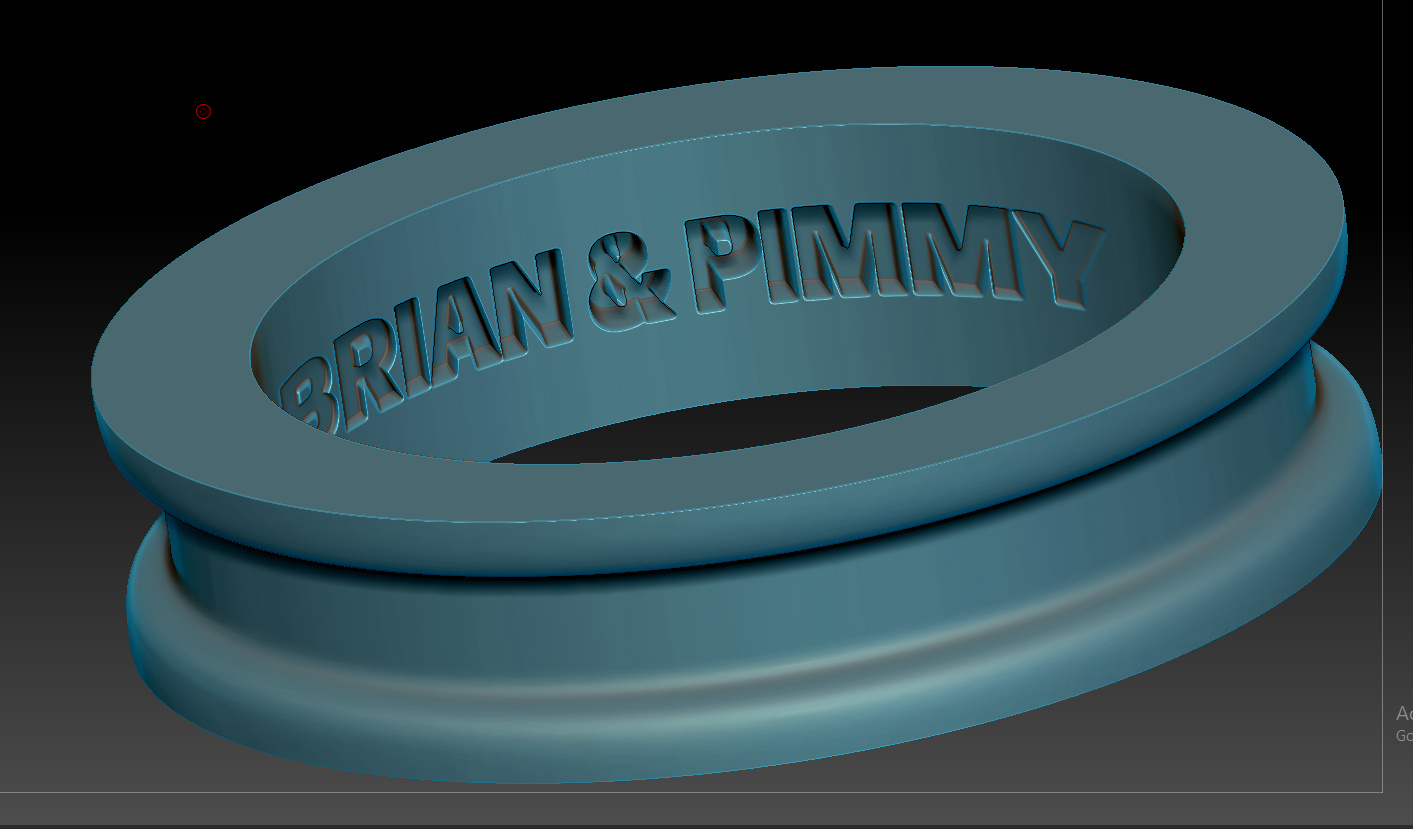
In this image, you can see why I want to project an Alpha or texture on a flat surface version of the inside of ring… because of the distortion.

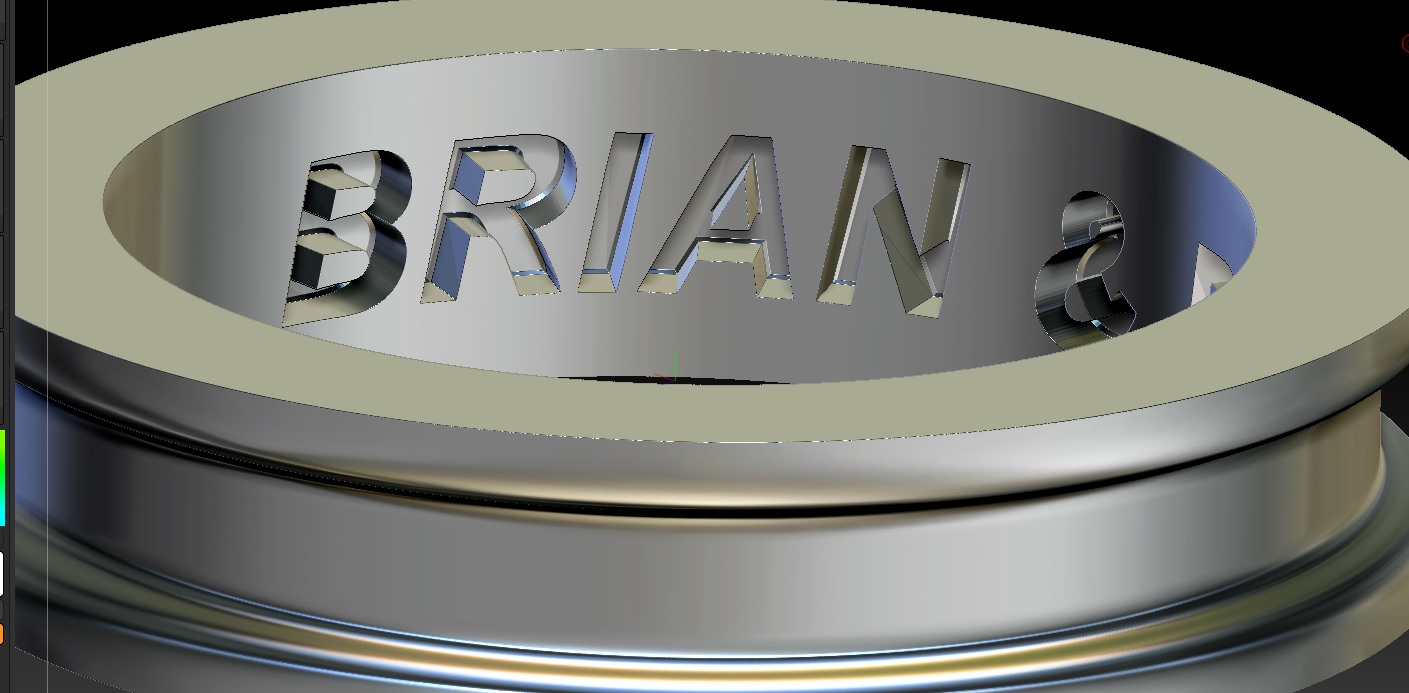
At least I learned how to make better Alphas by blurring so at least I’m learning. But I’m frustrated with no being able to make clean engravings on a curve. So I will have to try your suggestions.

I think maybe Extraction from Mask of the Alpha, using “double” to create mesh inside of the surface of ring… and I can control thickness… then when new subtool is created… merge down/subract… done. Right? That’s the easiest way I’m thinking now. Thanks guys, if I fail, I’ll try your ways next.best I can do so far.jpg

Attachments

best I can do so far.jpg

If Alpha’s aren’t giving you a clean result for inflating, perhaps the Text 3D & Vector Shapes plugin could be used to import the text/logo. You could turn it into a (live) subtraction boolean, and use the Gizmo transfer for arc it around the curve (setting the various axis to parallel/mirror will help).

Cool idea,

Thanks again, really appreciate it.

I tried Matchmaker brush since I have really clean texts I made from Alpha Make3d. But… Matchmaker only sees the outside of a subtool and not any other surfaces like the inside of the ring… even if I hide half of the ring.

wow, that looks amazing! Good job.

Cyrid,. I really like your idea, your picture looks great. I have 4r8 but don’t know what you mean by " transfer the arc of text to the surface of ring with the Gizmo". I thought only matchmaker did that. How do I use the gizmo to match the bend? Any chance you have video of you making that ring?

I must have been tired, because I just read what I wrote and even I don’t know what I meant by that.
I think I meant to say “…and use the Gizmo deformer to arc it around the curve…”

Anyway, here is a video (you might have to tell youtube to play it at half speed):

//youtu.be/g68-T5aD6Fk

Yellow Cones:

  • X Divide=5 (or more, depends on how smooth you want the arc to be)
  • Y Divide=2
  • Z Divide=2

Red, Green, Blue Cones:

  • X Sym=2 (mirror)
  • Y Sym=1 (parallel)
  • Z Sym=0 (off)

Ahhh, OK, now I have something else to try so thanks for clarifying.

I will watch this video and see if I can pull it off.

Thanks again,

Rick

Thank you butdone.jpg I didn’t use your method, I used “Bend Arc” and you can control the radius and the bend perfectly from the center of the text by the Gizmo.

So you did help me figure it out, but you get perfect control with “Bend Arc”.

Thank you!

Rhino sucks at text boolean because it creates errors with the mesh so thank you for helping me learn how to do this in Zbrush.

I appreciate it!

Attachments

done.jpg