Great work!!! Love the texture !!! TOP ROW !
Perhaps you could show us a wireframe version and an untextured shaded one. PLEEEEASSEEE 
Great work!!! Love the texture !!! TOP ROW !
Perhaps you could show us a wireframe version and an untextured shaded one. PLEEEEASSEEE
Hi guy, this very good the texture have a diferent personality, nothing more to say only perfect
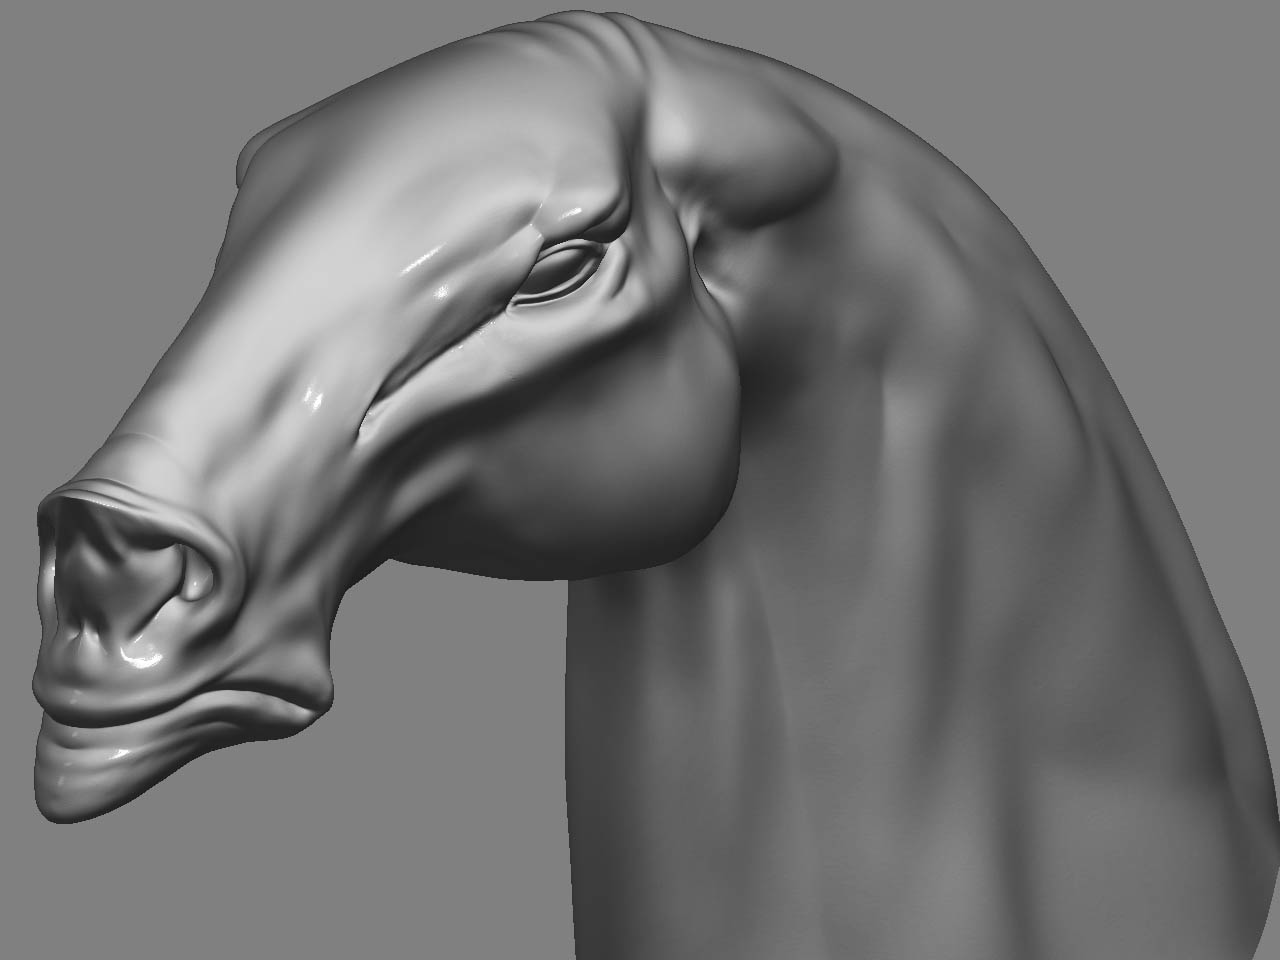
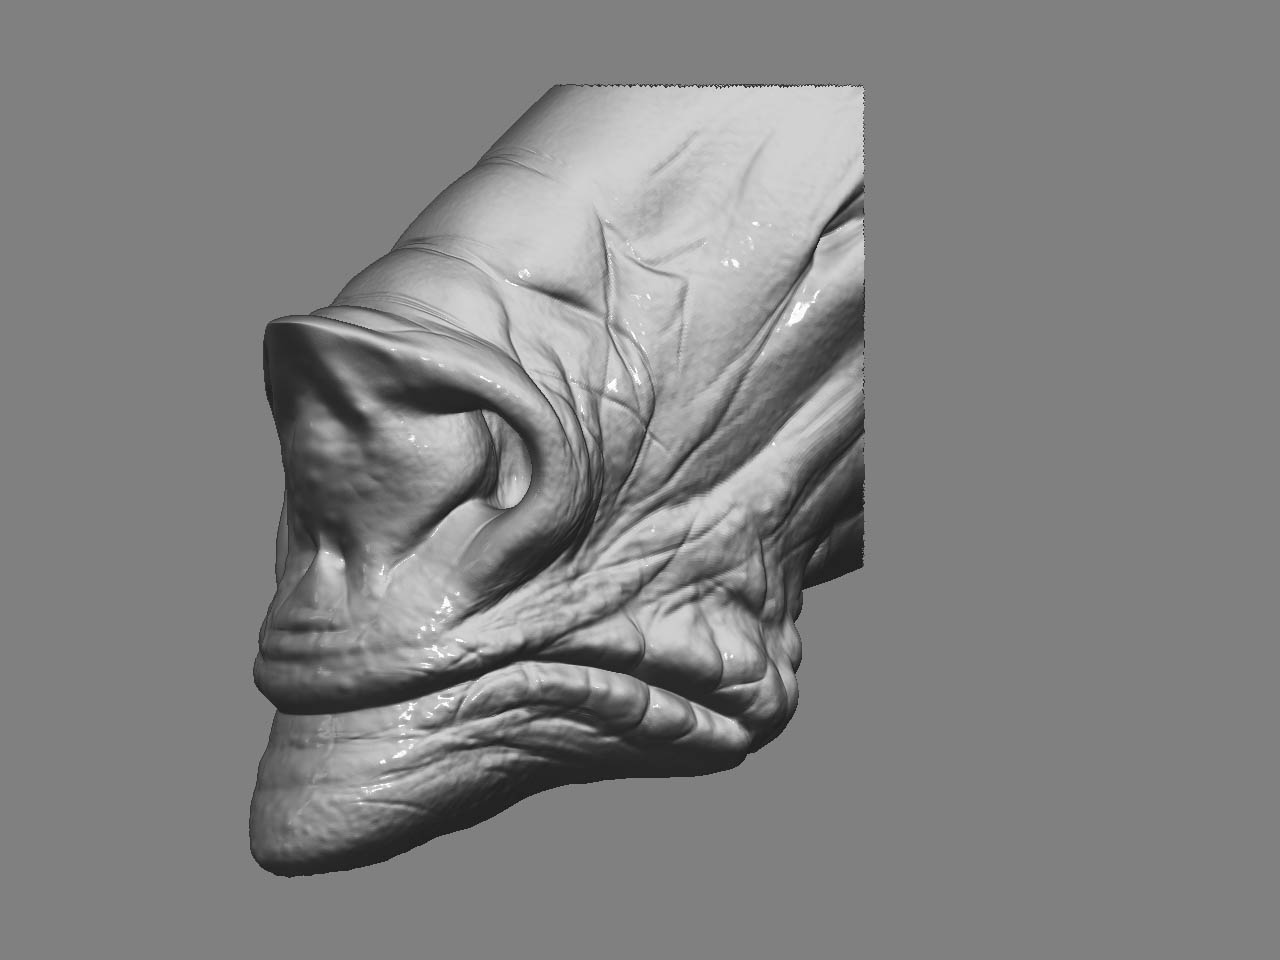
Great Work, I esp. like the overall angularity of the muzzle/chin.
-Kol.
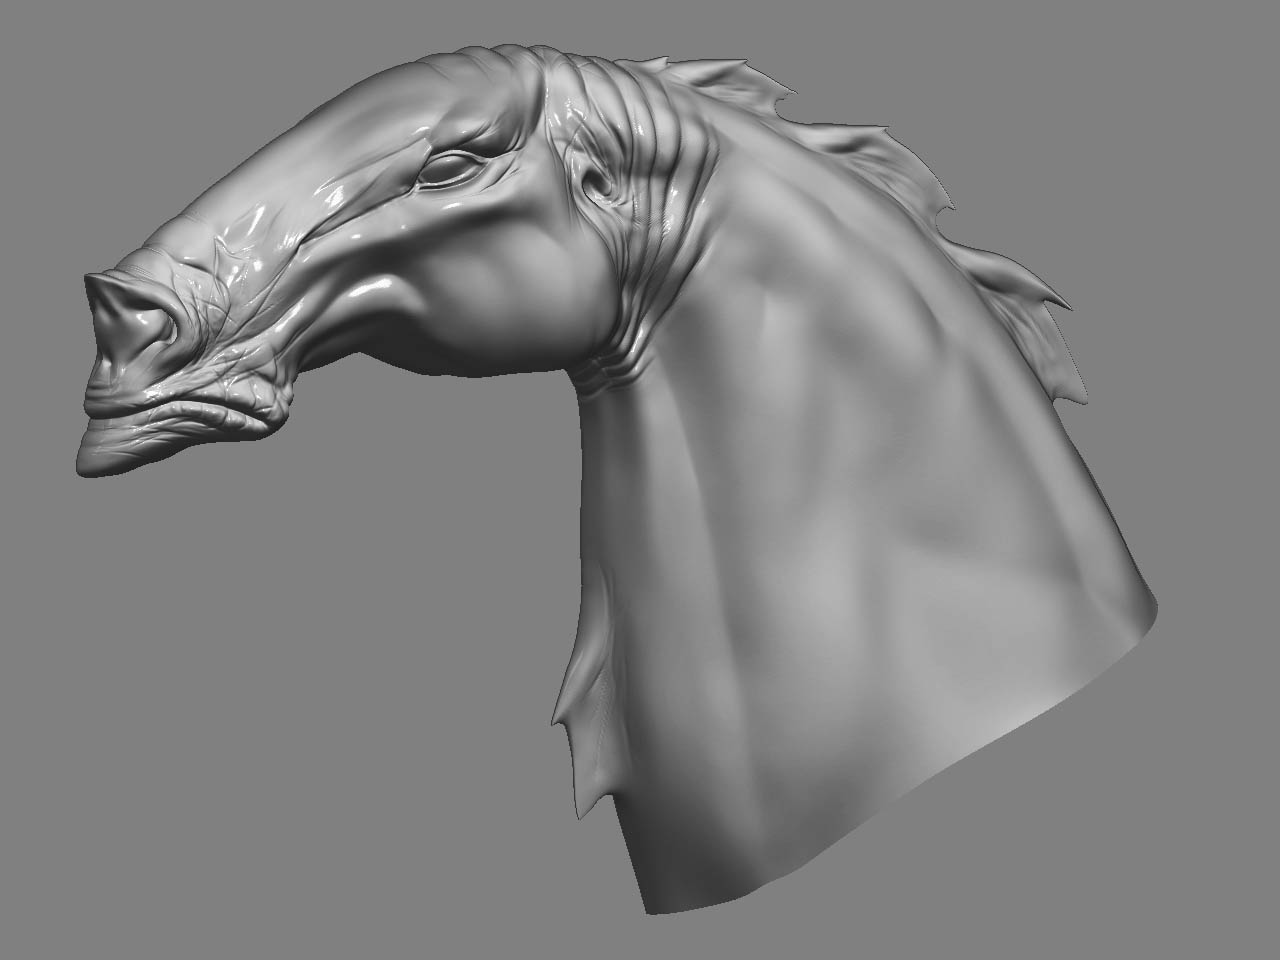
damn neveille thats off the hook!! I like the mouth bit, its got that comic book angry expression…fantastic texturing! Just great.
bravo…love the coloring and the depth of the image.

great work 5*, now you got to make the body the only thing missing i guess is the vain on his cheeks like in the concept sketch u made.Top material
This is such a superb model amd rendering 
haha that is some horse
how did you learn to draw like that, did you go through a school that taught you how to draw and model?
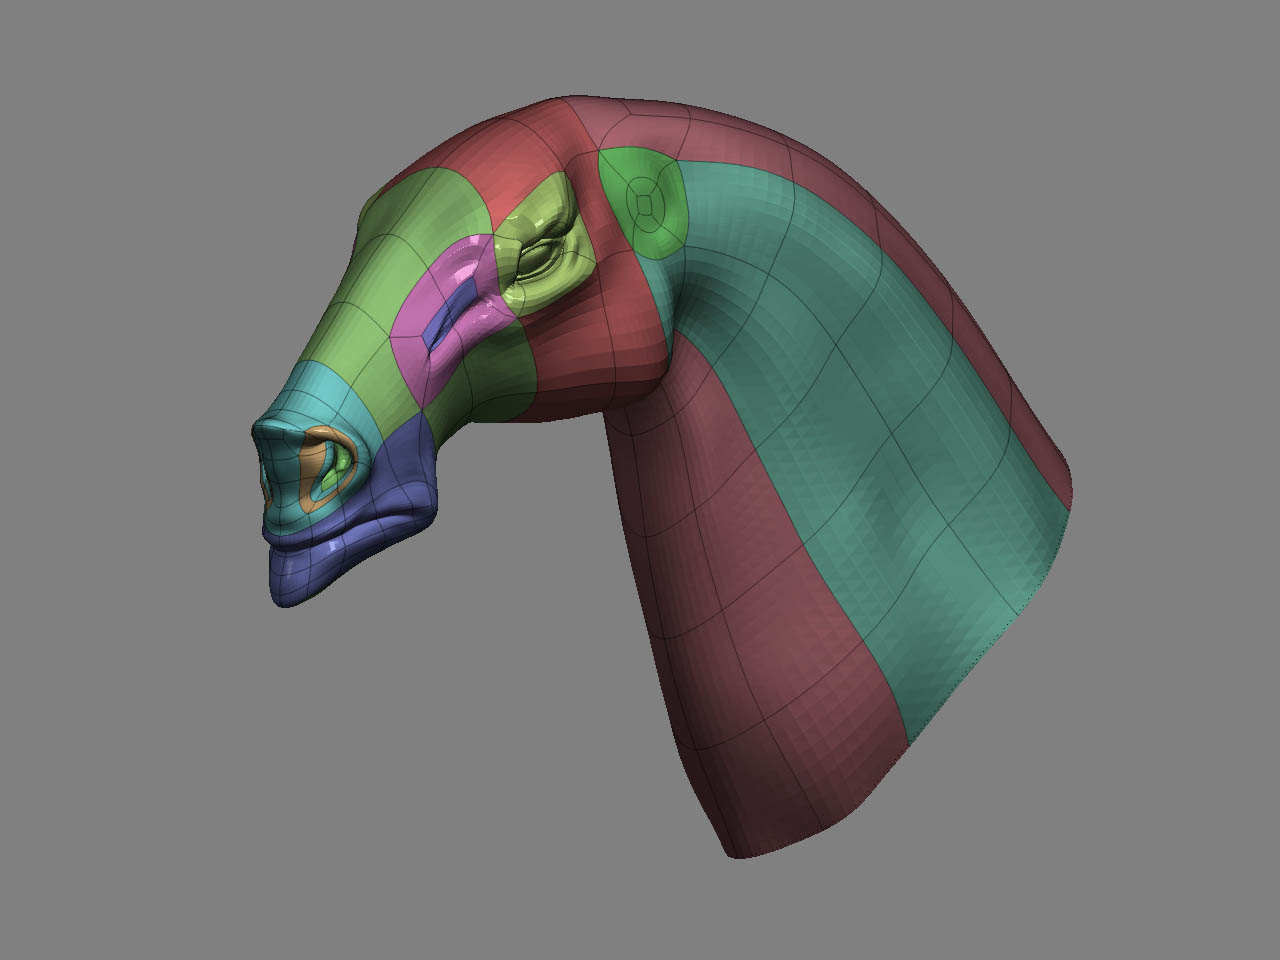
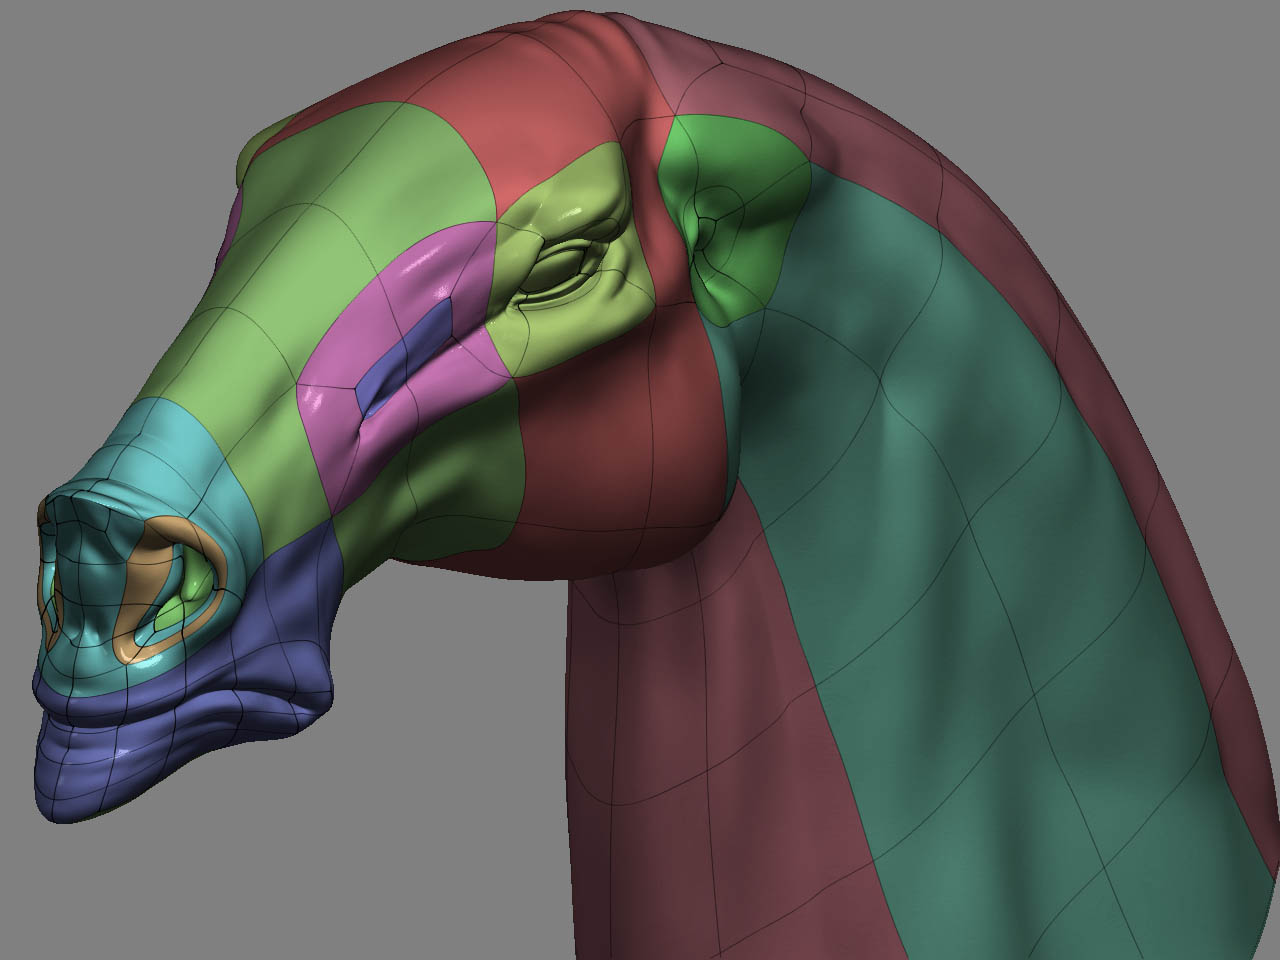
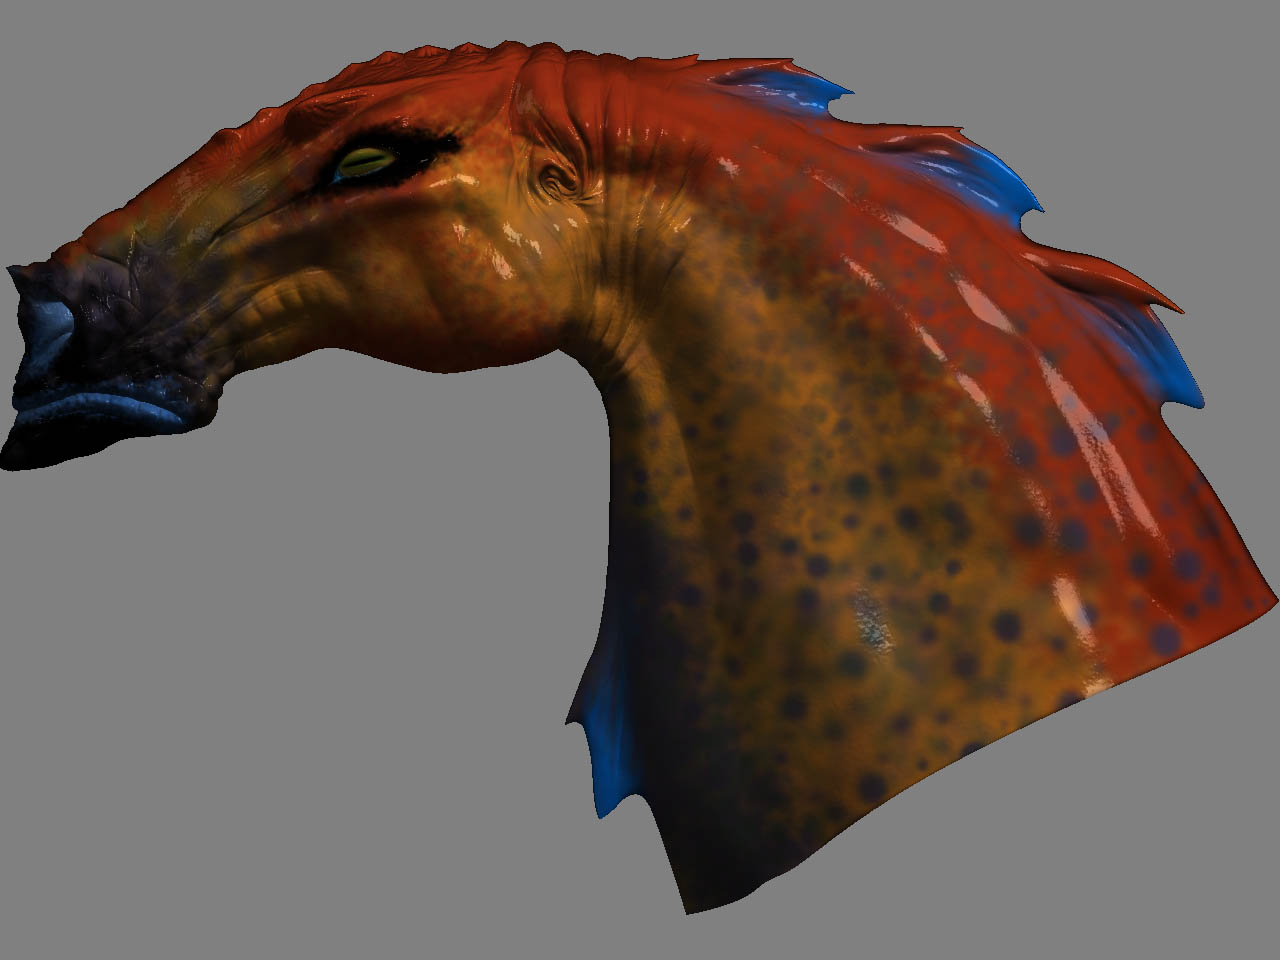
This is really amazing, your Zbrush skills are really coming along to bring your concepts to life. I really love the development going all the way into the final rendering. I love that character of strength seen in the masseter, this horse is really clinching his jaw hard.
My only suggestion is that you really change your lighting for the rendering. Its almost as if you have studio lighting in an outdoor environment. A little lens bloom would help it greatly. Perhaps some shadows cast on it from a like a near by tree or something (If any of you don’t know Neville is doing a DVD on Advanced shadow casting…sorry I couldn’t resist as Scott plugged it sooo many times in his DVDs).
Give me a holler,we got lots to discuss.
Nice fresh design Neville, as usual your work is fantastic and motivating! Love the thumbnail profiles!
Wooo ! really great man !
Man that is one of the best renderings i have seen in zbrushcentral . I was quiet intrigued to know you did it all in zbrush. SO did you entirely used zbrush? Or did you use photoshop for various specs as blossy look blur effect on the bottom right of the picture etc.?
Thanks for all of the wonderful comments. I have included alot of the steps to show the developmental process. Later I will include the Photoshop phase. I think that the images should be self demonstrative but if you have questions, feel free to ask.
I have a question, and excuse my ignorance, but I wanted to post my model, lights and material but was unable. How do I do it?
Crossbones- Yes, we do need to talk. I also agree with the outside render. I used studio lights and then put him in an outdoor scenario. Not a good choice, but it was an “on the fly” moment. Any suggestions on a good “outdoor” lighting condition in z-brush?
And, as for the DVD, …it is a ways away. As you know, my current gig is all consuming!! Soon though.
Again, thanks to all of you and your comments. Not only are your words motivating for me, but the work I am seeing lately is inspirational. Looking forward to “sharing the wealth.” That is the best part of this Z-Brush community!! Everyone seems to support and push one another. Love it! 


how r u painting this man? If you build from zspheres did you kick it out to another progy to unwrapp or wha? I know its a noob question but im totally baffled on how u just painted that lol.
thanks for the progress shots!
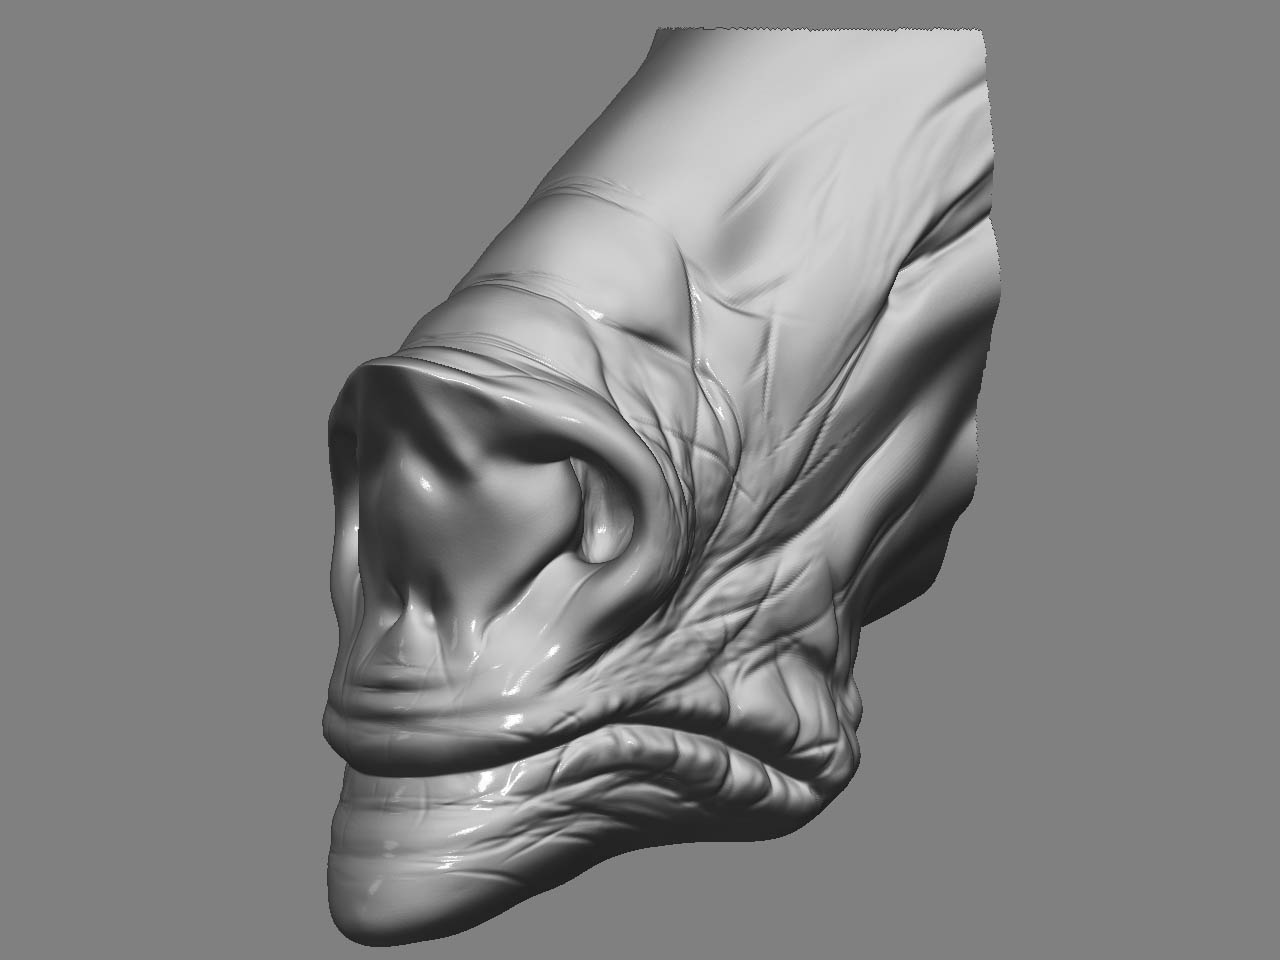
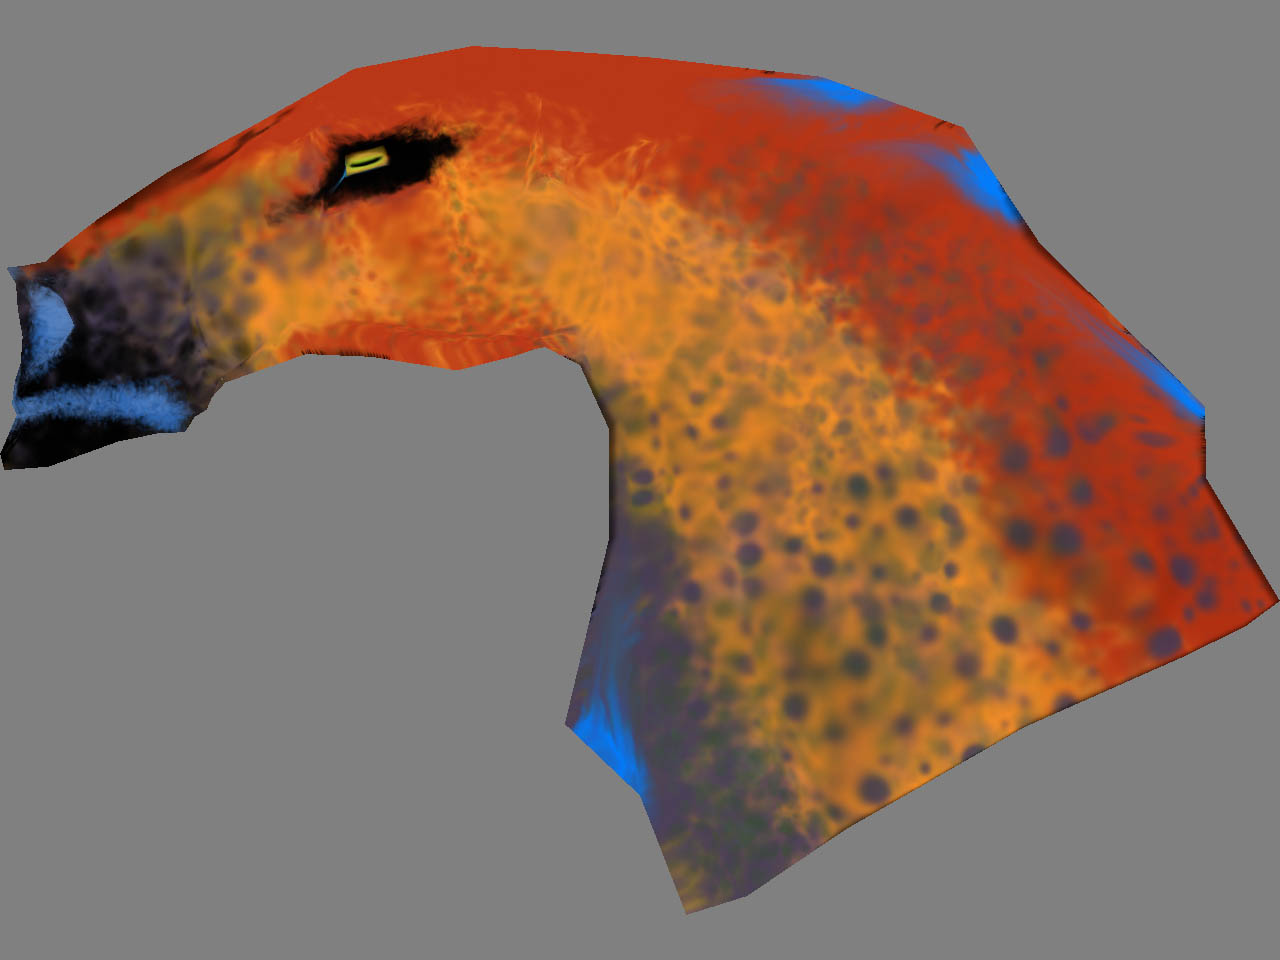
hey, this is really good good information. thx a lot for this pic sequence. what´s the poly account?
Wowwwwwww its amazin your work… keep doing
see ya
abraXas- The poly count is 1,187,100. On a Mac g4 (I know, gotta upgrade)
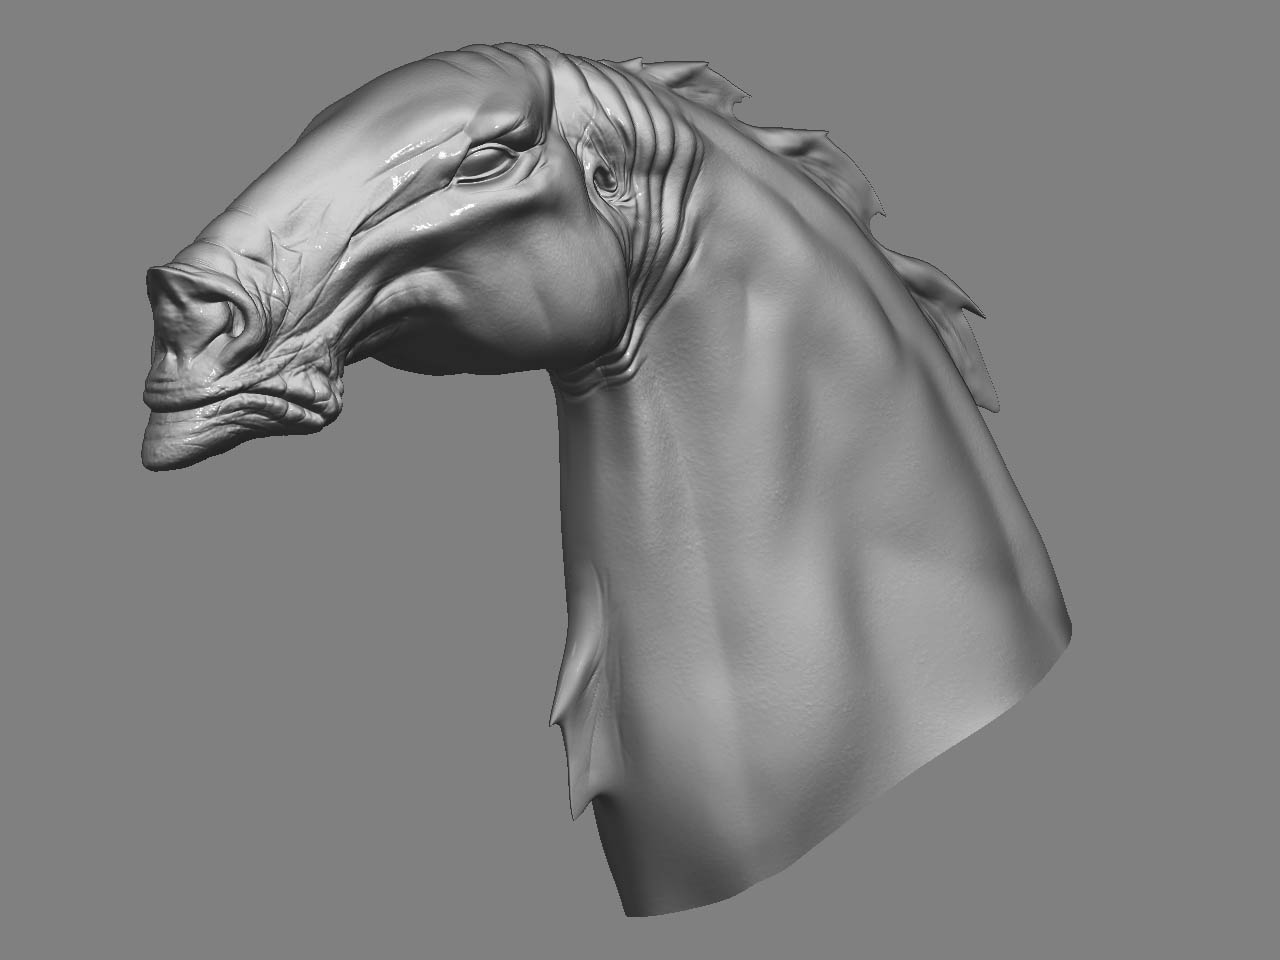
stimpack- Everything is done within Z-Brush (except for compositing and chin hairs, oh, and the eye, all of that is Photoshop) I use projection master to paint within. Simple brushes for this one.
Neville,
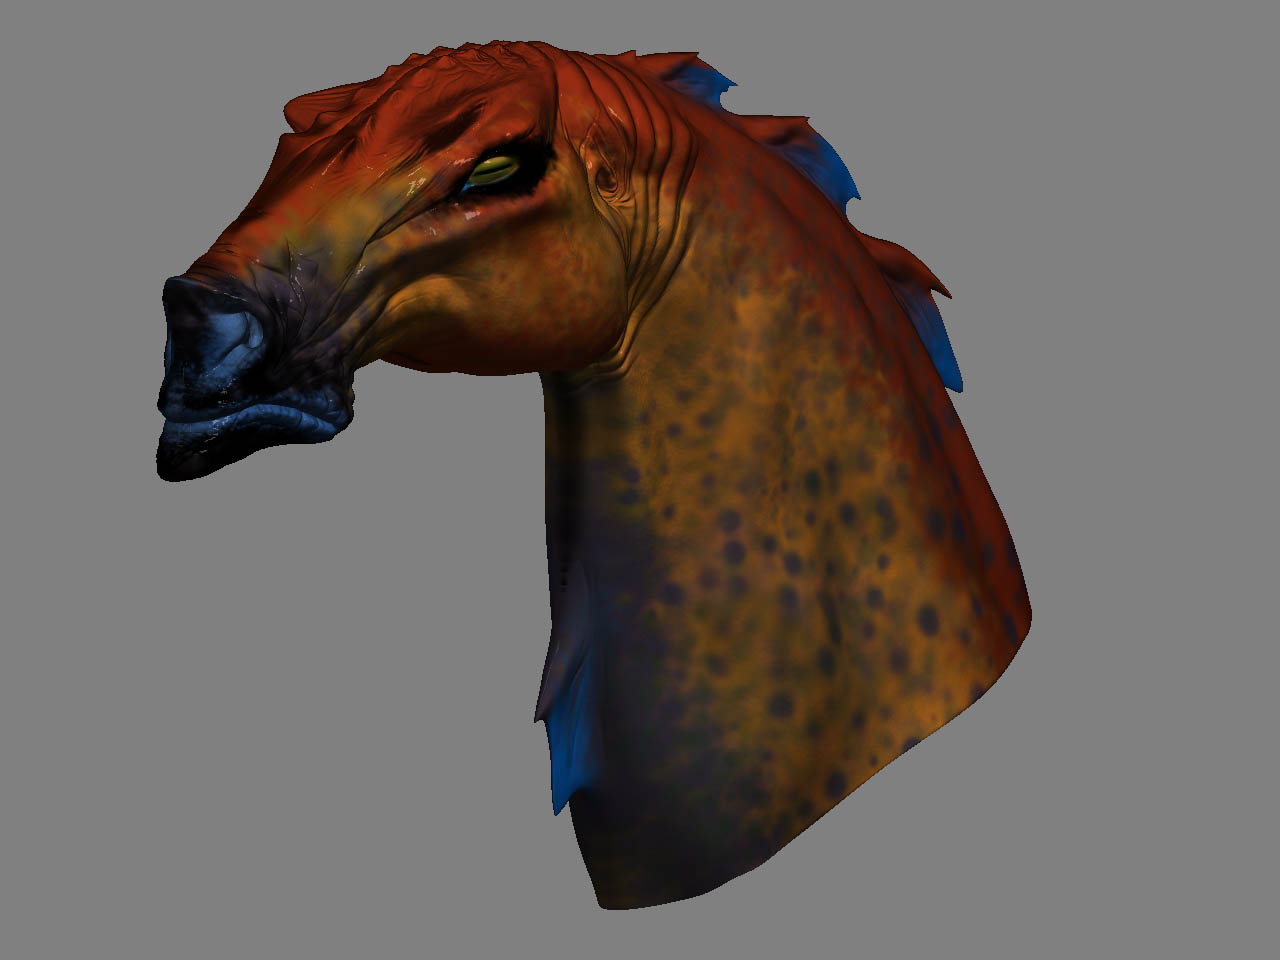
Whoa what a cool concept! Great fun looking at your choice of color. If you do make another post with outdoor lighting that would be great. All in all, 5 stars!
Yeah Nevile Mac G4!! My development version is the G4 Cube! Haha! 
Great inbetweens, and I do my colour maps the same, works great.
Neville- lets talk soon. Re: Your horsey.
Environment: Well there is a concept that most on this forum are familar with its called HDRI Lighting. Its where Pixels on an image project rays of light towards your project. It works using multiple exposures of the same image to produce the range of light and dark (think of the half-way to black concept on steriods) The results are amazing because you can have your background light the scene without much effort.
I am quoting aurik on how to do HDRI in Zbrush, "
First, the image must be converted to BMP, PSD or JPG format using something like HDR Shop. You should leave it in the Light Probe format. Load it into the Texture palette.
Next, in the Light palette, you have two patches – one for global diffuse, and one for global specular. Click on the patch to select a texture, in this case the HDRI image. Then you simply need to change the values of the sliders below the patches to get the effect that you’d like."
Also in Photoshop you can make and edit HDR files. You can also purchase HDRI images online or get a ton of them from Alex.