1. First off- I think we’re on the right track
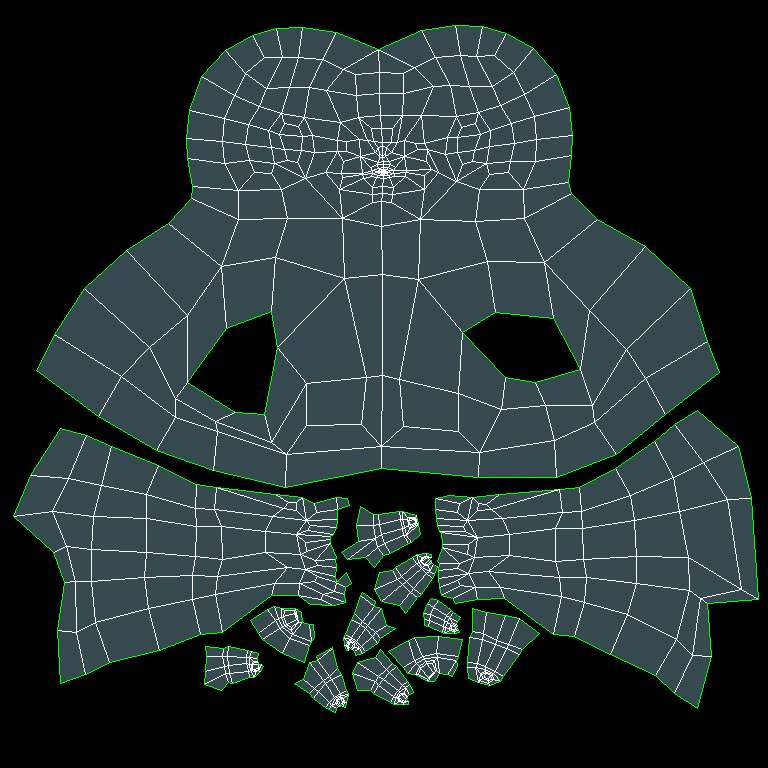
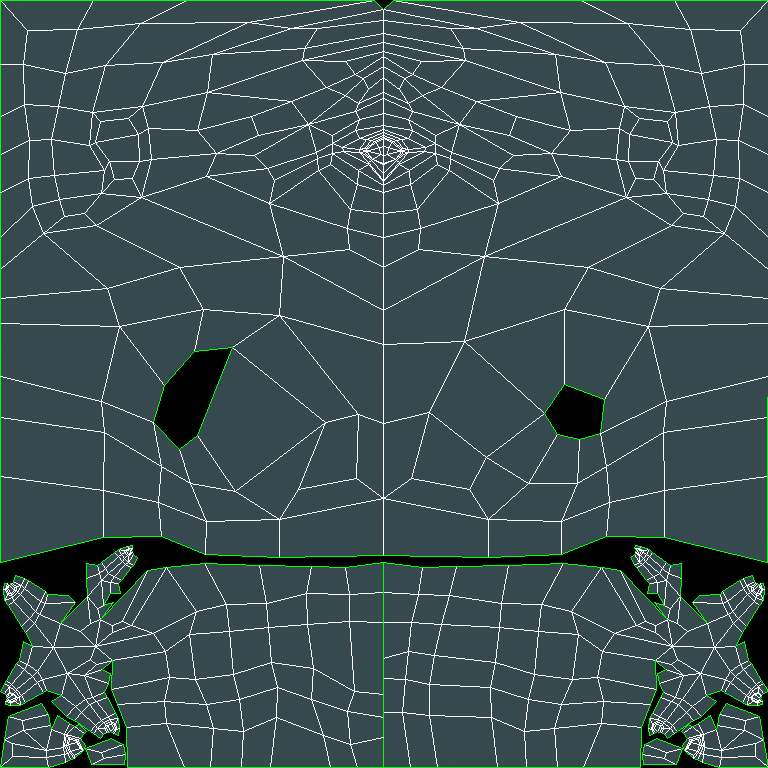
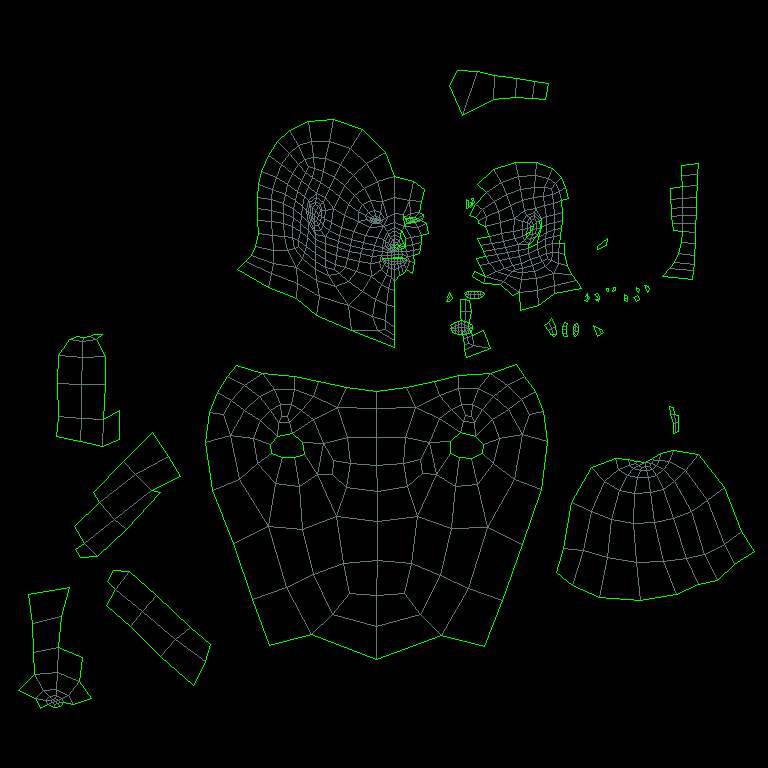
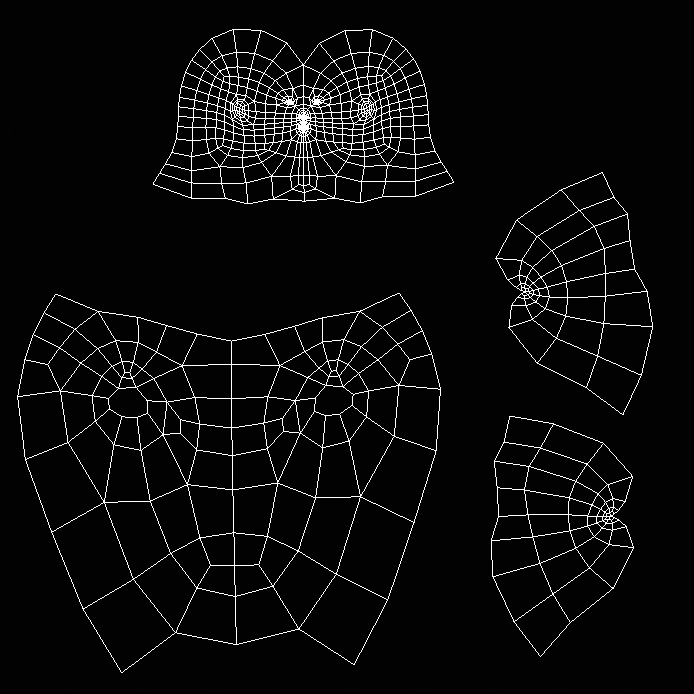
  . You are… well… Almost done with the UVs. Marvelous job so far. You have to fill in the space where you don’t have any UVs (efficient space usage, efficient space usage, efficient space usage! - I can’t stress that enough.) You are using roughly 60% of your texture box right now. This means that only 60% of the pixels are actually doing something. Simple to correct! Scale all the parts up (you don’t need that much nothing-like border space surrounding everything.) I think you already got in the jist of placing things correctly (I especially like how you put the arms, one this way, one flipped - the other way, so that they mesh better with less distortion.) Good job on that. I think when you scale all the things up and move the head and the body just a little towards everything else you will find that you have very little extra space
  . That’s a good thing. That means you won’t have to stretch the corner UV-points out to the borders as much. Now, again, don’t get scared when I say “stretch them out to the borders.” Just watch the overall distribution of your verts - so that the areas of your quadrilaterals in the uv box approximately resemble the areas of the corresponding polygons on your model.
I just wan’t to make this part as clear as possible - don’t be afraid of a little distortion. This will allow you to go from the 80% (after the scaling-up process) to the final targeted 93% - 97% of the total texture-space usage.
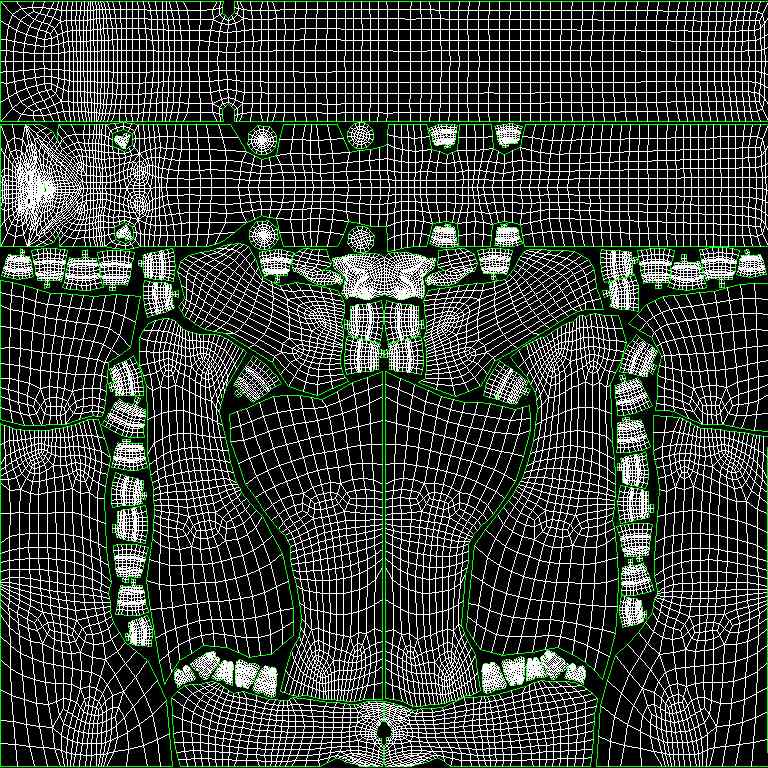
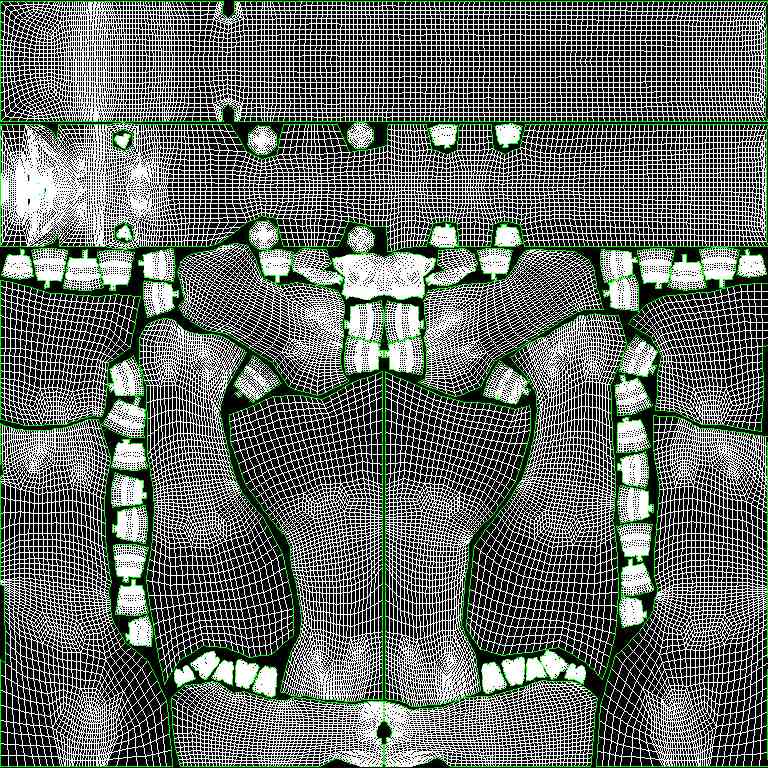
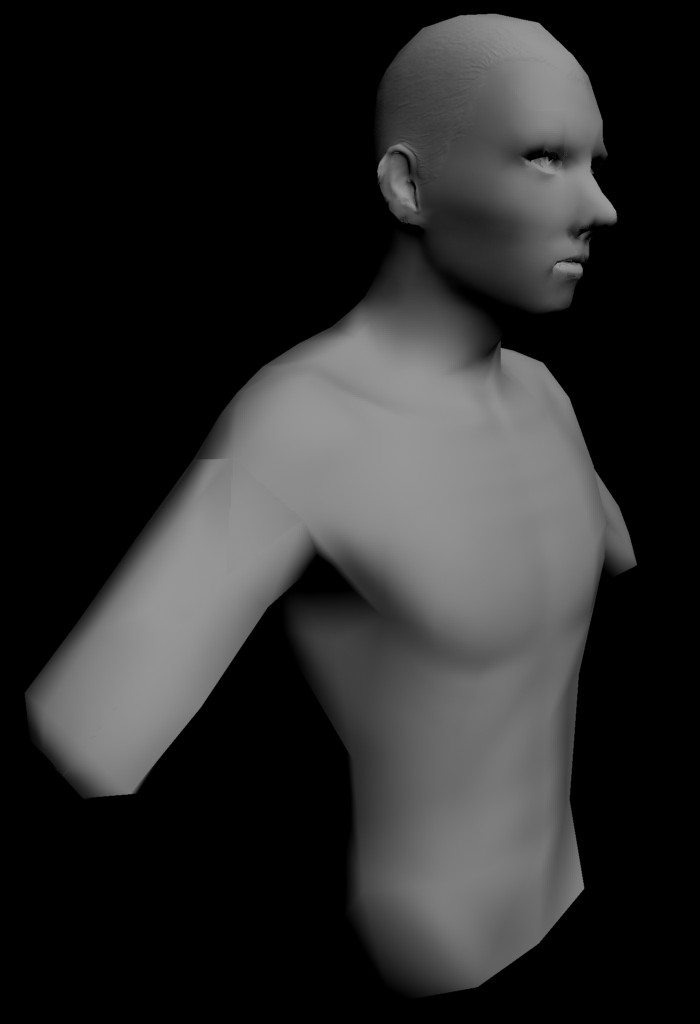
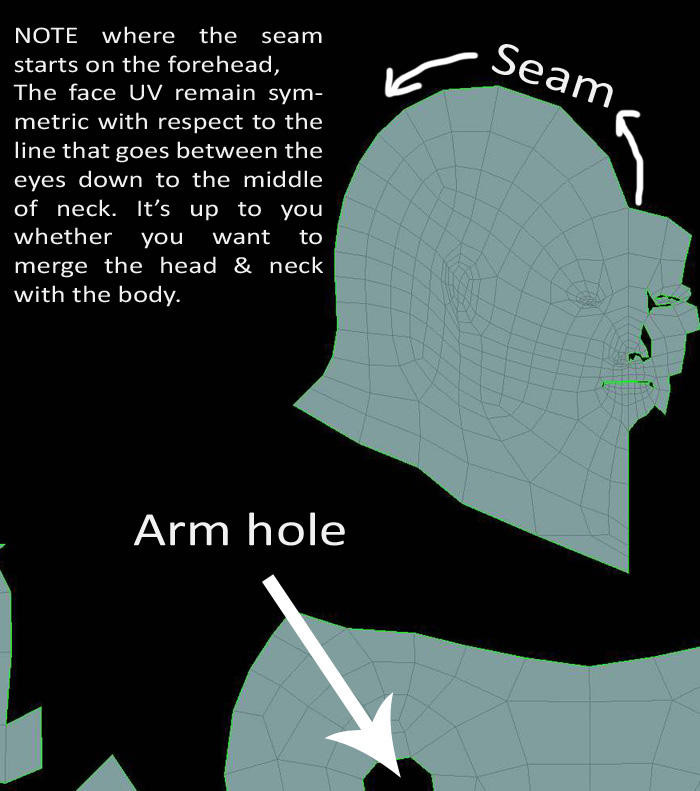
2. Make sure that when you subdivide the final base model before export (I assume you’re either doing this in Maya or ZBrush, but, anycase) MAKE SURE YOU STILL GET NO OVERLAPS in the UVs. This is crucial. This is what’s very likely causing those artifacts to appear in the ear and mouth. In ANY CASE, to EVEN MORE SO PREVENT THE ARTIFACTS or anything like this - stretch those facial features out a bit - make sure they take up more area that LESS IMPORTANT PARTS (effectively making even more distortion - but this sort of distortion is welcome, since it only increases the quality - you don’t care about the parts of the texture which are not that detailed anyway, since nothing’s gonna apear on the normal map there.)
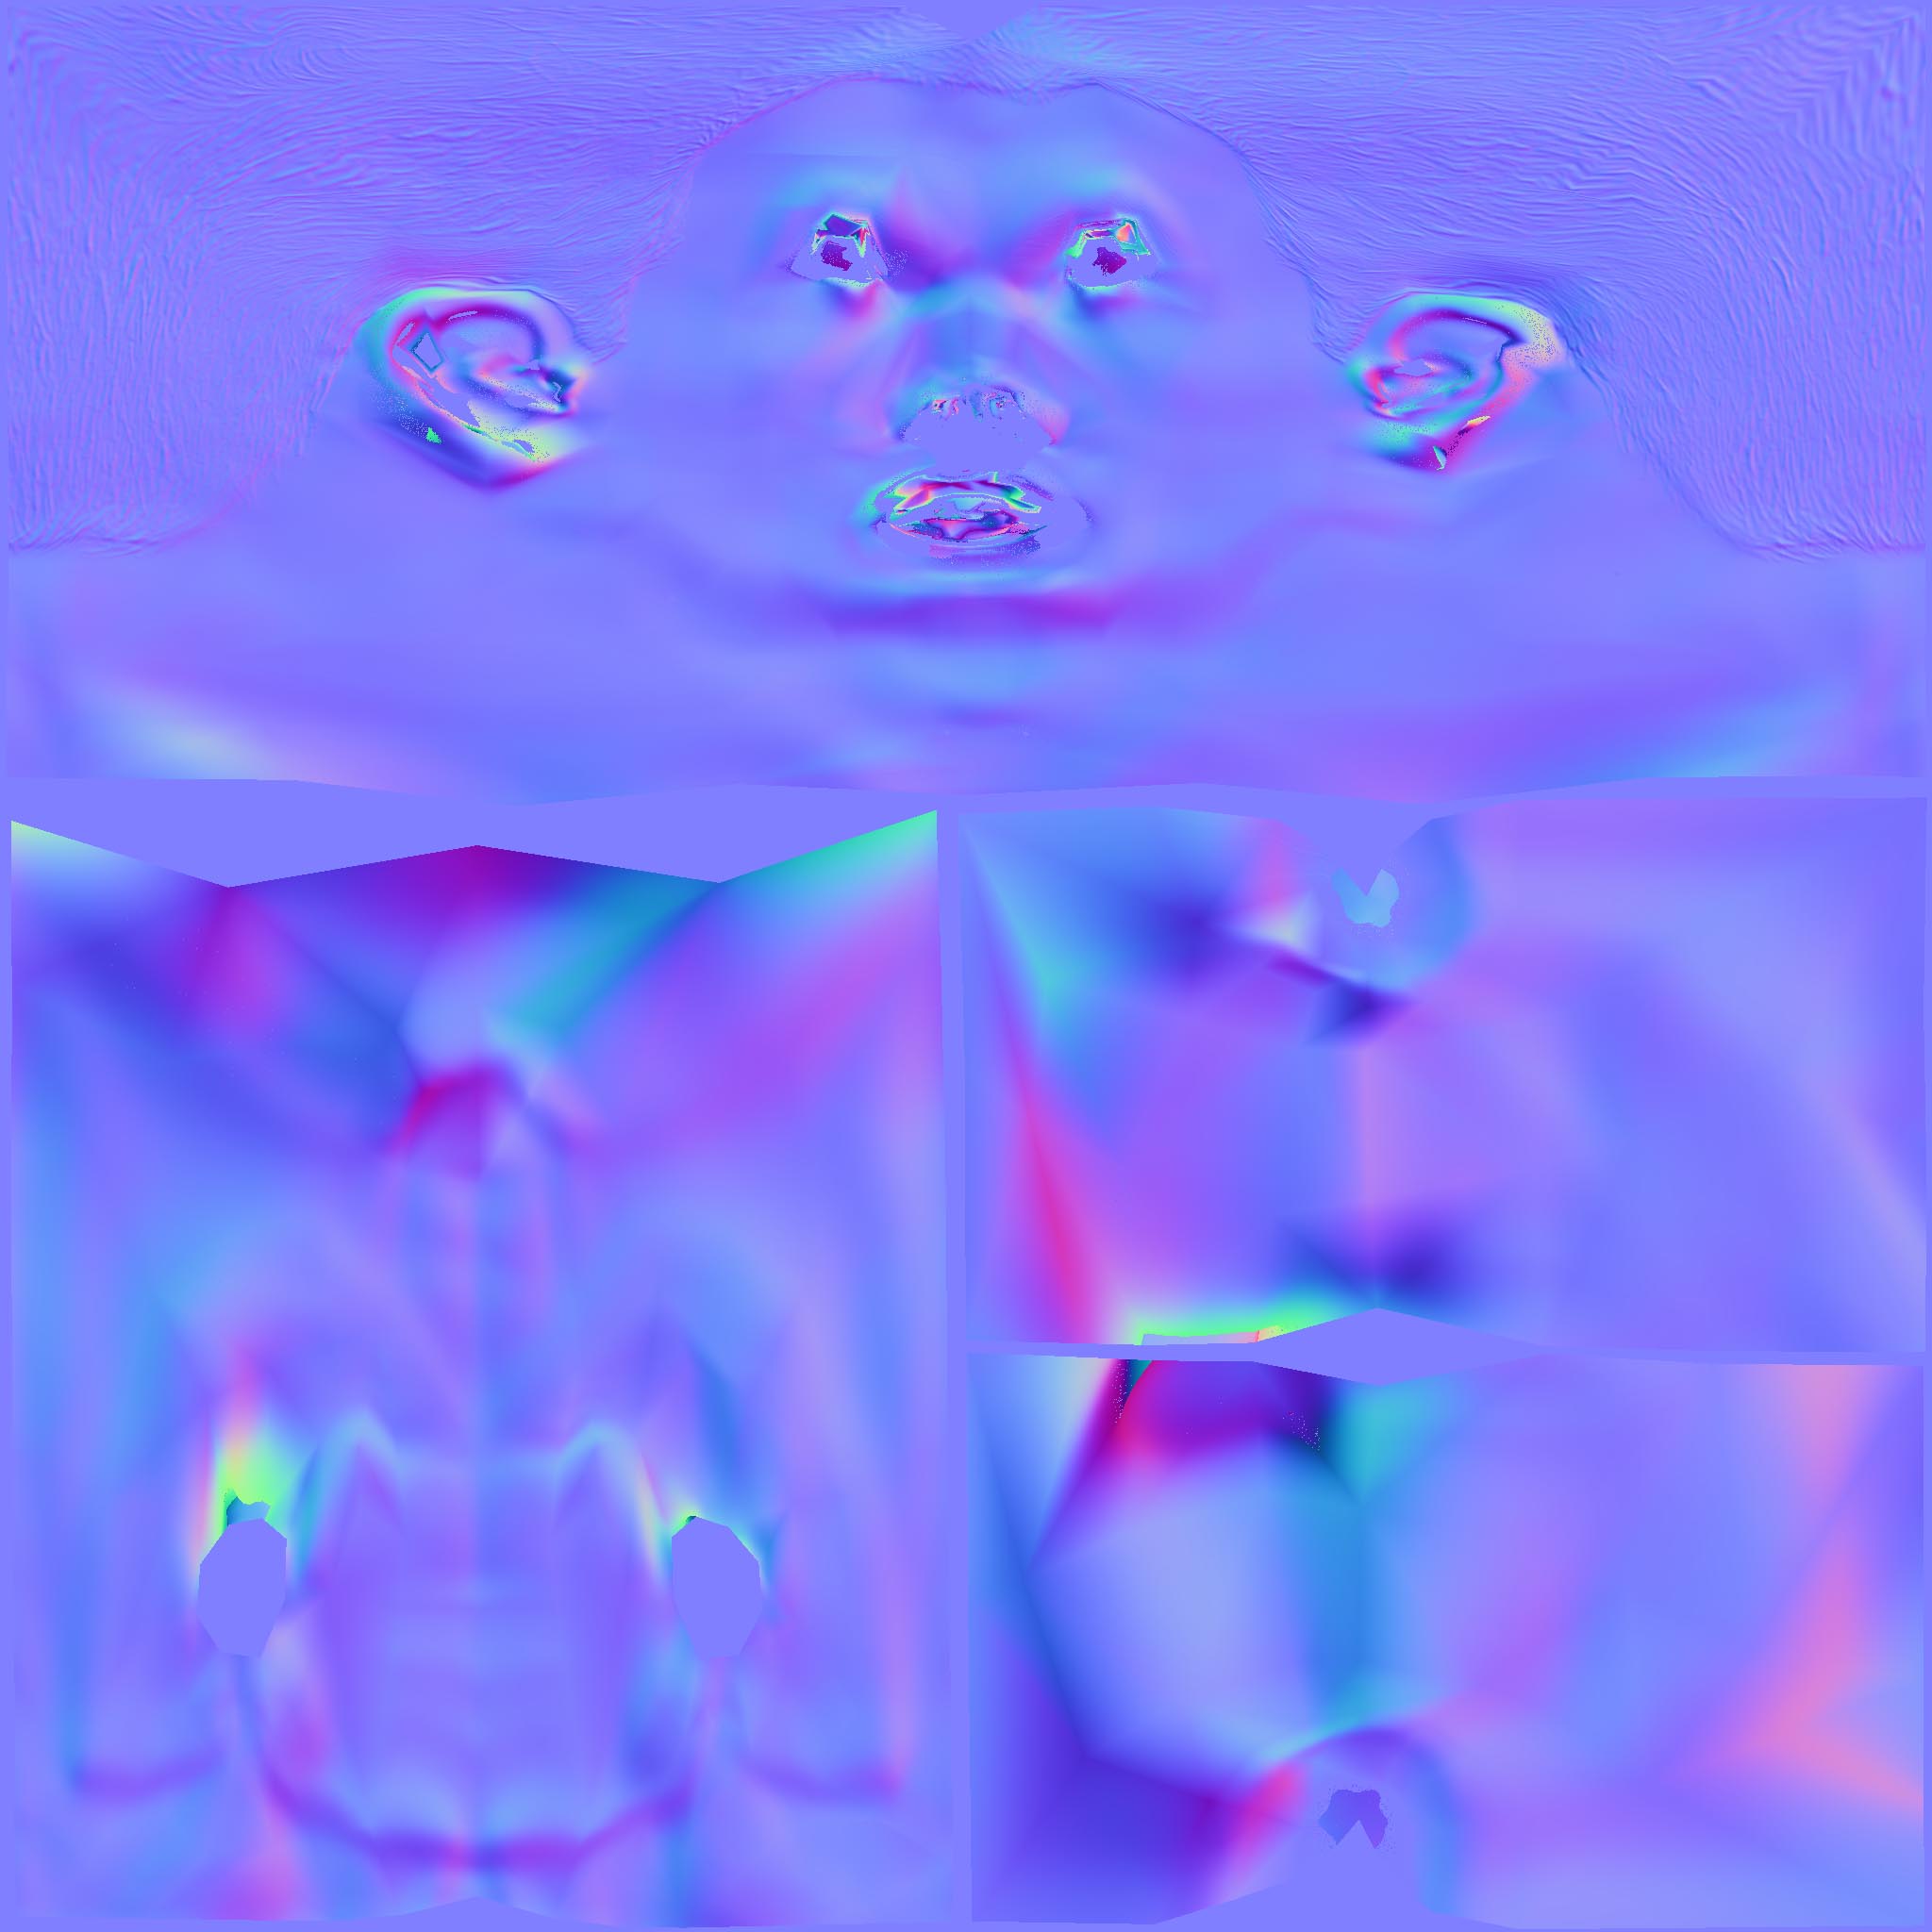
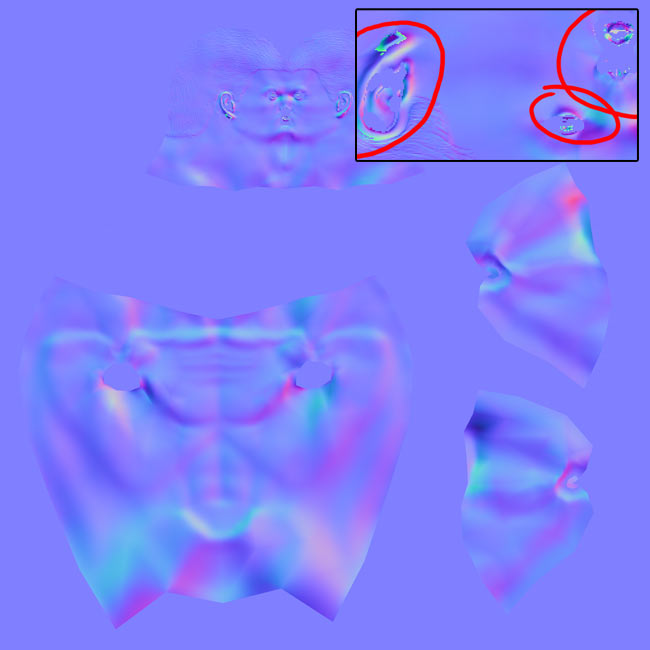
3. Make sure your RED | GREEN | BLUE settings in xNormal are on something like +/-X +Y +Z. It usually should be +X, but sometimes it’s the reverse. In any case, when you look at your normal map in Mental Ray, I think the colors should follow this pattern below:
Note: DarkPurple == downward-facing, Pink == facing to the left, Light blue bright yellow == upward-facing, Bright/Medium blue == facing to the right. Don’t be confused by the optical illusion - the picture displays mostly dent structures, not bump structures.
Great job so far - you’re almost at the finish line!


 1. First off- I think we’re on the right track
  . You are… well… Almost done with the UVs. Marvelous job so far. You have to fill in the space where you don’t have any UVs (efficient space usage, efficient space usage, efficient space usage! - I can’t stress that enough.) You are using roughly 60% of your texture box right now. This means that only 60% of the pixels are actually doing something. Simple to correct! Scale all the parts up (you don’t need that much nothing-like border space surrounding everything.) I think you already got in the jist of placing things correctly (I especially like how you put the arms, one this way, one flipped - the other way, so that they mesh better with less distortion.) Good job on that. I think when you scale all the things up and move the head and the body just a little towards everything else you will find that you have very little extra space
  . That’s a good thing. That means you won’t have to stretch the corner UV-points out to the borders as much. Now, again, don’t get scared when I say “stretch them out to the borders.” Just watch the overall distribution of your verts - so that the areas of your quadrilaterals in the uv box approximately resemble the areas of the corresponding polygons on your model.