ZBrushCentral

HELP! Displacement Problems :(

Hey all,

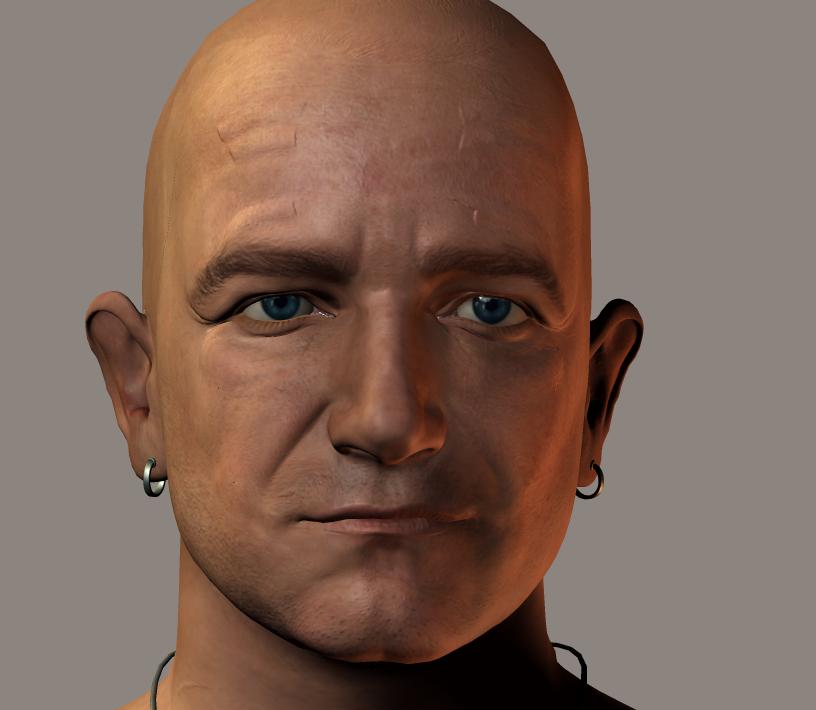
I’ve been trying now several times to create a displacement in ZBrush for my Poser figure for Poser 7. I’ve been following all the necessary steps of: Importing the obj into ZBrush, clicking Store MT, subdividing it a few times, painting on the displacement, clicking “Switch,” going back to Geometry and lowering the level back down to 1 I use the “Standard” brush at different settings. As far as I can tell, the lines look okay, and it moves around the mesh with no problem. But when I go to save it as a displacement, and it pops up in Alpha, it cuts off things abbruptly and some of what I painted doesn’t even show up. Does anyone know what could cause this? It’s VERY frustrating, especially when I’m so closer to getting the character how I want it. Attached is a picture of what happens with the displacement. I’ve turned the displacement settings up higher so the problems can be visible. It’s especially noticeable around the forehead.

Thanks :slight_smile:

–R.

Attachments

WeirdZBrushDisplacementProblem.jpg

For one thing, you need to press Switch after returning to level 1. Not while you’re still at the highest level.

And what technique are you using to create the displacement map? Are you using the Tool>Displacement menu and then using Displacement Exporter? Are you using Multi Displacement 3? Are you just using the Tool>Displacement menu without DE? What are your settings?

What rendering engine are you using? Have you made sure to disable any texture filtering like texture antialiasing or mip-mapping? What do your UV’s look like?

Heya, Aurick!

Thanks for your reply!

I’m pretty sure I did this step. Here’s what I do. I import the object (the head) through PoserScaler plugin. I then click “Store MT” then subdivide a few times (usually 3 times or something.) Then I paint on where I want the wrinkles, etc. to be. using various sizes of the standard brush, and zadd or zsub enabled with them (dependong on what effect I want.) After that I click I go back to level one, and click switch. Then go to the displacement window at the right under tool, edit the DPRes and Mid settings, then go to Alpha, click “Flip V” and then export it on the Alpha menu too (by way of the normal exporter.)

And what technique are you using to create the displacement map? Are you using the Tool>Displacement menu and then using Displacement Exporter? Are you using Multi Displacement 3? Are you just using the Tool>Displacement menu without DE? What are your settings?
I’m using the standard brushes, and then once I’m done, I go to the “Displacement” menu under tool, set DPRes to 4000, Mid to 0, then click “Create Displace map” and then go over to “Alpha,” and after I’ve remembered to click “Flip V,” I export it through the Alpha menu.

What rendering engine are you using? Have you made sure to disable any texture filtering like texture antialiasing or mip-mapping? What do your UV’s look like?
To Render, I’m using Poser 7… However if I open up the displacement map itself in an image editor, some of the displacement looks like it abruptly stops (the brush strokes) and some stuff I’ve painted is not there at all. So I assume that ZBrush isn’t applying some of my work for some reason. Which is probably my fault somehow hehe. Maybe a setting somewhere? I’m not sure how to show you the UVs (I’m more experienced with morphing than displacement.)

So what do you think the problem might be? Thanks in advance!

–R.