ZBrushCentral

Head thread

Every person’s gotta make a head thread, and I guess it’s just my turn. I used to be westward, a lurker, but I am tired of that name, and of not posting, so here we go.

I’m going to use this thread to personally catalogue the faces I sculpt. I have a standard face mesh made with modo, exported and now in zbrush. My plan is to better my sculpting skills by taking pictures of famous people and trying to sculpt them. I would like serious critique, and also suggestions of more famous people for the future.

My first head sculpt is of Christopher Walken. He’s got a crazy face, so any help picking out the details that I miss would be great. Currently, I haven’t started detailing, just getting his face shape down. Anyway, this is what I have so far.

[cw_01.jpg]cw_02.jpg

Thanks :smiley:

nice start man i’d like to see how this develops . If you need any help or advice don’t hesitate to ask . Good luck :+1:

Been working on this when I get a chance. It’s been a long time since I sculpted, and warming up again is taking a while. Thanks for the reply Spider.

Here’s the current wip. I haven’t done any skin detailing or anything like that yet, just trying to get the form. I’m half-convinced that Christopher Walken’s face cannot truly be conveyed in a mere three dimensions, but I’m not going to throw in the towel :slight_smile:

cw_306_01.jpg

Attachments

cw_306_02.jpg

nice!! haha i said to myself “christopher walken” before i even read your caption, great likeness!

Yep! A good likeness at first glance!

very good this is improving and so is the likeness to Walken . I look forward to seeing it near completion . Don’t give up man , you can do it :+1:

Even before I read any of the posts I thought. ‘Christopher Walken’!!

awesome work kzerza :+1:

id be interested to see how you tackle the finer details !!

great stuf!!!

ive tried numerous times to do a likeness of someone, but to no avail.

this is inspiring me to do a famous person myself.

Thanks for the kind replies everyone :slight_smile: Hopefully tomorrow I’ll have time to work on this some more. Honestly Steve-T, I’m halfway curious how I’m going to tackle the finer details as well. The knowledge is there, I’m just a touch worried about the execution.

How do you get the eyes in?
please help

Nice job! I have a quastion: when I made a head out of a sphere primitive, once I extruded a neck and did a few divisions, I got a lot of extra polygons, extruded in random directions below the chin. As if the “core weld” was not working properly. Well, that’s 3dsmax term, but essentially, the faces that were neighboring the southernmost vertex (the “core”), were all messed up and extruded randomly. Is there a tool for getting rid of these ugly extra faces and make the region smooth. See attached pic. Hope you can help.

I see what you’re talking about. Sometimes that seems to happen, and, although I’m not quite certain as to why, here are some things that I do to get rid of it when it does crop up.

  1. make sure all of the vertices are merged on the initial mesh. Since this was made from a sphere primitive, it probably is merged, and that’s not the reason.

  2. go to the lowest division level (shift-d until smoothing is gone) and see if it exists. Then move up one division level, and see if it starts messing up. If it does, smooth it out/move the verts to the correct location (w while in edit mode). Then go up one more level, and repeat until you’re at the top level. The higher you go, the easier it’ll be to just smooth away the problem.

  3. If it occurs on a certain side of the mesh (say one nostril decides to get screwy), you can use the smart resym tool to fix the problem. This probably won’t work on your current problem, because it occurs at the single point where it all comes together. Mask the half you want mirrored over, then select the direction for mirroring, and press butan.

You probably shouldn’t make a head like that, because I would be willing to bet the smoothing at the zenith point is what’s messing you up. It smooths it, but because there are so many points merging onto one location, it doesn’t know what to do with it, and makes that nastiness. If it didn’t mess up like that, you would probably have a ‘nipple’ there instead, a single point where you can’t smooth it out, because right on that place, there’s so many polies that smoothing becomes next to impossible. If none of these help, or I’m making a gross overassumption about the mesh, lemme know. Also, can ya show a picture of the original mesh without smoothing and with wireframe? That might provide solutions as well.

Check your PMs Manslaughter :slight_smile:

i read it, but im a huge noob and honestly i didn’t really understand :frowning:
i am not advanced enough. Care to give me noob instructions?

Alright, I’ll see what I can do :slight_smile:

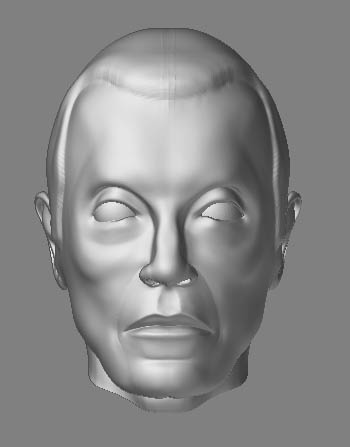
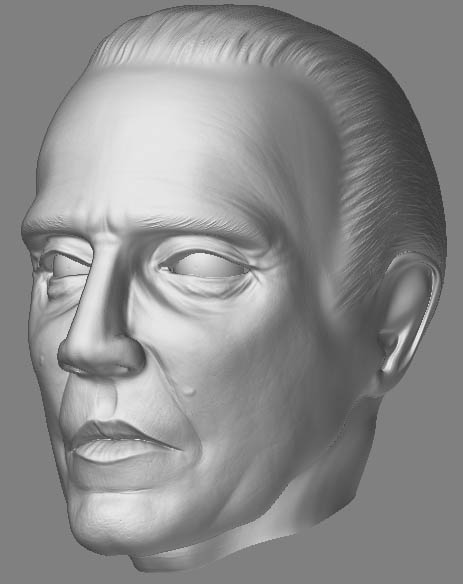
When I made my model in a seperate program (modo in this case), I had 3 objects. The face without the eyeballs in it, and both eyeballs. When I was about to import this into zbrush, I combined the objects, and created a single .obj for all three. When I put the meshes into zbrush, these remain seperated technically, but they are part of the same tool. Next I turned on frame (up towards the top of the zbrush pane), and went to tools -> polygroups -> auto groups. This made my polygroups for me. Now if I hold down shift + ctrl and click on the 3 seperate meshes, it’ll show each one individually. Clear this by holding ctrl + shift and clicking outside of the mesh.

Now, to position the eyes where I want them, I masked the eyes by shift + clicking an eyeball, then holding ctrl and clicking outside the mesh. This should mask off the whole eyeball. After masking it, clear out the polygroups (doing what is listed above to show all 3 meshes). Only one eyeball should be masked now. Holding ctrl, click outside the mesh. This will reverse the mask. ALRIGHT! Now everything else except the eyeball is masked off. This really goes faster when you’re used to working with polygroups and masks together.

OKAY :slight_smile: Now go into your tool menu. Under “Deformation” you’ll find Offset, and a slider. there’s three letters next to this. x y and z. These are the offset direction, the direction the mesh will move. Click one of them on, and move the slider. Only the masked portion will move. Use the x y and z buttons, combined with the mask, to position the eyeball where you want it. Then do all of this to the other eye. It really does go faster when you get it down, don’t worry if this all seems confusing.

And thus ends my disertation on positioning elements inside of a ztool. Whew.

There’s probably a much simpler way of doing this. Probably just adding the eyes after the mesh is done… Anyway, after writing all of this down, I’ll gladly take easier ways for eyeballs to be accomplished.

Thanks for the ideas kzerza, I ended up exporting the tool to 3dsmax where I cut out the whole “knot” and patched it up, I wasn’t able to fix it in zbrush. What toolbar is this smart resym tool located on?

Smart Resym is under tools -> deformation. It might only be there when you import a mesh from an alternate program, or use a tool that’s been converted to a polymesh3d, because I’ve noticed it disappears when you just use the sphere3d tool. It would be underneath mirror, if it’s there.

CHRISTOPHER WALKEN UPDATE
I’ve detailed Christopher Walken’s face, but haven’t taken screenshots. I’ll probably upload some tonight. I haven’t done his hair yet, and I’m kinda curious what the best method for that would be. Anyone have any suggestions? I was thinking a mask of his cranium area, with the offset tool to get things started, and then alphas and more masks to create depth and strands. Am I approaching this correctly, or is there an easier or better way?

But i only have z brush? and when i create eyeballs they make my model quit out of edit mode and become a whole different model. I really am clueless.

Alright, after a few weeks of time outside of work, I’ve put the lid on Christopher Walken. There are details that I’m not completely happy with, but nothing is ever finished. I’ll definitely be revising him more in the future, but for now, I’m going to move along to the next challenge. Christopher Walken taught me a lot, and I’m really happy I got him to the point I reached. I think it looked more like him without hair, but mainly because I didn’t want to do that wacky “OMGHAIR” that he’s always sporting. Maybe when I have been posting a year, I’ll make a new version, with crazy hair… I’m going to be starting the next bust soon, but I’d still like crit on CW over here, so that I can work that into the next work, or make revisions to this bust later on.

cw_final_front.jpg

Attachments

cw_final_3_4.jpg

cw_detail_1.jpg

cw_detail_2.jpg

Looks pretty good overall. The ears would need some more details as there is a flat spot there and because of the angle in the second pic, there seems to be space between his right eyeball and eyelid. Good job otherwise!

Very good likeness…leaps and bounds over the first post. I recognized him (in post 1) from the front view, but not the 3/4. With each successive update, the likeness has gotten truer (more true?). I’d say you can safely move on to celebrity #2. Any clue who it will be yet, or do we get to guess next time?