ZBrushCentral

HD and Maya

Hi I have three issues going on right now and not sure if its me or just a few bugs with Zbrush 4.0. First off I created a Trex model around 85 million total points in Zbrush Its not too crazy for my first model but I was having issues and here they are with explinations.

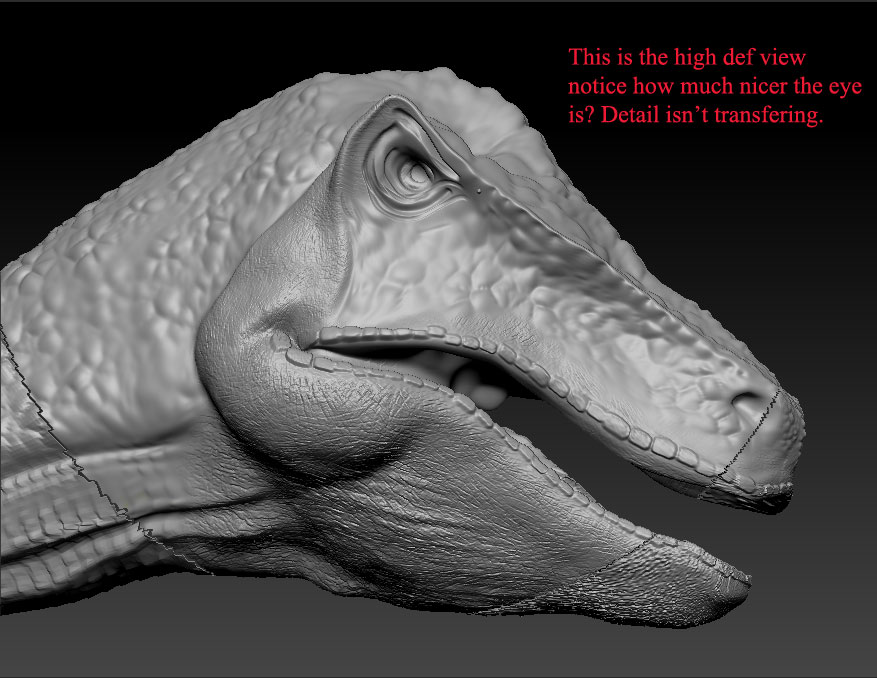
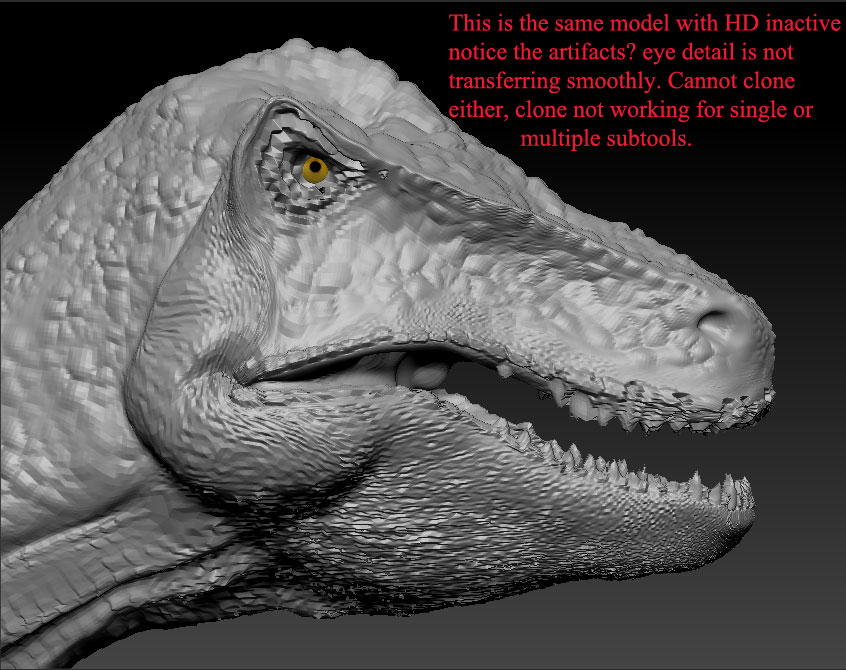
  1. 6 regular and 3 HD subD’s. I built up the form of this Rex from the lower Sub’s on up. Anyhow I did allot of final sculpting work on the 3 level HD such as the eyes and some other details. I finished her then just wanted to cut some maps with the standard MatCap Gray as the material and color. Used UV master to map out the UV’s into a nice group and then mapped out the Texture, Displacement and Normal maps. I tried both ways to drop my normal resolution to 1 when creating the disp map and to keep it (subD) at 3 and leaving my HD set to 3 both times but whats happening is I’m not getting a nice smooth highly detailed HD surface such as I do while actually under “A” and in HD mode. Photo included of non HD results. Question how do I get those nice details to bake into the model so I don’t see the jagged stuff? Around the mouth is also distorting.

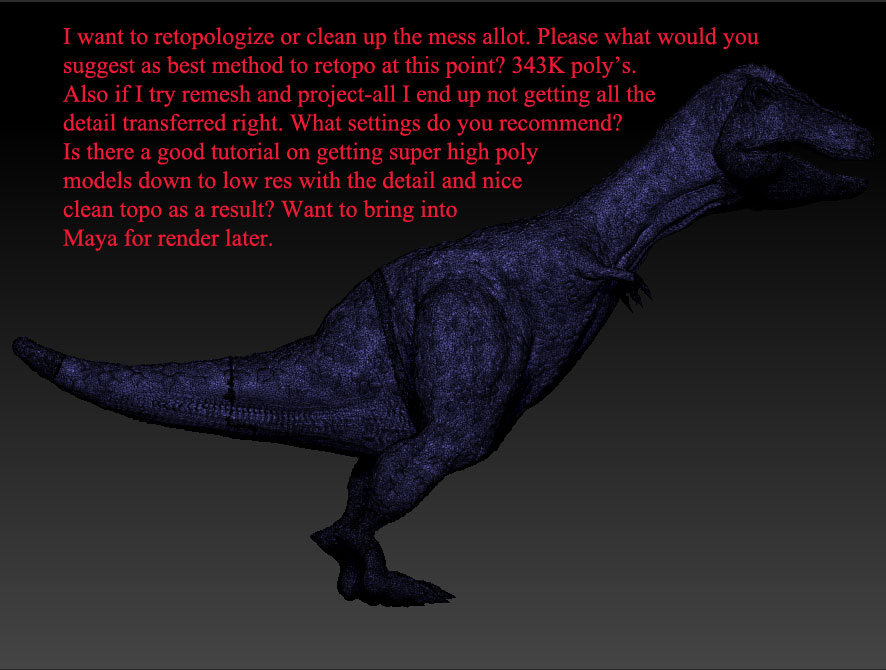
  2. Ok I wanted to bring the Trex into Maya as well. The GOZ works and I seem to have my maps but when I use the GOZ All option I only get the main mesh the eyes tongue and teeth do not transfer to Maya.

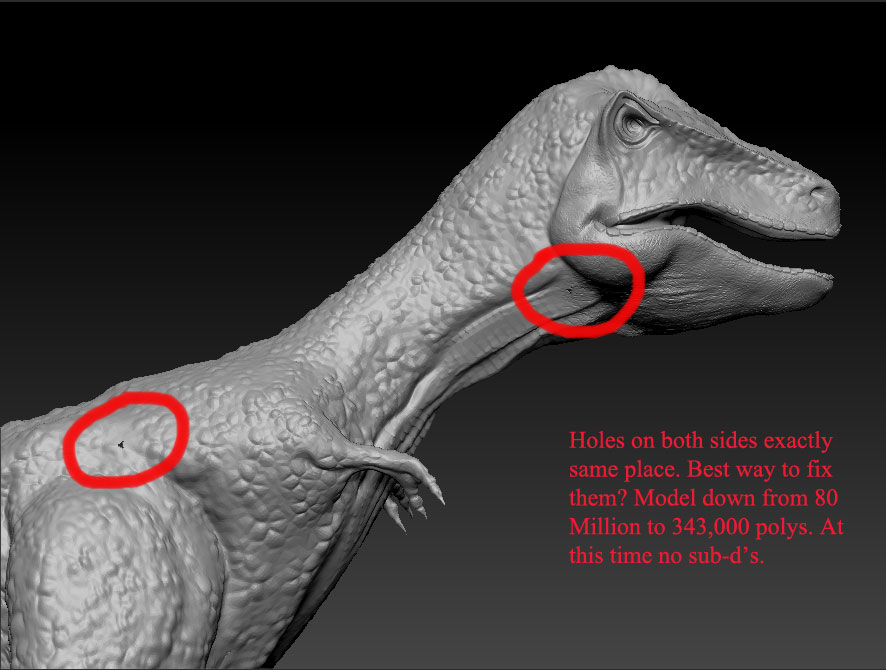
  3. I wanted to decimate the model as well. First I to clone the model and its subtools using clone all subtools and it will not clone anything because when I goto decimation master it says HD subD’s are still on the main model. So I can’t bring the model down in SubD to decimate.

rex_character_strip-.jpg

Hello ange321q

I have a couple of questions and things for you to try.

  1. To try and bake in all that HD poly information into a normal geo mesh will not be completely be possible. This is why HD is in ZBrush. So you can take something that is millions of polygons and generate maps to take into another application like Maya.

question: when you generated the HD map. What was your map size? You had normal Geo subdiv at 1 and the HD at 3, correct? In order to capture the HD info into a map you need to make sure that the map is large enough. For example if you have a mesh that is 16 Million polygons then you will need to have at least a 4K map.

The math works this way. Multiple two map size numbers to equal the total number of pixels that will be in the map. so 4096x4096 = 16,777,216. So rule of thumb if your mesh is around this poly number then 4K is big enough. However, I am sure you went much higher. :slight_smile:

  1. What version of Maya are you using? Have you tried to go to the Preferences>GoZ menu and click on Force Reinstall?

  2. Can you just click on the Clone button itself to clone all the subtools individually?

This video may help you as well.

http://www.pixologic.com/docs/index.php/Nick_Zuccarello

Let me know your findings.

Paul

Here’s a HD snapshot of the eye area and the detail I’m loosing. I am going to check out your suggestions right now Paul I really appreciate the help. CharacterStrip_rex_hd.jpg

Attachments

rex_character_strip-.jpg

Hi Paul sorry for the multiple posts, just trying to get you the information you need most accurately. Overall the total points of the mesh are 79.144 million. Acrtive points is at 4.850 Million.

In answer to the clone question I cannot clone the parts individually as well because I was going to try to decimate the model which fails.

The version of Maya I use is 2010. I have tried to force a GOZ reload on a number of occasions. I have another model of a raptor which I was able to get to pop into Maya with the eye subtools intact but the raptor is only around 16 million points total.

I will write back once of tried recalculating the map size I had used 4096x4096 for the rex which is way to small by your estimates lol.

Again thanx for you help Paul its appreciated.

I’m working through Nick Zuccarello’s tutorials on handling the large poly counts and they are great. Will let you know if this one can be handled like I said the Rex is at 80 million. At this point I was able to segregate every piece of the rex into seperate poly groups and then clone those seperate pieces. I will take a shot or two after the next crucial phase when I try and decimate the entire model and then remesh the results.

Well I just finished the top part of the head and it worked! The HD detail is being retained and I am able to decimate the poly groups seperately. Let you know how I do on the remesh all and welding the seems then I’ll try another decimate on the overall model.

I’ll update. Again thanx to Paul and Nick.

Hello

Great to hear you are getting some ground on this. Thank you for putting the pictures up. This helps out a lot. This is exactly how HD works. When you come out of HD mode it will never look the same. The eye should lose quality.

Let me try to explain. When you put HD levels on a model ZBrush is doing in memory. Think of it subdividing in the background. Pretty much no computer will run a single model that is 100 million polys or more smoothly. So this is where HD mode comes into play. (when you click A). When you do that ZBrush is just focusing on a section of the 100 million poly model which is why it looks clean. If you look at your poly count that little section is probably something like 7-8 million polys.

When you come out of HD mode ZBrush has to put the model back to regular geometry so that your computer can display the whole model at a level that is smooth to work.

Does that help?

Paul

Yes I figured as much but I guess what I wasn’t sure of was how to preserve that beautiful HD resolution and somehow map it onto a lower subD model. Since using Nicks tutorial I was able to chop up the Rex into a dozen or so Subtools and then with those pieces in HD mode I was able to save out HD polygroups which I then decimated I got the Rex down from 80 million points to 8 million points so far.

From what I get of Nick’s tutorial I should be able to stich the model back together then run one final decimation over the whole mesh and bring it down even more and still preserve that HD detail. I have my fingers crossed lol.

Would running a remesh on the mesh clean up the topology as well?

Thanx for all the help I’m trying to get them small enough to render some turntables out with wireframe fading in and out to use on my demo disk.

Well I actually managed to get the Rex down from 80 million to 343K poly’s that’s a humungous drop and I retained the detail of the H-D sculpt only now I have a Rex with a pretty ugly topology and some issues on how to fix that? My remesh and project-all are not giving me the desired detail transfer is there a tutorial on using them correctly and their settings? I’ve played with it for hours to no avail.

Also after using Nick’s method to bring down the poly’s and with it the H-D detail I still ended up with a few holes in the mesh indicated on the snapshot. Any tips on fixing those?

rex_holes.jpg

Attachments

rex_topo.jpg

Hey Ange321q

Can you put up your Project All settings for me so I can see them. As for the holes. When you get the projection to work that will not matter. The only thing that would of stopped that is to make sure you creased the edges which I am sure you did because you followed Nick’s tutorial.

No matter if we get the projection settings where they need to be then all will be well.

Can you also put up some images of what you are getting after the projection?

This should help for retopo as well

http://www.pixologic.com/docs/index.php/Topology_and_Reflow_Lab

you can also just add a Zsphere as a subtool then select the ZSphere and click on the Edit Topology button. Then rebuild.

Paul

Paul

Hi Paul,

Yes I did follow Nick’s tutorial and creased all parts of the rex but ran into issues with UVMaster it crashes Zbrush everytime. First time I used it on the newly decimated but uniform mesh of the Trex I got a message from UVMaster to split the mesh into subtools as it was to big at 136,000 polys. I went ahead and cut up the Rex with masks and then poly grouped those up. Opening UVMaster i just checked symetry and did it both with and without polygroups checked and used both Unwrap and the unwrap all buttons in two attempts both times Zbrush crashed.

So this is a break down of where my model is at this point

A) 80 million poly Rex created
B) Used Nick’s tutorial to first cut Rex into seperate subtools then cloned and creased them and then finally decimated the seperate subtools to arrive at a total for Rex of 139,386 poly’s the mess was unified as one subtool at this point.
C) Tried to UVMaster the unified Rex but keep recieving message that 139,386 polys is too much and I should split model into seperate subtools and try.
D) Using Mask split model again into fairly even subtools and using UVMaster on those seperate piece with setting Symmetry on and both with and without polygroups on and both times it crashed Zbrush but will not UV map the REX.

Note the settings for my remesh all were X on, res 1024, polish 5, polygroup off.

Note the settings for my Project All Dist 1, Mean 25, PA Blur 5, Project all.

Hey

When doing UVs the goal is to have your polycount as low as possible. Your polycount is too high as a base. What you can do is rebuild your T-Rex so the lowest level is a lot lower to UV. Here is a link about retopologizing in ZBrush,

http://www.pixologic.com/docs/index.php/Topology_and_Reflow_Lab

Your Remesh res is really high. Most likely you may be able to get away with a lower setting there and then just subdivide up. This will also make your lowest level have less polygons. This is more ideal.

I would also adjust the Dist slider in Project All. This is the slider you will want to play with most.

Talk to you later.

Paul