Gorgeous work Jason !
Definitely would be interested in some Keyshot tricks ! Has your skin shader anything specific and how much do you rely on compositing ? Would be curious to see your beauty render. Thanks !
Gorgeous work Jason !
Definitely would be interested in some Keyshot tricks ! Has your skin shader anything specific and how much do you rely on compositing ? Would be curious to see your beauty render. Thanks !
Nice job, it was great watching you work on this piece hair came out great btw.
Haha i love the mushu head on the tattoo. Lovely touch.
@Ouran Thanks! I’ll share some keyshot stuff later this week when I can. I can tell you I use the translucent shader and mess with settings. I also composite a AO and fake a lens blur as well as other Post tweaks/corrections
@danpants Thanks man
@Calvinluu01 Ha thanks, good eye 
Man this is awesome. Breakdown is so so helpful . This should be in the top raw.
awesome,
Great work and great execution
I DEEPLY appreciate your break downs on how you do things. You put time in to help us all. Thanks! Great model!!
Love character in her face and eyes! She is badass!
Really nice character, and nice presentation. Thanks for sharing your break down.
Dan
hey Jay! awesome tutorial as always! why did you stop posting videos on youtube? those were awesome! do you still stream on twitch too?
great fan of your work btw 
@Scote - thanks dude
@brianlife - Thanks man, I’m glad you like her and the model. No problemo
@tez - Thanks dude, appreciate it. Hope you find the breakdowns helpful
@guztaluz - Hey man you a sub!? that’s awesome. I’ve just been busy with work and life but I’m planning to get back at it pretty soon. I’m moving at the end of the month then I’ll have more time every day to make more art and tutorials 
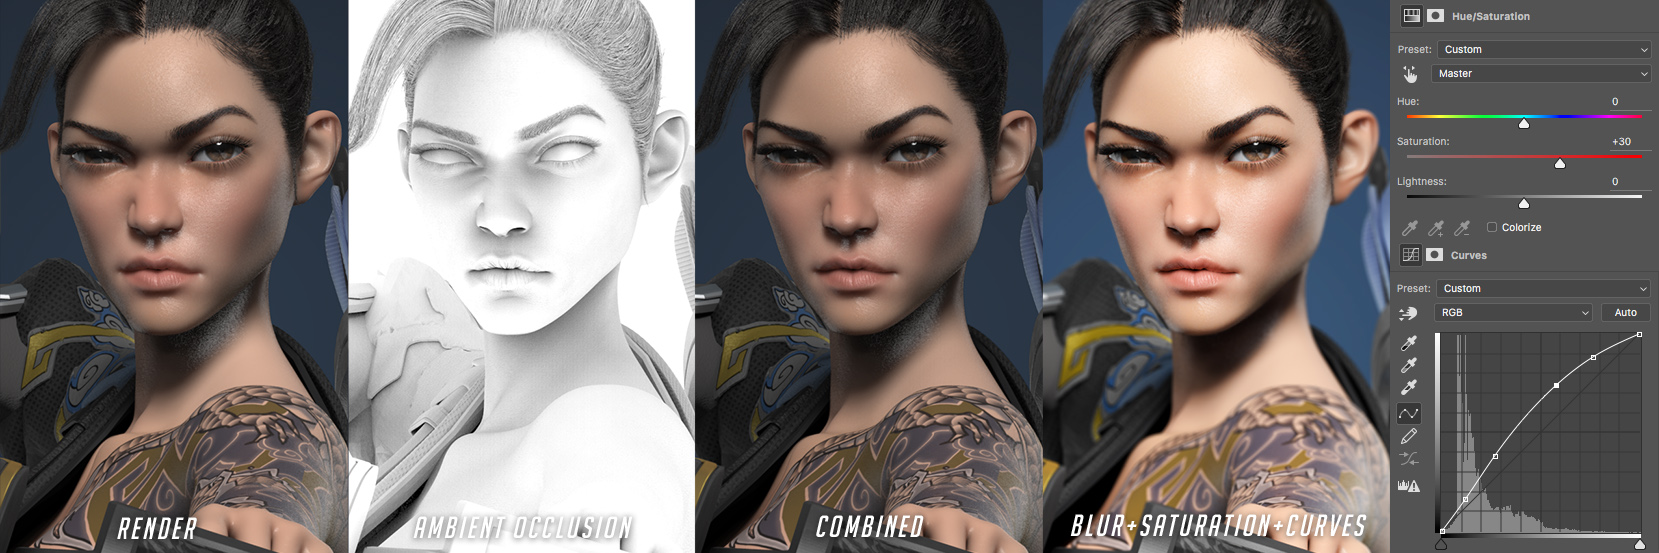
Some notes and tips on my rendering and composting
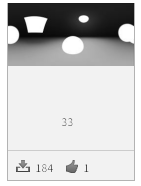
First thing is the environment, which is what is lighting the scene. You can have subtools in zbrush that are used as lights in keyshot by applying a light material on them once bridged but my image is all lit with an environment probe. I downloaded the one I used for free using keyshot cloud. The lighting is super important, I don’t need to say that but a program like keyshot really illustrates how lighting can elevate the subject or make it quickly look wack. I always play with the “rotation” of the environment to see what the look is at any position so I can find one that looks best. I like this environment a lot, especially for that studio look I was going for. Pictured here and named 33
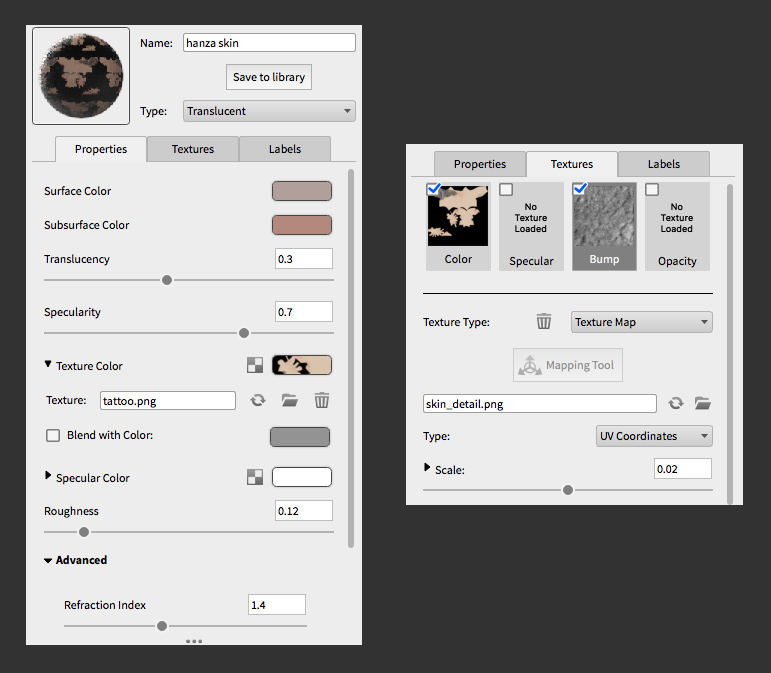
The material used for the skin in keyshot is called “translucent”
Some tips I can give are that I’ve dropped the translucency number any time I’ve used it and tiling a micro-bump map helps. I don’t know if the shader just defaults with a high translucency number or its based on size and sculpts that originate in Zbrush are super tiny so you need to drop it. Be careful not to make your model look too translucent. My character is a bit high because of the stylized Overwatch/Pixar look I was going for. Tiling a micro-bump map for the skin helps break up the highlights further, I’ve sculpted some pores but having an overall noise helps the skin look.
Here are my settings:
Another tip for keyshot materials is with metal. I found the metal materials were too clean and shiny, especially within a clean studio lighting environment without much color and noise to break it up. After doing some research in what others did I decided to make my own. I started with a “anisotropic” material. This allows me to tweak roughness X - Y and specularity independently. Metal material has one value. Since I felt the metal was too clean this shader is about noise and breaking up that reflections and highlights. I made some maps including a bump so the light had all kinds of imperfections to trip up on.
Here’s the metal material settings:
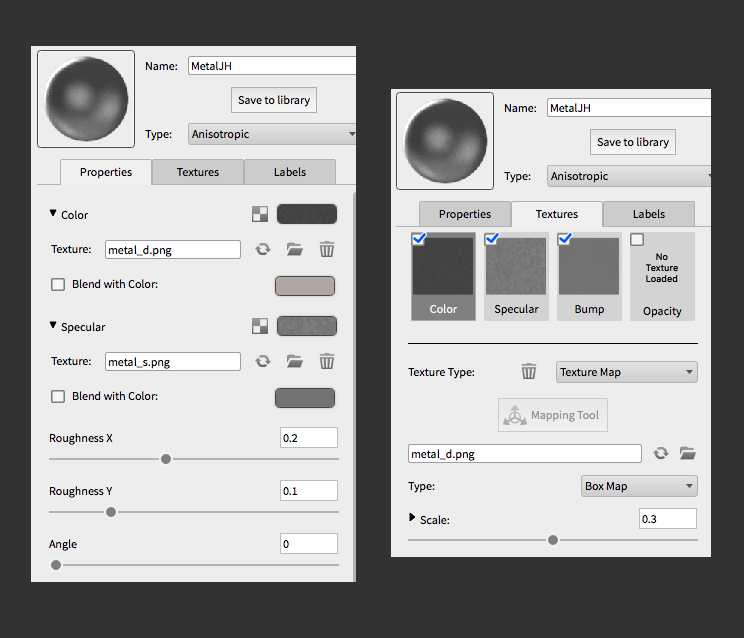
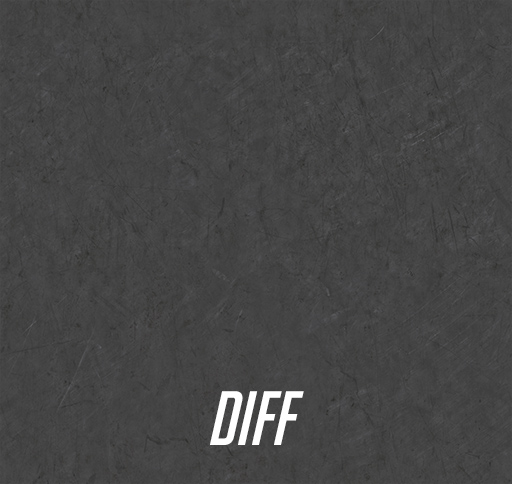
Here are the maps I made to plug into the material

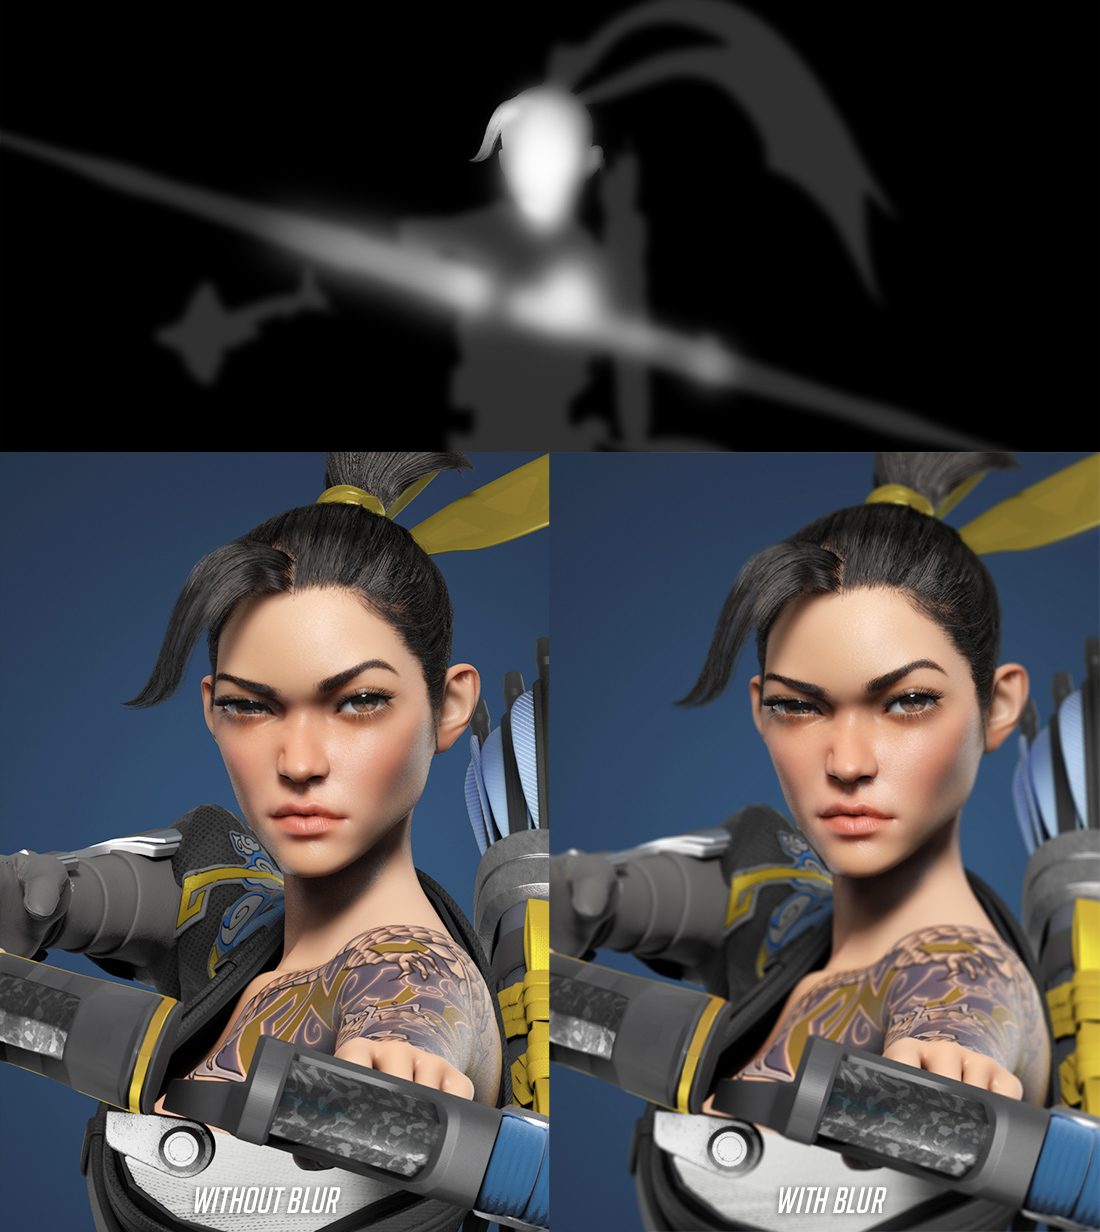
Then there is the rendering and compositing. I rendered two passes, a beauty with everything and an ambient occlusion pass. The ambient occlusion is achieved by assigning a matte white material to everything and selecting the pure white environment. I rendered these passes quite large so I could be free with the different compositions and final format of my images. It took about 5-10 minutes to render the beauty, the occlusion is much quicker. The translucent shader takes longer. In photoshop I added the finishing touches like a focal blur, vignette, and overall value and color improvements.
Here are the passes and post process
 *special note, I found that disabling ground shadows in keyshot messed up all the shadows, so leave ground shadows on at all times.

The focal blur is achieved by using the lens blur filter in photoshop with a custom mask. In other renderers and the full version of keyshot you can render out a Zdepth but I haven’t found a good way to do that in bridge. So the Zdepth is faked. Heres the Zdepth I made and the blur which I think makes things looks a lot nicer and more physical. Portraits are so improved by focal blur that the new iPhone is gonna fake it too 
That’s all I got for now. Let me know if you have any more questions. Happy zbrushing
peace
Really nice work man…
Amazing ! i try to remake the rope tutotrial but i’m a beginner and i don’t understand how do the second step, someone can help me ? ^^ Thank you
zbrush制作
Awesome. Amazing breakdown too  small_orange_diamondsmall_orange_diamond
Wow nice , This is just what I need, I started using Keyshot for my renders, thanks 
Thanks for the helpful breakdowns and videos you share @jhill - Love your last pic Keep it up!
Jaime
thank you man, will do
Really nice explanation, I learned some stuff from it.