ZBrushCentral

Grey Alien W.I.P.

Thanks kzerza, yeah still not 100% happy with the nose to jaw flesh bridge (will find out the anatomical name). im going to further twaek the mesh today and start some texturing.

I added the skin folds by using the inflate brush, then smoothing out where the folds meet other larger muscles. it is a very laboured process, and it taking too long. I would prefer a method that is more spontanoues and less laboured.

deco brush and smooth, wash rinse and repeat.

Cool, thanks warpy - yeah re-discovered the deco brush, made some alpha brushes and working into it now

result so far - still a way to go.

greyv4.jpg

Another question about the deco brush - how do I prevent it from jumping. I seem to get the stroke sorted in projection master, but when I release the brush it seems to ā€˜jump’ giving a different result.

Yeah, the deco brush is the way to go.

What do you mean by ā€œjump?ā€ Do you mean that when you pick up your mesh, it changes the detail you added? That’s a mesh resolution vs. distance from mesh issue, if that’s the problem. Just back out from the mesh and try again. Or is the brush actually jerking over to the side when you stop drawing it? If that’s the case, I have no idea at all.

On the current render, I really like the alphas! I think he’d look really cool with some highly visible head-veins, to really drive home that gangly, sickly look that type of alien is known for. With some more deco brushing to really drive home those wrinkles, and a vibrant color map, you should have something really nice :smiley:

Yeah with the deco brush its, the latter problem. tbh though Ive sort of gotten used to it. It does mean that you have to be a lot more spontaneus with your mark making though. thanks for your response btw kzerza.

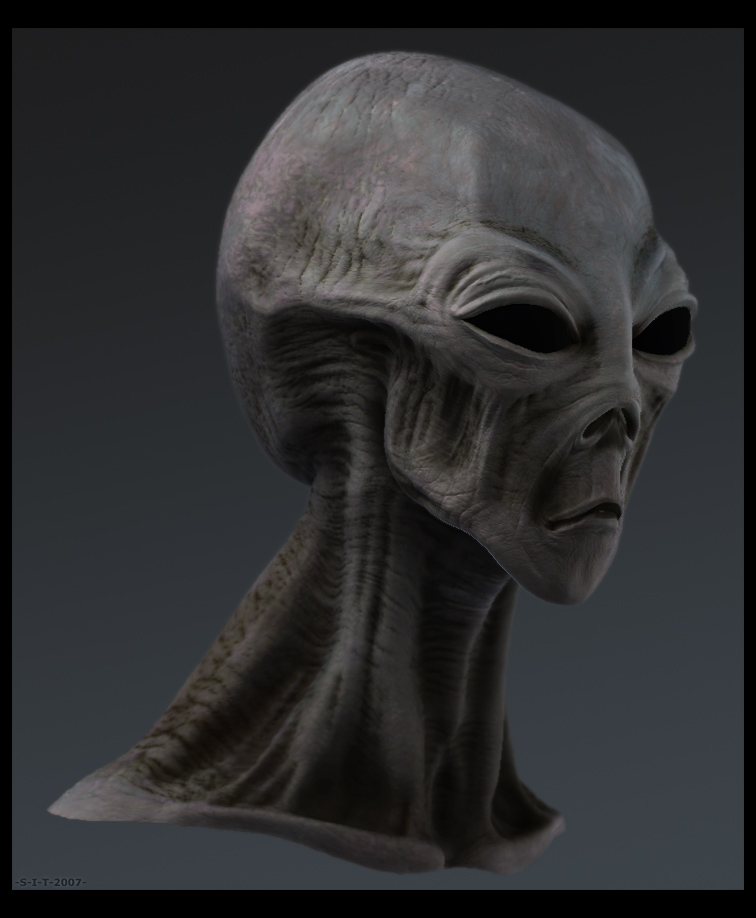
Anyway started the nitty gritty detail. Ive added an ambient occlusion map baked out from maya from one of the high res meshes and used that a a base for the final texture. adding this really helped me with the detailing stage of the image.

Also added a noise texture and using it as a mask inflated details from that over the top.

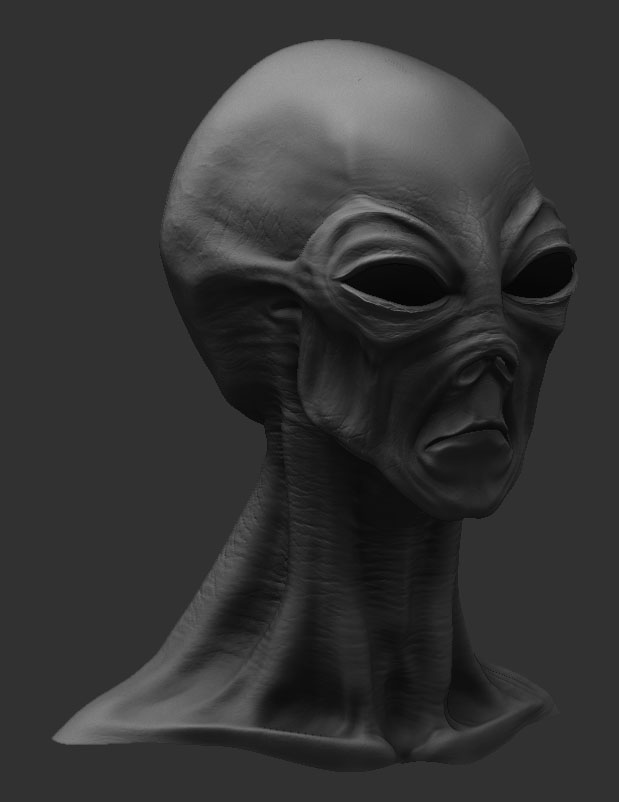
now Im getting a bit closer to the end though I feel that the face needs a bit more tweaking on a lower division layer. not 100% happy with some of the basic forms, I would be worried but this is one of zbrushes greatest strenghs, the way you can bounce backwards and forwards between lo and hi details.

Anyway here is the image.

[attach=51448]greyv5.jpg[/attach]

Attachments

greyv5.jpg

Oh if you interested here are the alphas I used to create the skin details.

alien_skin_cover_wrinkles seemed to be the most effective alpha in the process.

next stop is some colour - this grey wont be grey much longer :smiley:

Great work and great alphas too. Keep up the job

Could you make the eyes shiny please???

Hey, that’s really great :slight_smile: 
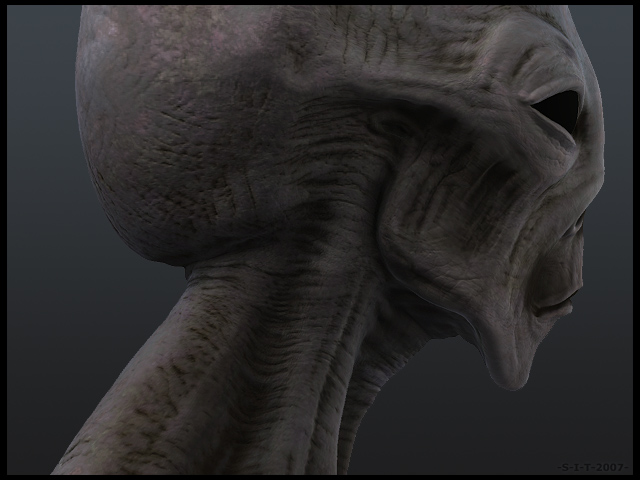
The area above the eye socket came together really nicely, as did the neck. Thanks for the alphas, downloaded and saved

Thanks for the kind words guys, here is the first colour iteration (with shiny eyes).

greyv6_first_colour_w-i-p.jpg

Need to add a lot more subtle hues to the texture for the alien, then I will probably take it over to Maya and set up some proper shading networks with sub-sur-scattering and the like !.

I will be posting up some more alphas as I make them in the near future.

abductee? :smiley:

i’m a big fan of aliens. i like your version. but since it is a ā€˜grey’ alien…i think you should tone down the blue-ish tint.

awesome! The shiny eyes give it a classic alien feel

Yeah, agreed a bit too blueish in tint - playing around with the overall colour atm. need to come up with a texture thats detailed enough in itself, but doesnt clash with the overall geometry detailing.

Thanks for the input skinnybonez.

Actually, getting abducted could be useful, I could get some half decent reference then :lol: :wink: .

Here is the latest - desaturated and added some zmapper cavitymap details. done a bit of post processing aswell. starting to get quite pleased with it :smiley:

greyv7_colour_w-i-p.jpg

:o Forgot the eye shine this time Slayir - will add this maya end with some cubic relection map.

btw ive read a few posts here and there about rendering normal maps in mental ray for maya. have tried it a few times but not had any joy. So I was wondering if anyone could point me in the right direction of a decent tutorial explaining how to set up/render normal maps correctly. If this fails I guess I could do some grabs from Maya in high quality mode, but its not the same though

[attach=51565]greyv8_colour_w-i-p.jpg[/attach]

detail closeup + sharpen.

Attachments

greyv8_colour_w-i-p.jpg

Wow, very good work, if i would see this on some top secret government documents, i would think this is a real alien! :lol:

heh, thanks N.T.X, maybe I should do some sort of Project Blue Book fake photo thing as the final piece.

of add some wounds to him and make him and alien autopsy study. :lol:

yeah…this is turning out nice…good work!

that’s a good idea w/ the project blue book!!! :slight_smile:

i’m looking forward to seeing that.

man it’s looking great!! well done!

Lookin forward to the final render…

this is looking good, nice design on the grey. a couple of crits around the eyes and nostrils the edges seem to sharp an could do with smooth and rounding off. The other small crit, is the mouth if your intention is to actually styleise a grey, the the mouths are apparently just a very thin slit, barely noticable. and again the lips could do with smoothing off a bit.

keep up the good work