That looks Awesome, how did you do the background?
Hi Harmonic. Thanks. Its done in photoshop using the plastic wrap for the water and a normal brush for the light rays, also used a gradient to make the water atmosphere. Glad you like it. Thanks for replying. cheers.
The anatomy is nicely done and the texturing looks natural. Looks great so far! You mention you got the shader and light from the forum. you know witch ones they are? Keep up the good work!
Hey Articus thanks for the kind words. The zbrush shader i did get off this site. ummm somewhere. haha. i know the one shader is called skin. i’ll have a look around here to see where i got it. Or maybe i can attach it for you here somehow?
very kewl creature Brett. I have loved watching this thread, but after seeing the above underwater scene I had to break my silence…ultra kewl. The whole progression of shots along the way have been quite impressive to me.
g’ nite,
ps. just zip the file and you can post it on the forum…the material files are very small…
Good work…But I think last image, your model lost definition.
I would work more the background and the enviroment…
In all ways,good work…Specially painting.
(Sorry my english)
Wow. Thanks for the comments guys. I really appreciate it.
Ron Harris: Thank you for your kind words. Ye its been pretty quiet in this thread. thanks for posting.
TheOutsider: Thanks for the crit! Ye the above image is a really rough idea of what i’m hoping to achieve. Sort of a guide I guess. But your right 
Ok i attached the file with the skin and lights. I cant remember where i got it from. Who ever made these thanks a million!
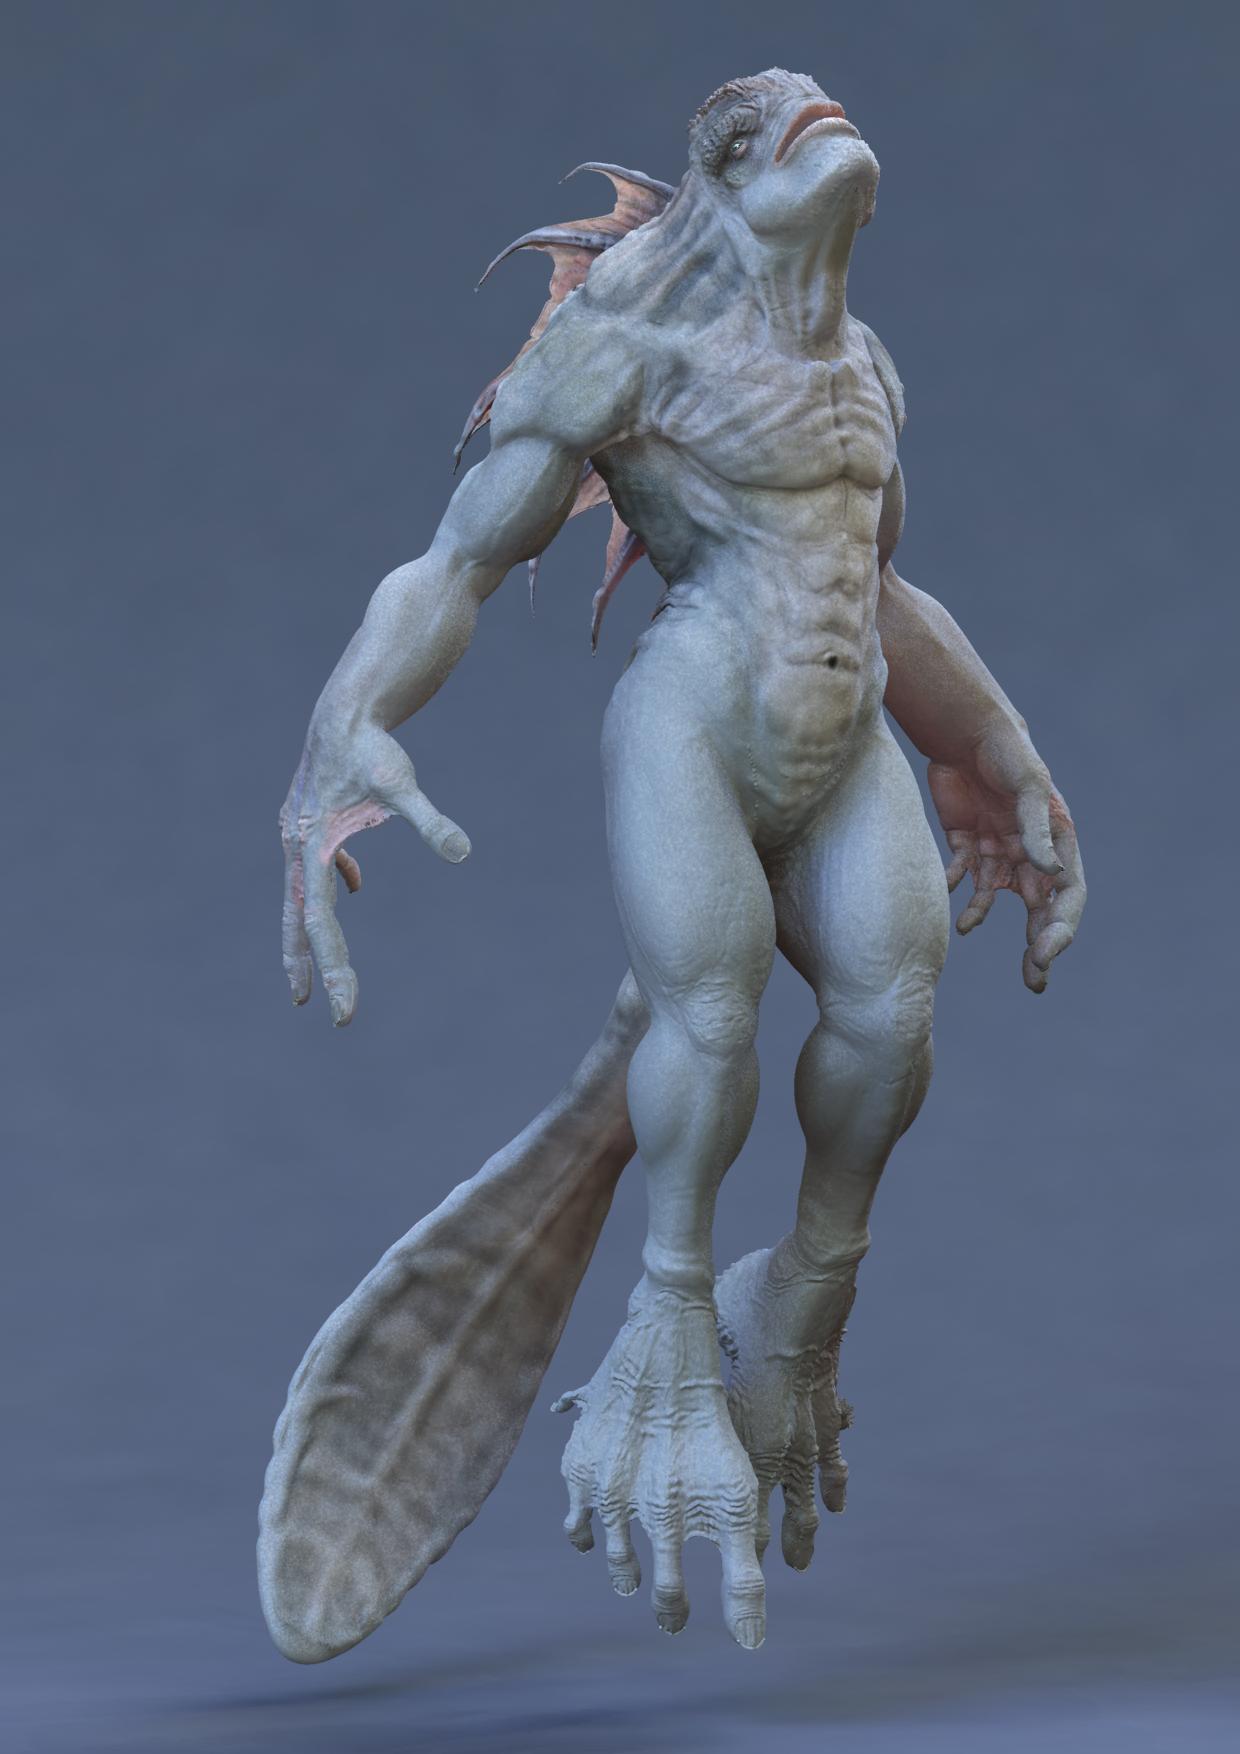
Another update. Mostly did the feet, legs and touched up the back and head displacement. Still some little problems to sort out with the disp map, Its spiking up to high on the feet and head and a few seam areas need sorting. As soon as i’m happy then i’ll move on to colour. I think i’ll stay more neutral colours as i have. As i find whales and sharks have this sort of shading. Hope you guys like it so far. c&c welcome.
Attachments
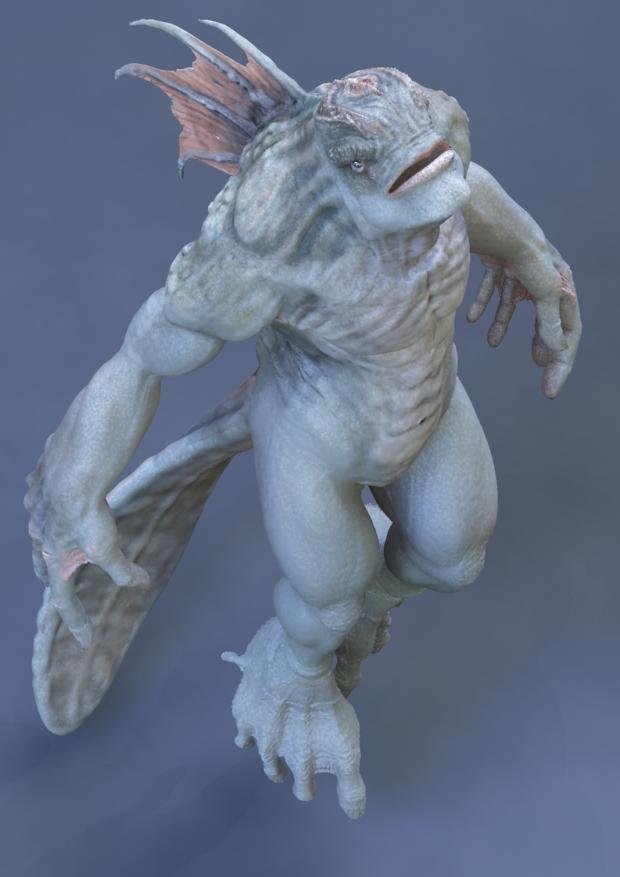

Pretty cool design. The thing I noticed is the lack of sharp areas/detail, wrinkles, creases, etc., resulting in an overly soft plush tou appearence. Of course that could be the goal… 
very nicely done, what did you use to render with? i like the use of sss with the blue skin as well… i havent mastered that technique yet, if you dont mind me asking, what combination of maps did you use for the sss?
love the anatomy, definately gonna use this for reference on my own creatures. You must have a beast of a computer to get down to pore level detail like that!
Hi guys. Thanks for the crits and comments.
Jason Belec… I know what you mean. I’m struggling to get those wrinkles in my renders though. I’ve added fine detail in zbrush but its just a nightmare to render it out. As this is my 1st time extracting a displacement map out of zbrush and rendering it. Its still a learning process for me  . I’ll try get more out of it. I’ll also look at sharpning the bigger wrinkles. Thanks for the crit.
abone114…Thanks man. Its mental ray for maya. HDRI And a few spots. I plugged a colour map in over all colour and epidermal. Tweaked up the subdermal and backscatter. Also i crancked up the sampling to 124. I have a crappy spec map in there as well. for the moment. hope all that helps?
Indecom…Thanks man. I really appreciate that. Nah i got a really crappy pc. Need a new one. mine is 4 years old now. haha.
brettSinclair, before extracting, did you drop back to the lower level and hit ‘Cage’? Sounds like an issue of detail over geometry that doesn’t have enough info to replicate.
Now just to be clear, the new mesh from ‘Cage’ needs to be attached to your mesh in your other app as a morph. You apply the displacement generated for this mesh (Cage) and you should be fine.
The reasoning is that you might be losing the detail because of the geometry. I work alot of with zspheres and some of the stuff I work up is way beyond the original meshes ability to retain. So ‘Cage’ came into play, worked a charm.
This may not be the reason, just one of several.
Did you follow the guide for your app and Zbrush?
What about the displacement thread with the head and sword? Do those work for you as a test and baseline?
Hi Jason Belec. Thanks for the tip. I’ll give the cage a try. Problem is i’ve had to cut my model up. I also have morph targets in zbrush which i use to switch back to my original base before extracting. But i find that i some times have to go to a higher level? Which is wierd. I’ve checked out the head and sword thread. I have tried a test on another model of mine with just the head Which works fine. My problem is that this is a full body so it takes a lot more to render. naturally 
Thanks again for your help. I’ll be sure to check out what you mentioned
very nice work, i like the creature alot.
i completely hear you on the ‘pain in the ass’ for rendering,
i’m trying to render out my beast with horns (another post) in maya, and i’m not having any luck at all, i know how the displacement maps work, i know how to bring them into maya, i’m just not havin any luck with maya co-operating with me, it’s crashing or aborting the render for no reason =\
have you exported a cavity map? they help to add to the visibility of your wrinkles.
WOW!!! Do you read Lovecraft stories? this looks like you pulled it kicking & screaming right off the pages of one of his Cthulhu based stories. Very nice work.
Hi guys. thanks for the comments i really appreciate it. It keeps me motivated.
Runegod…Thanks man. Have you added displacement approxiamtion and subdiv approx? thats the start of things i guess.
Indecom4000…Hey man. I have but havent fiddled with it much at this point. As i’m mostly focussing on the displacement. Thanks for the idea.
Lucifer The Dark…Haha. Thanks… I’m afraid i haven’t read them. I know of the metallica song though. Does that count?
Ok well I decided to fiddle around and thought let me give renderman a bash.
Turns out My displacement is fine. needs some tweaking but all the detail is there. Including pores And the rendertime was under 2min. Ok thats without sss or finalgather type of effect.

Which brings me to the conclusion maybe its my final gather and sss thats killing the detail. Any ideas?
Attachments


SSS can do that. Detail isn’t everything though, you might want to watch how your lighting it too.
I would suggest you start the tried and true approach.
Start with a basic shader on your character.
- 3 point lighting
- test
- add enhancements (lights if you need them)
- if it’s OK, add your shader/texture
- test
- now you can introduce the fancy stuff slowly if it’s necessary
- test and repeat
Too many people use that sss stuff in all it’s variations as a problem solver. I know a lot of people consider it the answer. In general I see about 1% of the users who know how to use it, most just throw away the hardwork.