Hey All,
Been running into some errors which have completely stumped me and so I turn to you. I combined the two errors into one post.
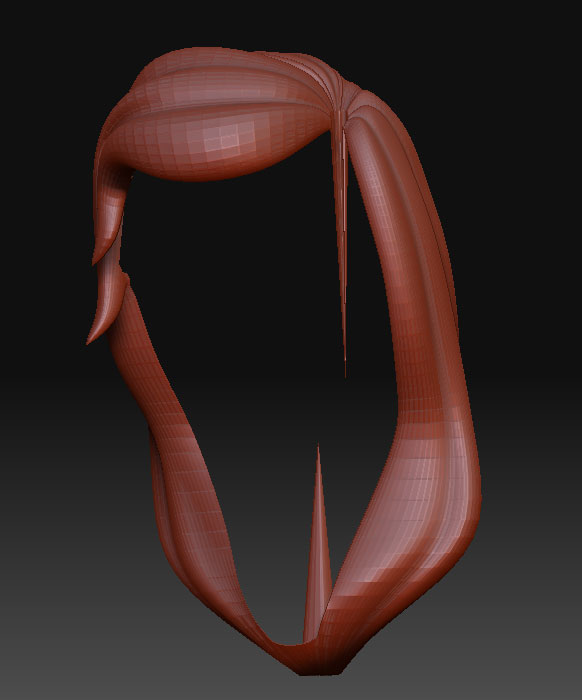
A) I’ve modeled geometry in Maya which I’ve exported out as an obj and imported into zbrush. It looks fine with no errors until I smooth it out and two points on the mess spike out. The two points in question are the center of a so called “star” formation(ie. a bunch of polygonal lines converging at one point creating the image of a star out a the edges) but there are no nonquads in the entire peice of geometry. I’ve triple checked the geometry and there are no errors or leftover bits of history and the uvs are clean also. I’ve evn smoothed a version in maya and exported that. I tried just using the smooth brush in Zbrush but it becomes difficult the higher the divisions and I worry that this might create errors in the displacement map. I’ve attached an image of this error.
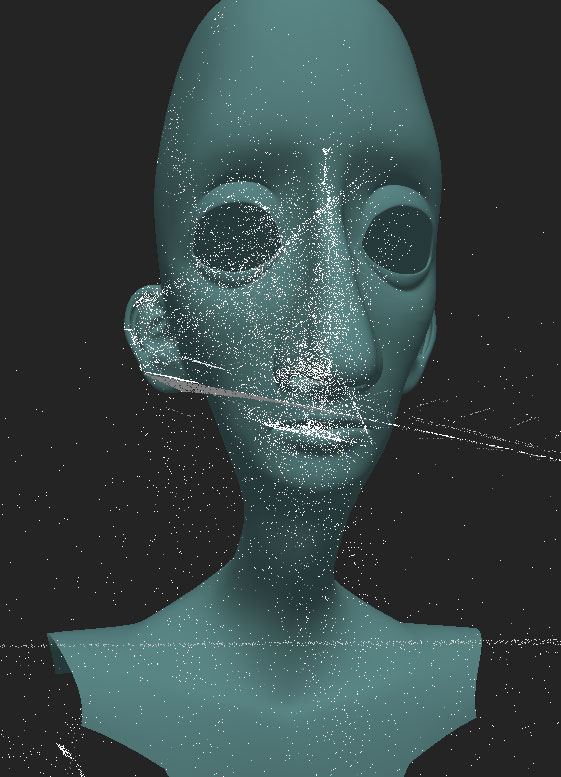
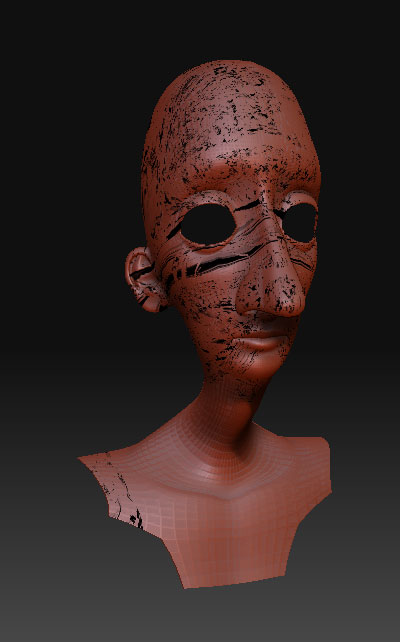
B) I have a character who’s basemesh I created in maya and I have imported into zbrush. Its UV’s have been setup in the uv grouping method(ie giving each section its own UV space for each area I want a different map for). I’ve added the high res detail and poly painted it with no prob, the uv groups come in clean with no errors and at the highest level its seems all the uvs are staying in there own areas according to GetMeshInfo’s listing (in the Multi Displacement 3 plugin which I use to make sure the uv’s stay clean). I now want to create some dirtmaps as zmapper seems a bit easier to control then masking out the cavities. So I hide the geometry I dont want calculated using UV grouping, enter zmapper, and load the settings I want, hit calculate cavity map, and Wam!! The calculation points go crazy, streaking all over the place, calculating on geometry thats hidden and acting as if the geometry has exploded in some unseen way. The results you can see in the attached images are in error.
I’ve tried to be specific as to process in the hopes that someone may pickup up on something I’m doing wrong.
Any help would be greatly appreciated 
Matt
Attachments