Hey guys, i am new here and thought i would share some of the work i have done. It doesnt come close to the work i have seen on here quality wise but hey we are all here to learn and improve.
Attachments
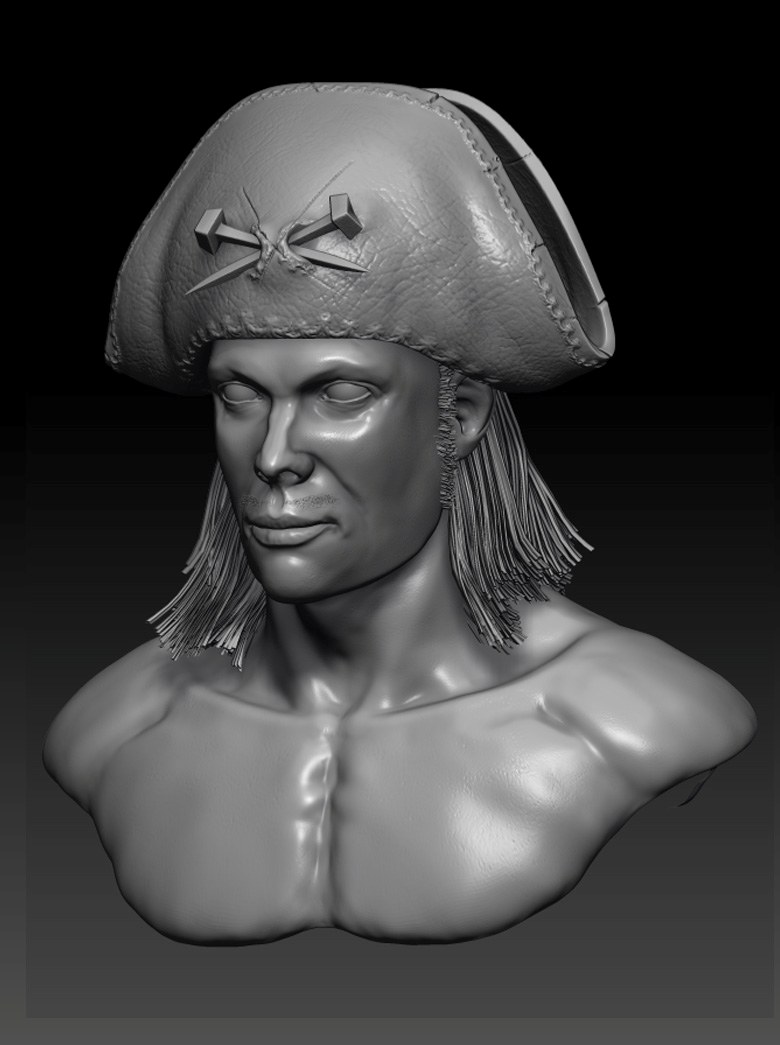
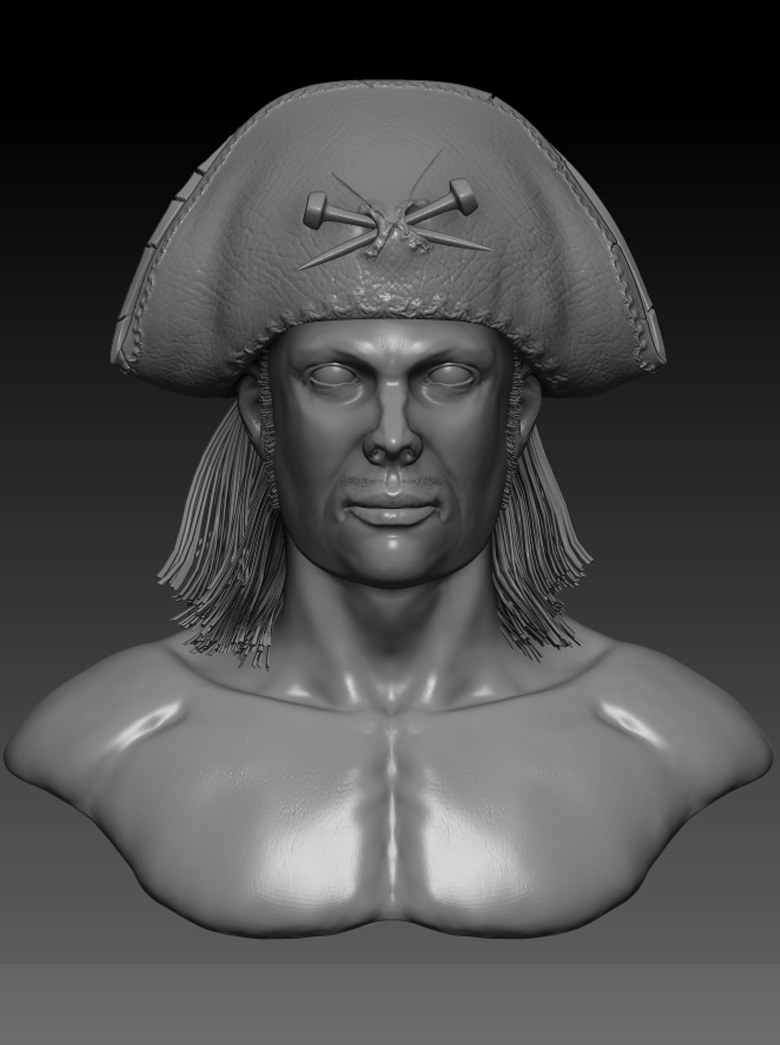
Hey guys, i am new here and thought i would share some of the work i have done. It doesnt come close to the work i have seen on here quality wise but hey we are all here to learn and improve.
ah dang dont think i attached the images correctly mm will give another go soon with new stuff
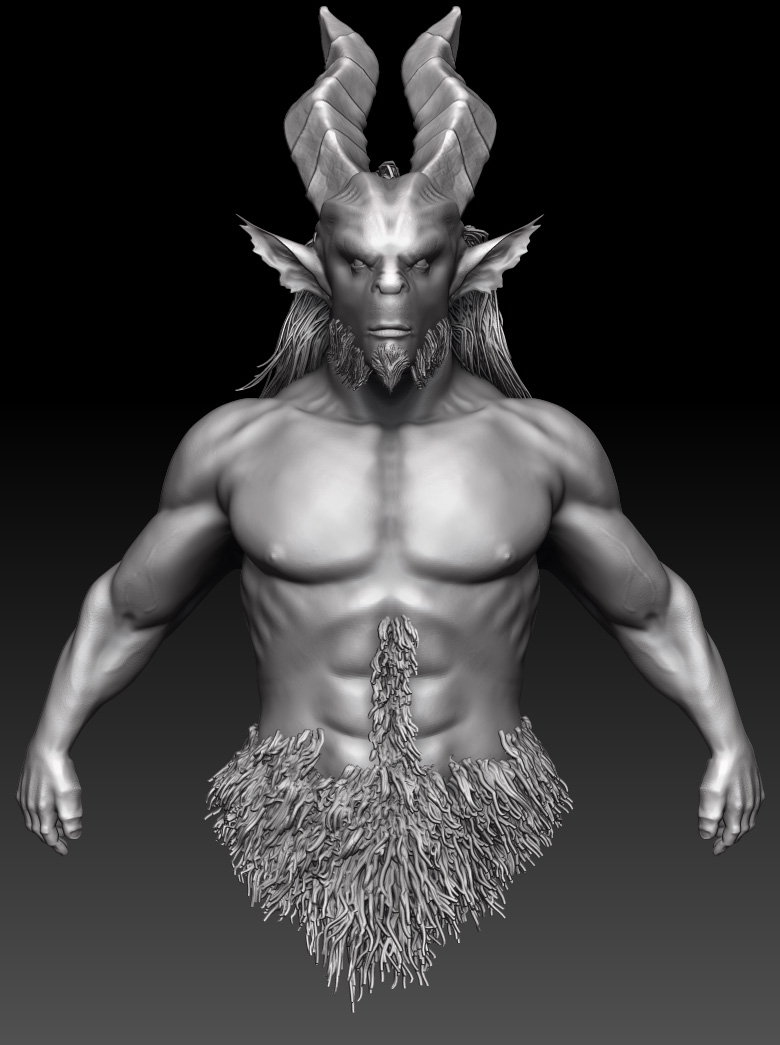
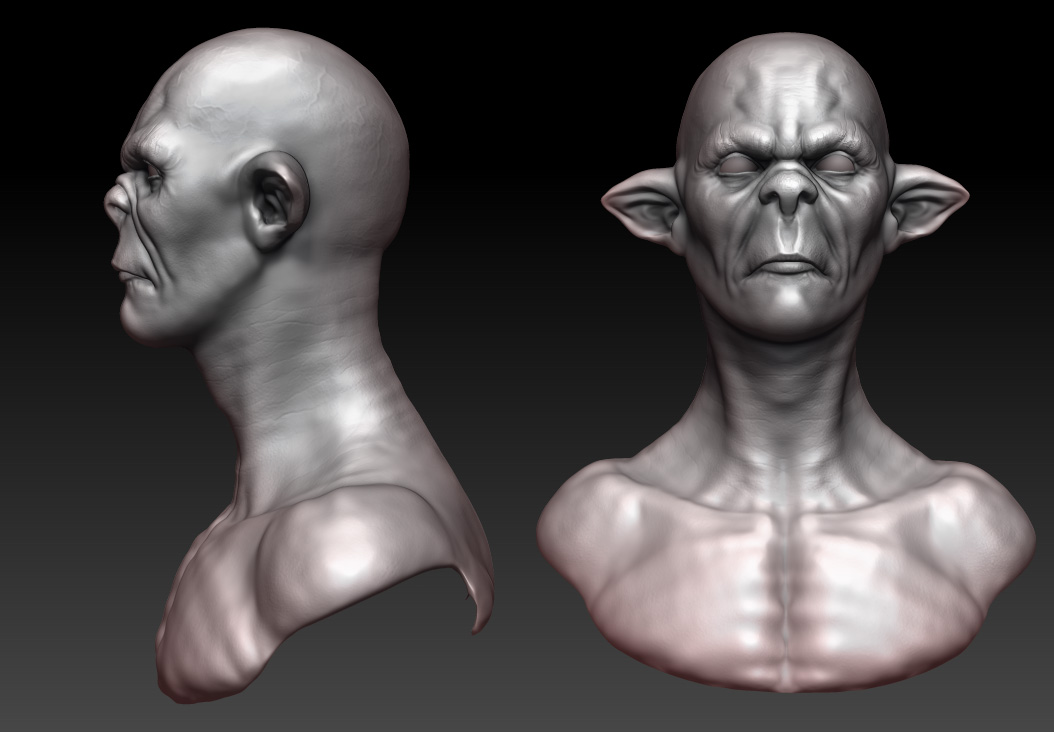
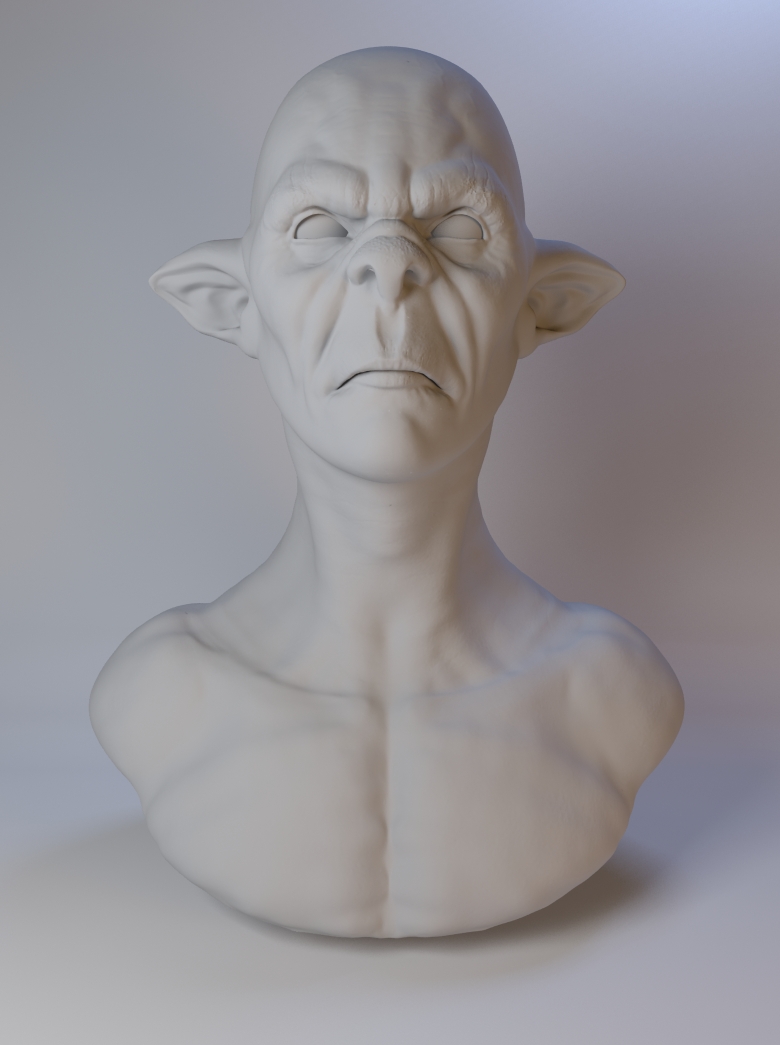
This is a vfx character i am working, well hopefully it will turn out the way i want :D. It is based on a concept art by Marco Nellor which can be found here :CLick here
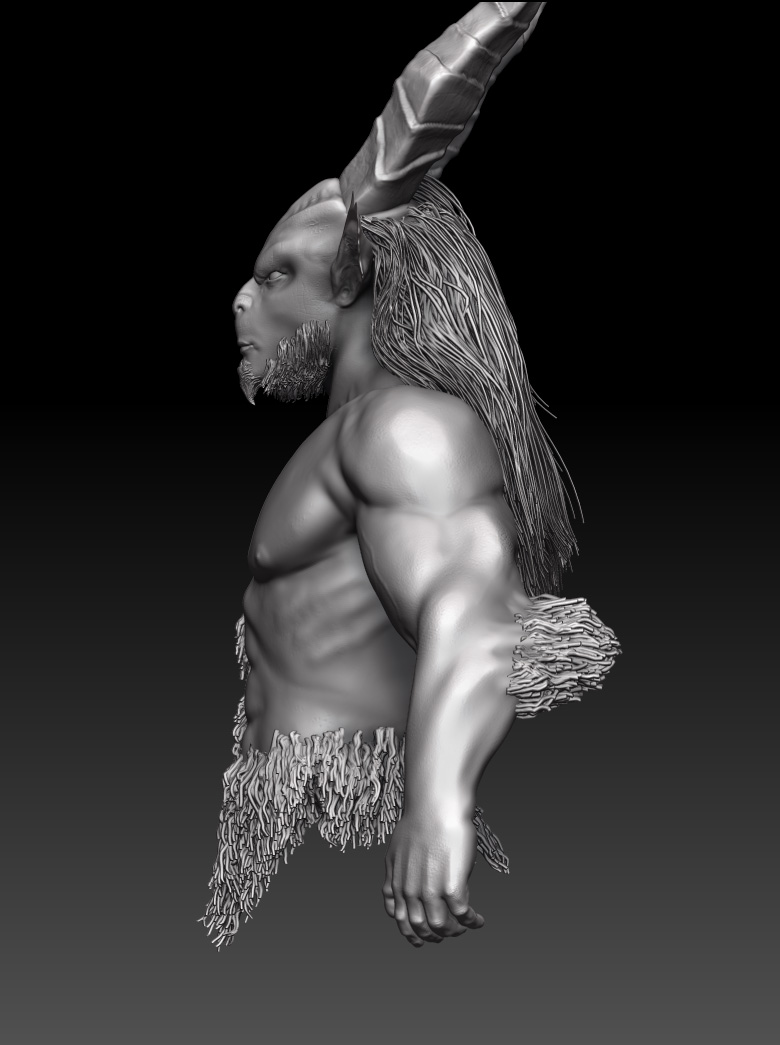
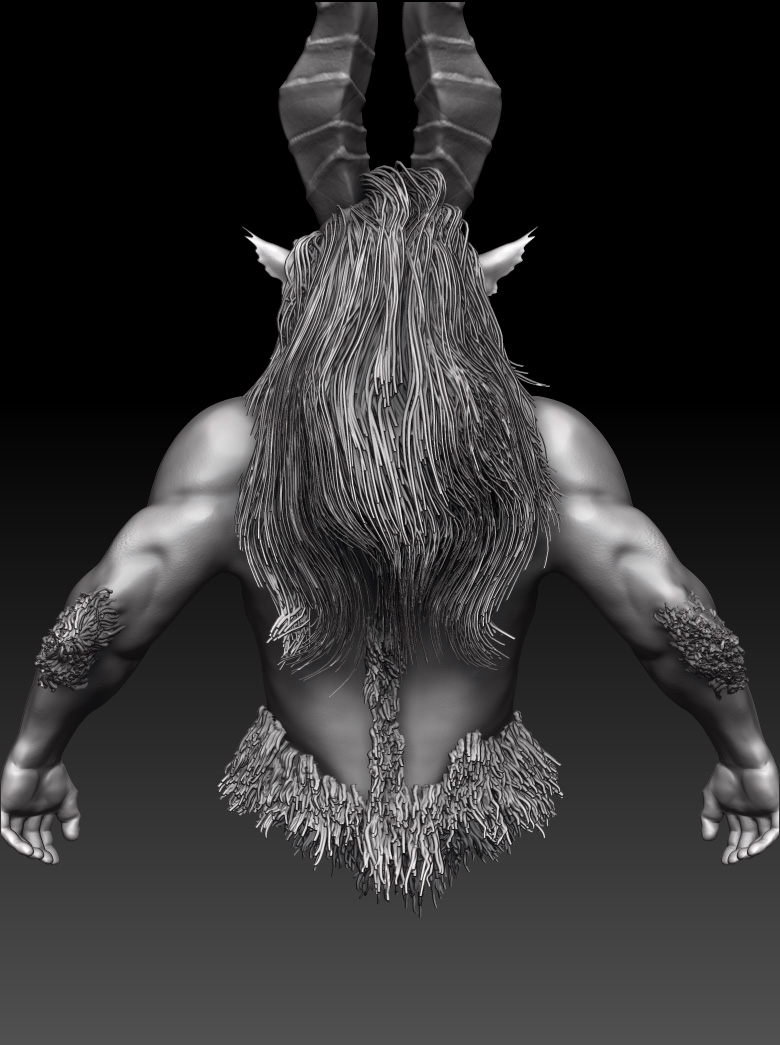
modelling work is done now on to texturing and hair. the images below have been rendered in max
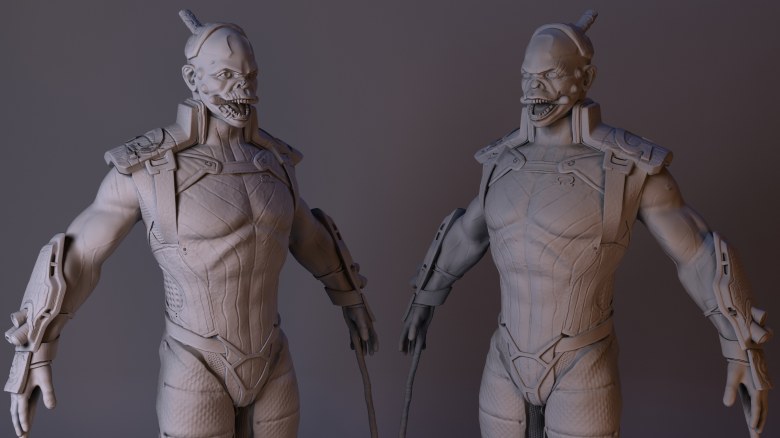
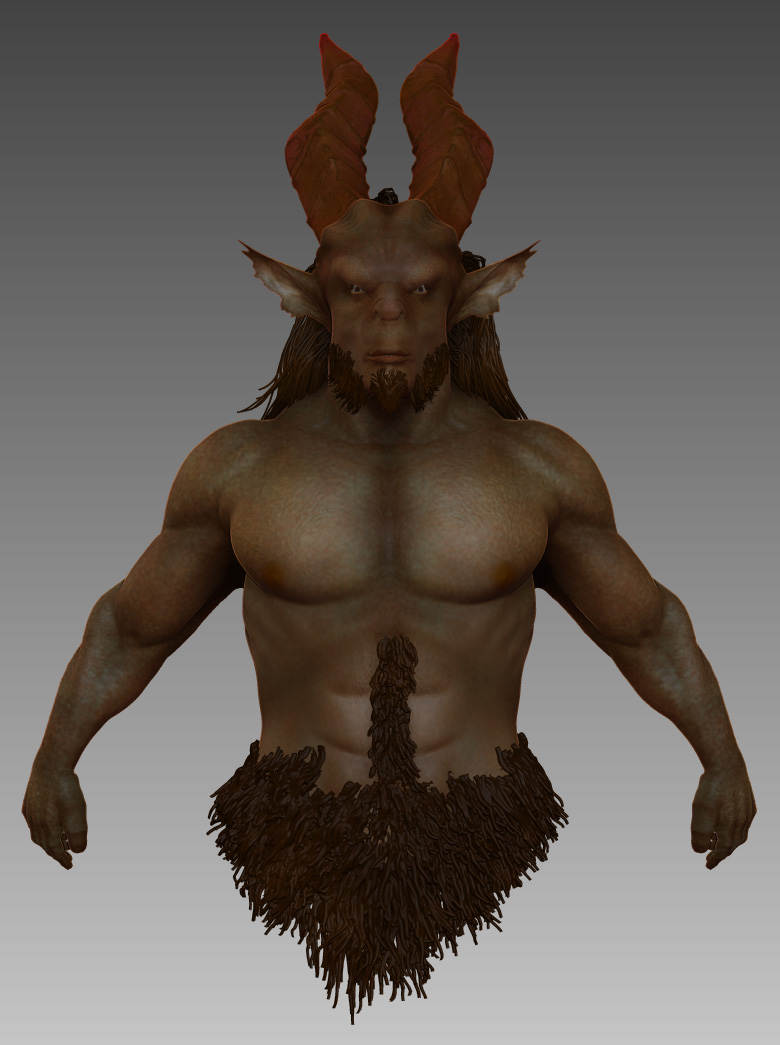
not entirely sure if the workflow for texturing vfx characters is the same as for games but hey ho will try the game method. If you guys know of any other cool tutorials or methods for texturing i would gladly appreciate it. Right will now get on to the texturing hopefully today.
hope u like it, any feedback and such will be welcomed.


Hey, nice solid work. I’m using max too. are you using mr or vray?
i would love to know what is your lighting, rendering set-up for this kind of look if you don’t mind sharing.
Hi GX@W,
thanks for the kinds words. I use mental ray for my lighting mainly because its the only rendrer apart from scanline that i know how to use lol.
my light setup is fairly simple, i use a 3point light setup. i have 3 mr Sky Portal lights setup with blackbody shaders, which can be unlocked in max 2009 or if you are using 2010 i do believe it comes with it, if not erm look for jeffpatton’s light tutorial he shows how to unlock them. place the shader in the advanced parameter of the light as a custom light source. drag and drop it into the material editor and instance it. do this for the other 2 lights. currently the key light is set to 3.5 on the multiplier, the fill light is set to 3.0 and the back light is set to 2.5. the mr Sky Portal lights use kelvin light values so just google kelvin chart and shud come up with an image with all the values. the key light has an intensity of 2.5 which can be set in the material editor, and i normall have it like a very light yellowy color, the other 2 are set to 1.5 intensity. o and each light you can set the sample shadows in the modifier panel, i normally have them on 32 for a final render along with final gather at medium. erm if you send me your email address i can send you the max file just in case what i have type doesnt completely make sense. and im using maz 2010 atm. hope it helps
woah, thank, that’s very helpful explanation. I would try it out soon. Thank again.
Hey all,
Just done a speed sculpt yesterday, callion him aion i think. hope u guys like it.
front 1
thanks
byeez
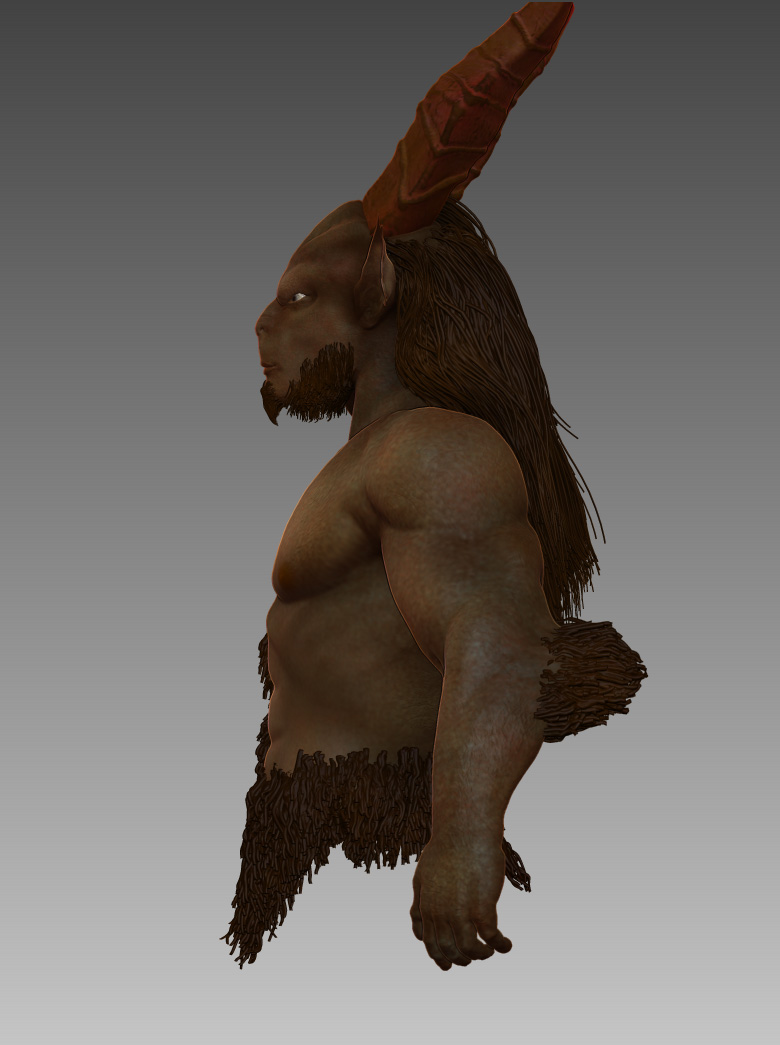
finally got round to painting this beast all done in zbrush, hope you like.

hey guys
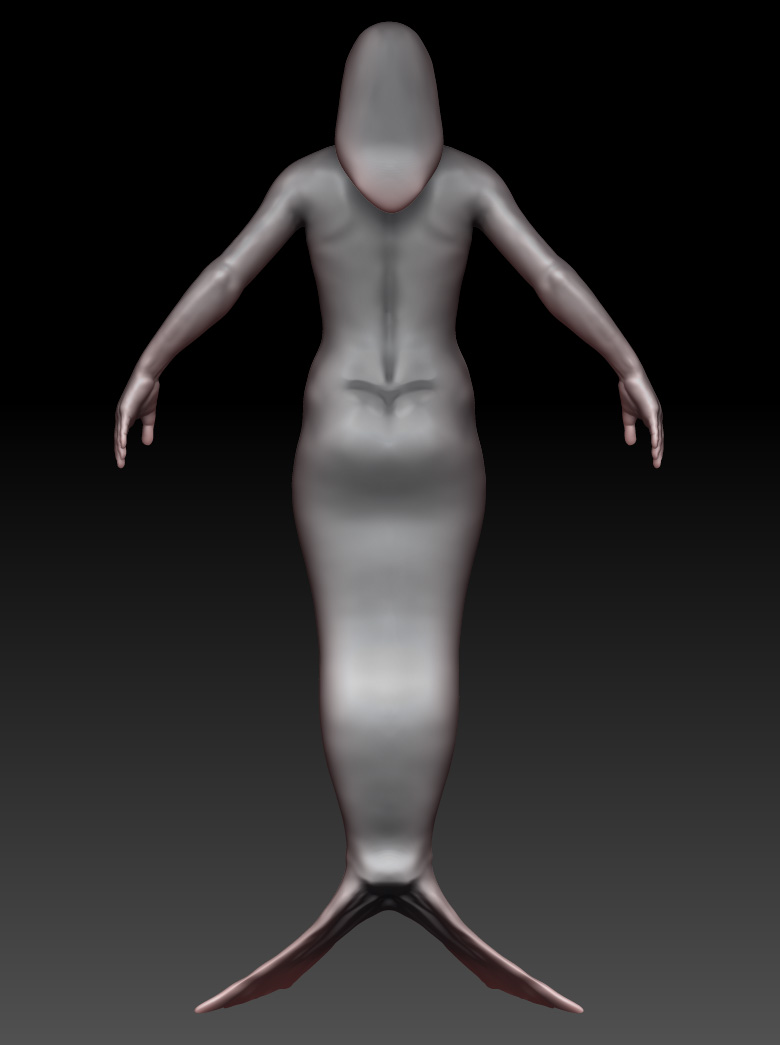
just a wip im working on. the misses loves mermaid so i wanted to sculpt one and try to get a 3d print made as a pressie for vday so all crits and tips i can get will be handy.
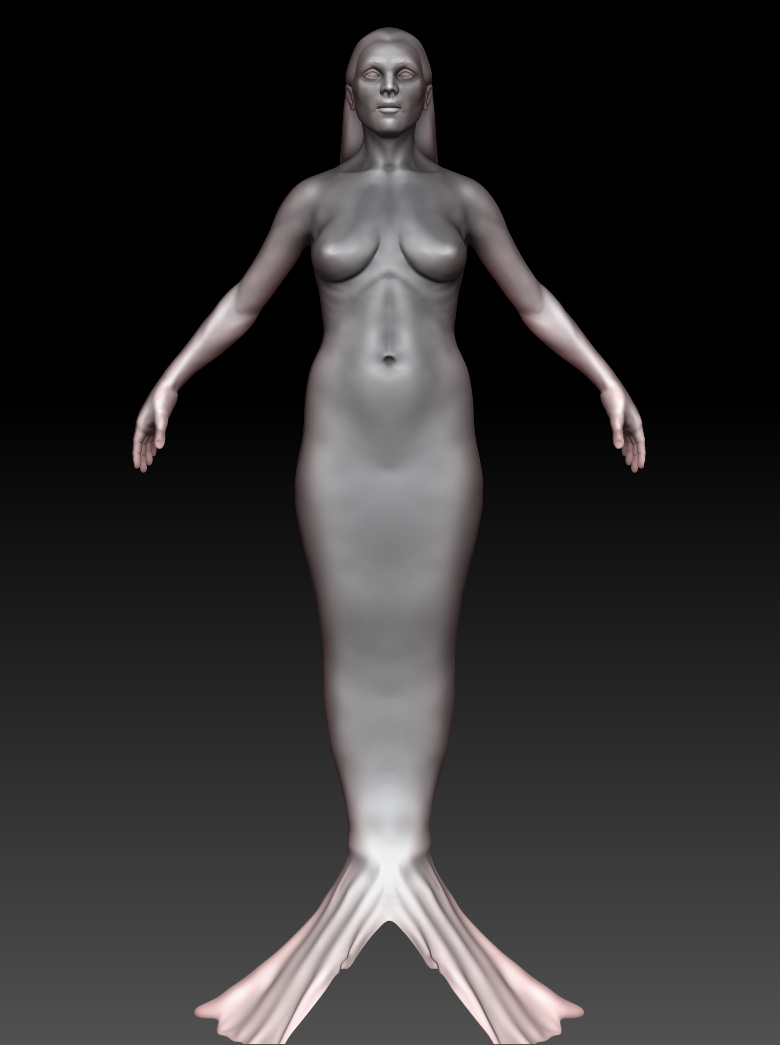
thanks, and hope u like. trying to get the female anatomy right too.
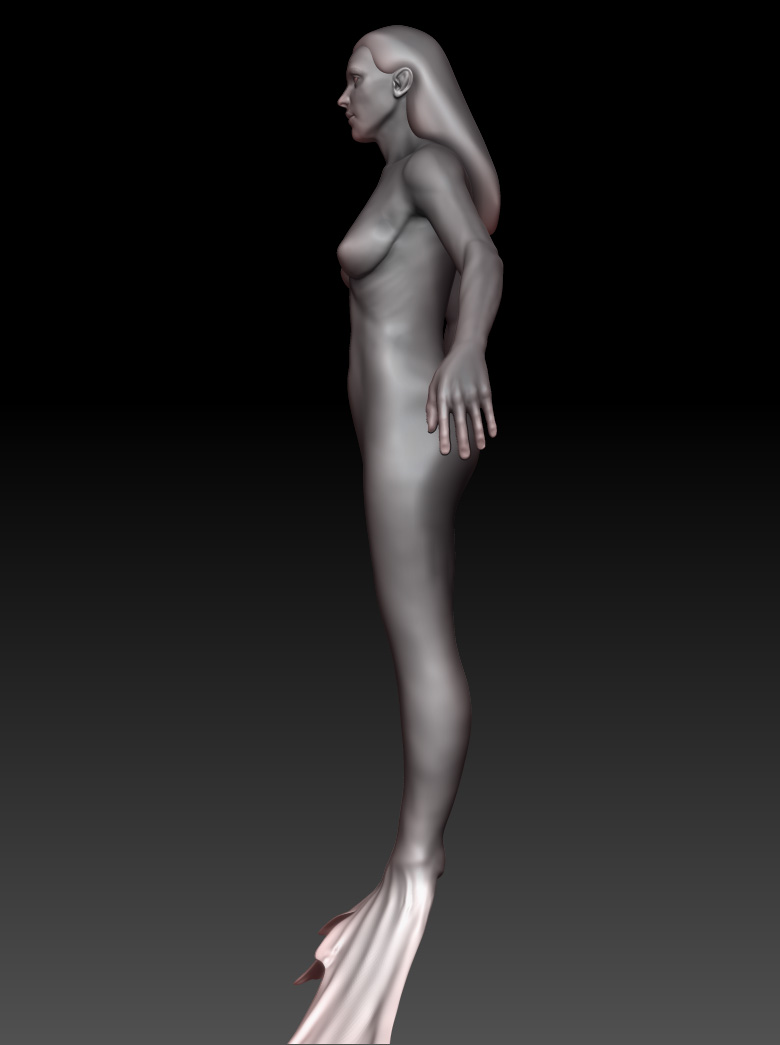
Good start, but i feel like the tail is a little too leg-ish. From the side view it doesn’t look like she has a tail at all. I think its a little too flat.
It looks good! Dont stop though, you can add more detail on the tail like scales, and smoothen out some of those curves and contours on her back.
If you 3D print it, try and model and set it up so it will stand up…sort of like the Oscar trophie.
Clintus: good spot there, i didnt like that area much but just cudnt work out what needed changing, spose i stared at it too long. will make tweaks asap. thnk u 
R9Lemon: I will be getting to the scales later on, atm i just want to work on the forms and stuff to make sure it all looks good before i detail. You know female anatomy to me is a huge pain to sculpt because its all about subtle hints at muscles and stuff which i find it hard to do sometimes, will get on it with smooth brush. And also will probably end up posing her on a rock or something. Do you know of any good printing companies? thnx for advice XD

got some scales in there and some star fish. think i need to subdiv one more and do the scales there luckily i save the scales on a layer.  hope ya likes
Hey man… i like the detail… you didn’t really do anything with the tail though…
hey hey hey
clintus: sorry about that, i had an idiot moment, after posting i realised i made a mistake and went back to the drawing board doing all the tweaks again so will post another update again.
and now for your consideration Zig zig
hope u like chers.
right right, just sorted out an ao and normal map for zigzig. the ao sorta fixed the details being washed out so here he is again. will hopefully get round to painting him today

cherz
Looking good. Can not wait to see it painted up. 
here be ZIGZIG painted up in a comp made in photoshop for your amusement, currently getting a max render sorted. hope ye likes pwease c&c.
[attach=237341]zipzip comp.jpg[/attach]
painting probably needs alot more work, need to learn more texturing and poly painting but yeh this is the best i got atm.

here is a render outa max which i think needs some tweaking

got an issue with normal map around lips are i know,
hope you like please c&c
thats awesome!