Thanks for all the kind words guys!
DarkSharp - My computer specs are not that great. Im actually on a 32bit system. haha. I do have a Quad core and an 8800, but the 32bit is killing me. I was going to upgrade to 64-bit very soon. I think just getting some extra RAM will help with keeping zbrush and 3ds alive with those heftier meshes. If I was having troubles with meshes, I would just break them apart with polygroups to bake them.
I finally finished up this little pillar break down. Now let me pre-phrase this breakdown and say that this might not have been the best way of creating this asset. I learned some valuable lessons on this one. If I were to do this asset again I would make some adjustments. Figure 1-C was the biggest problem. Im sure some of you can see the problem just looking at that image, but I will explain it further below and how I would remedy it.
Changed the format a bit too for this tutorial. Im trying to work out the clearest and most concise way to lay out these steps. I wont go into much detail on exporting and importing because I covered that with the brick tutorial. This will focus more on the basic workflow between Zbrush and 3DS Max.
<table class=“fieldset” border=“0” cellpadding=“0” cellspacing=“1” width=“100%”><tbody><tr><td>
</td><td align=“right”> <input name=“Place image” value=“Place this image in your post” onclick=“zb_insimg(‘197162’,‘PillarOrthigraphic.jpg’,1,0); window.close()” type=“button”> </td></tr></tbody></table>
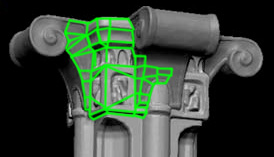
Step 1 - Base Mesh Creation
1-A: Created a very basic shape out of quads that was the shape of the pillar I wanted
1-B: Created some shapes that I will ProBoolean to get my base shape for zbrush. I abuse this fantastic tool all the time. It is so much cleaner and more reliable then the old Boolean. Still some clean up needed, but not like the old one.
1-C: Here is the basic shape I got from subtracting the corner peices and unioning the middle pieces. Looks great shape wise. I figured I can just beat this thing into submission in zbrush. BIG MISTAKE! That topology is terrible for sculpting and caused me much pain later on in the process, mainly in that I needed to crank the subdivisions really high to be able to sculpt reasonably. The reason it is so bad is because of the triangles in the mesh and also the uneven size of quads.
*solution for avoding this - I could have easily created loops from those corner tris and ran them right down the base of the shaft. Also, I could have just cut subdivisions of all the quads until they were all a similar size.
Step 2 - Zbrushing the Center Shaft
2-A: Import your OBJ from Max and subdivided it up. Dont forget to turn off smooth for those first couple subdivides or your model will turn to a doughy mess.
2-B: Started Masking across areas and using the deformations to inflate the masked areas out or in.
2-C: Still Masking away, getting those landmark cuts in. I use these cuts to guide me along for the rest of the process
2-D: More detailing. The top shape was created in the same way, except for I softened the mask. It gives that slightly curved shape.
2-E: Getting the more detailed masking and sculpting in. The top row of arches was created from a custom alpha
2-F: Finish up detail sculpting on shaft.
Step 3 - Creating the Moldings
3-A: In max I created these two quaded shapes and exported them out to zbrush
3-B: In Zbrush I did a remesh of these two objects with them set to union. This gave me a nice quaded shape to sculpt the molding out.
3-C: Sculpt the molding out
Step 4 - Sculpting Details
4-A: Duplicated moldings around base and around top of shaft. 8 total.
4-B: Ribbed the shaft
Step 5 - Polypaint and export High Res Mesh
5-A: Throw down a base coat of polypaint on objects. Block in basic colors.
5-B: Get in there and detail up the object with some grime and age. Export out your polypaint and High Res Mesh. (refer to brick tutorial if you do not know this process)
Step 6 - Decimate and Export low res meshes to objs
Step 7 - Import all meshes to 3ds max and unify them into a single mesh. I use ProBoolean for this as well. After you connect them you have to clean up and dirty areas. A ProOptimize for good measure can help too after it is all one mesh.
Step 8 - Unwrap in your favorite UV Unwrapping program (mine is headus!)
Step 9 - Bake out those base textures from Xnormal (or any program that can bake)
Step 10 - Cleanup/Optimize. I decided that I could cut this down a few notches in triangle count. 5400 was a bit on the steep end for a UDK mesh. Got it down to 3400 which is much better for memory. I could probably spend a lot more time on this stage and get it super clean and efficient. Just turn on preserve UVs and it is really easy to remove edges and cut new ones
Step 11 - Export OBJ to UDK or your favorite game engine!
So this was my process for this prop. Biggest lesson learned, stay clean on that base geometry early on or suffer the wrath of zbrush later on! Hopefully some will find this Tutorial helpful! Let me know if there are any questions!
Thanks again guys!