ZBrushCentral

Foot Creature Model....new to 3D so...

Created the base mesh in maya with all Quads and then bought him into Zbrush. no Uvs created yet but will soon as I am looking to texture him.

But I am having problems as you can see he looks to be sclupting fine on the side model but the front shot of him doesnt look right.

I am trying to make that look better by sculpting his Anatomy in better proportions, all critiq and advice welcome and needed!

I think I am having problems beacause I didnt have a front image plane to work with on him with and only only used a side image plane when creating him in Maya. [![creature_base_image.jpg|600x511](upload://xHRZnDgnknBVajfoylmITHAp5JD.jpeg)]![creature_front.jpg|600x621](upload://ffXNSWFcvUg0hu6tEJIvsqmhoLR.jpeg)

Attachments

creature_side.jpg

It could be because of 2 things.
The first is that you need an even distribution of polygons across your surface.
Secondly is that many of your polygons in the head area are stretched horizontally. Try to keep your polys as evenly spaced and square as possible.

When it comes to sculpting and texturing, good typology is key.

Thanks for replying…

Could you explain in more depth or maybe an example of how I can evenly distribute my ploys? Not to sure…Do you mean change the verts around?

What about now?I have evenly distributed and cleaned up.

[creature_base_image_cleanded.jpg]

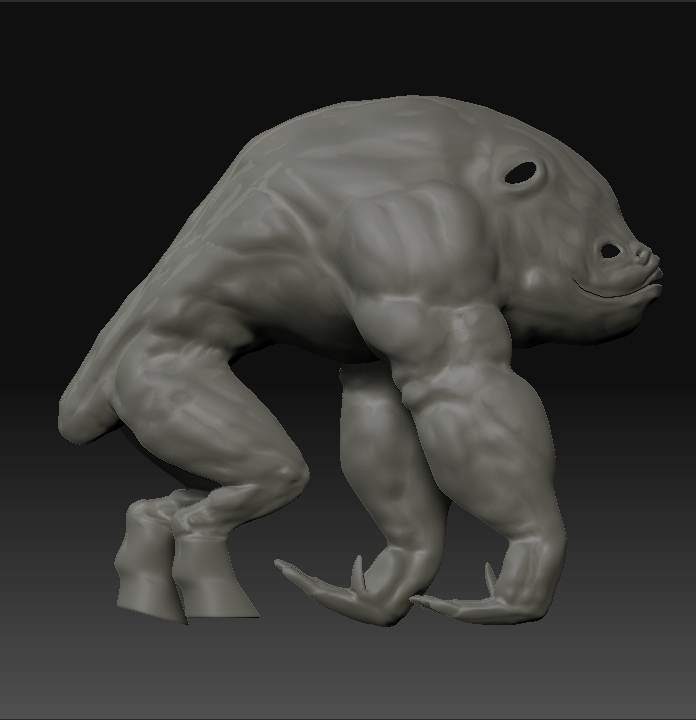
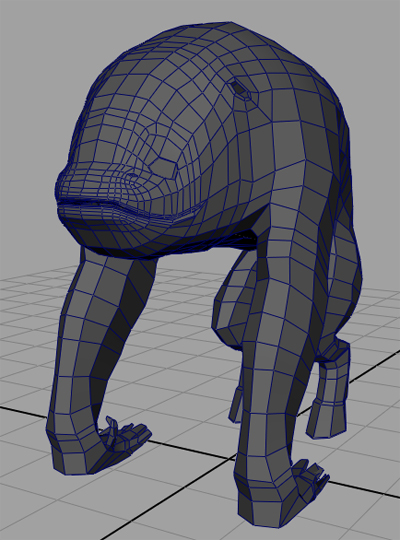
While having enough polys in detail areas are important - evenly spaced is helpful too - I think your model would be improved greatly if you paid attention to the volumes from the front now that you have the side done. When you’re modeling and when your sculpting, you need to pay attention to volumes and forms. Sure, from the side your model looked great but did you take a look at it from the front? What about the top? Underneath? These are things that could have been done before going to ZBrush but now that you’re in ZBrush, take the time to look at the forms and volume from all angles. Think about how the arm changes as it goes up from wrist to shoulder - it doesn’t just stretch along the z axis, it widens in both the z and x axis as it reaches the elbow (where it briefly dips again). If you need to, break out an anatomy book or do a search online for images of anatomy that comes close to what you’re trying to achieve in a certain area. Better yet, get a mirror, nothing beats a live model and since your creature is humanoid, you’d be a good stand-in.

So I think you have enough polys, you just need to work them from all angles, not just the side. You should be able to have a mental picture in your mind of what you want the final to be like and then just move the polys to match that volume.

iv been working on the overall form and shape…just a question
I see that when modeling alot of people just model there ploy model in maya without any wrinkles or deatils, like say they adont add any extra edge loops or anything like that. Whats the best procedure to modeling an organic model? Should we model with some form more then less…?

That depends on the needs of the project I would say. If you’re just doodling, there’s no need to go super detailed with your base mesh (or even slightly detailed) just be sure to capture the silhouette you’re going for and then sculpt from there.

In a production, it can be handy to have a loose base that you can manipulate into various takes on a subject. If you have a clear idea of what the model needs to be at the end, however, you can model in the essential details and use your sculpt to enhance or add flavour to them.

It all depends on the needs of the project.