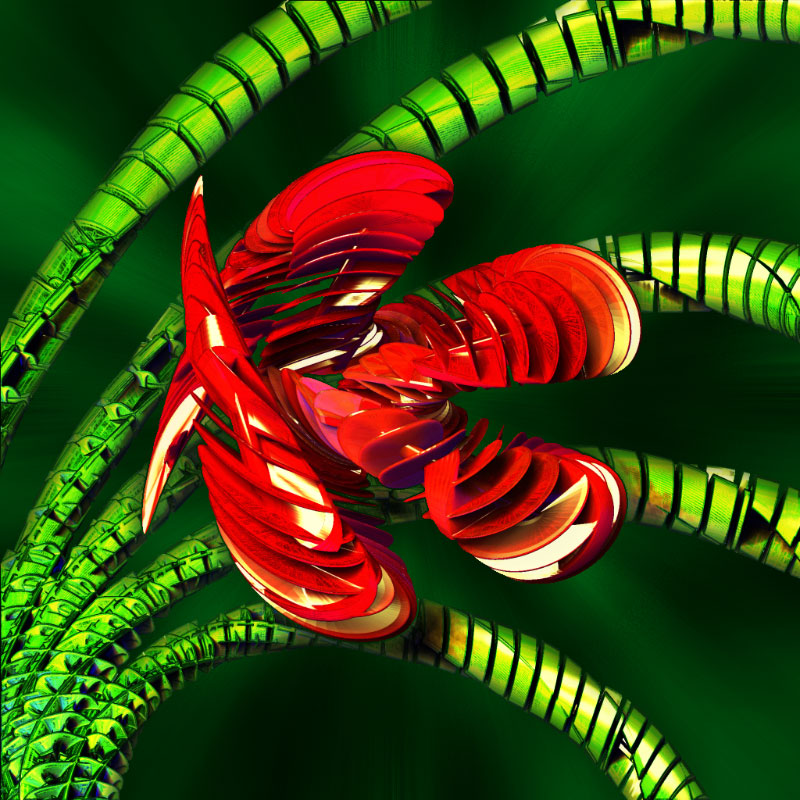
Since you asked…
This image was done with ZBrush 2. No beta trickery. 
The materials used were modified versions of Jantim’s bronze shaders. I just went to town with changing colors and maps for each of the channels. I didn’t use reflection in the materials, but instead created a reflective effect via my specular renders.
The multipass rendering was based on Meats Meier’s presentation at the Pixologic Users Group meeting. I did a total of five renders:
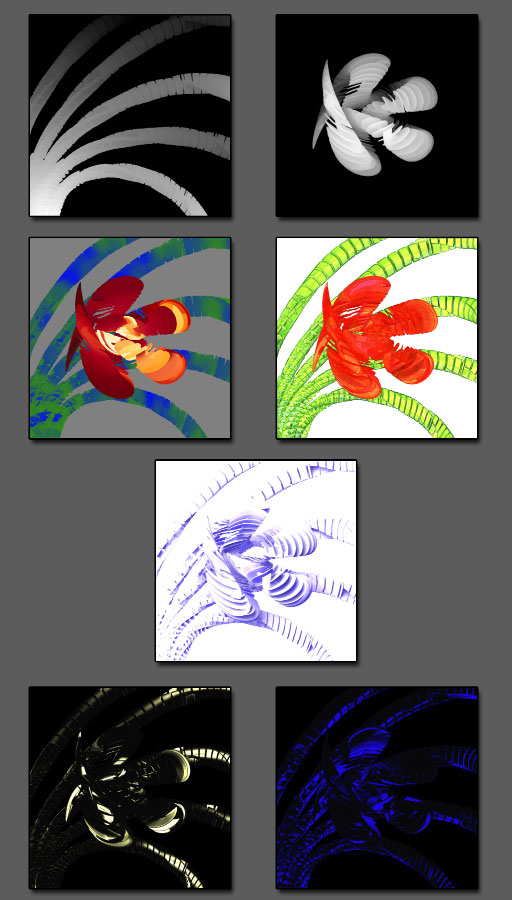
The top two images aren’t actually renders. Instead, they are Alpha>GrabDoc for each of the two layers. By doing separate depth grabs for each layer, I was able to composite the flower and leaves differently, which actually worked to my advantage in this case. The depth grabs were simply adjusted for levels so as to turn all shades of grey into white, which was then used for selection channels in Photoshop.
The next row are my color passes. For the one on the left, I activated Render>Flat. This gave me the unshaded RGB colors – no lighting or material effects. On the right, I used a five light setup so as to provide uniform light throughout the scene without shadows.
The single image in the third row was my shadow pass. I recolored the entire scene white and painted it over with a material that had a very high diffuse curve. The whole scene was white until I did the render – I couldn’t even see the objects in it.
The two bottom renders are my specular passes; one for each light. This time I adjusted the material so as to have no ambient or diffuse, and a very high specular value. I did a separate render for each of the main lights, and for the blue light I loosened the curves a bit so that the effect was a little more diffuse.
After that, it was just a matter of mixing the various renders in Photoshop until I had a result that I was happy with.
Hopefully you’ll find this useful – and put the technique to better use than I did!