Attachments
excellent work
cool model…good work…you gave me the creeps!!
when i was snorkling in Hawaii these fellas would swim up near the surface, you’d see one or two but mostly you’re looking down at all the other colorful fish…until that is you throw out some food…then you see about a 1000 of these fellas coming at you at the speed of light and they are coming from all directions so they basically surround your head before you can blink…aaaaaeeeeeeeeiiiiiiiiiiiiiiiiiiii. Harmless though they may be…what a freak out it is!!!
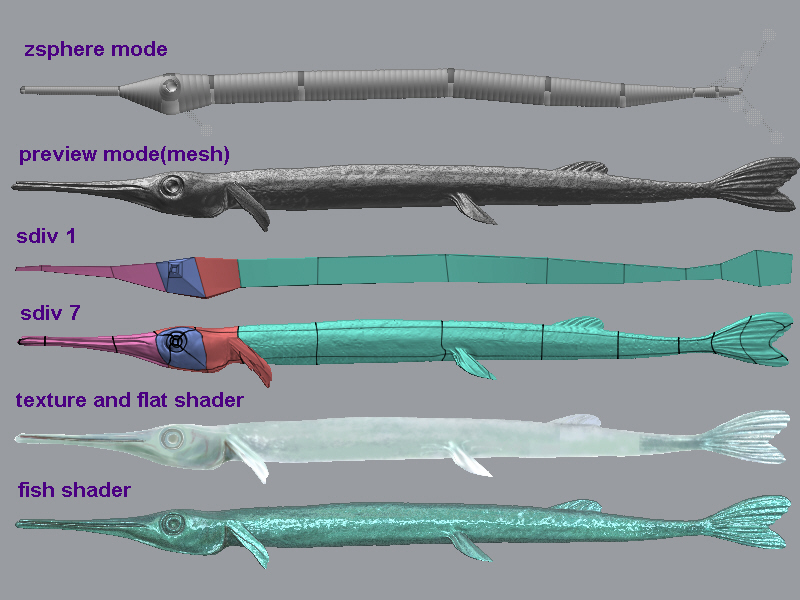
finish 85%
good one. I like it.
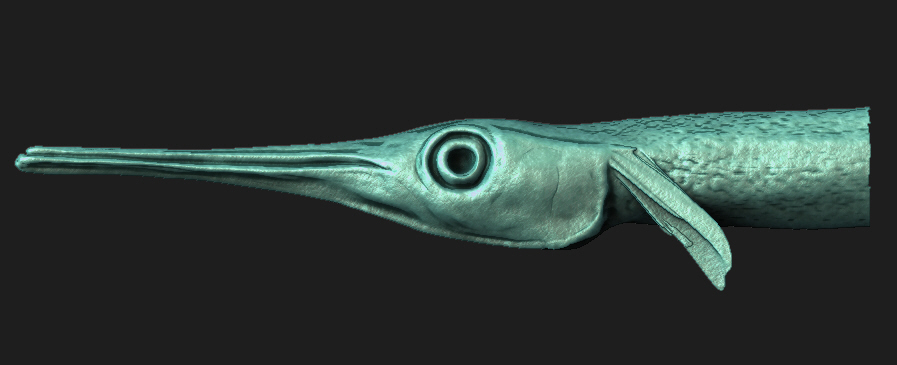
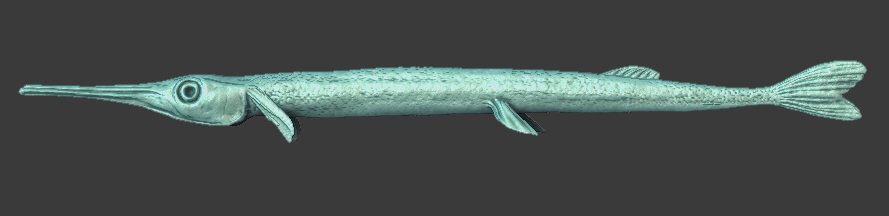
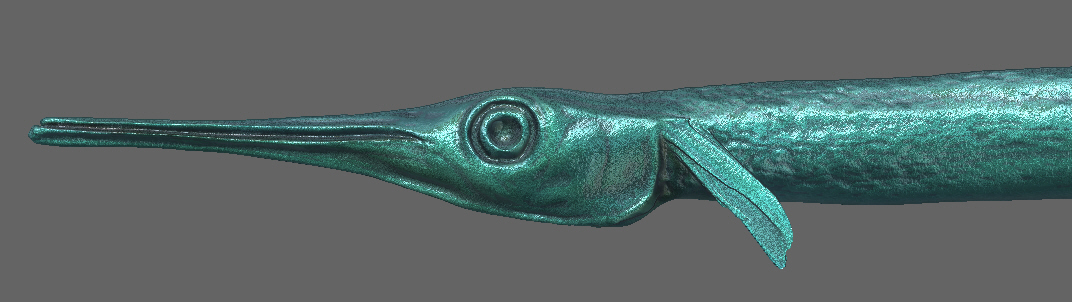
in Hawaii we call this fish a “Needle fish”.
Verry cool work… realistic 
 small_orange_diamond
 small_orange_diamondsmall_orange_diamondsmall_orange_diamondsmall_orange_diamond
… line fish 
Pilou
… line fish
Pilou
who can give me some advice?:o

but i have a problem:o Two material can’t blend:eek: There will be a seam
First of all, nice fish.
I had the same problem you have with the “material-seam” so I dusted off an old technique.
Having not used it in a while since most programs support alpha masks for blending textures.
[ ](javascript:zb_insimg(‘2796’,‘Alpha Mask tut.jpg’,1,0))
1:Original material
2:A painted alpha mask, painted as a complete texture and assigned to the object.
3:Slime texture render 1.
4:Slime texture render 2.
5:The completed composite using Photoshop.
You can use the mark tool to recall object positions and so on if you have multiple objects.
I think it is possible to similar in ZB with stencil and so on but have not tried it.
I hope this helps a bit, I am not a good teacher.
Hallongnu,i see,your method is belong to postwork, can’t solve the method at all :o
As I said I am not a good teacher but i will try.
[ ](javascript:zb_insimg(‘2797’,‘fish mask.jpg’,1,0))
I used your image as an example this time.
It is just a quick and dirty crop in photoshop so its not 100% accurate.
1: Your fish shader material.
2: Your gray scale render (contrast modified).
3: Your flat shader.
4: The combined result.
Photoshop procedure:
First adjust your grayscale image to a reasonable value.
You can get this image from several sources, in the example using your fish its the grayscale version from your image in my render its a specially painted texture applied to my object.
After you have adjusted your alpha mask use “Apply Image” to blend your renders using your alpha image as a mask.
This can be used several times with various blend modes to achieve the effect needed.
I used a basic “Normal” blend at 100% to demonstrate.
I hope this clarify things.
But in ZB I suppose you could achieve the same result with layer blending or using multiple shaders but it has the problem with seams as you experienced.