ZBrushCentral

Fink's Sketchbook

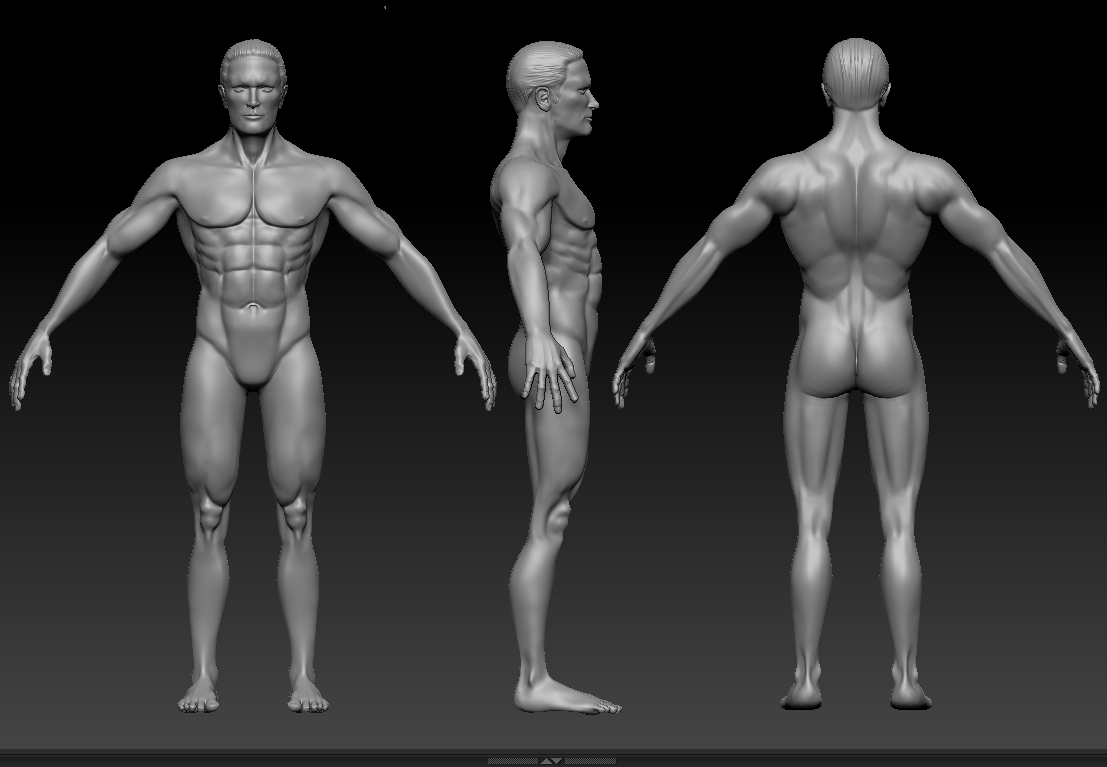
I believe this is my first post on this site…ever? :confused: Nerve-wracking!:o Anyways, I’m trying to break out of the habit of hording my work until it’s complete… I think I’ve got that artist-perfectionist bug that’s going around us amateurs, keeping me from seeking critiques until things are done and ‘perfect’. Being too close to my work and simultaneously not getting any feedback es no bueno…as you know… so I tend to overlook mistakes until it’s all one big mistake and I lose motivation. It keeps me from getting anything done :cry:…So enough of that work ethic! I’m putting my work among the Zbrush greats (I mean like, really great. I almost didn’t put this up because, wow… it’s a turd in comparison) and I’m hoping to get some great feedback I can immediately put to practice to improve myself and my work.

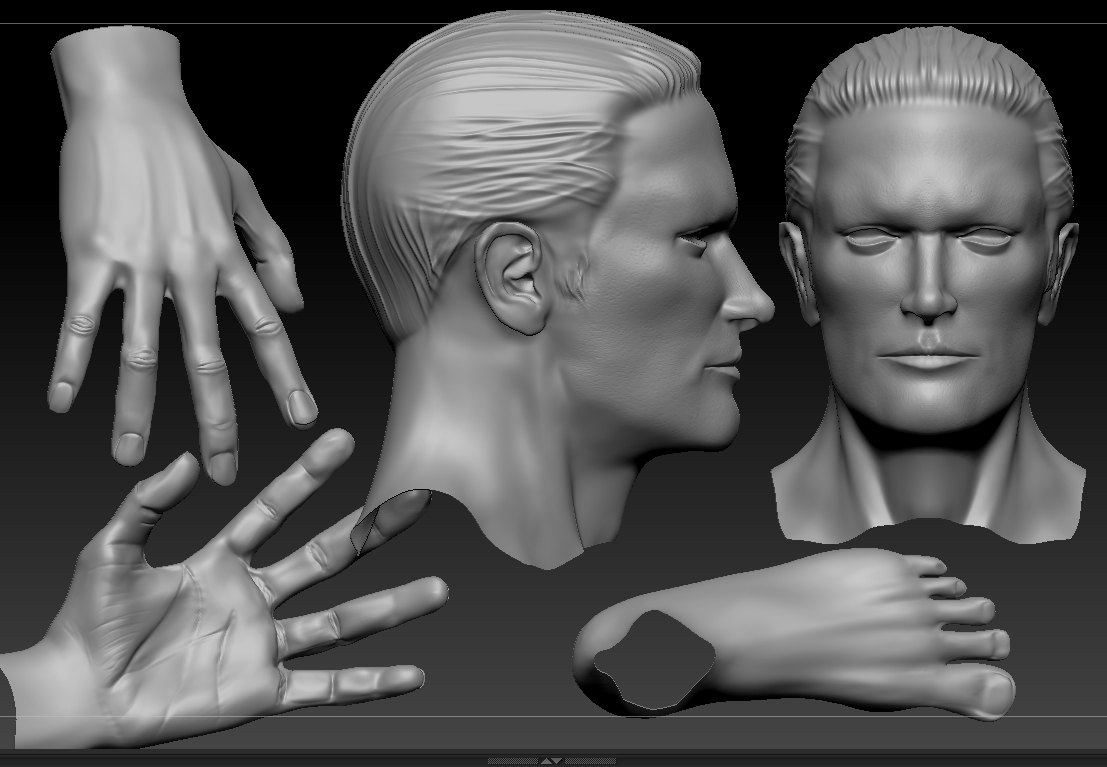
Any feedback whatsoever to improve this WIP would be greatly appreciated. A few things I’m already concerned about:
-I’m not sure if how I’ve started sculpting the hair is better than hair planes. I wonder if a bald head with hair planes would greatly improve the final product… ideas? :idea:
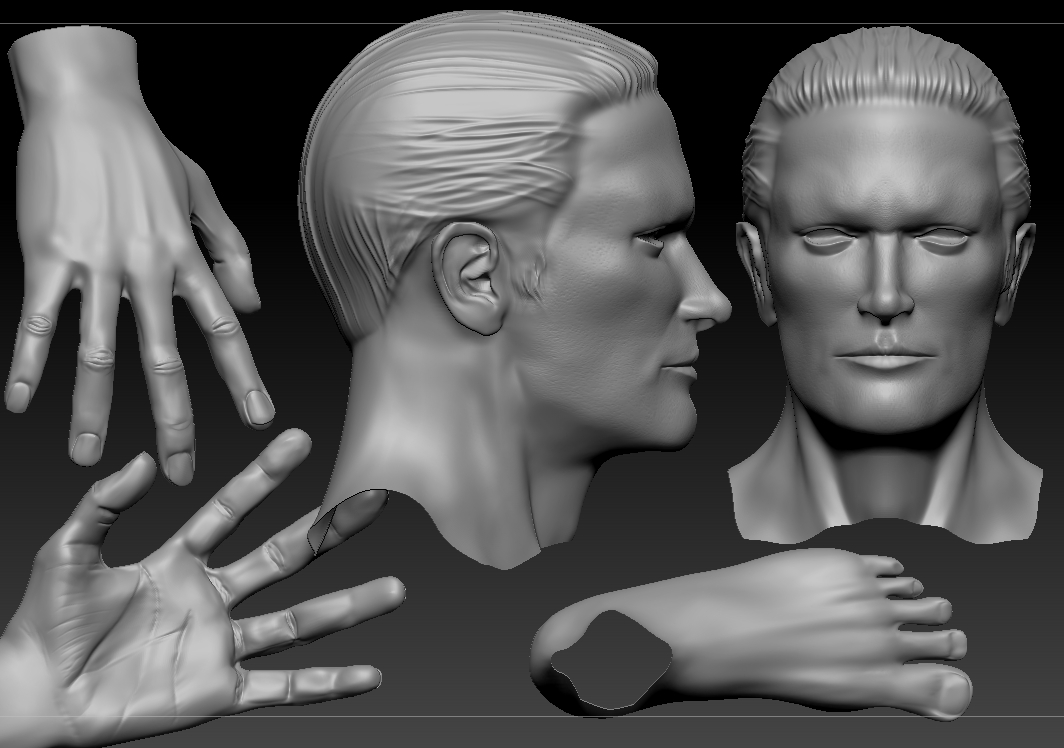
-Something looks off about the hands shape/form?:td:
-Are the back muscles correct? To one reference they are but to many others they’re different.:confused:

Attachments

ZBrush ScreenGrab01.jpg

ZBrush ScreenGrab02.jpg

ZBrush ScreenGrab02.jpg

Sculpted the feet and hands a bit more. May go ahead and finish the hair the way I started it and if all else fails, make him bald and experiment with fiber mesh. ZBrush ScreenGrab03.jpgZBrush ScreenGrab04.jpgZBrush ScreenGrab05.jpg

your chest muscle are too much stiff try smooth it

I went ahead and smoothed around the chest outline, as well as rounded the nipple a bit more. It had a sort of oval shape. Thank you so much for your feedback!:D:+1:

ZBrush ScreenGrab06.jpg

Worked on tightening up the upper arm muscles and sculpting some of the forearm. I’m still a bit unhappy with the under-side of the forearm; references are really hard to come by. A little more sculpting and polishing to it and I can go ahead and add some veins. I’m gonna get the legs on roughly the same level before I continue with the arms. Critiques on nonsensical, problem, or just plain old eyesore areas are greatly appreciated! :wink:
ZBrush ScreenGrab07.jpg

Excuse me but can I ask you what method did you use to get the body to look like you can see it on the outside but on the inside it looks empty. Im asking this because im trying to do what your doing by making each body part separate and then put them together as one mesh. Also when you do put all the body parts together are you still able to work on them as one complete mesh?

Im still doing my tutorials.

That would be selection tool I guess, hidden selection + perhaps poly groups to make selection easier.

They’re actually not separate meshes though they appear so. They’re separated into what’s called Polygroups (under the tool menu, there is a submenu called Polygroups).

To separate groups of a mesh the way I did, what you do is:
-Be sure your mesh is at the lowest subdivision level.
-While holding control + shift, (notice the brush/stroke change on the top left), change the stroke from the Rect default to Lasso. This is just so you have more control over what part of the mesh you select.
-On the right side of the screen there is a Poly F (short for polyframe) button with the hotkey Shift-F. Click this on; your mesh should become a solid color with the wireframe showing. This basically means every face is part of one group.
-Drop down the Polygroups menu (Tool>Polygroups).
-Now, holding Control + shift, use the lasso to select whichever part of your mesh you’d like to separate (in my case, each limb/hand/foot/finger/toe, one at a time of course).
-Note Control + Shift + Alt is to hide selected, while Control + Shift is to show only selected.
-Once the part of your mesh you want separated is alone on-screen, under the Polygroups menu click GroupVisible.
-Clicking Control + Shift into the background will bring the hidden pieces back, and just repeat the process until everything is separated.
-To show/hide a group, just Control + Shift click it 1 or 2 times.
ZBrush ScreenGrab01.jpg
Once it’s all grouped separately, it’ll look similar to this.

Hope this helps!

For more info on the topic and/or a better explanation:
http://docs.pixologic.com/reference-guide/tool/polymesh/polygroups/

Sculpted the leg muscles to about the same level as the arms. From what I can see I’ve gotta give the back of the legs a little more attention but I’m gonna go ahead and give the hair further detail, then revert back to arm/leg/back sculpting. I find getting distance from each piece helpful so I tend to bounce around. :lol:

Can anyone tell me if the feet appear to be too long?
ZBrush ScreenGrab08.jpg

Really nice work! Just a few hopefully constructive comments (only since you asked).

  1. On the isolated arm figure there almost seems to be an extra muscle group in the lateral upper arm just distal to the deltoid. In that area you should see deltoid, tricep, and bicep. As you go anteriorly you’ll get to the deltapectoral groove and pec insertion. I didn’t see this in the sculpt with the entire body, so you may have refined it a bit before putting it together.

  2. The forearm (elbow to wrist) is a bit long compared to the rest of the extremity.

  3. Bicep is a bit large as well.

My background is hand and upper extremity surgery, not art, so this is strictly a comment on anatomy. Again, really nice job!

I’ve shortened the length of the forearm and so it seems more proportional. Hands usually reach down to about mid-thigh (before they were much longer). Also I’ve smoothed the bicep down a bit.

I’m going to be working on refining the arm to search for and fix the muscle group you’re talking about. I couldn’t quite decipher which muscle it was you were speaking about, but I’ve got a ton of references so I’ll study a bit more and continue refining.

Thank you so much for your constructive critique! I’m certainly looking forward to any feedback I can get.

Before I continue refining, here is my current progress with the forearm shorter.

ZBrush ScreenGrab09.jpg

Worked a bit on the back muscles today. Still a lot more to go but I made some progress. Unfortunately I didn’t have as much time to work today:(, but I want to stay in the habit of updating. :+1:

I also decided to make him bald and either use a separate mesh for the hair using the extract tool or use hair planes. I’m at a complete loss for hair styles haha. I’ll have to decide if I even want to take the character further than just an anatomy study and dress him within a scene.

I’ll be updating tomorrow. In the meantime, please feel free to leave constructive feedback.

ZBrush ScreenGrab10.jpg
ZBrush ScreenGrab11.jpg

I reformed the head and face completely. Reshaped the eyes and nose and lifted the nose and lips. Fixed the jawline and added some minor pore detail throughout the mesh. I’ve gotta continue adding more wrinkle detail in the face, possibly blemishes or scars, and tweak the areas where the muscles meet to appear more realistic. Critiques are most certainly welcome!
ZBrush ScreenGrab02.jpg
ZBrush ScreenGrab01.jpg

I started laying on the skin texture. So far only on the torso and arms. I’ve got a bit more sculpting to do with the head, hands, legs and feet before I should texture them. I also spent the day re-topping the mesh as well as UV Mapping. Nearing the finish line on this one! :smiley:
ZBrush ScreenGrab14.jpg
ZBrush ScreenGrab15.jpg

My current progress on the Female Anatomy sculpt:
Female Anatomy Screen Grab 01.jpg

I still have quite a bit to sculpt–may make her middle section wider, haven’t sculpted the arms much at all yet, complete the feet/hands, finish her face up, and sculpt her legs and back more. So, uh…pretty much everything’s a work in progress. Just dropping in to update. Critiques on the form would help me greatly. This is my first female sculpt at the moment.

The male sculpt is on hold while I explore new territory. Keeps the job much more interesting and fun! :D:+1:

Recently I’ve been working on a deviantart members’ piece of the Caterpillar from Alice in Wonderland. I thought the concept was fantastic and deserves to be in 3D! So far it’s been a lot of fun to work on.

Link to concept: http://zeeksie.deviantart.com/art/The-Caterpillar-127574193

Link to artist’s page:http://zeeksie.deviantart.com/

ZBrush ScreenGrab01.jpg