Good! 
Marcus,
Quick question. After I have set up my Ref Image and stored positions, how do I save those settings so that at a later date, when I load the tool for further work, I am able to call up the settings from the initial set-and-store process?
Thanks!
~S.~
Hi SNARK,
To save a Reference Image project, Shift+click the R I Setup button. To load again in a later session, click the R I Setup button and choose ‘Load Project’.
HTH,
Thanks Marcus!
Even though the method is very different from the ‘Quad View’ approach used in apps like Maya, this works very well and I thank you.
~S.~
Hi Marcus,
I have a question, is it possible to add in more position buttons to the ones already provided. It would be nice to have about 10/12 buttons to help when you are bringing in multiple objects on layers?
Thanks,
TrapDoor
Hey Marcus …
I love your plug-in!
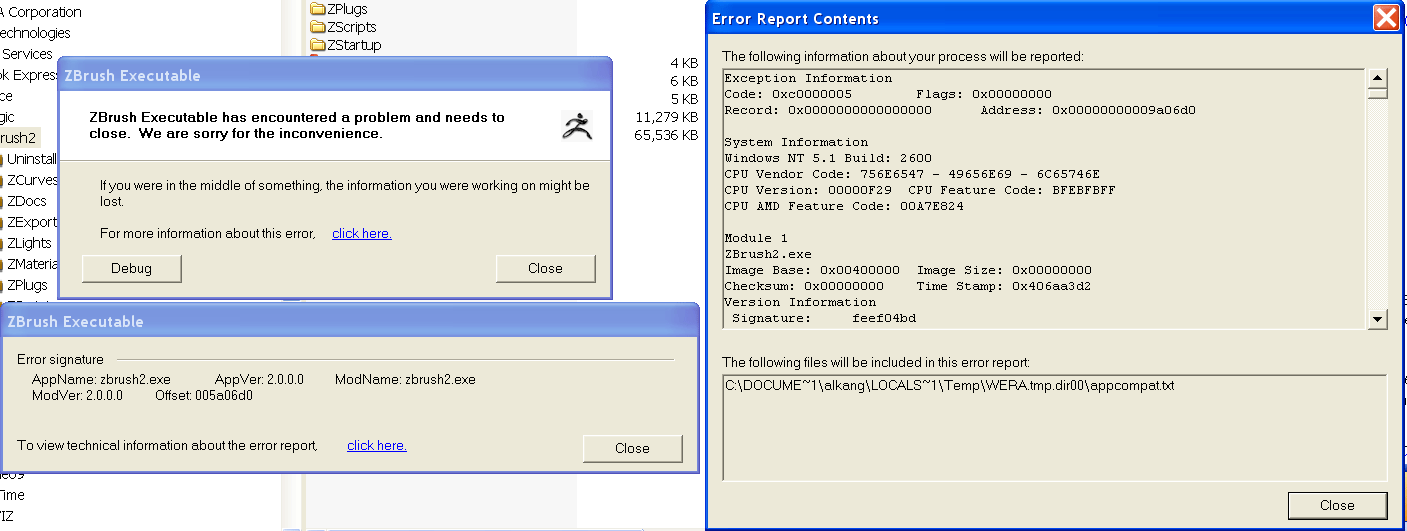
I was working away with it, until I suddenly encountered a problem … I came in this morning, and when I tried to launch Z Brush, I got this error :
[attach=30222]ref_image_error.gif[/attach]
I isolated the error to strictly the .zsc file …
Without it, I can work fine in Z Brush … BUT I’d rather work WITH it …
Any thoughts?
Thanks … and great work by the way …
Attachments

Hi Al_Kang,
I’ve not encountered any problems of this sort with the plugin before. Please check that it is installed correctly though. Reference Image (as with all user-made plugins) should be installed in the ZStartup\ZPlugs folder for which (for a standard Windows installation) the full path is:
C:\Program Files\Pixologic\ZBrush2\ZStartup\Zplugs
For new installations you will need to create the ZPlugs subfolder.
(Note that there is another ZPlugs folder in the ZData folder which is for factory-made plugins only.)
I hope this helps.
and Trapdoor,
My apologies for the delay in replying to your message. It’s an interesting idea to have more buttons. It would certainly be possible and I will bear it in mind for an update.
Cheers,
I am new to Zbrush and have started trying to use the reference image plugin.
The problem is on occasion I have inadvertantly framed the model in the view port (by alt click I think). This meant the model was no longer at same scale/position as the background image.
Is there any way to recover from this ?
Hey, Marcus. I love the plugin. How do I go about placing my reference image in a layer so that I can turn it on and off?
Thanks!
~S.~
Each image you load is automatically placed in a different layer…
Hi tonyhnz,
All you need to do is press the button for the view that you want. As long as your model is in Edit mode the setting will be restored.
Hi SNARK,
You can switch layers to turn the image off but remember to return to the model layer otherwise you will lose transparency. Switching layers will drop your model to the canvas. Use Ctrl+N to clear the model layer. Redraw your model, press Edit, then whichever Reference Image button you wish to work with.
All the best guys,
Thanks Marcus!
It would be cool not to have to re-draw as part of turning the ref image on or off but it’s still a big help to have the plugin.
Thanks!
~S.~
SNARK,
I’ll bear in mind your suggestion for when I get around to updating the plugin.
Meanwhile, another way occurs to me. If you have a RI view button you’re not using and your image has some blank area, simple move and zoom the canvas so that you just see the blank area, then draw your model and save the view. Now pressing that button will restore that view and you can model without your image showing (and without the fiddle of switching layers).
Great, Marcus!
~S.~
I just srarted playing around with this utility
my Q is
after placing the Image in layer1 for example
how can i move it backword so it will not intersect with my creature
if i try to move the creatre away , then it get smaller and i can’t allign it correctly
thanks

When you first place your model, before you enter edit mode, select move. The gyro should now be on the screen. Click and drag your cursor up or down anywhere outside the gyro and the model will move in or out.
that did the trick
thanks
as a SUG maybe it should be in the image plane setting…

Your welcome. Cool concept.
Hi ashaiad,
You can easily move your model forwards so that it’s not clipped by the image. All you need to do is switch off the Edit button and then switch on Rotate, so that the Gyro is showing. Then click outside the Gyro and drag downwards to bring your model forwards. (You can rotate the model to check that it is far enough forward.) When you are done switch Edit back on and then set up and store your different image views.
HTH,
thanks 
thanks 
thanks 
thanks