ZBrushCentral

Female Citizen, Video game character(VERY WIP)

Hello, This is a first time post (major post) That I am doing here.

For starters I should say that I am one of a few students in a group working on a total game conversion based off the half life 2 engine. This is our first attempt at developing any sort of game without to much guidance from our school, So if your someone who has any sort of experience in this kinda of matter, your help and critiques would be very appreciated…

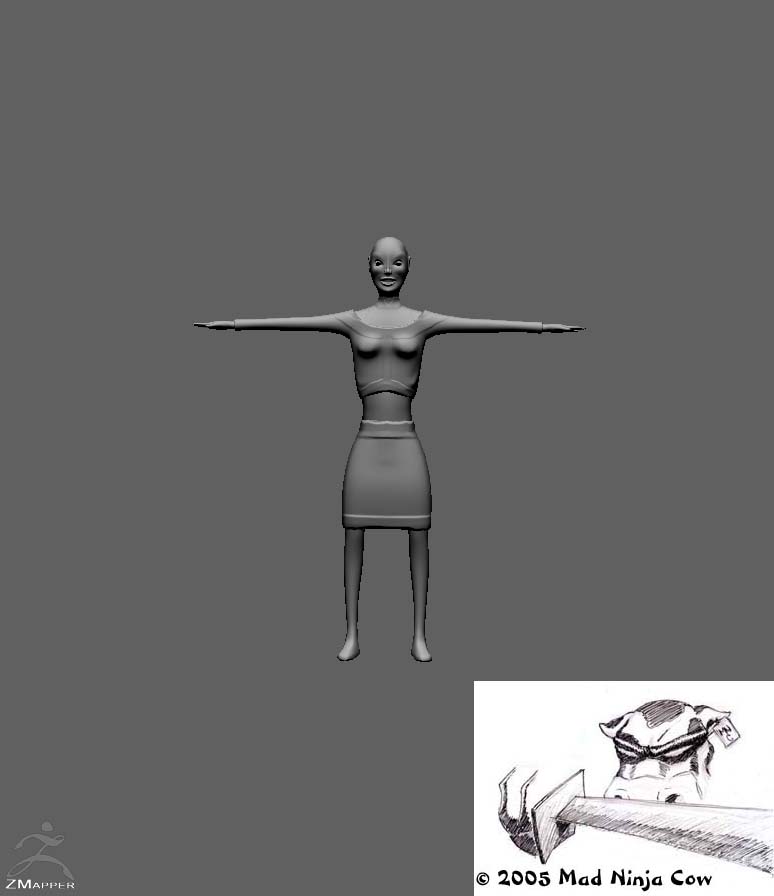
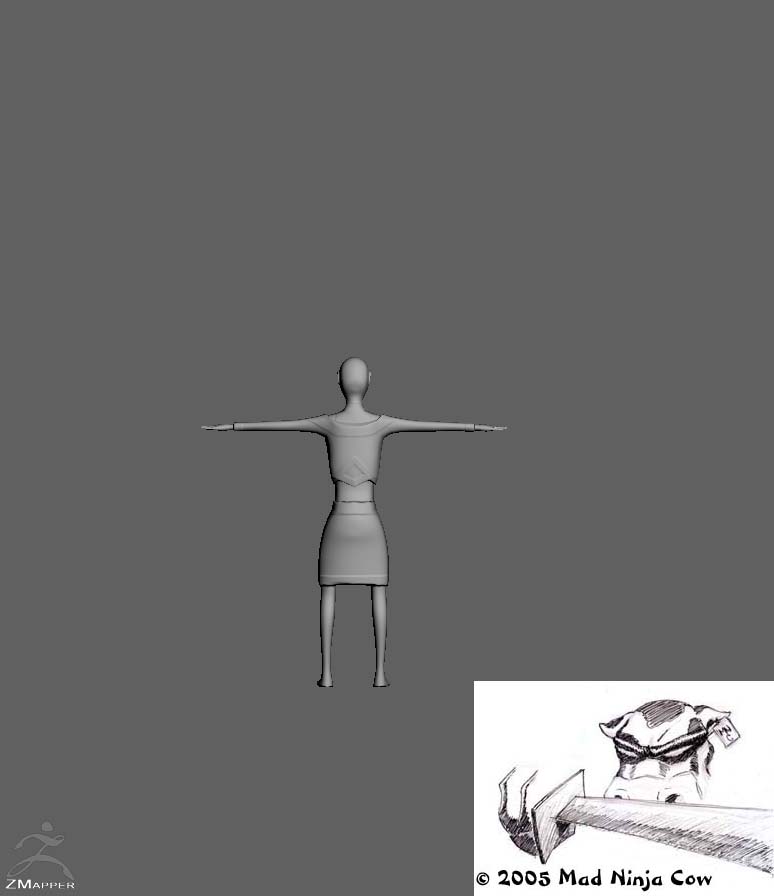
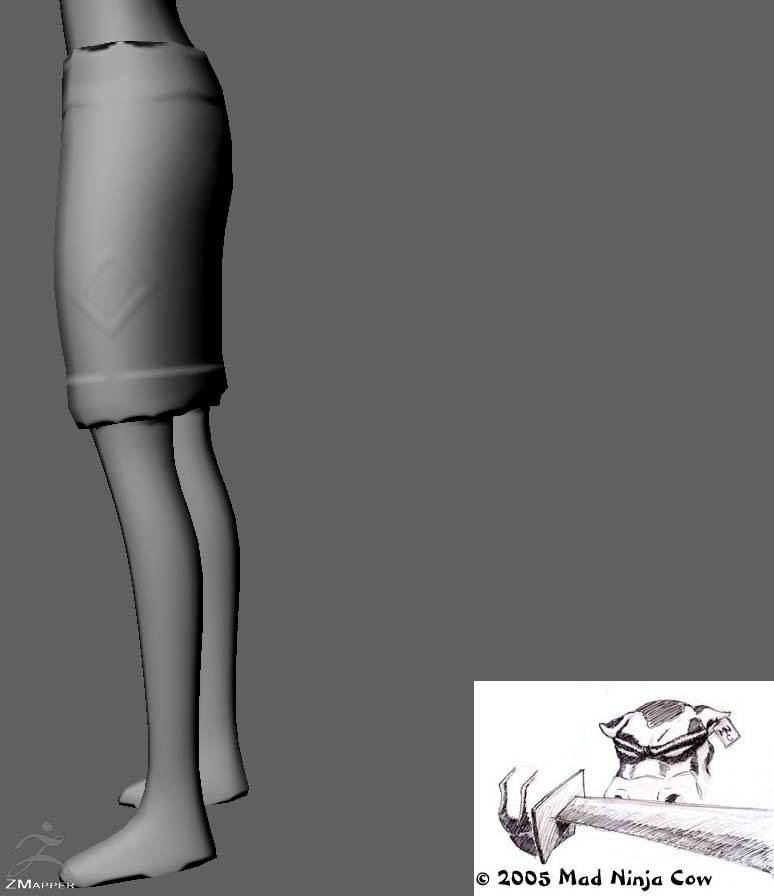
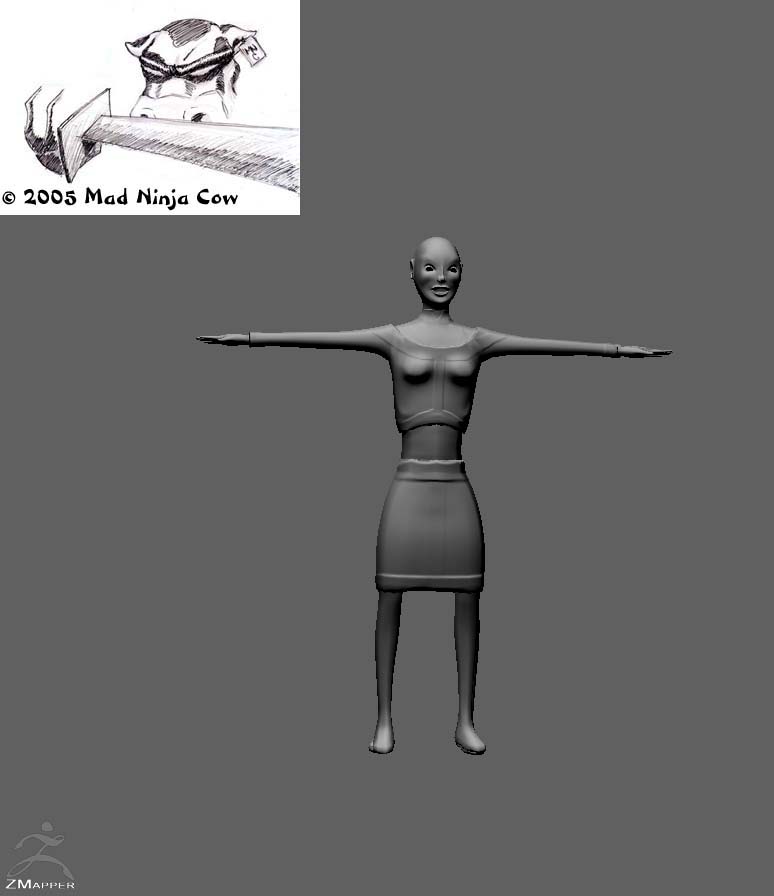
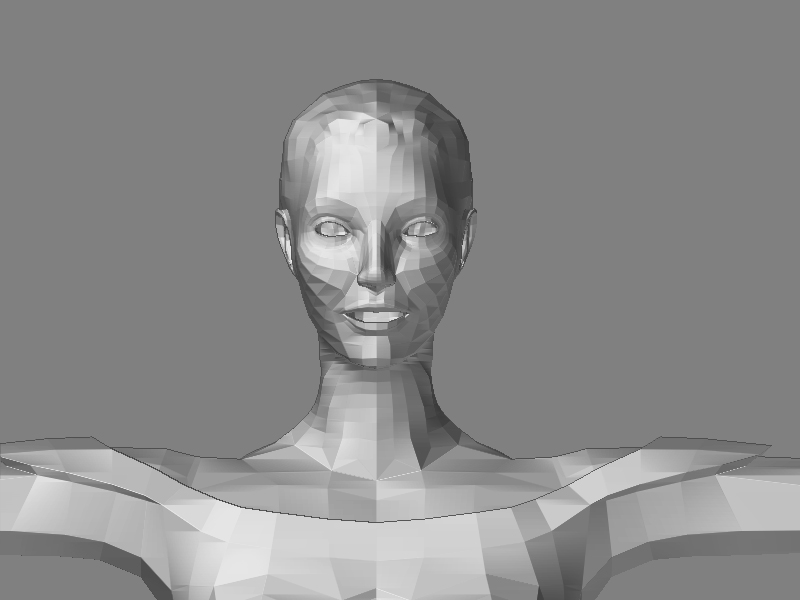
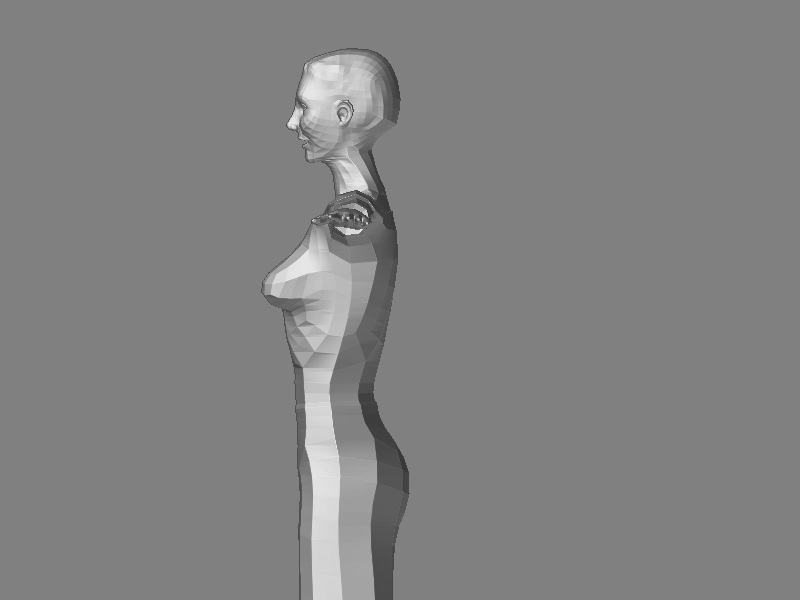
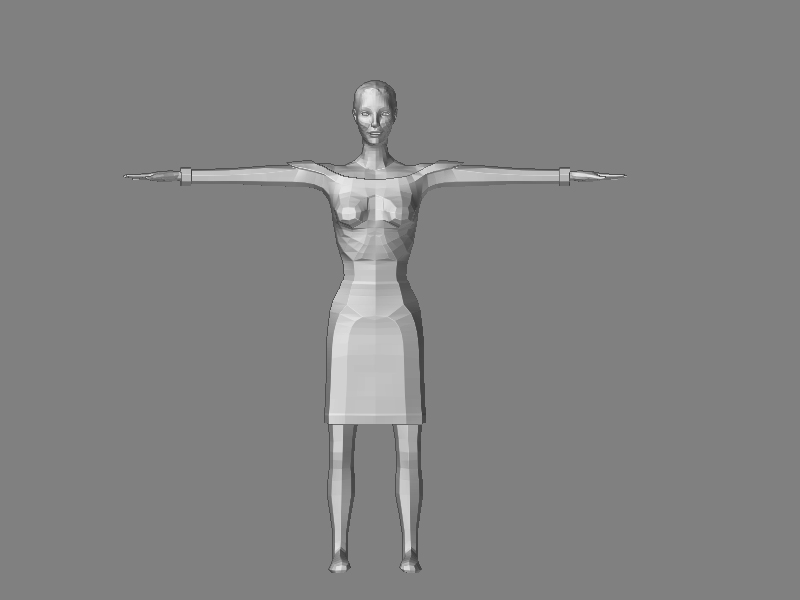
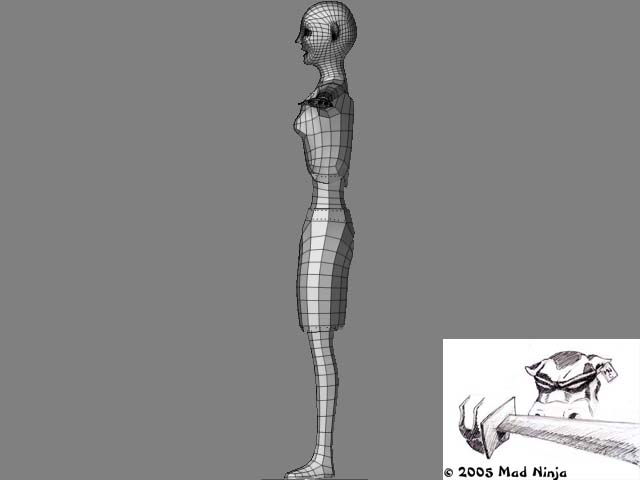
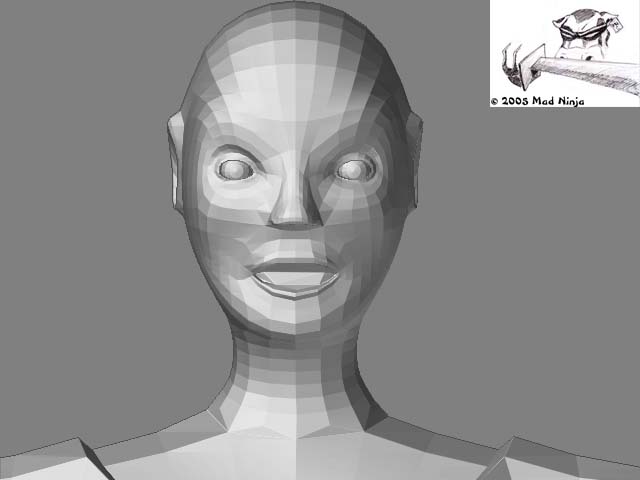
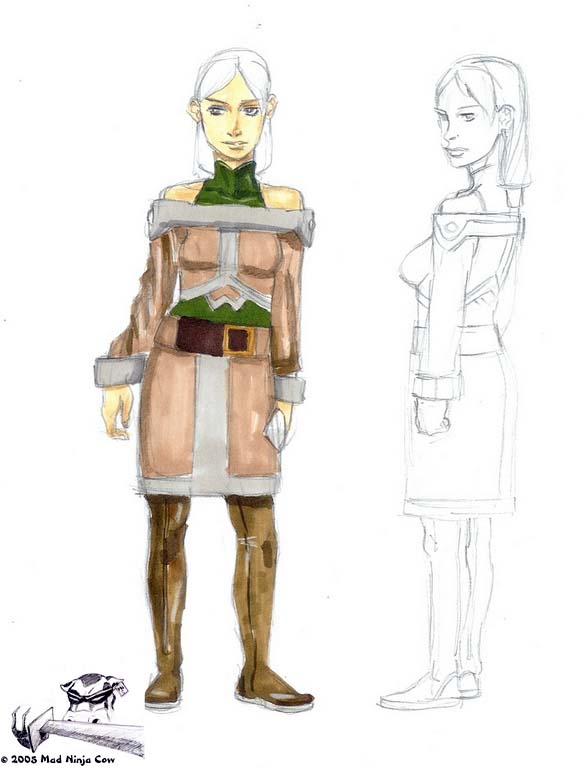
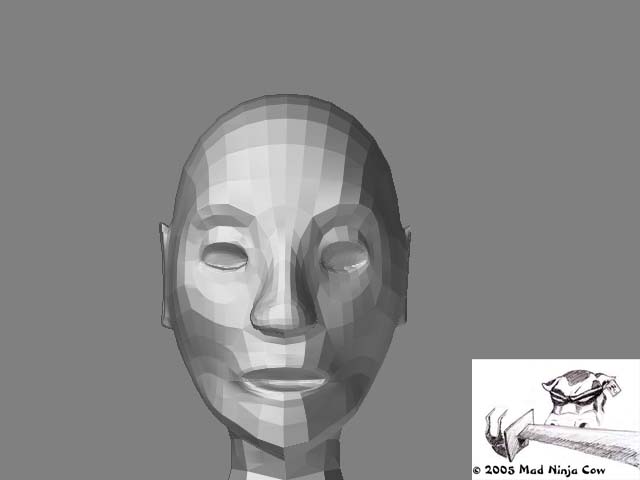
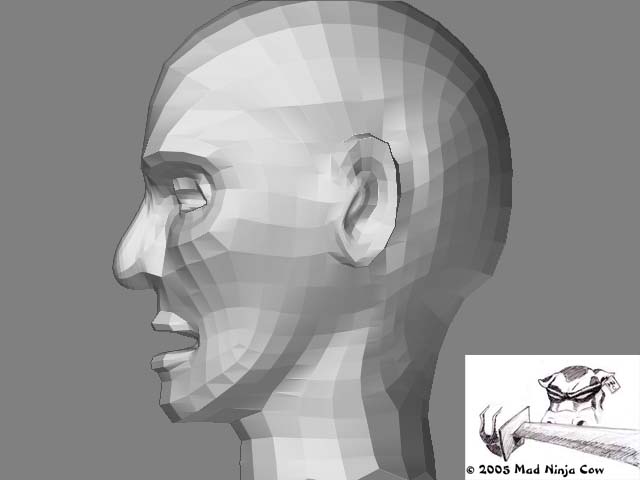
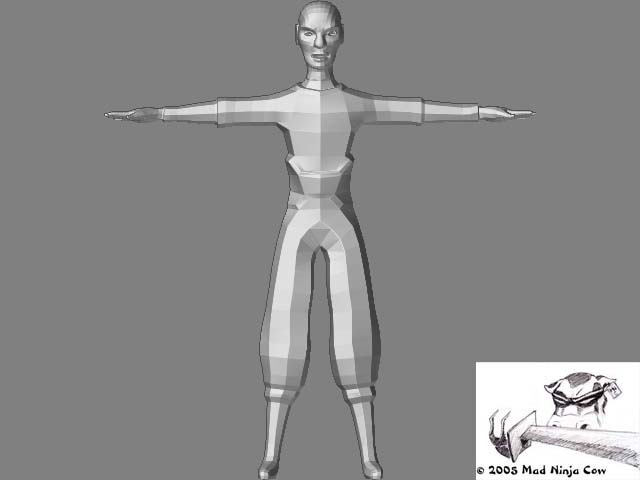
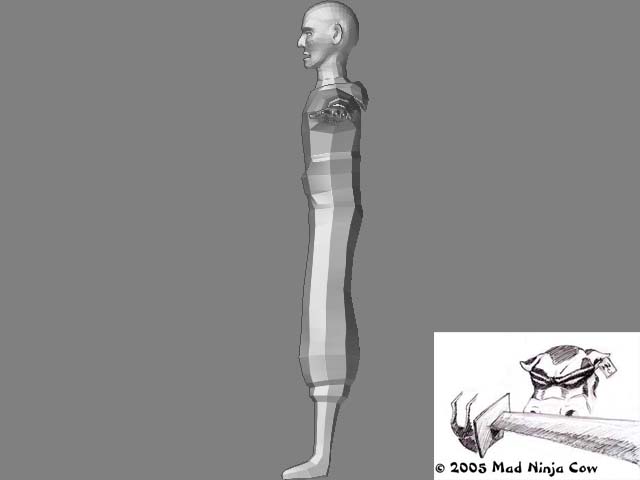
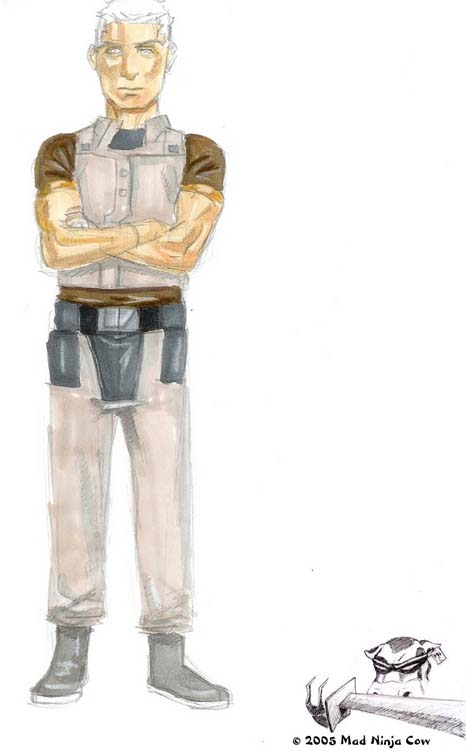
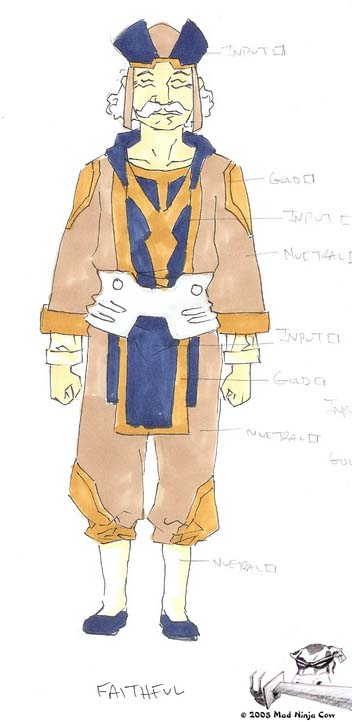
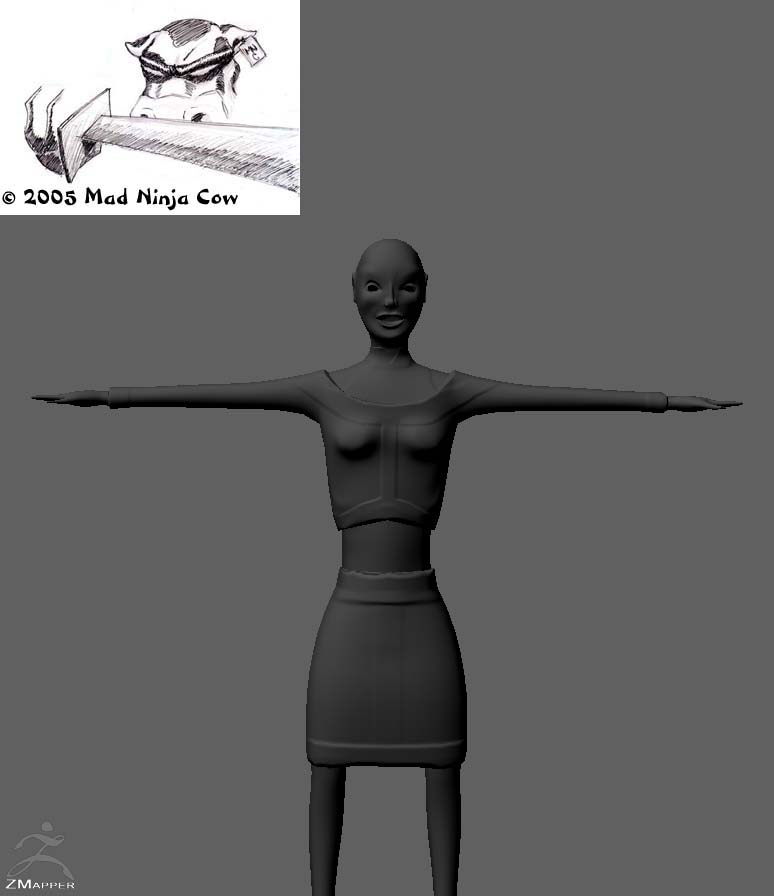
Anyway on to the more fun stuff, I am “Seforin” , one of the main people in this group and one of the more main character modelers…

We are using Z-brush and max8 and well, Ill just shut up and show you what Ive have done so far.. [![bodyfront.jpg|640x480](upload://2n3MnttNZrCf3pCucgE2BtUqzK6.jpeg)]![faceside.jpg|640x480](upload://2gbDKuDEww2SaLNSDzwmrtHL5fp.jpeg)

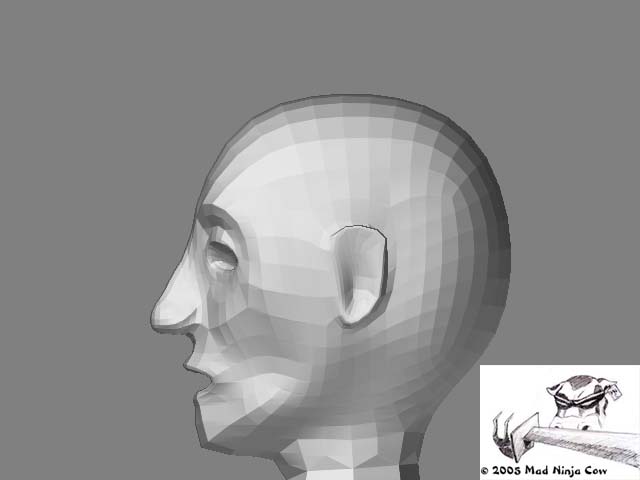
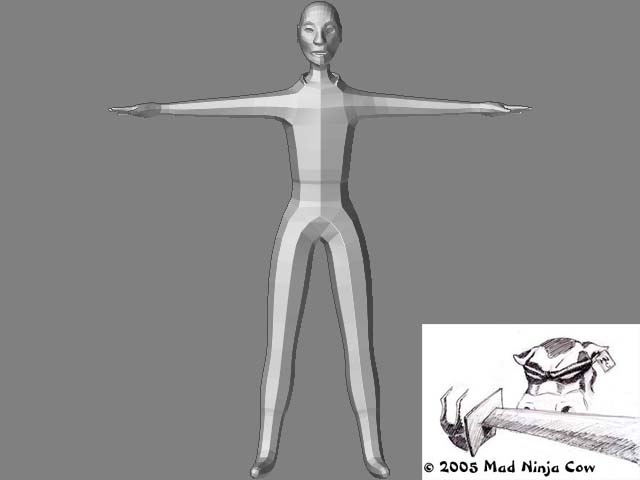
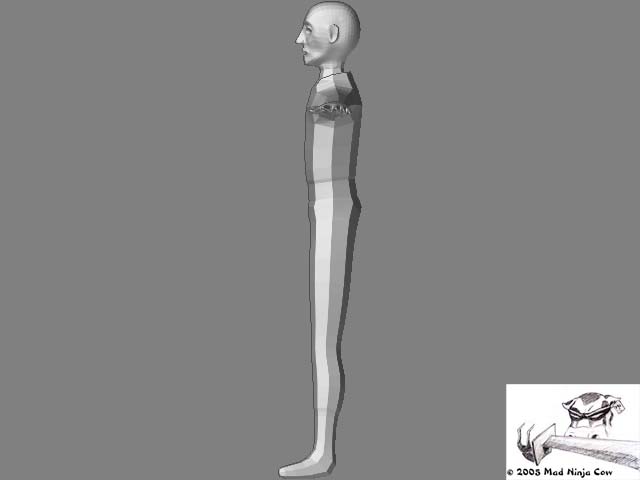
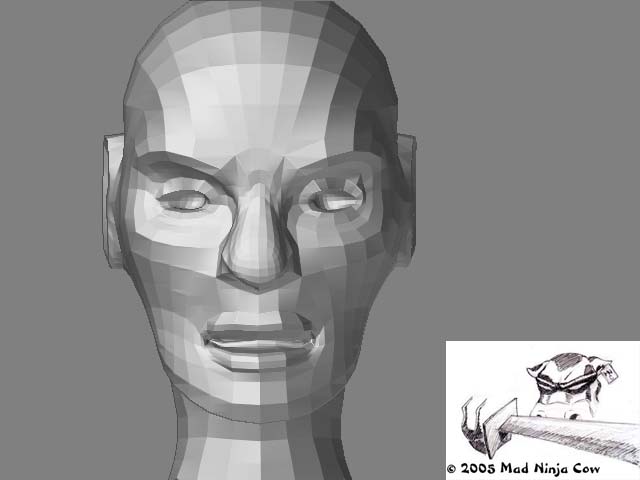
So far without the eyes this character is only 2550 polys or so/ So since this is in the half life 2 engine (where characters average around 4-5 and 6-7 on main characters) This what we have.

Also included is one of the reference art works used to base this character off....

right now I am trying to learn how to do normal maps (using the z-mapper just created recently) But im not exactly sure where to start doing normals//bumps for a character…are they any good refence tutorials/z-scripts on here that explain “visually” how to do this?

once this character is normal maped, texturing will be done in photoshop and hair added via Planes in max 8. Well Sorry to be so long winded, but just wanted to give the full skinny,

please any critiques or help would be VERY appreciated, but for a first timer and student and learning this and teaching this on our own , not to bad? =p

Attachments

bodyside.jpg

facefront.jpg

refernce_art.jpg

Nice start.

Her waist area should be shorter, it’s disproportionate now.

Her limbs need to be thicker of course.

pretty ambitious!! looks like you are off to a good start tho so keep it up! Remember it’s supposed to be fun too…so when ya start feeling like tossing it all out the window…go for a walk or stand on yer head or something for a while!!

and keep at it!

Oh…trust me theres been alot of that…

Mainly flipping of pc’s…

But in all honesty I love using z-brush alot more than using anything else, since its so…hands on…

If you told me to do this same thing in max or maya I would probably then flip the table and walk out.

In either case The Ironic Part is after I posted this I made a “For fun” character off another body, and it came out 20 times better than this =p

hahaha see my point is made…do something different and all is good with the universe!! Work doesn’t have to be work…attitude before sitting down dictates the outcome and level of frustrations in between. So dive in believing all will be well and good and fun and even the mountains become ant hills.:smiley:

Heres some work in relation to 2 other people In my group…Like I said these are very WIP…

This one is modeled by “Jose” And the other by “Scuba steve”

These models were done Literally 3 days ago…so they still need to fix details with the feet and clothing and such in max 8 (Learned about creases kist recently…so Its my fault there models came out like that :o )

But heres Scuba Steves’ (WIP)
[Male_Adult_Citizen_face_front.jpg](javascript:zb_insimg(‘23773’,‘Male_faithful_side.jpg’,1,0))

Attached is just a piece of the reference artwork, I already Have scuba steve fixing the feet and shirt for now , jose has already fixed his details and Ill upload his more completed piece some time via the upcoming week…

================================

I know im sounding like a pain, But is there any good tutorials (asside from the giant pdf which has helped tons) Which explains how the projection master works a bit better? Something visual like a movie or a z-script?

I have a hard time reading things and picking them up , im more visual…If not I will still continue to research and try and figure it out, but since I really need to learn how to normal map characters before next week any help would be REALLY appreciated…

Well in either case As I said before critiques are welcomed, and if something for one of these other people needs fixing I will let them know or have them come on here and read it themselves :lol:

-For the record We enjoy this stuff , if it makes us be able to produce something better than our teachers can(but you didnt hear that from me) :stuck_out_tongue:

Attachments

Male_Adult_Citizen_face_side.jpg

Male_Adult_Citizen_front.jpg

Male_Adult_Citizen_side.jpg

Male_faithful_face_front.jpg

Male_faithful_face_side.jpg

Male_faithful_front.jpg

Male_faithful_side.jpg

male_femaleColor.jpg

maleFaithfulColor.jpg

did ya know…that there are some good PM tutorials via zscripts included with zbrush? access via the help menu or hit the ? after hitting PM button.

there is also the Zapplink plugin that allows you to access PS or psp or any .psd capable paint program of your choice if you are more comfortable with those.

actually my friend came over and let me borrow the set of pipeline dvd’s (all of them) and Im watching them now…any particular one that goes over projection master// normal(Bump) maps quickly?

If not Ill just skim them all till I find it.

Updates will be coming soon!

Hello MadNinjaCow

Great start on the characters. I am a zbrush newbie also. You have some very nice 2D character concept art there. I was thinking maybe you could use them as image planes for developing your 3d work. I would also suggest the Gnomon zbrush and low poly game character DVD’s. They are very informative. This site also has some amazing free video tutorials. I also suggest that you do not Only utilize zbrush for the development of your game. You need to do a lot of pre and post work in 3ds Max or Maya (Modeling for animation, Unwrapping, Normal maps…. .) Zbrush is only an added tool that makes your low to mid poly characters look a lot better through normal maps. Hope my 2 cents help.

Good day,

Do you know which dvd is the low poly game character you speak of? As far as max/z-brush, we based our bodies using z-spheres to create generic male/ female bodies, from there imported back to max added clothing/ added polys where needed, brought back to z-brush did proper head modeling. From there trying to apply normals for more clothing detail to save on poly count and then texture over it.

Using max is fine in my opinion , but for a base body, (this is more my taste) But I prefer to have a base male female or creature body predone in some fashion and then from there doing tweaking in max and from there details in z-brush.

Uv unwrap is good but as soon as we get a normal map on a character its a texture based outline from there…

If you know anymore more details as far as texturing/ normal for game relations go, that would be very appreciated any sort of info. (Ive found a few people on here who have made textures for game characters but Im just curious what method they went about it to create it)

Well I hope to see some work from a fellow newbie. Thanks, were gonna continue hard at this and have something produced in the next week or 2.

Hey MadNinjaCow. I like what you’re doing. Keep it up.
BTW…Can I advise you to ignore the 1 star rating you have. I’ve had them, and it’s just someones way of saying - “Good Effort. Keep up the hard work and you’ll do well !”…honest. In fact…they were very lucky because when they started using ZB - they were perfect at it, I mean 5 star perfect.
Great stuff for a noob…ZB is a hard programme to learn…I know, others forget. :+1:

The DVD’s that I am speaking of can be found on the Gnomon workshop website (www.thegnomonworkshop.com)They are not free but worth every dime.

Good luck

Ok a bit of a update as I promised.

This character is the female one that I am currently modeling (Seforin is =p )

So I wanted to show what has been produced thus far…

Now Im using the z-mapper that was recently created, so forgive if my screenshots arent exactly on the money :lol:

Also after watching a few dvds on modeling with z-brush and seeing the quick skimming they went over on the projection master, I think I have a idea on how to work it now…(I just cant make nice square shapes that I needed to for this model…so I noticed 1 or 2 flaws in this character after normal map creation…but hopefully texture will fix those up)

Well Enough talk, heres some of the action.
[ZMapperSnapshot3.jpg]ZMapperSnapshot2.jpg

I also took some advice and plumped up the character some (look to skinny as I was told constantly :rolleyes: )

I also Went into a higher sub division and made the lips more…lippy(?) and gave them a more female touch.

=============================

Well as always telling me things that are off are good to know…This model still needs some more work done before it is a finalized character.

But after tommorrow I should have the 100 % completed normal map done…

Um a bit of a noob question…when I export the texture map out…should the texture look all rainbowed colored? (Ive only dealth with bump maps only until today , so please dont laugh)

Also I want to try to texture IN z-brush, Im just curious Can I still paint on those higher sub divisions after making this low rez normal map for the ingame character? Or will this be a issue I need to think about?

Well thanks , sorry this is long winded…but well …

Yea thanks everyone! :stuck_out_tongue:

Attachments

ZMapperSnapshot4.jpg

ZMapperSnapshot5.jpg

ZMapperSnapshot1.jpg

Hey MadNinjaCow :slight_smile:

A few crits to help along the way: You may consider studying a bit more female anatomy, noteably around the hips and arms. By accenting the hips more, you may get rid of people telling you to fatten her up. Look for where the hip bones meet the skin, and you’ll see what I’m talking about. On the arms, look at muscle diagrams. If the cloth were hugging that closely to her skin, then you should be able to get the impression of the mass beneath.

Anyway, good luck with your project! IM me if you need any help.

edit: Yeah, it should be multicolored… Normal mapping uses three different colors to tell the engine how light reflects in a 3-dimentional space. So three colors exist for x, y, and z, and how they interact with each other dictates how the engine allows light to reflect off the surface. Bump mapping ++.

thanks for the insight. AS for the legs issue, the funny thing is it had a curved arched to it (I did this in z-spheres originally with as correct anatomical correctness I could) But after exporting into 3d max and creating the skirt lip itself. When I brought it back into z-brush I did not know about the CREASE tool back then…and well…I got atleast a week or so into the model and realized it later…These are tests Im doing right now, But for some reason every time I move the legs back in correct allignment in max and reimport it to z-brush, it curves them out again.

But in either Case This is a first attempt model So I figured that the anatomy wouldnt be 100 % , but the 2nd model will be just that :stuck_out_tongue:

Sure I would love to have a z-brush friend in my buddy list. I’ll Im you some time.

I’m sorry to have to be the guy to tell you this, but the model you have created is FAR from looking even remotely human. You need to look at a real person, and then look at what you’ve got modeled. They are completely different, I am sorry to say. Basically, you need to get some reference, and model to it. The latest update has done little to alleviate the problems with proportion that you have with this model. The ones that your friends did are not up to snuff either, I’m afraid. You need reference, especially if you are not proficient at drawing or sculpting realistic human faces from scratch. Best of luck to you, but they need a LOT of work. Take some art classes; they will help immensely. Figure drawing, and portrait drawing are essential to knowing what looks good in the human form. Good luck!

-Zack

Yea so I am yet another member of Mad Ninja Cow. You can call me Ritalin, Bill, Billy (only if your a girl).

This model was more of a test to show the guys in my group the abilities of bursh. I am by no means an experienced zbrush user, still in the learning prossess.

I still had alot of work to do to the model, arms, hands, legs, and otehr details. Was trying to see about a good prossess for doing hair when its short. I know for longer hair I should use plains, but does anyone know about a problem with normal mapping hair when it is done from this aproach. I was told recently NOT to do it like this.

The last image in this post is what made me love this prog. I did this when I first got zbrush. Did it in maybe 5 hours.

So Tell me what you think.

The Low resolution images are actual game models. Right around 7000 polys.

Attachments

face low.jpg

face high.jpg

profile low.jpg

profile high.jpg

full low.jpg

maybe 5 hours.jpg