@Freewaldo, @Donghua, @Cosmick: Thanks!
@Monstermaker: Thank you for taking the time to post your workflows as well! I think fondly on the soldering iron approach pretty much every time I 3D print something 
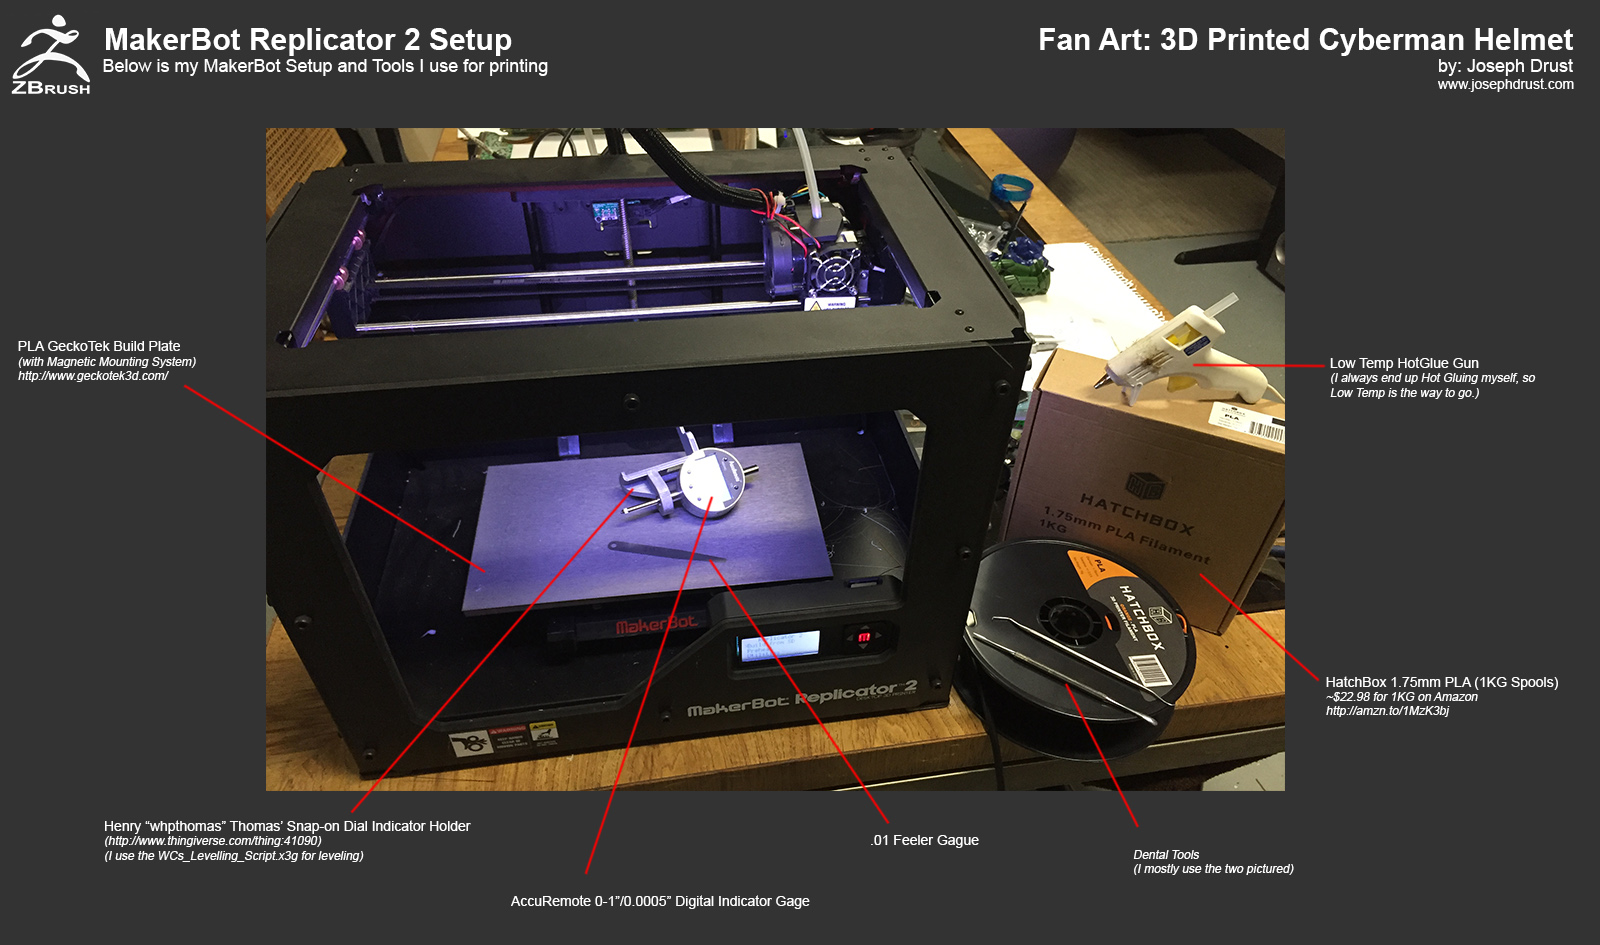
Here is my setup for my MakerBot Replicator 2. I am using a GeckoTek Build plate with the Magnetic attachment system. The Magnetic system is really nice and allows me to pull the build plate off easily to detach the prints. I run two GeckoTek plates that I switch between (I can fast swap the completed print and plate and slap in a new plate and print instantly.) The prints also adhere well to the GeckoTek plates; the plates do have a lifespan but I have printed ~60 prints off of a single plate.)
http://www.geckotek3d.com/
In general for getting high quality prints from the Replicator 2 I recommend four things:
- A precisely leveled bed
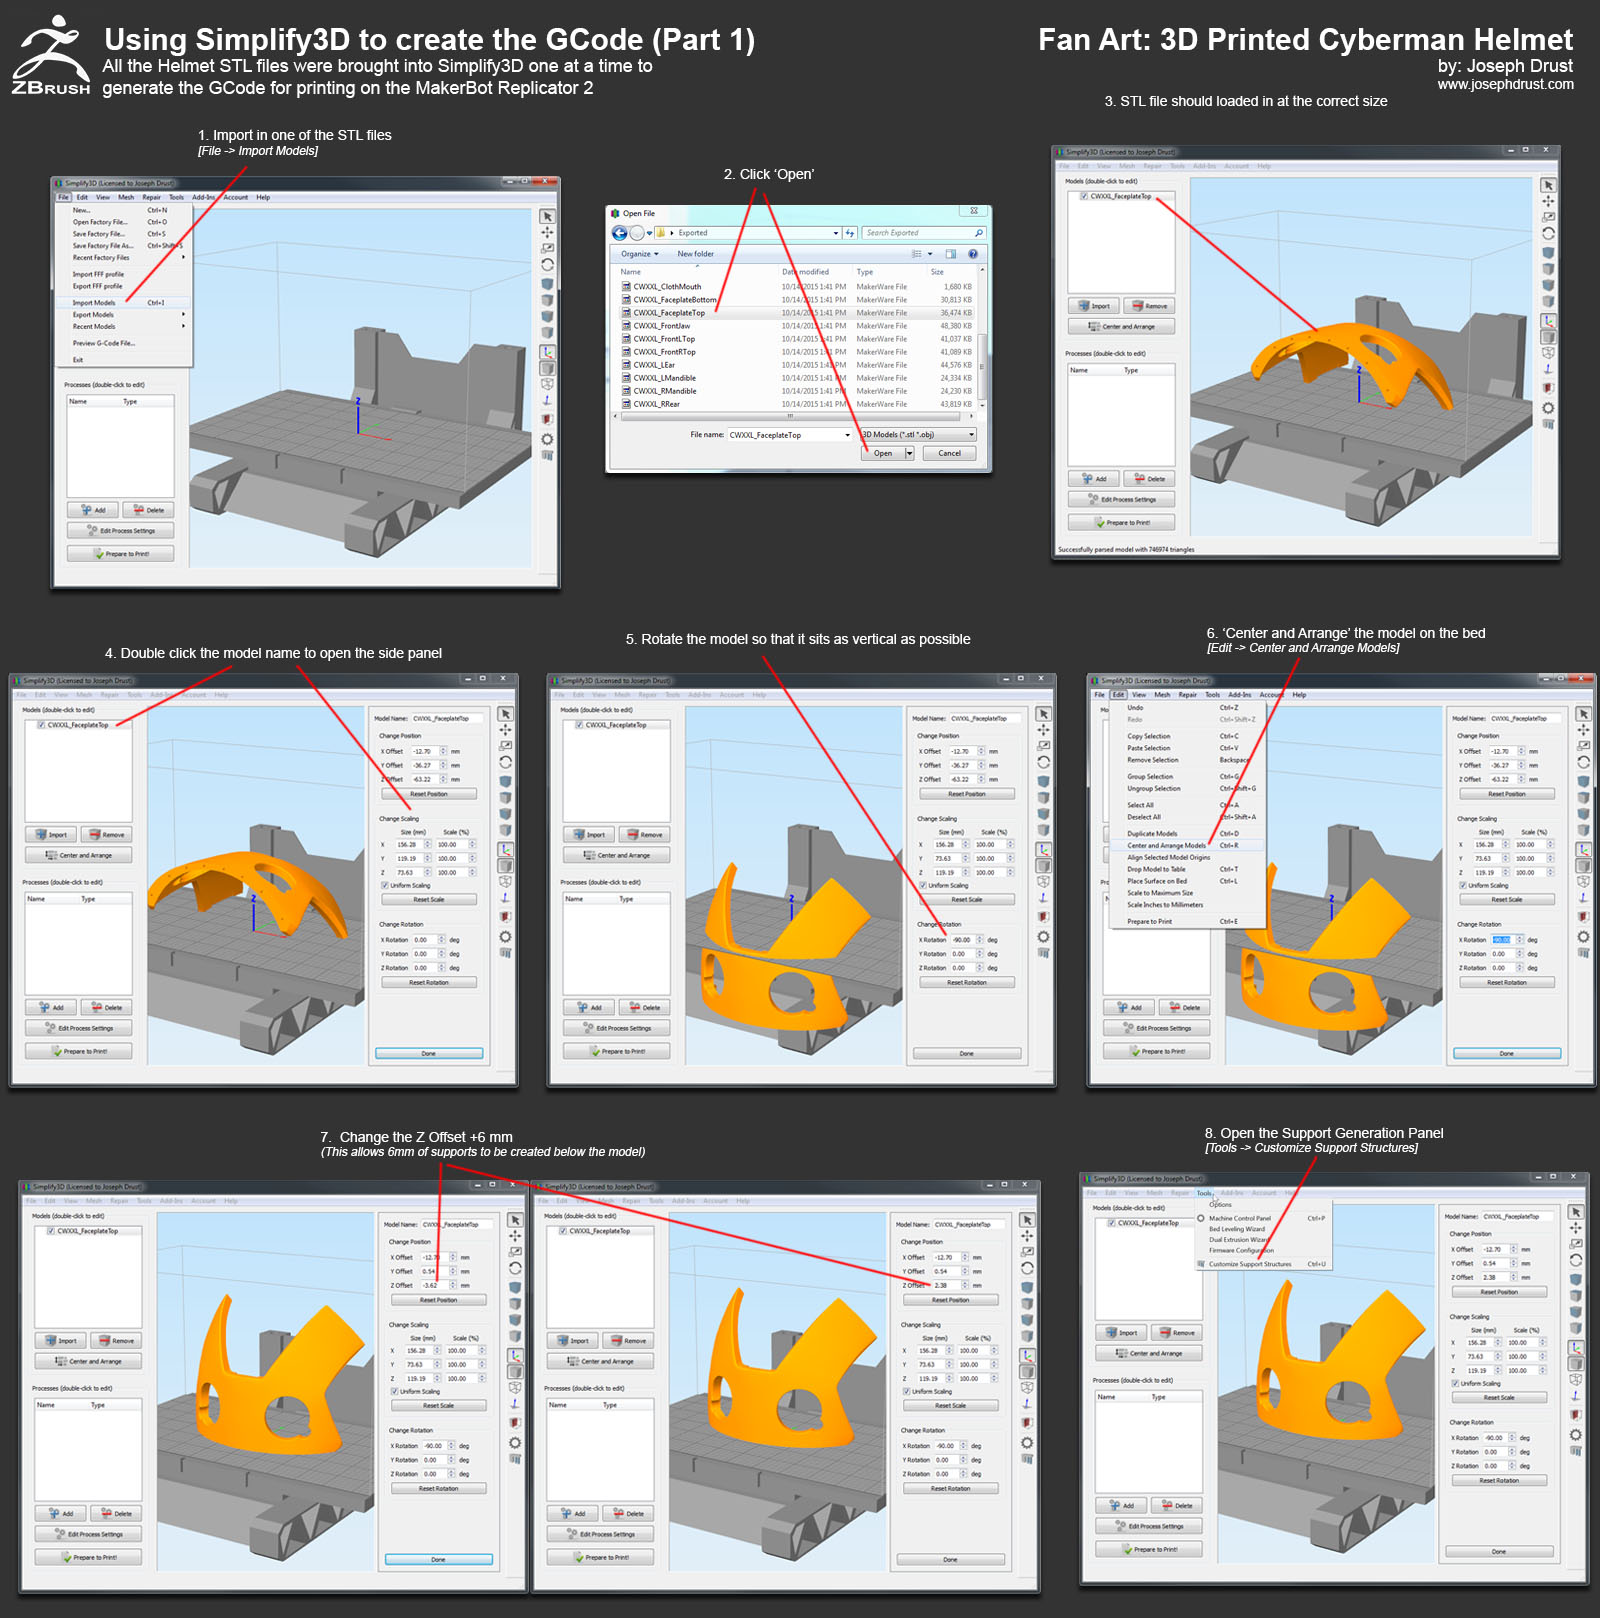
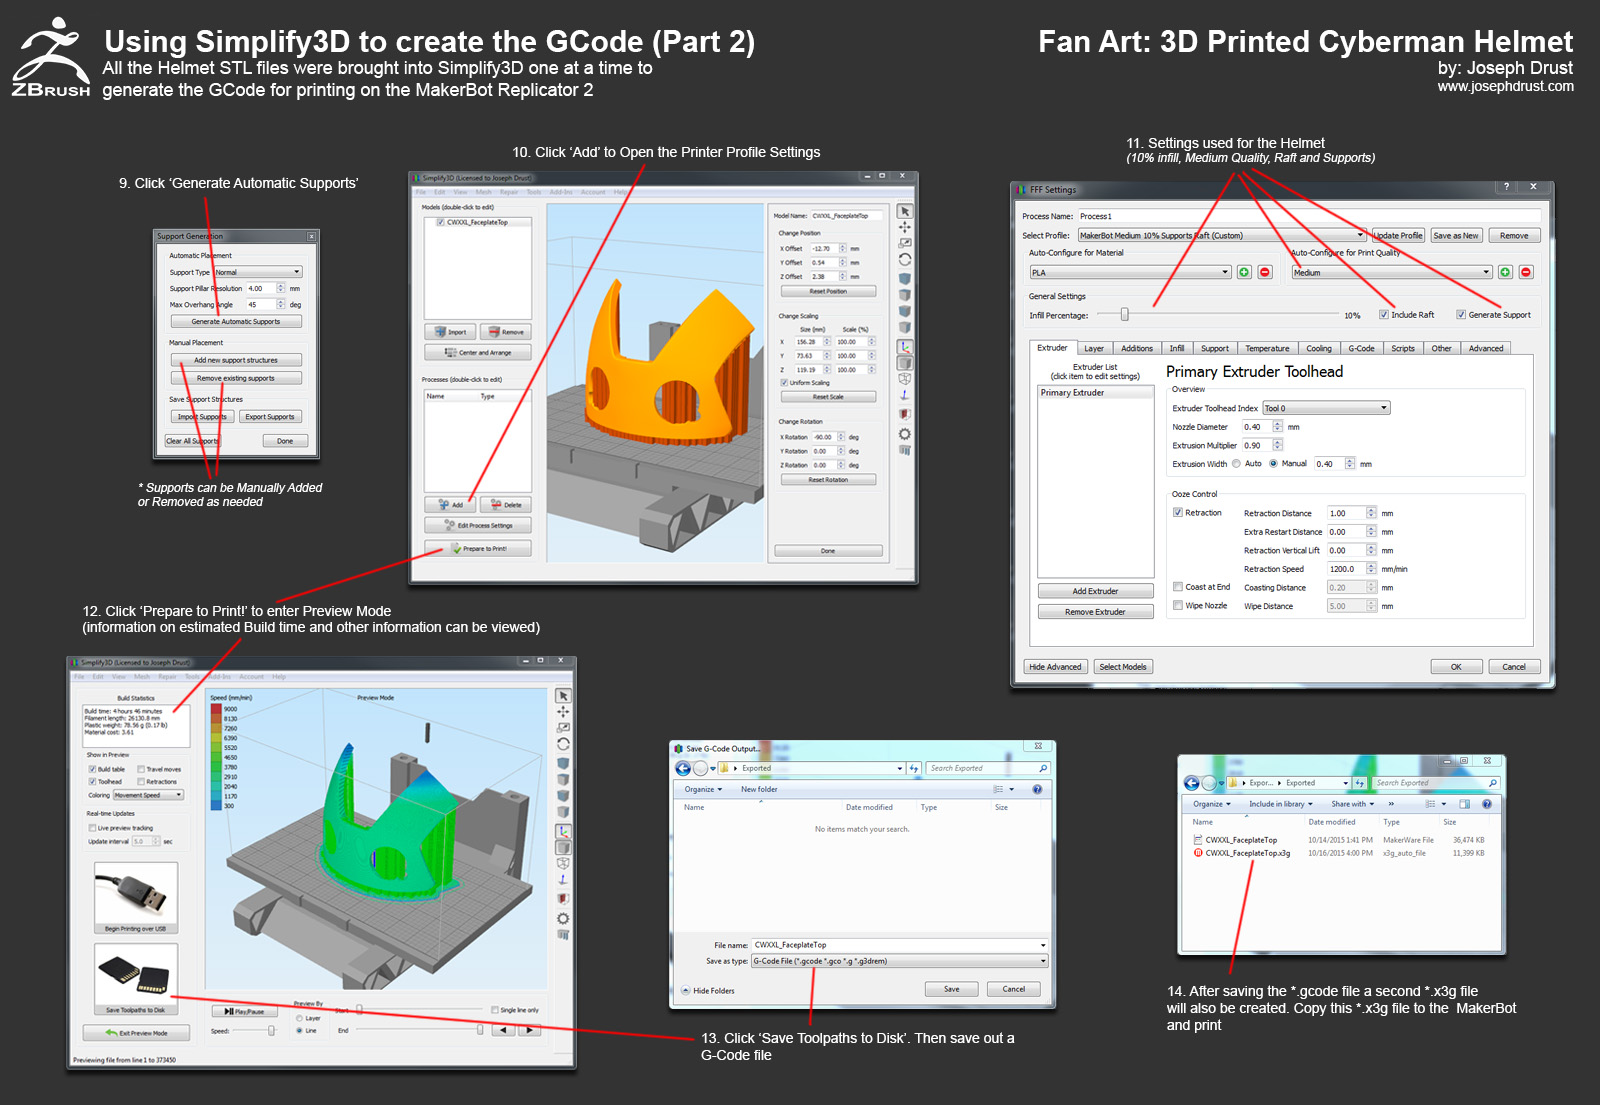
- Simplify3D Software
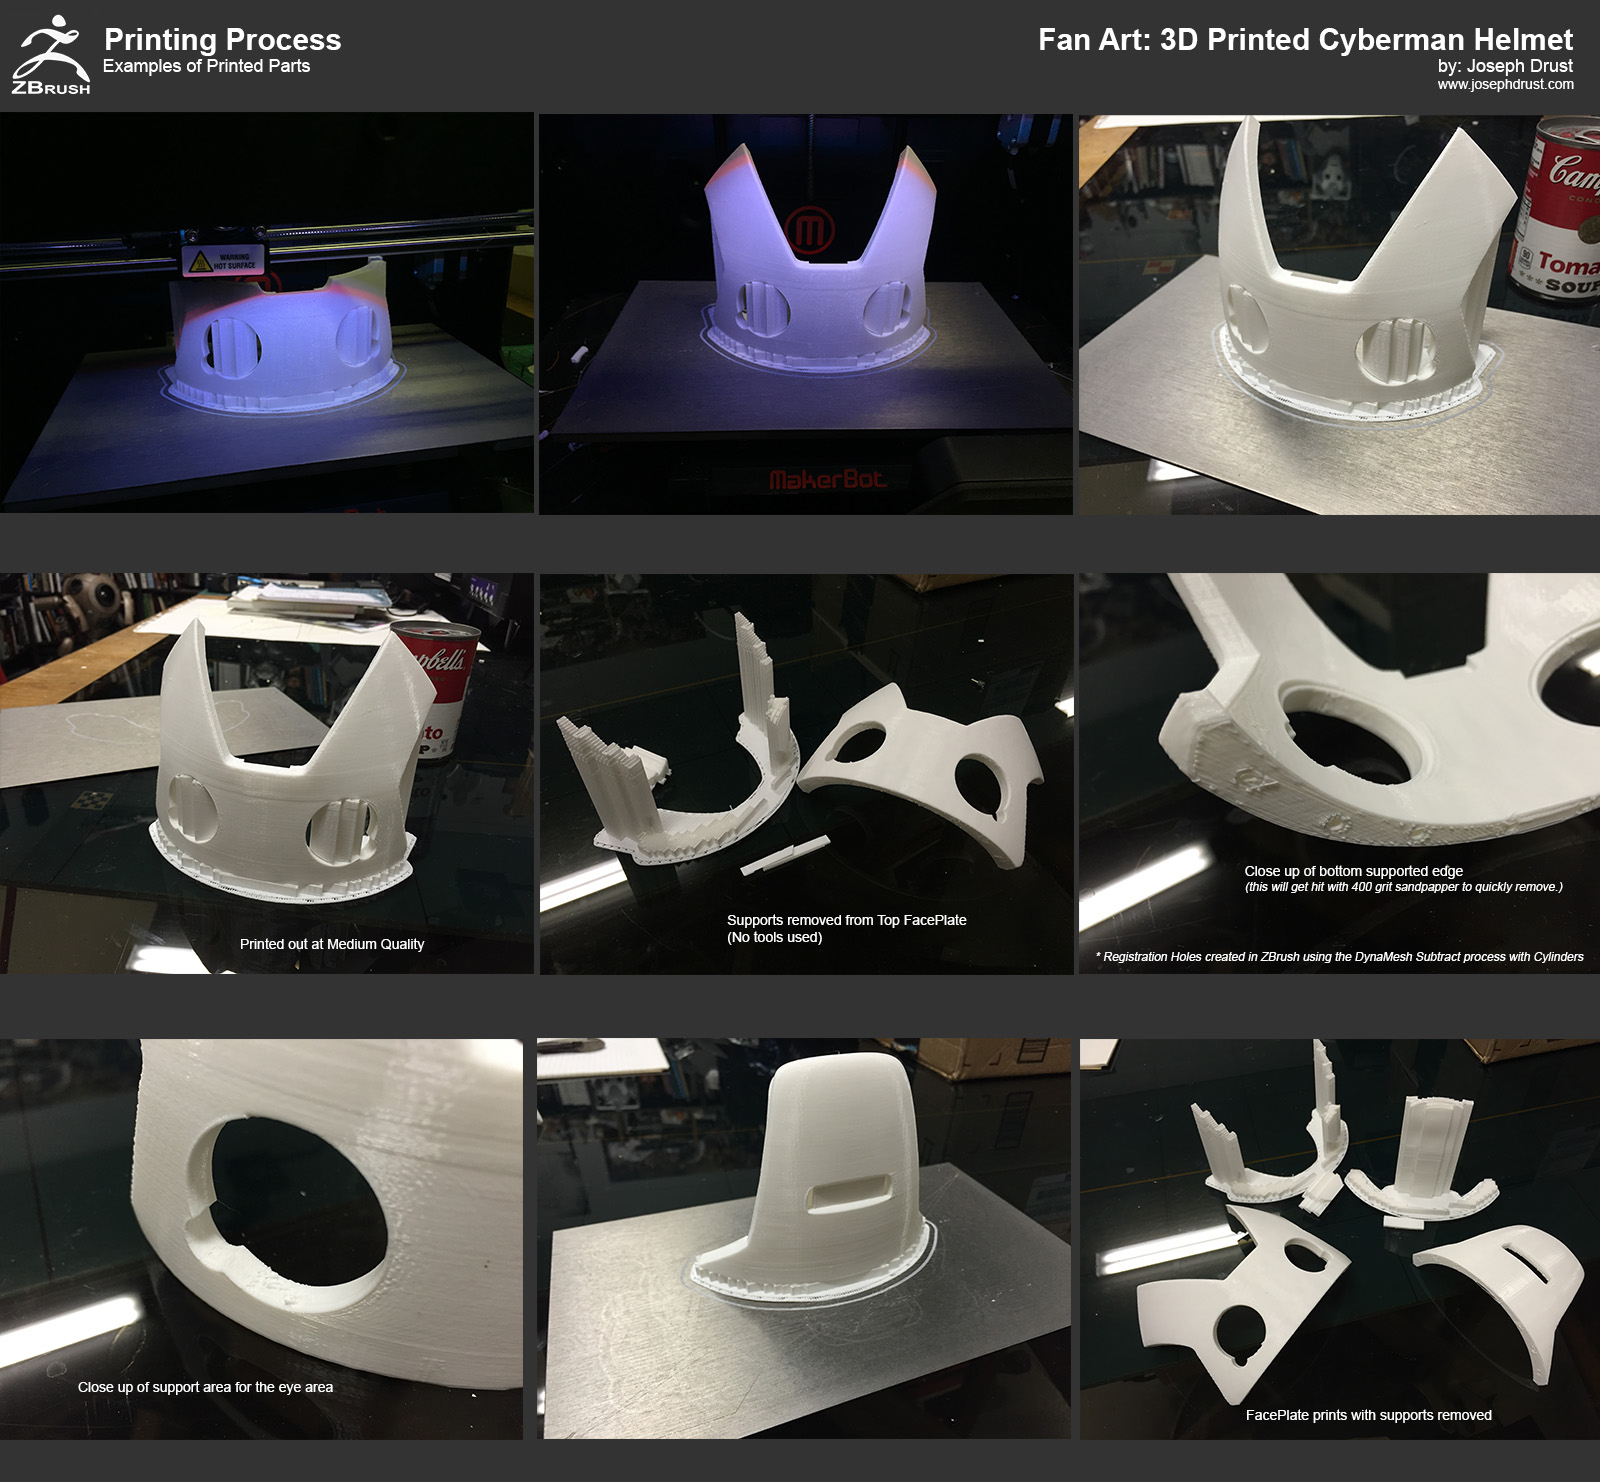
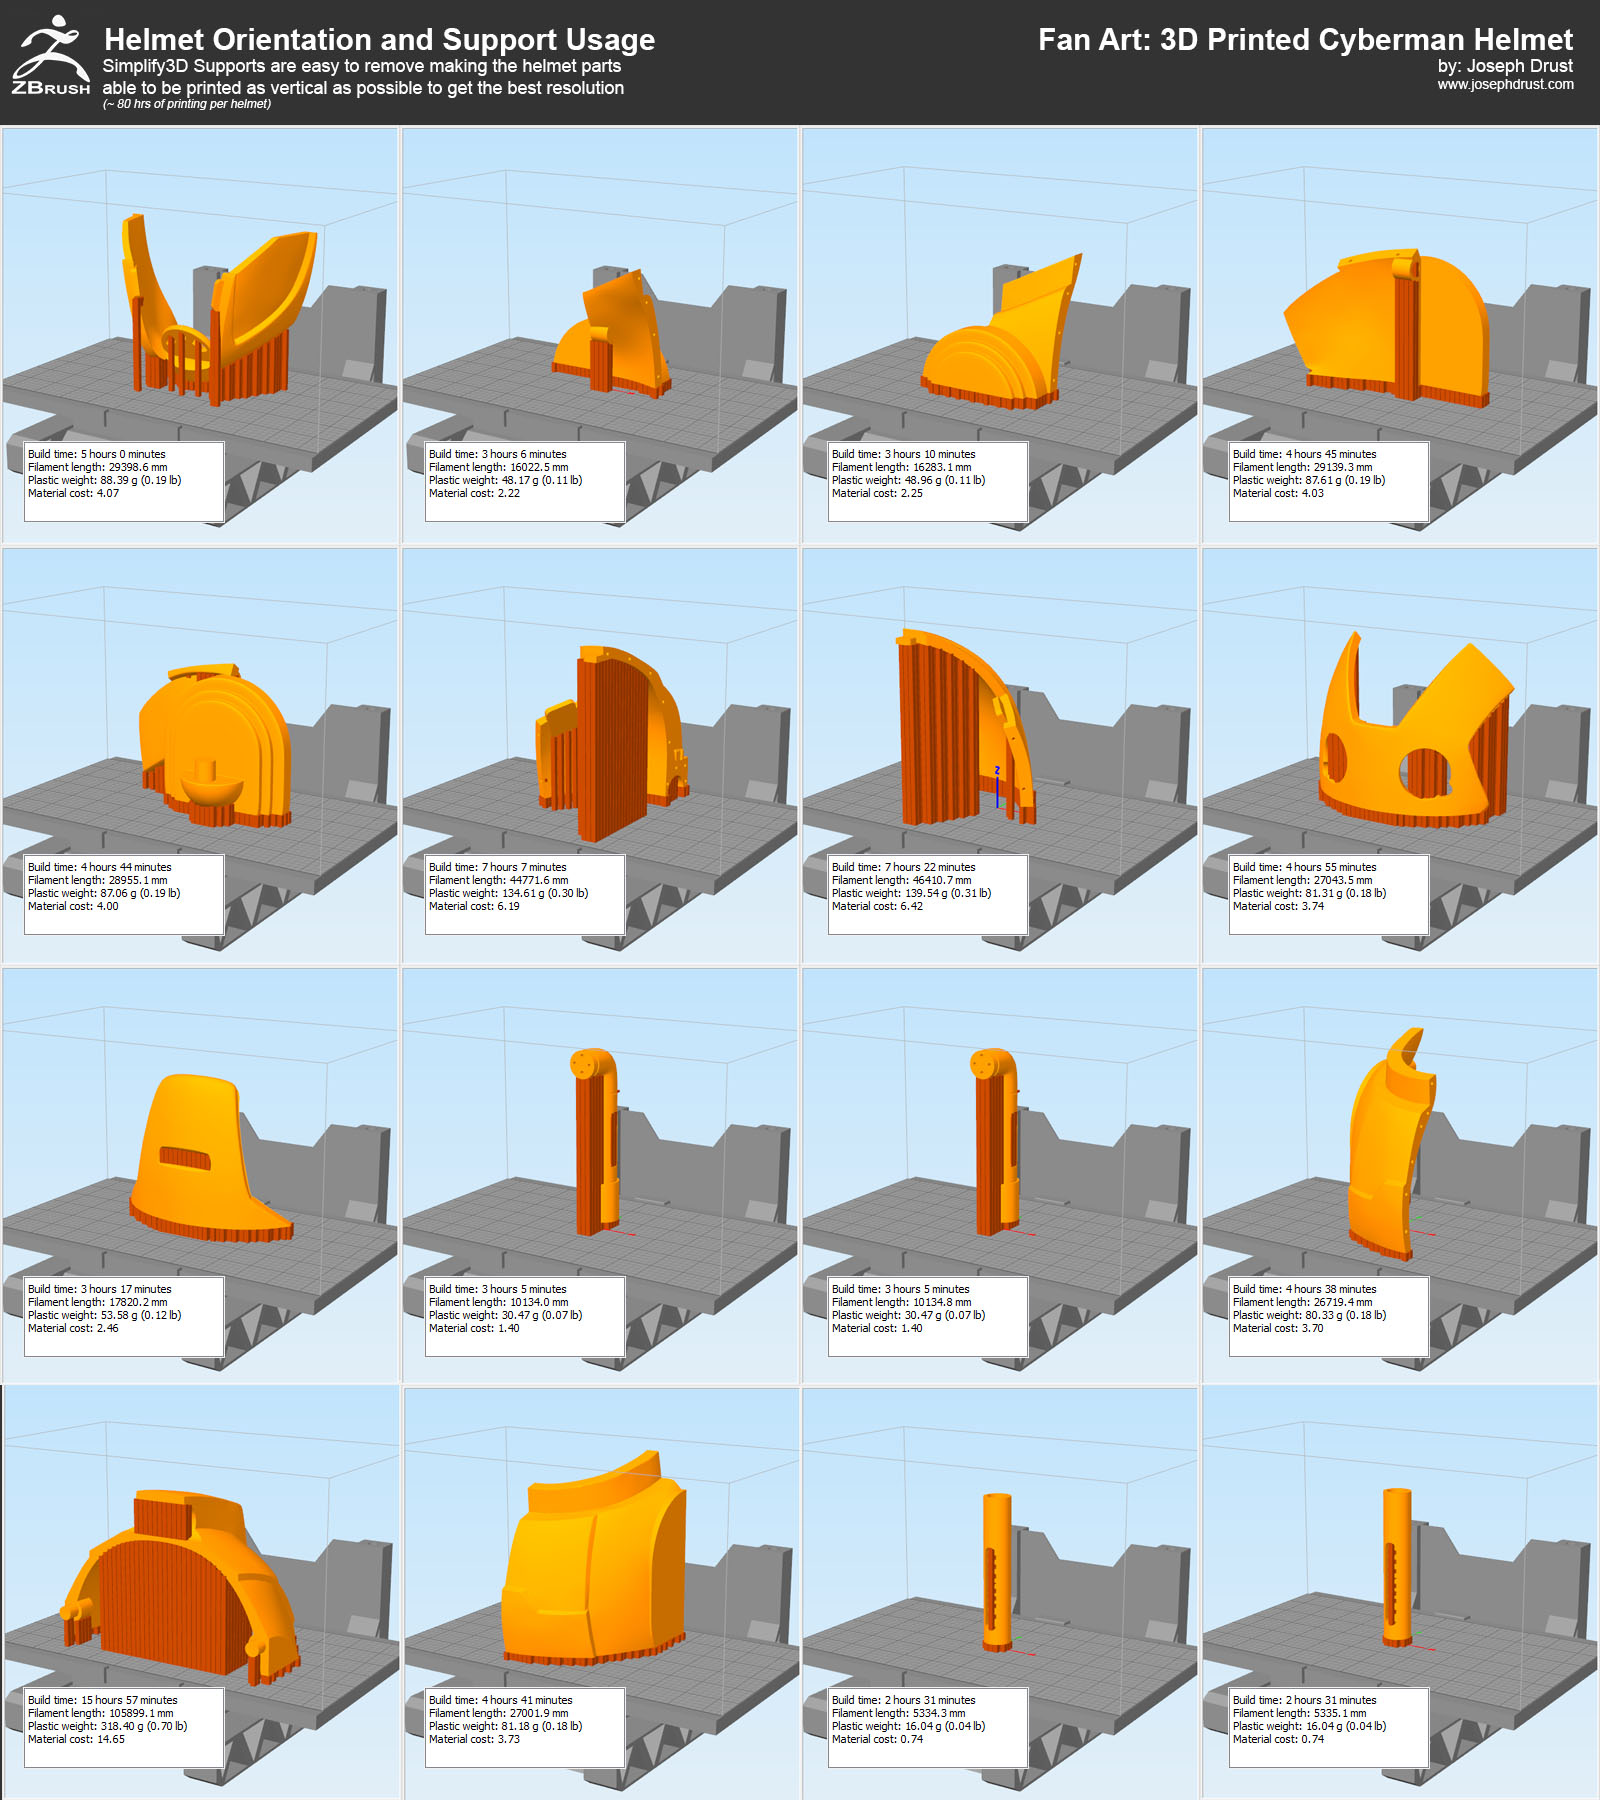
- Print as vertical as possible (Z Axis delivers the highest quality on the Replicator 2)
- Use Filament with a consistent diameter
For leveling I use a 0.10 metal feeler gauge to start the process (This is superior to the Makerbot business card  ) After rough leveling with this I then use a Digital Dial Indicator with a Printed Snap-On Dial Holder using Henry Thomas’ Leveling script. You can grab the script and holder off of Thingaverse here:
http://www.thingiverse.com/thing:41090
After leveling once you can print for quite a while without re-leveling. I usually recheck the leveling monthly or if I start noticing issues in my prints.
For filament I am currently using HatchBox’s 1KG PLA spools. I have gone through quite a few spools of the material and have had no issues in it’s quality. The cost is really reasonable at ~$23 for 1KG from Amazon (it also ships with Amazon Prime if you are subscribed to that service.) Since I will be painting everything I print I usually just go with the cheapest color available.)
http://amzn.to/1MzK3bj
If you ever hear ‘click click click’ when printing check the filament; I have had quite a few bad spools where the diameter has deviated greatly. I have not heard any ‘click click click’ since I switched to the HatchBox PLA.)
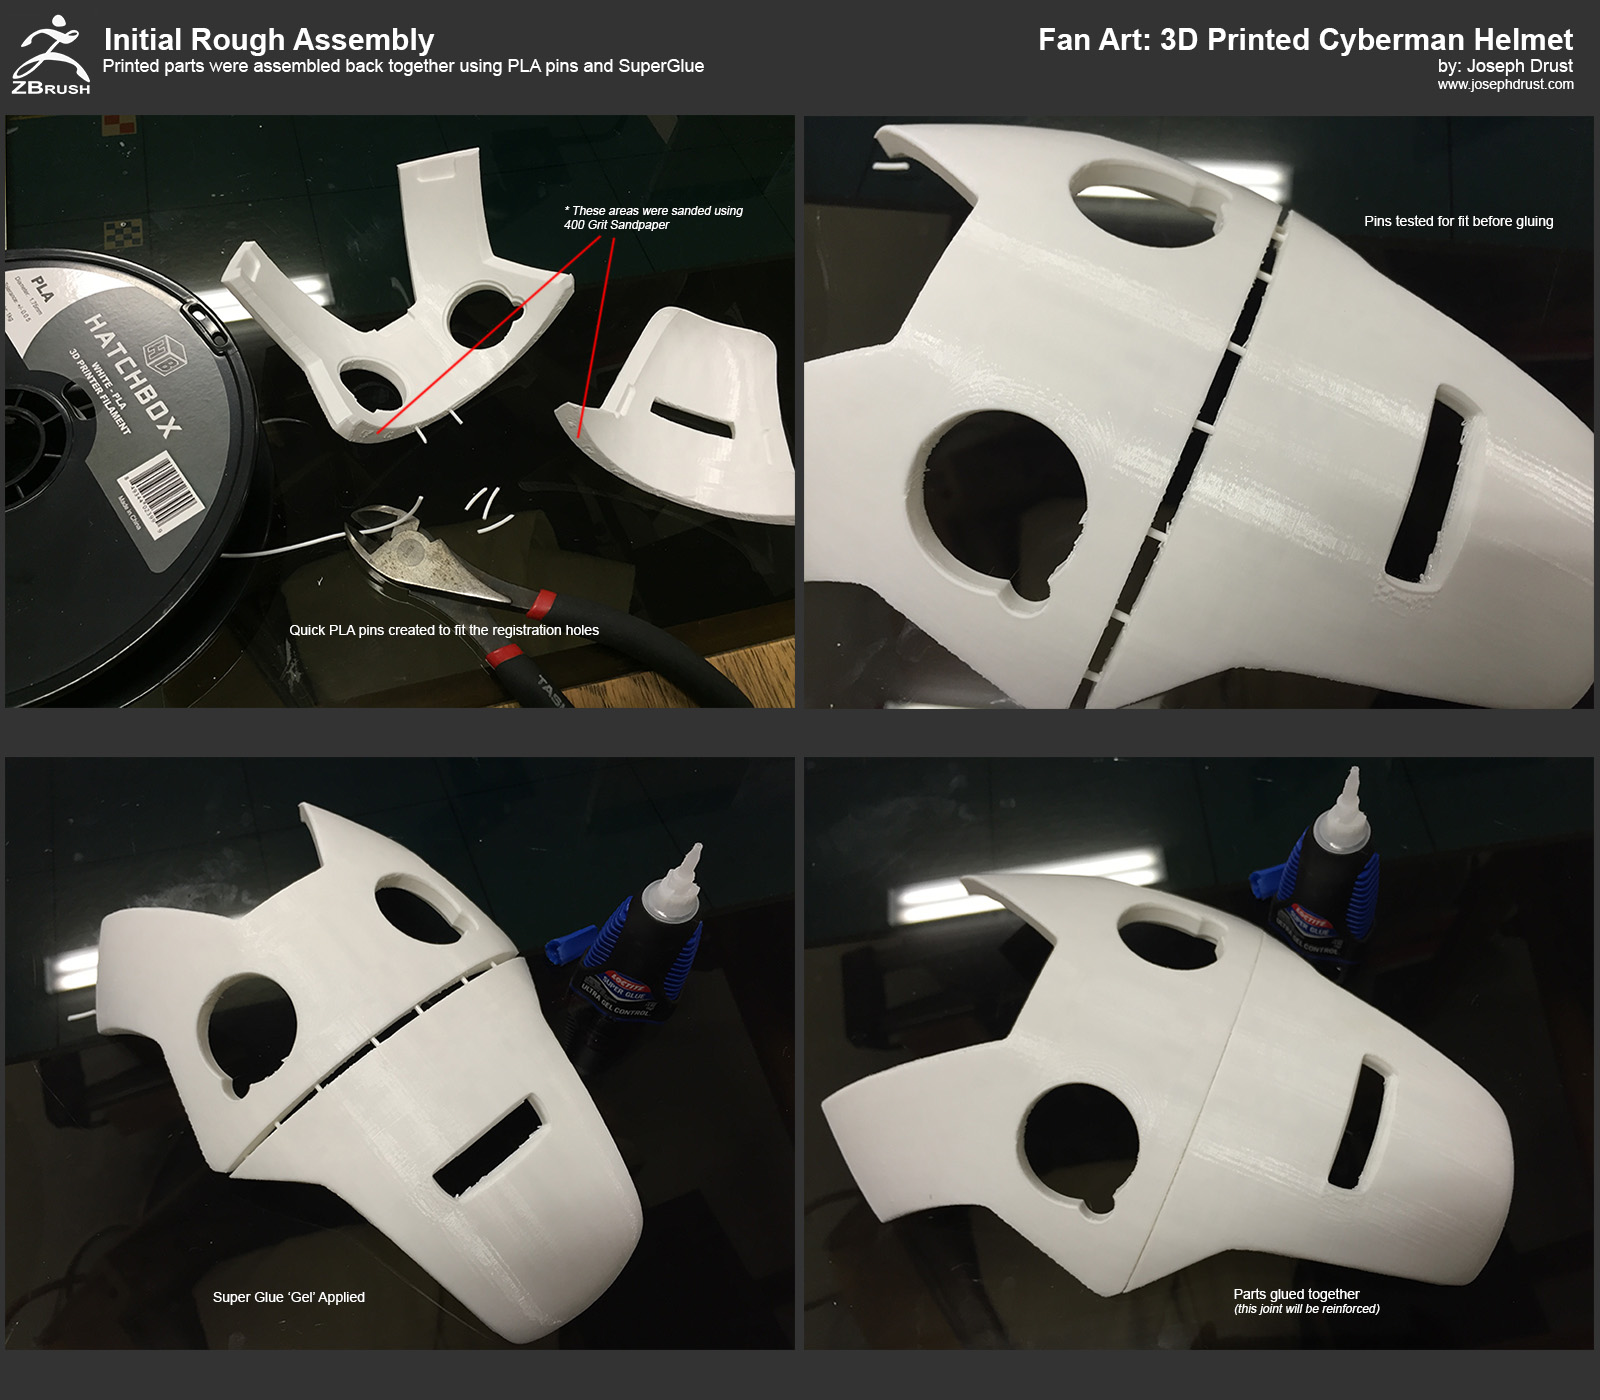
I use a Low Temp Hotglue gun to assist if something goes terribly wrong (Hot Glue Works really well at adhering prints to the bed or strengthening small areas. I used this a lot more before acquiring Simplify3D.) While using this approach I always refer to Rick Baker’s thread on ZBC where he describes using a soldering iron to manually fix 3D printing errors
http://www.zbrushcentral.com/showthread.php?177581-Bringing-back-an-old-friend&p=1068625&viewfull=1#post1068625
For removing supports I have two dental tools I primarily use. Most of the time these are not needed with Simplify3D (unless I just need to get a purchase on a small support somewhere to pop out.)
“Use the Soldering Iron, Luke”
-Joseph
Attachments


 ) I just use Netfabb basic to double check the scale of exported files.