Great attempt. 
Thanks for the response and thanks for dropping by Dragon.
Ezra
Your very welcome. You know I always drop by when you have something new that is HS to view (yourself and Gary K.) Love both your works.
That’s coming out great and its not at all feeble, how are you doing it? Is it a mesh extract?
Befuddled minds want to know!
Cheers!
Hi MealeaYing. Thanks for dropping in and the encouragement.
It went something like this.
- On a subdivide plane, and using symmetry, draw out your shape with masking.
- Turn the mask into a polygroup ‘polygroup from mask’ using ‘polish’ to get nice smooth edges. Make the rest of the plane polygroup, hide that part and delete hidden from the Geometry>Topology palet to get rid of everything but your base shape.
- Now you have a single layer or thickness of your shape. With ‘Display Properties’-Double on, use move, smooth and anything else that seems like it might be useful, to push, pull and prod your flat plane object into the form you like.
- At this point I ‘masked’ off the shapes where I wanted the holes to be, polygroup those masked areas (see item 1), hide those polygroups, then delete hidden (see item 2) so that you now have the holes in your single layer shape.
- Now you want to make that single layer into a thicker object with an inside, outside and edges. ****>S to take a snapshot of the current scene, from the Tool>Morph Target pallet click Store MT, use ‘Inflate’ from the ‘Deformation’ pallet to move your shape over and away from the snapshot image. The space between the two will be the thickness of your new object. Click ‘Create Difference’ Use CTRL N to get rid of the snapshot.
- Retrieve your new ‘thick’ object from the 'Tool" inventory by using the append button in the ‘Subtool’ pallet.
- At this point I ‘Dynamesh’ from the ‘Geometry’ pallet so that I can use insert mesh and be able to ‘weld’ it to the main object. Smooth, pull and prod some more to fine tune if required.
- I created a pipe type form to fit the main center hole in the front, turned that object into a ‘Mesh Insert’ brush using that button in the brush pallet and 'placed that into the hole in the front of the cowling, positioned as required, and then applied ‘Dynamesh’ to merge the two at the front opening of the hole. This created the ‘tube’ tha extends back from the front opening of the cowling. I then used the same insert brush to make the inside tube. I then merged the two tubes at the rear ends of the two.
While writing these steps I’m thinking “Wow, that seems so easy when you write it all down like this” lol. BUT, it took me MANY trail and errors of different methods that DID NOT work, starting over, etc. before figuring out this method. All the time thinking to myself. "I bet Meats has some really elegant and easy method of doing this that takes about 20 minutes max. 
Ezra
Holy cow…
I would never have though of any of this, and that morph trick…
This is going to be interesting! THANK YOU!!!
Regardless of whether you designed it, that Honda is ****ing rad, as is your model. Cheers!
Cobra update. I got a little time to work on the Shelby. Still not finished and still all Zbrush.
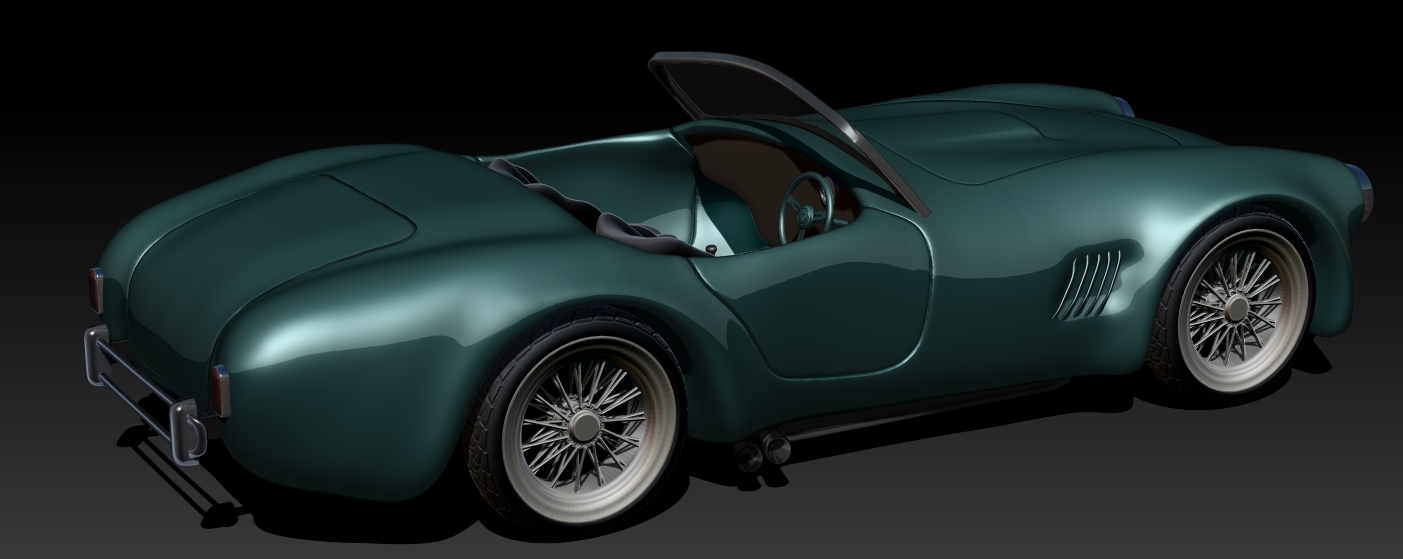
As always, C&C welcomed.
Have fun Zbrushing everyone.
Ezra
Attachments
small_orange_diamond looks great !! only crit is right hand drive ?? easy enough to mirror tho - and would look better with perspective on !!??
Thanks Gary, Your right about the perspective. I forgot to switch that on before I rendered. :). I have a bad habit of not checking the perspective view enough. Some of the reference images I had found are, actually, right hand drive. So I made this one like that for a change of pace. I suppose they had Cobras in England and other countries that drive on the ‘wrong’ side of the road. But yeah, mirror is always an option.
I was sill able to edit it to the perspective view.
Ezra
Hi Ezra52. Dig it my friend. Don’t care for the colour, but really like the idea that it has ALL been made in ZBrush. The tires and rims are just AWSOME!
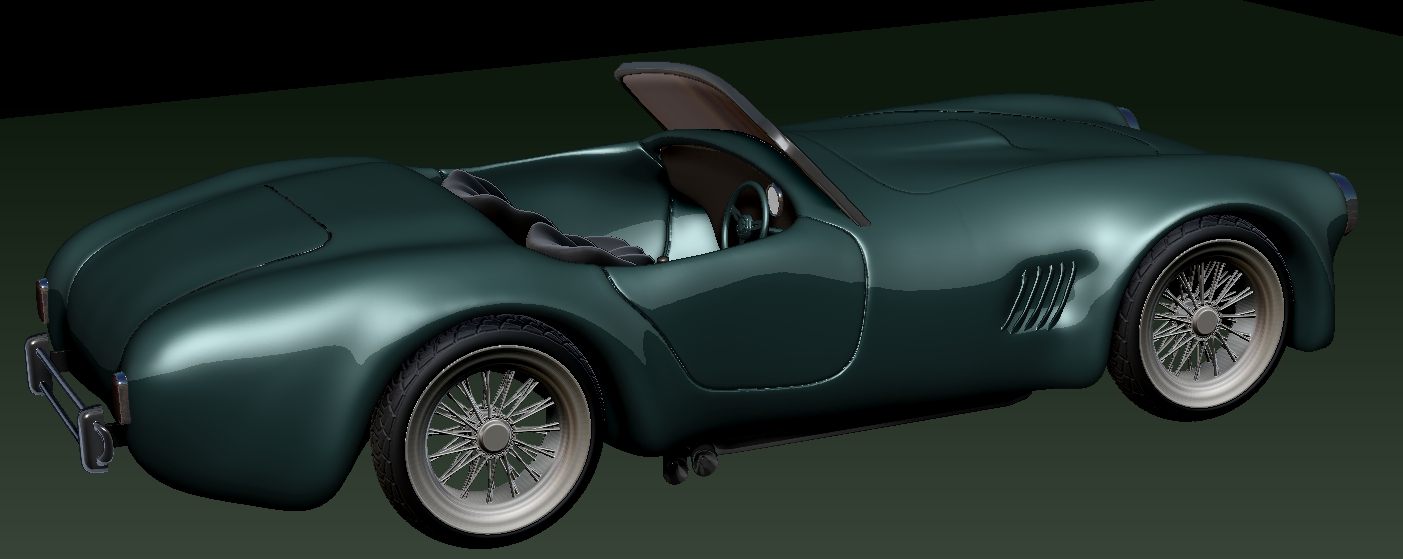
small_orange_diamond better! things look so distorted without persp, too me !!
Wow! Nice!

I like fuctional models unlike the mechs here that cant even bend at the joints !!??small_orange_diamond
Now that’s cool, but please put ‘back in’ the nice REFLECTIONS on the body from the other render. Man, it also needs some sort of cool background (IF your looking to do more work to the image). I know, I’m a pest- But again, too cool of a looking car and ALL ZBRUSH.
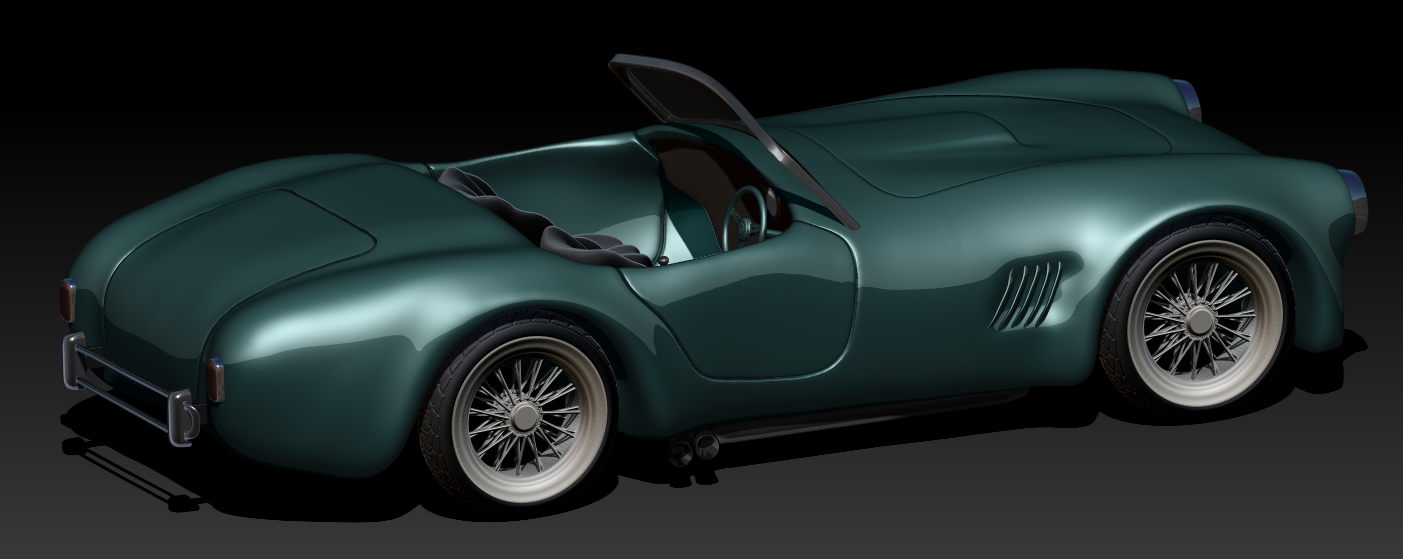
Just playing around with lightcaps and rendering again.

Any C&C welcome.
Ezra
Great progress. Maybe the goldish mat is not that fitting for a farmers truck.
by the way:what a crazy design that was, spending almost half of the car for the motor, compared to nowadays…
Crazy, but…beautyfull.
Thanks for dropping by Jake. I agree with you about that gold color. I had a 1940 Ford coupe when I was younger and painted it from a great black to what I hoped would be a cool brown. It turned out about that color of goldish. I always regretted doing that paint job. So I’ve taken this one back to black. So much easier in a digital format.
Well some of the buttons and sliders are getting to make a little more sense to me. Just a little though 

As always C & C welcome.
Ezra
really good EZRA, like the last one…my only suggestion would be: a bit more ambient occlusion beetween the wheels and the “street”, shadows more soft or more shades and probably on the car some scratch or grain (sorry for my english hope u undesrtand)…btw it’s great to see those design withing zbrush - excellent work