great works man, you really got a unique style.
theflu thank you!
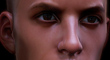
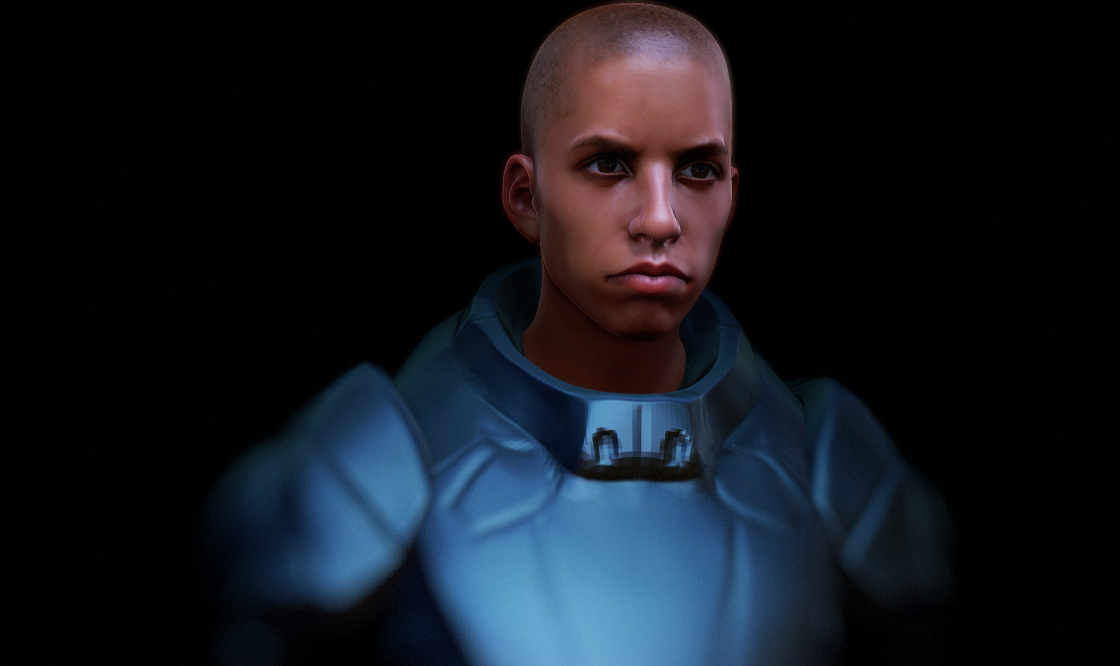
here’s new render test of man’s head, its just BPR + PS Cooling Photo Filter (82) -

Attachments
thanks for the texture man
i tried it on a flat plane but theres too much noise in the picture. and if i blur it the rope dissapears
tyrellcorp oops, that’s my fault, 'cos jpeg is just 8bit, I’d upload 16bit .psd texture here - http://ge.tt/2FOsr6g , let me know how it works.
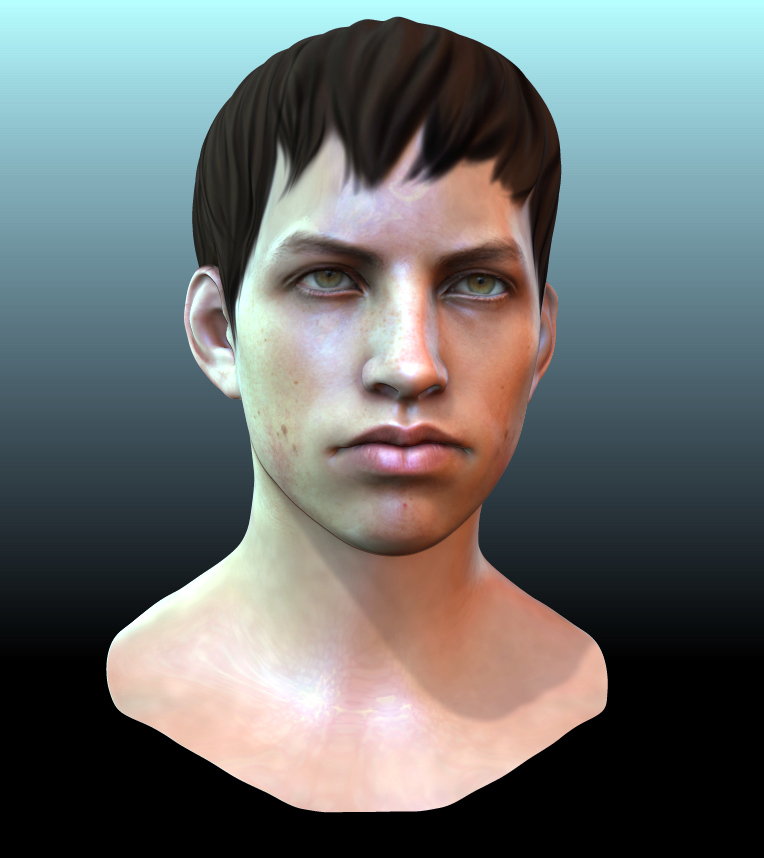
I really like that man/boy head. it has a certain emotional quality, just as the previous woman had.
hey eof3D,
What do you use to sculpt skin pores?
P.S Great job man. Always looking for your updates
Julian_K thank you man!
Eiad Hi! Thank you for comments. In case I dont need highres geometry for normal map baking, I could use just color bump in material properties for small skin imperfections. If I need sculpted pores I’m using dot alpha with spray stroke with great workflow from Rimasson - http://www.pixologic.com/docs/index.php/Francois_Rimasson and Keller - http://www.pixologic.com/docs/index.php/Eric_Keller. I highly recommend to check it.
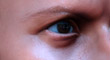
And here’s new sketch based on basemesh I share on previous page. Shader looks a bit buggy but I like this guy anyway ))
Attachments
once again many thanks for the high rez version.
just to let you know of some of the bizarre happenings with this.
if you bring your hi rez into ZB in the texture palette it comes in @ 32bit , but the orginal file is 16…
but if you convert this via the “make alpha” in the texture pallette it becomes 8bit…
also if you flood your tool with “polypaint from texture” command in the polypaint menu and then try to “mask by intensity” you get the second picture
and finally , if you just import it directly into alpha pallette and then use that as a mask you get the first picture.
well i am glad all of that is sorted… phew.
i think my brain is starting to melt…
thanks again… 

tyrellcorp I guess that better way will be importing that .psd as alpha and then use this alpha as displacement map as described here -
http://archive.zbrushcentral.com/showpost.php?p=749082&postcount=569
Many thanks again for the basemesh and the overall guidance you provide for this thread.
The male and female head from you are very important reference when I do my sculpting especially when i want to define the eye areas.
Piggy I’m glad it was useful.
One more render test of boy’s head. Hope you like it )
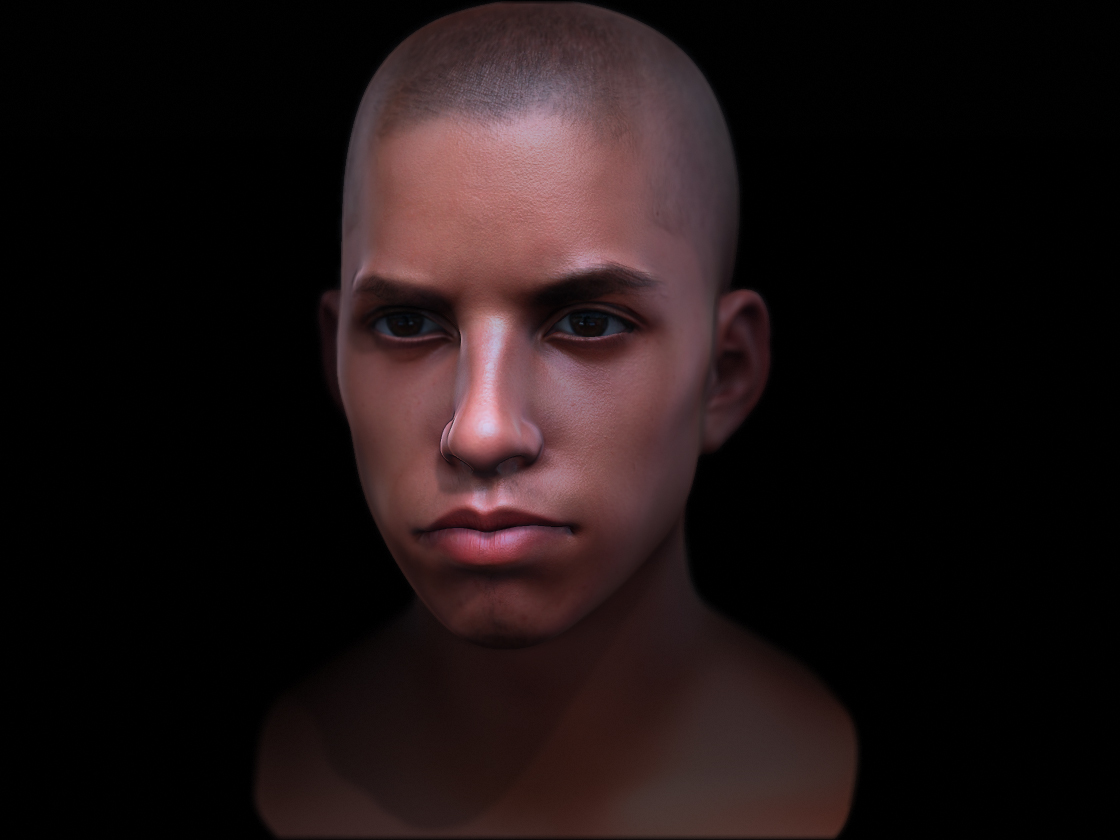
Attachments

Really like this head. 
Looking good as always eof- Also cheers for unearthing the tips from Francois Rimasson Eric Keller.
kaisasose thank you!
McJak thank you!
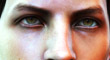
one more shot of this boy-
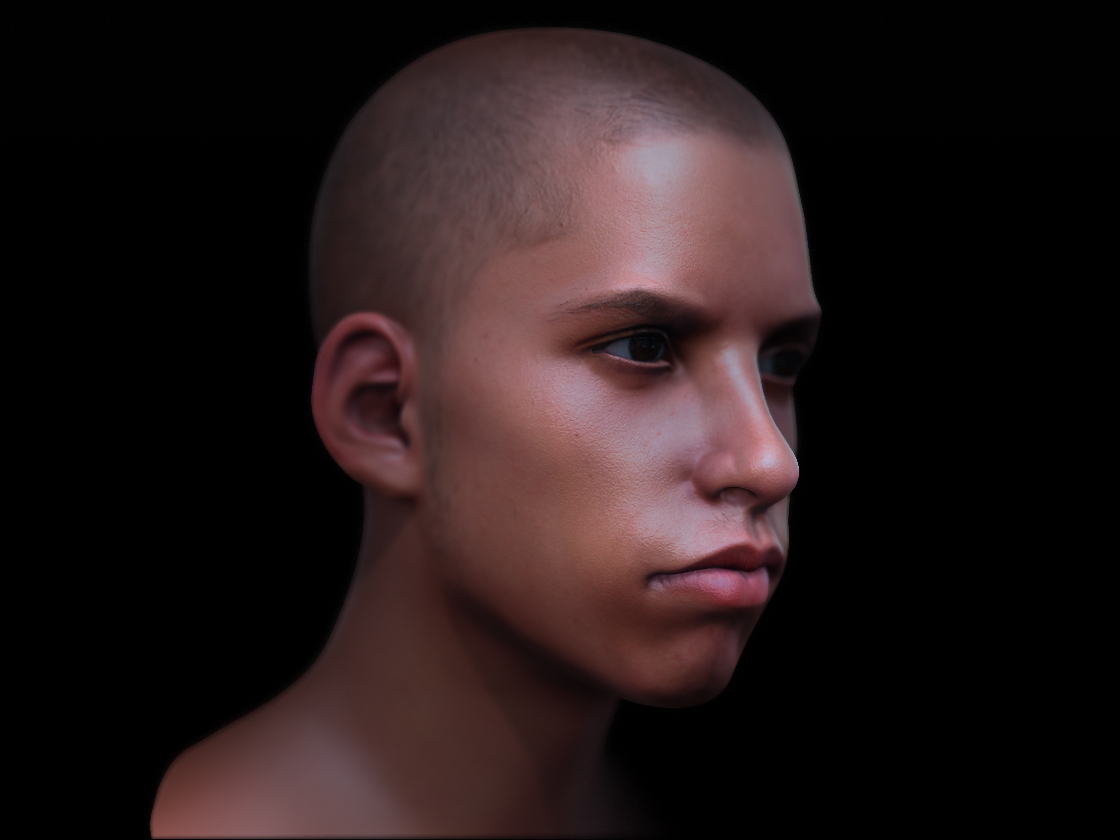
Attachments
I like the last sculpts a lot, especially the palish one with the longer hair.
Is the skin hand painted or from a photography?
Nice head!!
Chris_by thank you. textures composed from photos.
Bas Mazur thank you!
Here’s brief explanation of rendering boy’s portrait in zbrush:
- Setup of TriShader material and render settings:
Edit: sorry, I’ve forgot to mention that all small surface details come from Surface noise in tool pallet and from color bump in material settings )
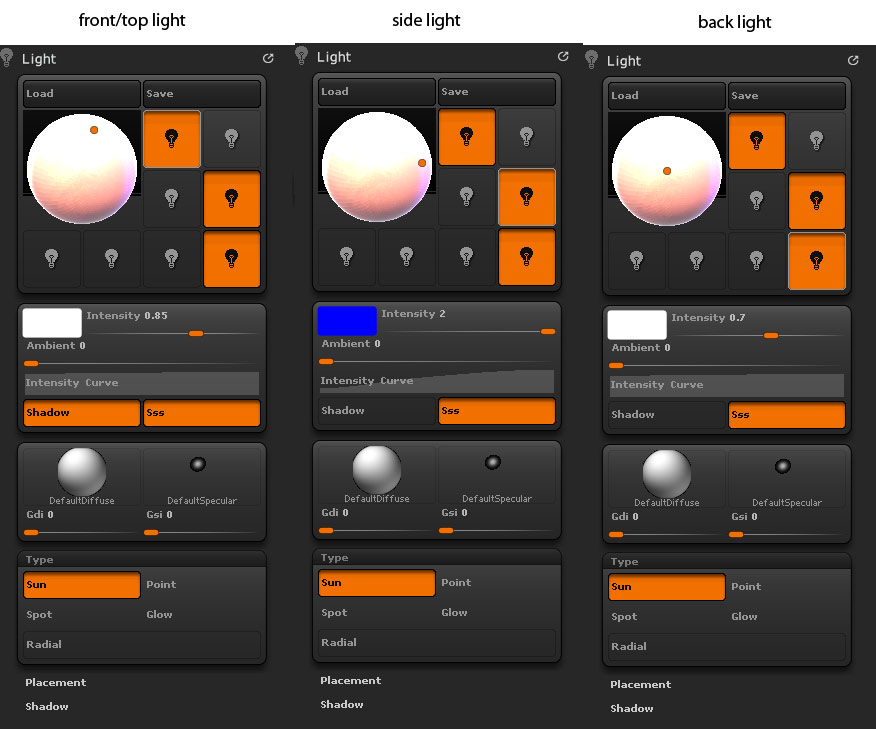
- 3light source settings -
- Post-work in Photoshop - lens blur with depthmap from zbrush and slight color adjustment with cooling Photo Filter.
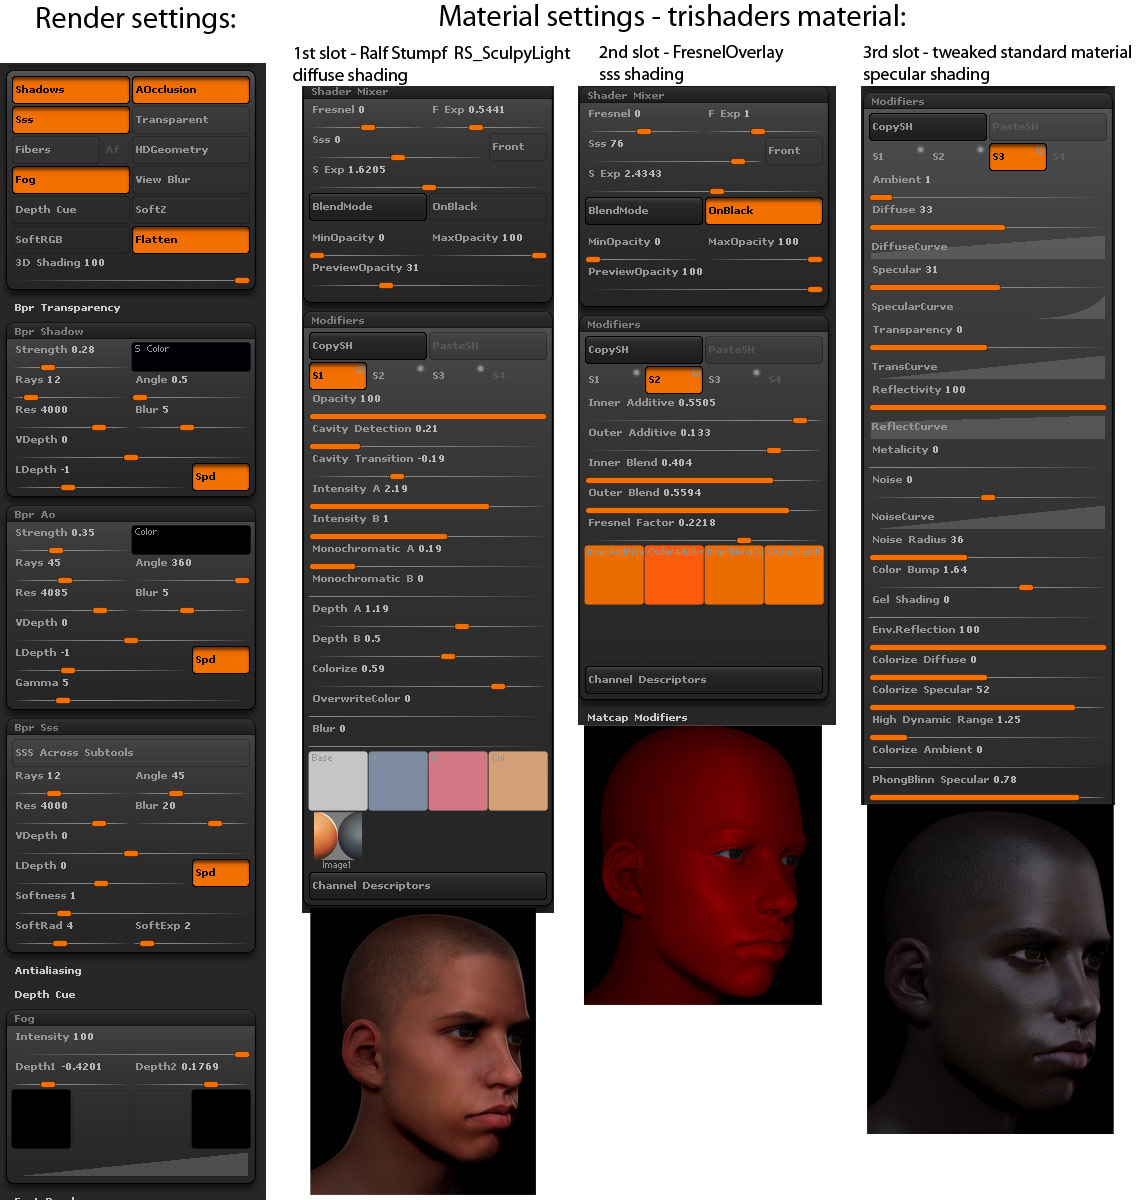


Attachments


wooo bravo man skin look pretty good
Hey man, that head looks beautiful -> delicate balance between sculpt/texture and render Thanks for sharing your render and material settings  !
!
madhead thank you!
Etcher thank you!
Probably there should be some kind of cyber suit like Paul Richards did.
Quick sketch -
Attachments