ZBrushCentral

Dynamesh SubTool subtracting; Edge quality

Hey, sorry if there is a similar thread already, but I have a question concerning Dynamesh SubTool subtracting. When I have two or more overlapping SubTools and I want to subtract certain shape from a certain selection, I’m not always satisfied with the edges quality that Dynamesh creates. If the intersections are too sharp, after Dynamesh, they seem to lose quality, there is this tearing effect that happens. My question is, is it possible to preserve the sharpness of the intersections using Dynamesh without this happening?

Here are the examples:

Of course I can Smooth it out myself, but I was just wondering is there some better way of doing all this?

Thank you.

Attachments

1.png

2.png

3.png

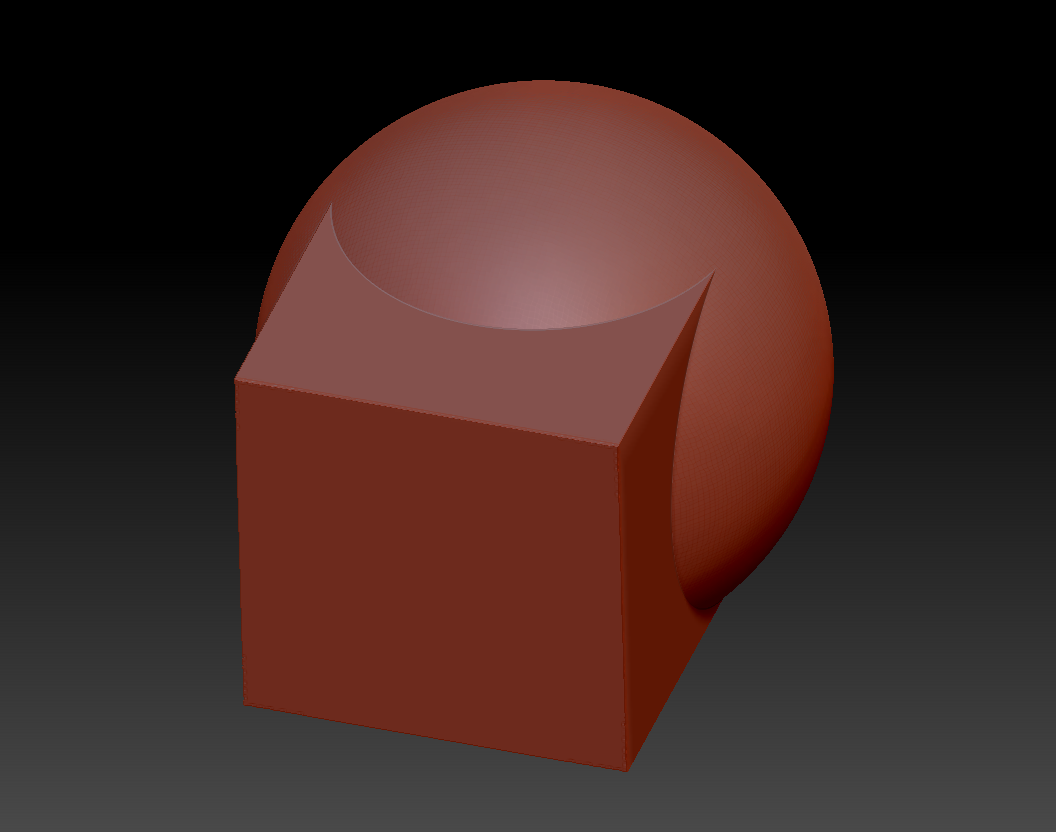
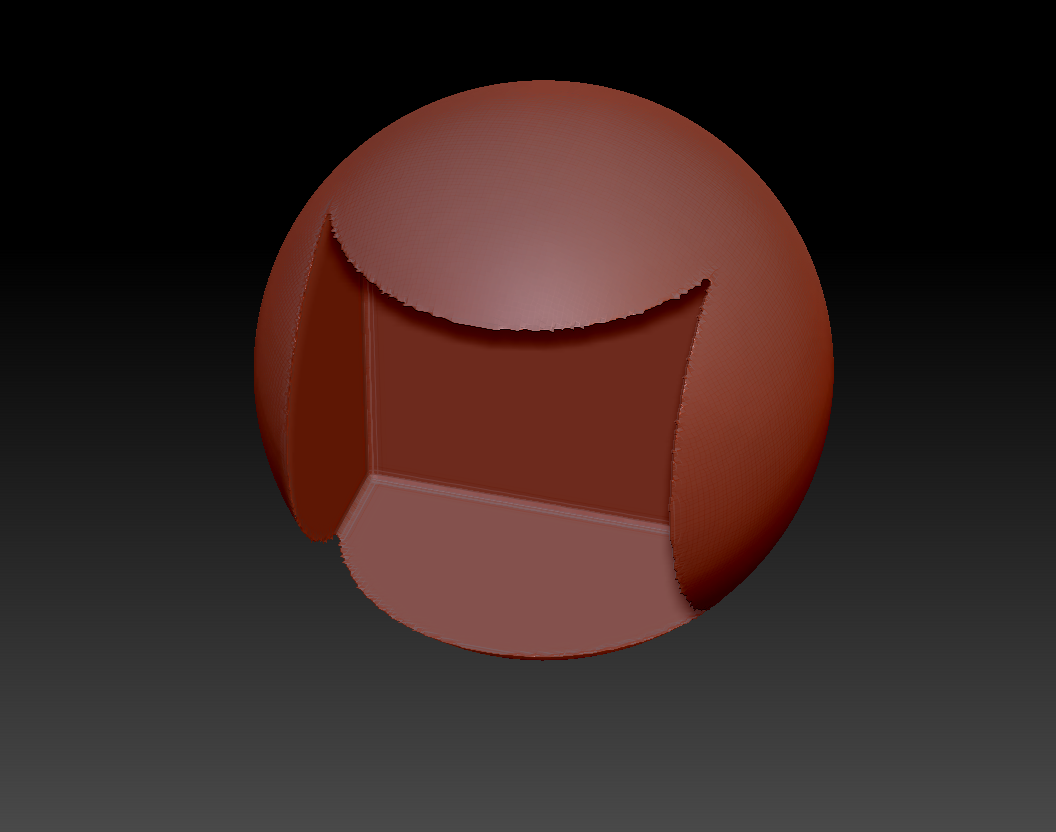
Dynamesh subtraction that results in edges that protrude at less than a 90 degree angle will frequently result in excessively sharp edges with artifacts. Try to avoid this where possible.

The most reliable way is to model that extrusion in with the Zmodeler tool, if you have a sphere with precise enough low poly topology to allow it.

If you’re working with a high poly object, or one with unsuitable topology, try slicing the shape to be extruded instead, and use transpose-extrusion. See the quick and dirty example I’ve made below:

spherecut.jpg

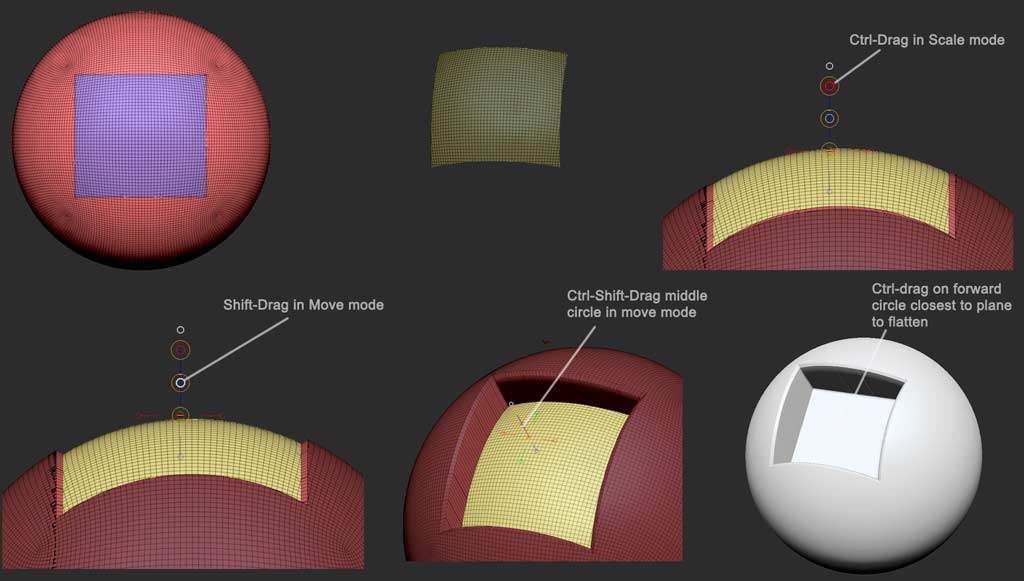
Slice the square shape in with the Slice Rect brush or slice curve brush (I actually recommend the latter, but I’ve used the former for speed). Shift-click on the resulting square polygroup to hide all but. If you sliced without hiding the backfacing side of the sphere first, you’ll have another matching square on the rear side. Either hide that or polygroup it separately. Once your target square polygroup is the only thing on the screen, ctrl-click the canvas to mask it. Shift-ctrl click the empty canvas to unhide everything. Ctrl+click empty canvas space again to invert the mask. Now you’re ready to work.

In Transpose Scale mode, center theaction lineon the target area, and ctrl-drag on the end circle to extrude the shape inward a bit. Now, In Transpose-Move mode, make sure the action line is perpendicular to the target area, and Shift-drag on the middle circle to move the target area inward just a bit while constrained to the action line direction. This will result in a slight bevel to the edge of the extrusion that will blunt those impossibly sharp edges, and make it easier to dynamesh. Now, still in Tranpose-Move mode, ctrl-shift-drag on the middle circle to extrude the target group inward, again constrained to the action line axis. Finally Ctrl-Drag on the forward most circle to flatten the target polygroup (you may need to move the action line forward a bit so the circle is located on the plane you wish to flatten.

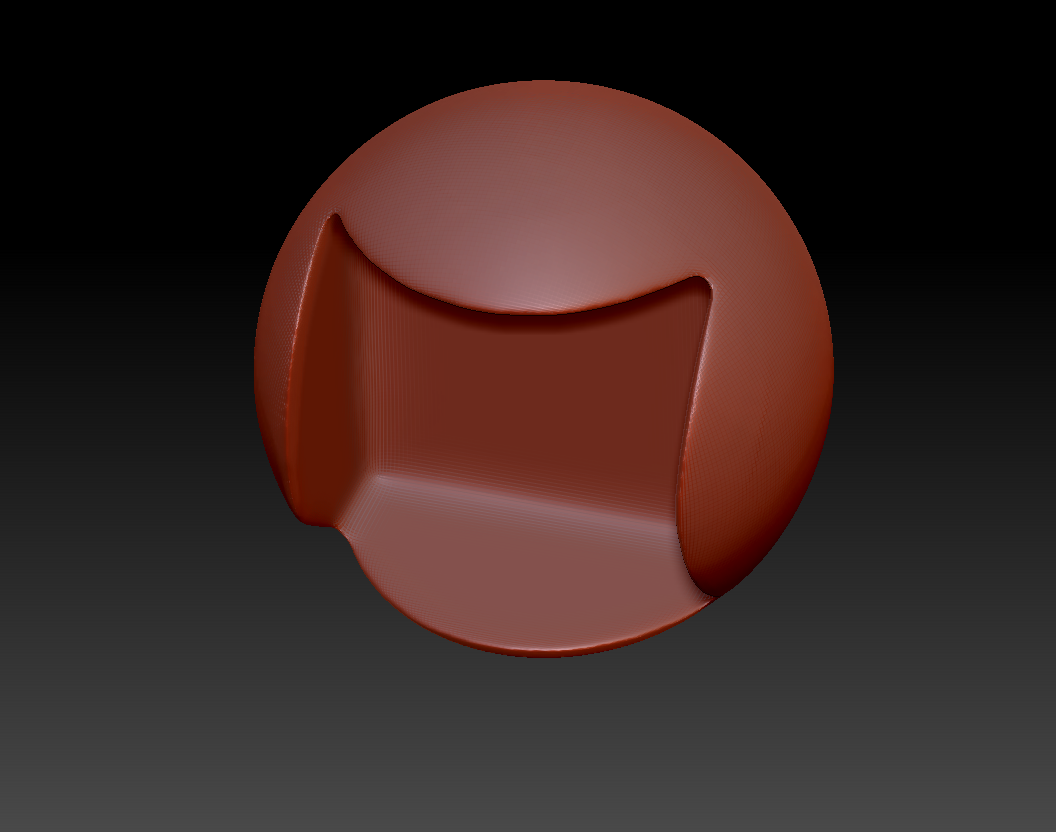
And there you go. A much cleaner result. You’ll notice there are a few “grooves” in the side of the extrusion. That was because I was hurrying, and didnt clean up any extraneous polys on the edge of my target polygroup before extruding. You’ll have to clean those up if they bother you, or use the slice curve brush to slice one side of the square in at a time, because it results in cleaner cuts than the marquee slice tools.

Thanx for the response, this definitely helps for this exact problem. But there’s always something new coming up with Dynamesh, especially if the model is more complexed and doesn’t consists out of primitive shapes. Lots of trial and error I guess, until they make it better.

People tend to ask a lot more out of dynamesh than it was ever really intended to do. I count the fact that it does hardsurface well at all as something of a bonus. This bit was made with nothing other than dynameshing at high poly. No low poly modeling involved:

r6stompysmll.jpg

It’s just a matter of gaining experience with the ins and outs of your chosen tool, and knowing what situations a slice will work better than a subtraction, and vice versa. In the case of your problem above, that edge you were trying to make would have been impossibly sharp and problematic in a number of workflows. Be sure to become familiar with the Zmodeler tool, and see how something that might be tricky with one way of working, is trivial for another, whereas another shape might be simplicity to make with dynamesh but tricky to model. Then you can make good decisions about what the right tool for a job is.

Good luck!

Wow, that really looks awesome. I’m not giving up on ZBrush or any of it’s features. I’ve just downloaded the other day the latest version and have been looking into ZModeler tutorials online. You definitely have a lot of things to learn as you go along. But, I’m switching from painting to 3d modeling/sculpting, and now I see that it’s best to go one step at a time, and learn as you are working… depending on what it is that project is asking out of you.

But thanks for the responses, I was just thinking that perhaps I’m missing out on something with Dynamesh… or is it as you said, that I just need to learn it’s limitations :).