ZBrushCentral

DynaMesh mess

Hi all -

Can someone please explain to me what is going on here? I have a DynaMesh foot (image on the left) that was appended as a SubTool with the rest of the leg. After merging the foot with the leg, then performing a DynaMesh re-mesh, I end up with all this crazy geometry between the toes (image on the right). I initially thought that maybe I needed to close some holes on the foot before merging (Geometry > Modify Topology > Close Holes), but that didn’t seem to work.

After you laugh at my amateur question, any help would be much appreciated. :slight_smile: Thanks!

Attachments

dynamesh.jpg

the toes are just too close together. dynamesh will always try to bridge minor gaps like that.
you could try using a higher resolution (sometimes helps).
or, keep a duplicate of the foot. then, on the one to be re-dynameshed, spread out the toes with transpose and masks.
spread them out far enough so that the dynameshing does not affect them. then use transpose again to put them back in line and then project the details from the duplicate of the original you kept.
if you have 4r6, i believe you can circumvent this whole process, by assigning polygroups to the toes.
i’m not exactly sure about how it works just yet. i haven’t updated to 4r6 yet.

Hi again, Hammy -

(Love the handle, by the way). Thank you so much for your reply. ZBrush is my first go-around with modeling. So far, I think DynaMesh is a great concept, but I gotta say, I’m a little disappointed as I’m now discovering its limitations. Mind you, I get that DynaMesh is just intended for blocking and not for detail work, but as you can see, I’ve kept the foot detail to a minimum, so in my view, the problem that I’m experiencing shouldn’t be an issue.

I suppose it wouldn’t be so bad if the tutorials made mention of the fact that DynaMesh tries to create geometry between gaps within the same SubTool. And it would be nice if they showed some examples of the resulting consequences. I’ve upgraded to 4R6, but if you haven’t already, It’s probably not worth the bother, at least where DynaMesh features are concerned.

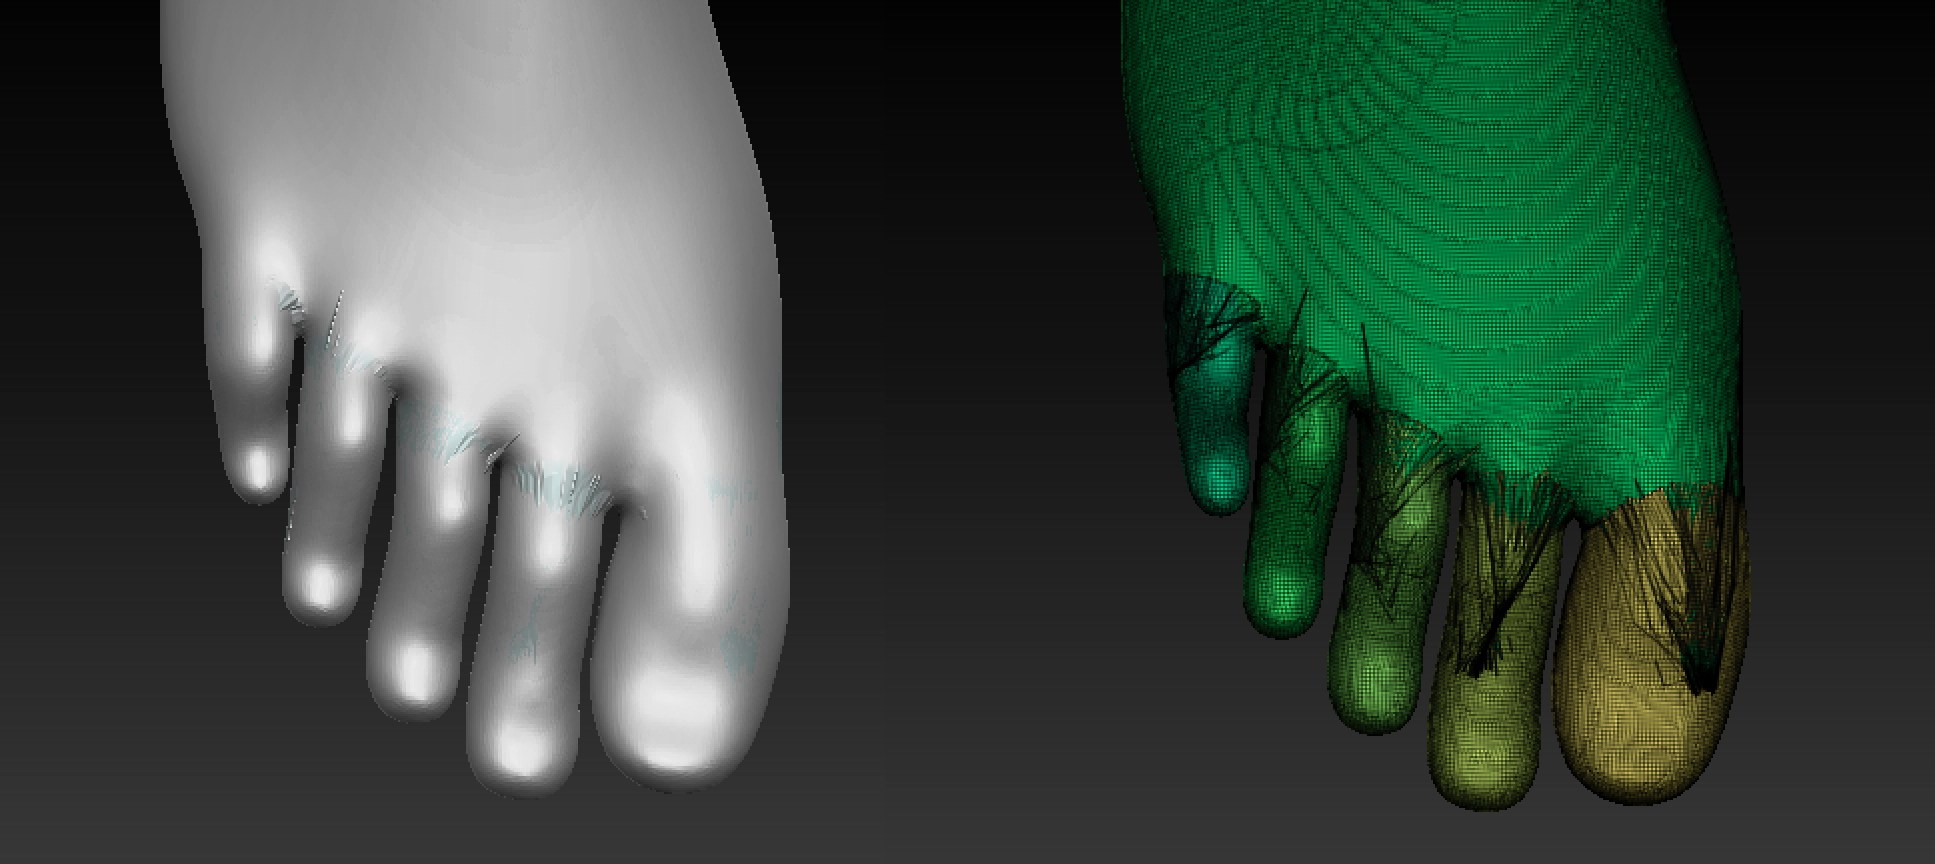
You mentioned about creating PolyGoups for each toe. The attached images show the result of that, then merging the foot with the leg and performing a re-DynaMesh with the “Group” button enabled (next to the big DynaMesh button).

The result? Not good. The Polyframe (right image) shows what looks like a spider web that was created by a spider under the influence of Benzedrine. And using the smooth tool is like trying to clean an oil spill with a damp sponge: useless. I suppose I would have to resort to your
first option of using the Masking and Transpose features to spread the toes out, but I think there must be a more eloquent way to do this.

I’m hoping I can just export this mess to Maya and fix it in some fashion.

Anyway, thanks again for your help.

Attachments

grouped_dynamesh.jpg

Did you have Blur turned on when you Dynameshed?

The size of the subtool will have a big impact on dynamesh operations.

Subtool at small size (Dynamesh settings: 1024):

foot1.jpg

Same exact subtool scaled up (same dynamesh settings)

foot2.jpg

Thank you, Thor!
Such an easy solution.

Thanks for your suggestion, Thor. Much appreciated. I wish I had your magic touch for the scaling to work. I tried as you suggested, but alas, the issue persists.

Also, to dillster’s question, yes, I did have a Blur value set when “Project” was enabled, but also tried the procedure with “Project”
disabled – neither made a difference.

Thor, I’d be curious to know the numeric value of your scaled up foot, just so I can get an idea of how big I need to scale up mine for the DynaMesh to produce better results. I should mention that the re-DynaMesh works fine on the foot as its own SubTool, but seems to get pretty jacked up after merging and re-DynaMeshing with the rest of my character. Also, I’m using the highest resolution possible.

Thanks again, guys.

If Thor’s approach does not work, maybe you can use a dynamesh sub after dynameshing leg and foot together?
Given you have made a dynamesh-subbed negative form of your foot.

Feet into Cube, sub foot -> negative form of foot. Dynamesh foot and leg, put Cube-form on and dynamesh again with cube as sub.

This is just an idea of an amateur and I have not tried it out.

hmmm… i thought one of the new features in 4r6 was the ability to retain polygroups through the dynamesh process, but not have it turn a group in to a separate “chunk”.
i’m going to be updating in the next day or so, so i’ll do some experimenting. this has been a long time issue for me too. i’d love to have a quality workaround to it.

So here’s something I did that so far looks successful: I duplicated the foot and merged the original foot with the rest of the leg, then re_DynaMeshed. This of course produced poor results with the toes, but at least I have a duplicate (good) foot to work from.

I then trimmed the metatarsal portion off the bad foot and replaced them with that same portion from the good foot, leaving a bit of overlapping geometry. I then made the good foot a single PolyGroup, then “merged down” with the rest of the leg and re-DynaMeshed with “Group” enabled.

This feels more like just a work-around, and I don’t know if it was the overlapping geometry that made a difference, but for now it looks like DynaMesh as separate poly groups is the way to go in a case like this. The only problem might be that certain brushes won’t produce good results across the seams, such as the Smooth brush.

Attachments

polyframe_foot.jpg

I use and recommend the Dynamesh Master plugin:

http://www.zbrushcentral.com/showthread.php?177194-DynaMesh-Master!-unofficial-Information-Installation

The big advantage of this plugin is being able to set the desired polycount.

I had the foot as a separate subtool with enough resolution to keep the toes separate.
The leg subtool dynamesh was lower res. here’s what it looks like after I merge:

foot3.jpg

Now, if I simply redynamesh, it applies the Dynamesh resolution to the WHOLE foot and leg- which, because of the scale, is going to be too low. This causes the problem with the toes:

foot4.jpg

However, using the Dynamesh plugin, I can give it a target polycount (I just used the default of 1.5M) - the plugin automatically scales everything to get the desired result:

foot5.jpg

Thanks again, Thor!

DynaMesh Master seemed sooo promising. Unfortunately after downloading and trying it, I’m experiencing the same results as my first DynaMesh attempt, even after playing around with different settings. :frowning:

Given that it works for you, I can only assume that there must be something I’m doing wrong, either with my model or the software/plugin.

Bummed, but thanks again for your input.