the eye feels like it is pushed back into the skull, I can see the zygomatic definition from the skull.The crease under the nose should probably stop when it hits the lip.
check this out
http://en.wikipedia.org/wiki/File:Lateral_orbit_anatomy_2.jpg
the eye feels like it is pushed back into the skull, I can see the zygomatic definition from the skull.The crease under the nose should probably stop when it hits the lip.
check this out
http://en.wikipedia.org/wiki/File:Lateral_orbit_anatomy_2.jpg
Hi Dustin, man I love your work on the sniper! How come I missed that post? lol Anyway I’m currently working with a sniper rifle also, Mauser SP66, but facing a little bit of a trouble for the topology flow (not much of a hard surface stuff done before, need to practice alot), so care to share a little bit of some tips for creating it? how to manage good edge flow in a pretty limited surface, not like modeling organic stuff?..showing the edge face rendered out is enough  Much appreciated!
Thanks
_Revel
@Turchik: Thanks for pointing that out
@Revel: Thanks man. I modeled that gun in Max. Personally, it would take me longer to do that sort of stuff in ZB. I just used standard poly modeling, nothing mysterious. Here’s a frame from my reel that shows the wire.
[[attach=187673]barrett_camA_clayWire_00100.jpg[/attach]]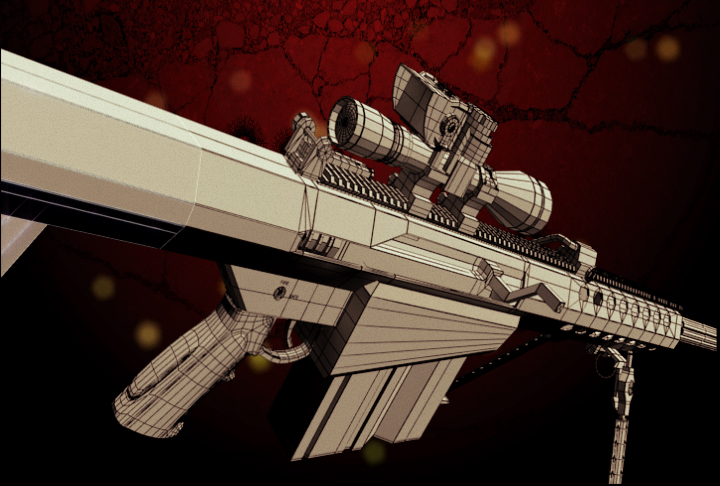
your showreel looks good, really nice presentasian 
Thanks for the quick reply man!
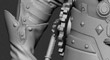
From looking into the wire, I have question though, I see alot of nGons here and there, isn’t that gonna effects the final render, pinching/ smoothing error? but from your render it looks so smooth…how did you do that? hrmm 
I’m a Max user myself, and not yet that familiar with hard surface modeling in ZBrush, and also more prefer doing this kind of stuff inside Max.
*I haven’t check out your reel, cus the internet is kinda slow here sometimes…but looks like it worth to wait for it to finish loading your video reel
_Revel
It’s all quads and tris with a TurboSmooth modifier applied. There are loads of tutorials online for modeling things like cars. I recommend you check those out to get you started. Here’s one that looks good. One tip I can give you is to assign the NURMS subdivision toggle to a hotkey. I have it mapped to the tilde (~) key. This will allow you to quickly make sure you’re getting good results when you smooth. Good luck man
I see…with all the quads and tris, no wonder the final looks so smooth…
Haha, yea I also have a hotkey assign for the NURMS which is [space bar], actually I want to assign it to [tab] key, but Max won’t let me :lol:, I come from Lightwave and used to press [tab] for previewing subD mode.
Anyway thanks for the link! I will definitely check that out
_Revel
nice work bro keep it up now i am coming on zbrushcentral check it my work and give me ur advise bro
Work in progress. Sculpted from original concept by Little Druid. Still lots to do.
[[attach=188662]engineer_wip08.jpg[/attach]](javascript:zb_insimg(‘188662’,‘engineer_wip08.jpg’,1,0))
[ ](javascript:zb_insimg(‘188663’,‘engineer_wip08_thumb.jpg’,1,0))
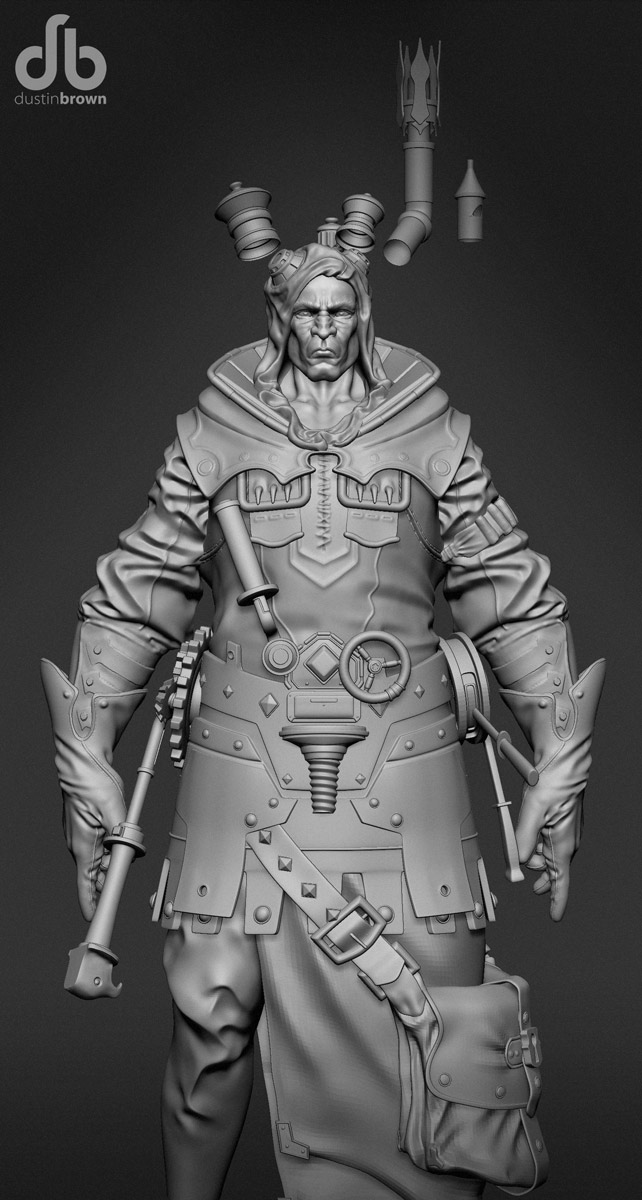
Dustin - you never cease to amaze me with the quality of your work. Can’t wait to see the final result.
Heheh…saw this on your website…love the wrinkles.
Anyway I think the hands looks too big though, or the shoulder is not wide enough?
Well other than that, cool stuff!
_Revel
steampunkilicious!small_orange_diamondsmall_orange_diamondsmall_orange_diamondsmall_orange_diamondsmall_orange_diamondsmall_orange_diamond
Looking good man! Cant wait to see the final product.
My 2 cents. His face looks a little longer in the concept.
Great treatment on the clothing especially. Very impressive work technically.
Can you explain a little bit how yours steps for clothes… is very impresive… can you swhos us with a little video you tube an example and record your work¿?
@Capa: Thanks buddy.
@Revel: Yeah I need to tweak his proportions for sure. Things get a bit out of wack during sculpting.
@Greg: Spot on man, I’ll fix that for sure. Thanks!
@kevphil: Thank you.
@yfchild: Thanks! I can’t promise anything in the immediate future, I’m pretty busy with my portfolio. I am trying to record more tutorials though, so who knows! In the mean time I can recommend a couple good resources for you.
Richard Smith’s Video
The Masterful Drapery thread on ConceptArt
Hope that helps. Good luck man.
making progress on the sculpt.
[[attach=190085]engineer_wip12a.jpg[/attach]]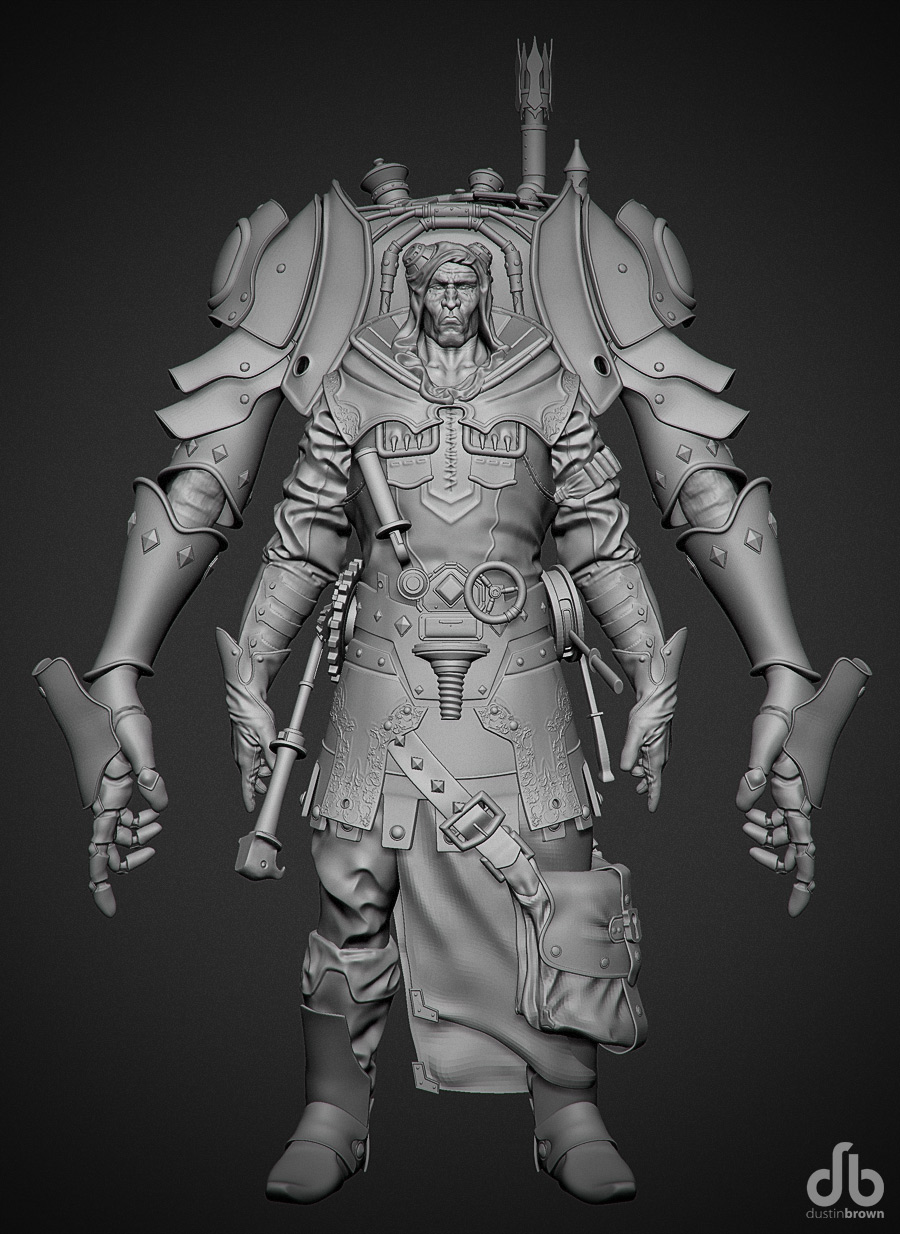
and also working in Max, modeling the back.
[[attach=190086]engineer_wip12b.jpg[/attach]]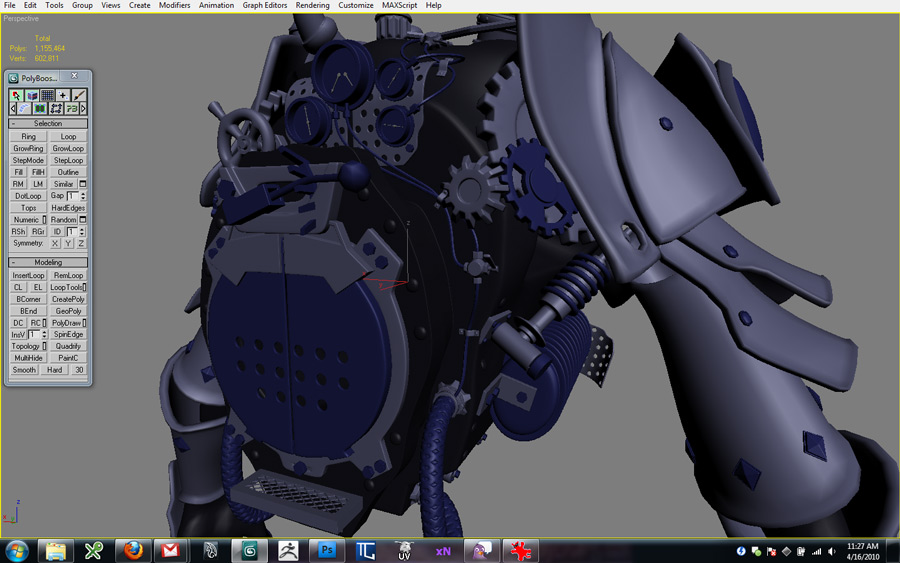
[ ]
]
This one is looking sweet so far, great details, and I really like the robot design. If I may just crit one thing though, I think it would be really cool to have pipes wires and whatever, at the link between upper and lower arm.
Keep it up man, it looks really good
holy crap he’s got alot of parts
@-Storm-: I’m trying to stick as close to Little Druid’s drawing as I can to show that I can model from a concept. I’ve barely touched the area you mentioned, it’s just blocked in for the time being. The mech hands are still in sad shape as well. Loads to do.
@JohnYip: Yeah…the feedback I got on my last demo reel was that I had too many simple busts and people wanted to see more full body characters with clothing and accessories. This is my first attempt at trying to follow through on that feedback. He’s definitely got clothing and accessories