many thanks to aurick for your quick and helpfull response.
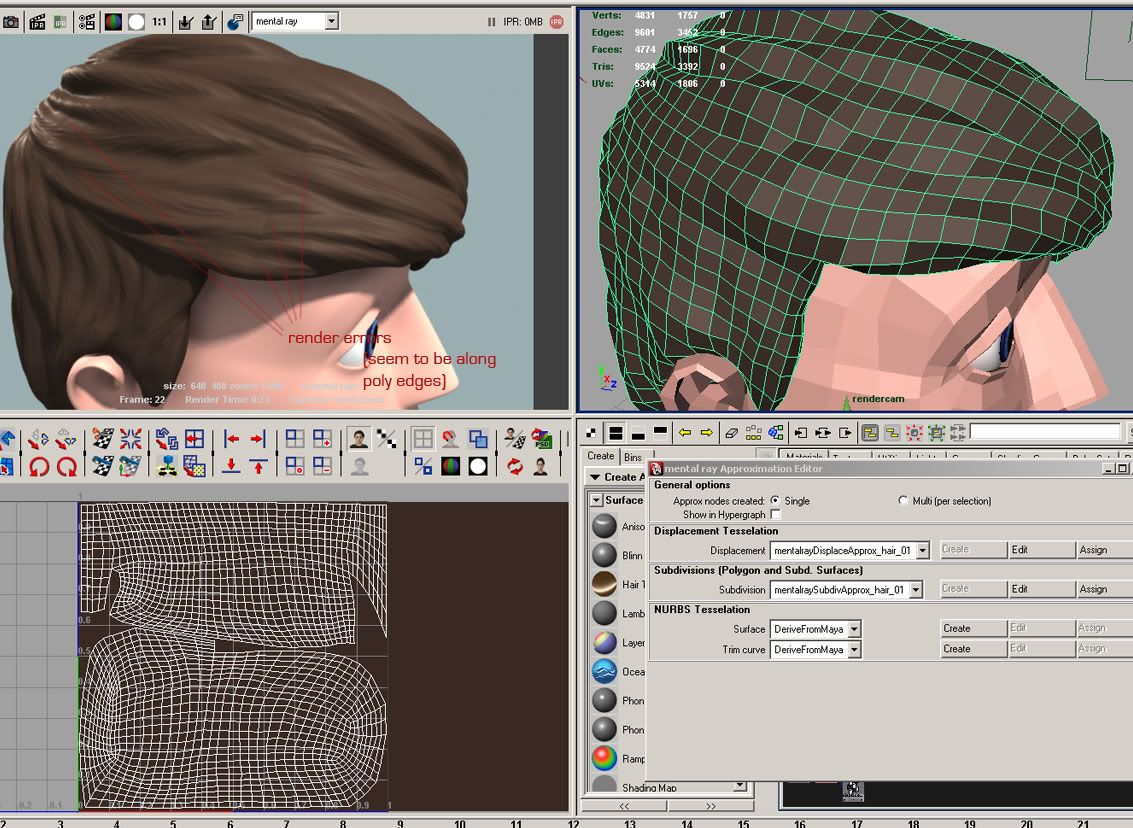
throughout the last couple of days i tried to get this solution running. But i didnt even get this far. I worked myself through tons of video tutorials on the displacement mapping issue (many thanks to scott spencer and cannedmushroooms) and really learned a lot but i ran into a problem I am not able to solve. When rendering the model within mental ray there are some distortions along the edges i cant get rid of.
What I did:
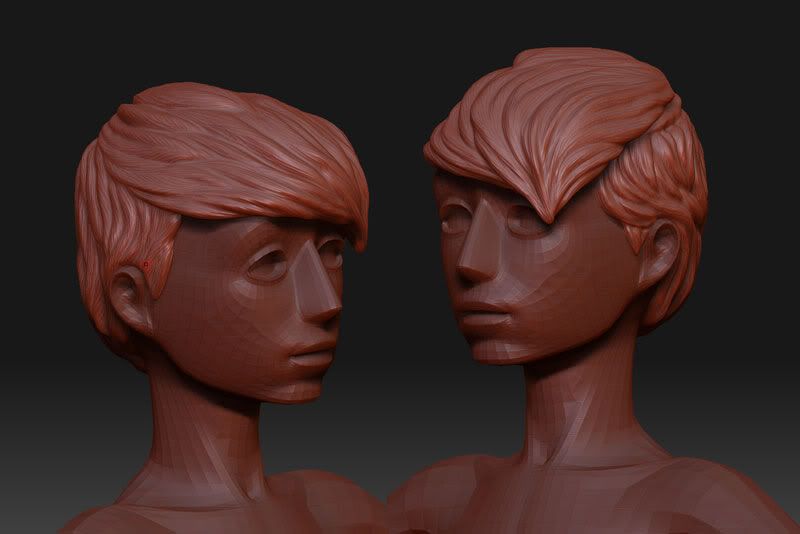
I modelled the base mash in maya and imported it into zbrush, I did the sculpting (used brushes: standard, pinch. move and inflat).
then i retopologized the mesh in zbrush to better fit the shape. Exported the lowest version and did the UVs in maya. Imported the base mesh back into the tool. and created the normal maps. rendered it in maya(mental ray) and got the problems which i still can`t get rid of.
I searched Zbrushcentral for help and tried anything i could imagine would possibly help:
I created the displacement maps with TOOL/DISPLACEMENT and with MULTI DISPLACEMENT 3 (same distortion problem, though TOOL/DISPLACEMENT gave better results in terms of image depth)
I used the TOOL/DISPLACEMENT result as a preview in the MULTI DISPLACEMENT settings.
tried it with smooth UVs on and off.
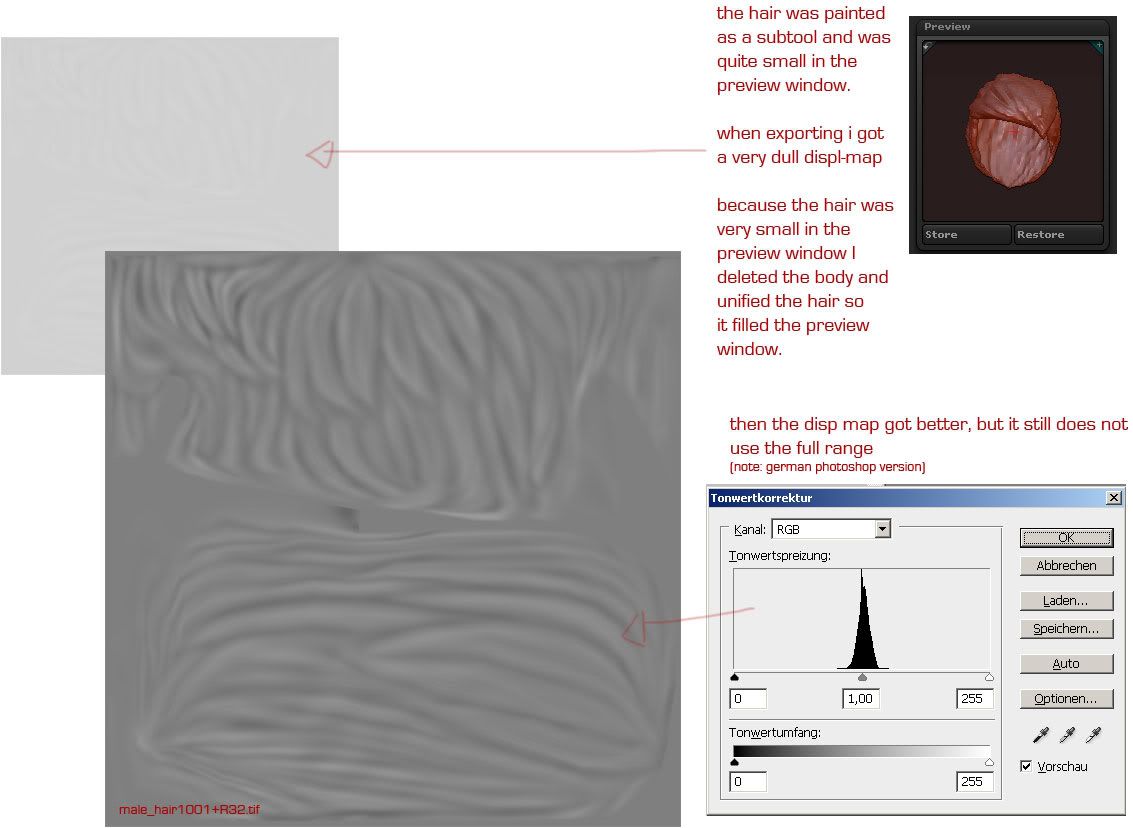
I unified the mesh to fit the preview (I painted the hair as a subtool on the body, so it was kinda small in the preview) This gave better results in image range, but distortion remained the same
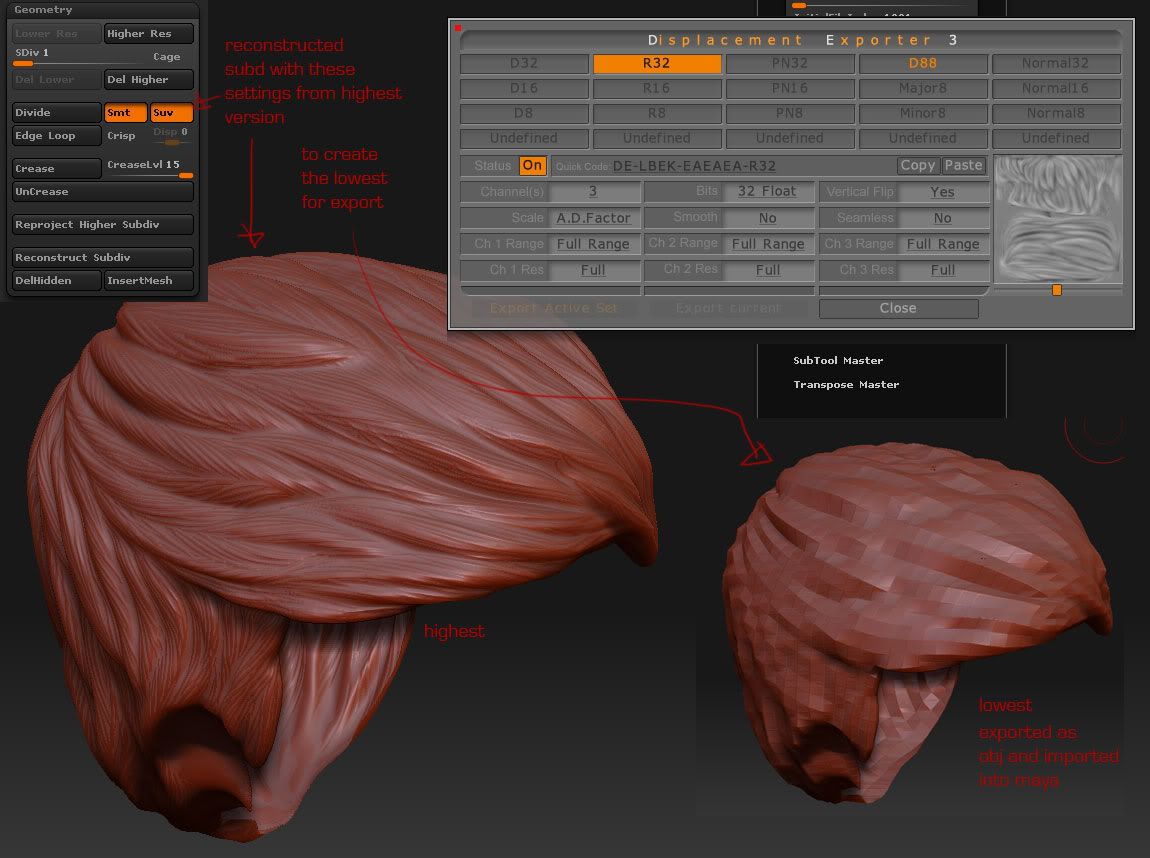
I used the 2nd level instead of the first as a base mesh in maya (as you can see in the screenshots)
deleted all lower levels and reconstructed the subdivisons of the tool from the highest down.
ofc i tried all different settings in the displacement (adaptive on and off, smooth UVs on and off)
I hope someone can help. I also add the tool as a rar file to this post and some screenshots to display the two main problems:
distortion in rendering, dull displacement map
www.miete-strom-gras.com\male_hairpaint_01.rar
many thanks for your time