ZBrushCentral

Displacement mapping problem

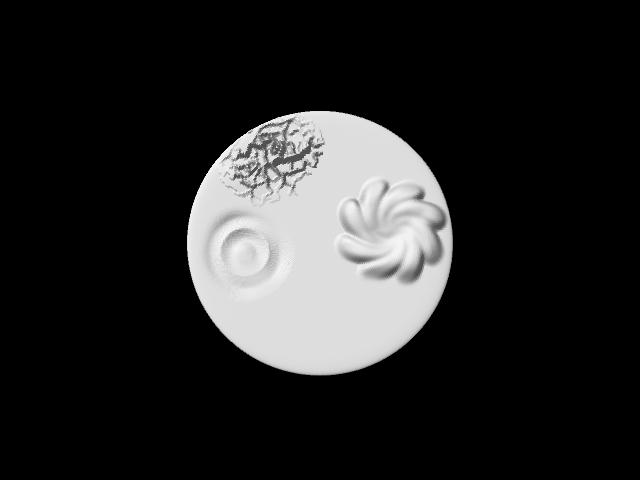
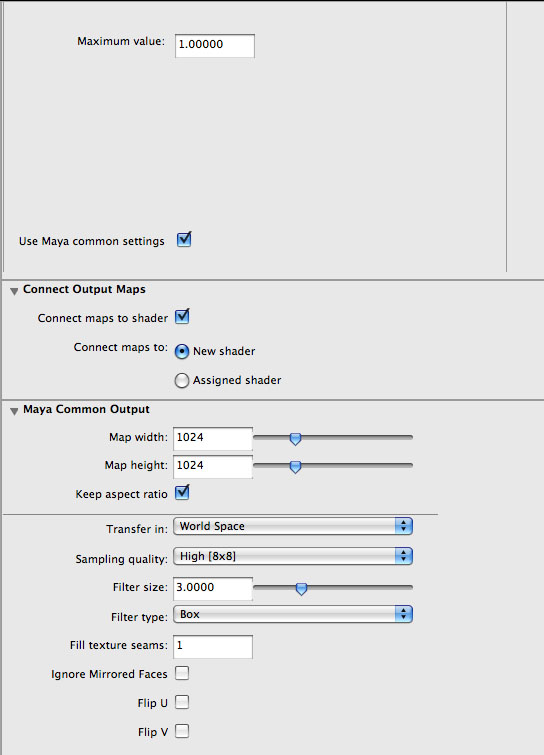
I have been having problems with displacement mapping and am not getting the near what the original model looks like. What i have done is create a cylinder as a test for displacement mapping (transfering the detail stuff). Then made a few Extra edges to make it divide better in zbrush. I then exported and imported to Zbrush from Maya, Then i Edited it in this on smooth of level 5. I added a few alpha masks and reversed then Zadded on them. I then exported both the level 2 and the level 5 out to Maya. Then i softened the edges and added Uvs, then went and used transfer maps under lighting and shading to make a displacement map. This is the result i got from the render, the exported Zbrush high res, the transfer map settings

Can someone help me solve this?

Thanks for any replies

Attachments

diplacementmaptrial1.jpg

diplacementmaptrial2.jpg

Picture 3.jpg

Picture 1.jpg

This is the high poly model that was exported from Zbrush,

Attachments

diplacementmaptrial2.jpg

This is the Setting i used for the transfer map

Attachments

Picture 3.jpg

This is the second half of the setting lol thought could b useful :smiley:

Thanks for any replies

Attachments

Picture 1.jpg

How big is your displacement map? Is it 16-bit?
-Kerwin

Hey thanks for the reply, Im kinda new to this I made the map in Maya how do you check to see how big the map is?

The size of map is controlled in Zbrush–alternately open the map file in an image editor and see what it says for size and bit-depth. I suspect your map is small or not deep enough for the amount of detail, but I’m just hypothesizing. :slight_smile:

-K

Think its 300 X 200

Try a map of at least 1024 x1024 and 16 bit depth. 300 x 200 will likely loose too much fidelity to your sculpt. As a rule of thumb you want about a thousand by a thousand for a million polygons.

You will also get best results with a power of 2 for the size. That means 1024x1024, 2048x2048 or 4096x4096.