hi everybody.
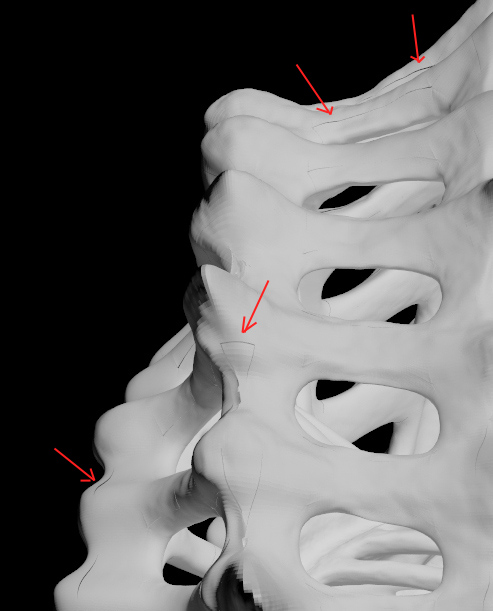
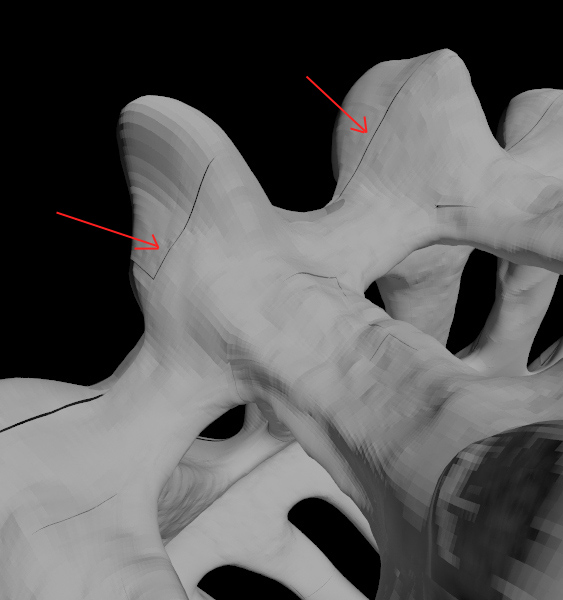
i have this problem. i’m learning zbrush, and already know how to sculpt and generate displace maps. but i have problem with those maps in 3d studio max. generally displacement looks good, but whole map looks like it’s divided to small regions.
displacement map has small gaps, seams. i think that problem is caused by zbrush during displacement map creation process. probably zbrush generates those seams (uv mapping?). does enybody know how to fix it?
it’s 4-th day i’m spending on countless tests. i went through dozens of posts and watched like 20 video tutorials on “how to make displacement map”. i spent more than 20 hours looking for answers.
but i didn’t find any solution. finally today i found this on zbrushcentral: somebody wrote “there is no solution for displace seams”. i hope thats not true. i believe there’s a way to use zbrush + max + vray succesfully.
i know there’s hundrets of tutorials on this matter, and i’ve already read a lot of them so please don’t just copy/paste links to another tutorial. i desperately need some exact answer to this question.
i tried everything and i’m simply tired with it… i even asked that question to my frien who used to work in game undustry as a pro, making models i ZB and he didn’t know the solution.
- i set blur i max material slot to 0.001
- turn off map filtering in max and vraydisplacementmod
- i tried 2d and 3d vraydisplacementmod
- i tried different setting of turbo smooth
- i make cage in zbrush (tried with and without it)
- i tried making displacement with adaptive option on and off
- i tried making displacement with smooth uv option on and off
- i import displ map into max with gamma 1
- i tried to set rgb offset in max material slot to -0.5
- i tried to convert displ map to rgb in photoshop
- i tried 32 and 16 bit tiffs and different types of uvmapping
nothing wokrs. please help.
ZB 4, max 10
Korek
Attachments