ZBrushCentral

Displacement map includes lumps on original model, not just changes

Hi All again!

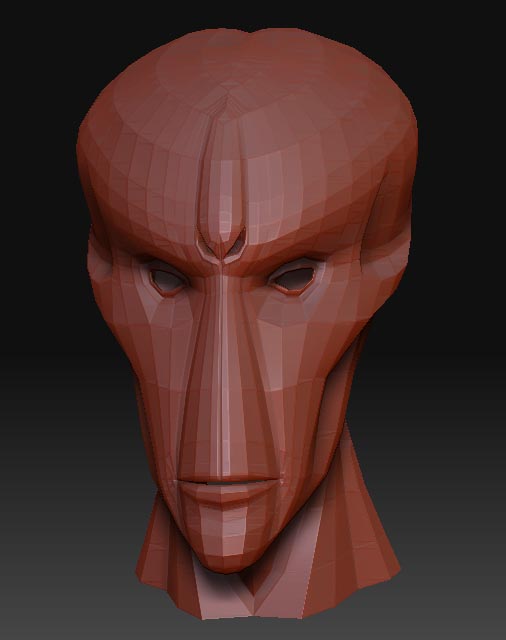
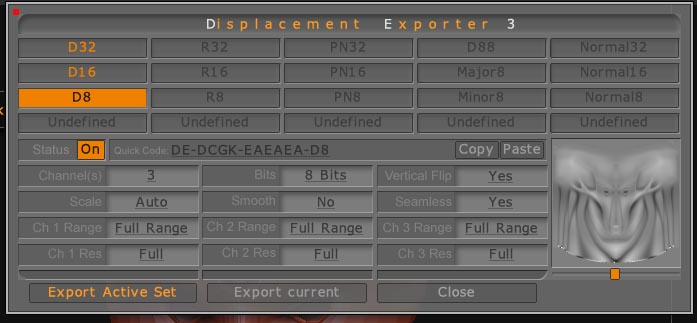
Second question: When I make a displacement map for my model, the resulting image includes the bumps and dips of the original model rather than just the modifications added in ZBrush (ZBrush 3.1). The result is that when I apply the map in Maya (7.0), rendering in RenderMan for Maya 2.0, the lumps like the cheek bones, which are modelled, are added to greatly, and the finer detail is almost lost.

The only way I’ve got round this is to tweak the map in Photoshop, which is not an ideal solution.

Am I doing something wrong again?

Many thanks again.

Jules

Could you show examples?

Can you describe the steps you’re following and the settings you’re using?

Hi again, Aurick,

I’m keeping you busy.

Below are two images: one is the undivided model as imported from Maya (with its UVs all working now, thanks to you); and the other is the displacement map exported from it.

There is no work done on the model except to subdivide it a couple of times. No brushes were used or anything else, so I expected to get a plain gray image. As you’ll see, it’s not.

Model.jpg

Hope this all works.

If I do some brushwork on the model, I get that superimposed over the image above. I suppose I could export the unchanged image into Photoshop and invert it before applying it to the final displacement, but it seems not the best way to do it.

Thank you again for your help.

Jules

Attachments

Displacement Map+D8.jpg

Displacvement pallete.jpg

DE Options.jpg

Here’s what happening:

When you subdivide the model, it smooths. This causes the mesh to contract. When you return to level 1, that smoothing gets carried down in levels. So when you create the displacement map, you get some stuff going on because it’s looking at the high level mesh which is still based on your original model; not the one that has resulted from multi-res manipulation.

Before you ever divide your mesh, store a morph target. When you later come back to level 1, switch to the stored morph target.

If you forget to store the morph target before dividing, go to level 1 and store one at that point and then import your base mesh again. This has the same end result.

Just remember which mesh you’re looking at when you’re at level 1: the original base, or the modified version. Before you go back up in levels, you need to make sure that the modified version is active. Otherwise, the changes made by restoring the base mesh at level 1 will end up translating to the higher levels and changing them!

Thank you again. I think I understand. Haven’t done morph targets yet.

So I use the stored morph target as the base for making the displacement.

I’ll give it a go.

Thank you very much once more. I should be up and running now.

Jules

Hi Aurick,

Just tried what you said and it works. I suppose I ought to have found that in the manual or the Help files - sorry. Can’t see the wood for the trees.

Anyway, I can really do some stuff now. Thank you so much.

Jules