ZBrushCentral

Displacement map generated is zoomed in/scaled up version of what it should be

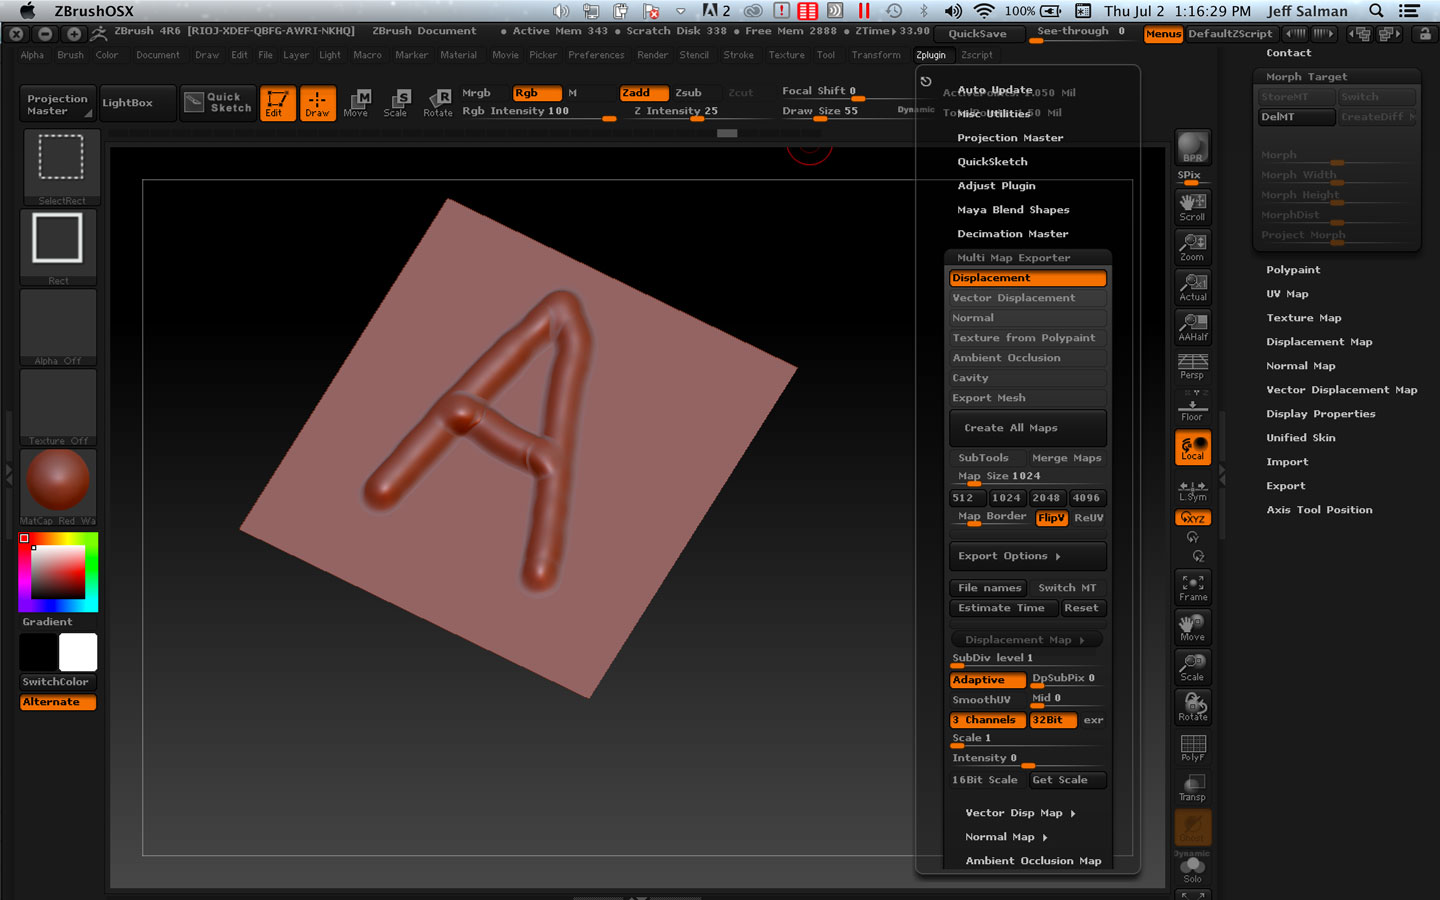
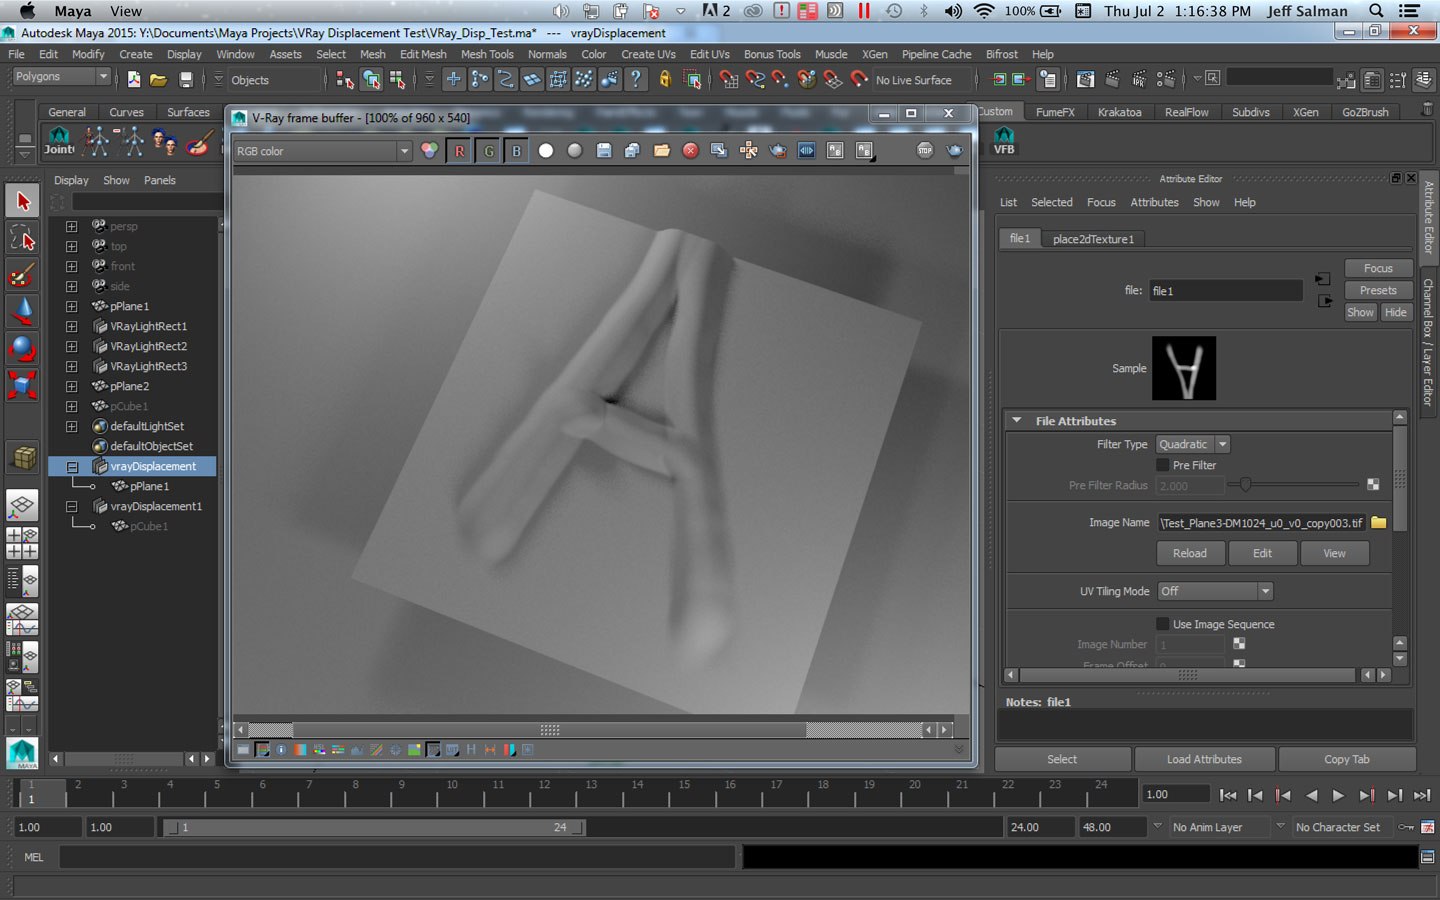
Not sure how to describe this problem, but hopefully the pictures I’ve attached should help. This problem only arises with a Plane that I’ve created in Maya and exported out as an OBJ to ZBrush. If I do this using a cube from Maya, then the displacement map is generated as expected. Not sure why the result is coming out different/not as expected with a plane.

The displacement map that is created seems to be a zoomed-in/scaled-up version of what it should be. It’s almost as if the displacement image is being zoomed-into/scaled-up before the displacement map is written into the UV layout map/space.

If anyone has any ideas, would greatly appreciate the help. Thanks.

Attachments

A1.jpg

A2.jpg

A3.jpg

Ok, I’ve narrowed it down to the Adaptive button for the Displacement map in the Multi Map exporter. When I have it on, I get the weird displacement map sizing issue; when I turn Adaptive off, the displacement map is generated as expected. From how Adaptive is supposed to work (i.e., the purpose of it), I don’t think this is intended to cause this kind of a problem. So it seems like some kind of a bug to me. Again, this seems to be an issue with a plane; using a cube, Adaptive works just fine.

Also found another post from a couple of years ago that also seemed to be the same problem (though no solution either). Here’s the link to that:
http://forums.cgsociety.org/showthread.php?t=1029823

All this is just in case someone else has the same problem or is able to use the info to troubleshoot more or figure out a solution.