Here’s some tests for C4D 10:
The original

Here’s some tests for C4D 10:
The original
Cinema 4D with a PN32 disp map. No matter what settings I now change in Material editor box the result is more or less the same, although the displacement is definately being picked up.

Using the following Quick code:
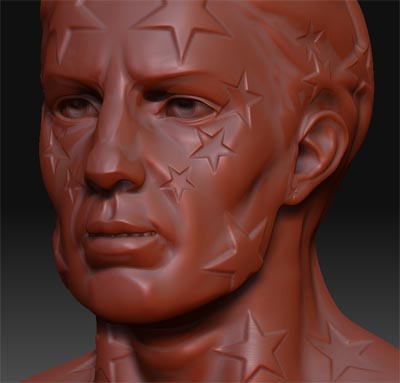
DE-JCGK-EACADA-4D_D32 results in:

Ok it’s getting better, but does anyone know how to correct the parts circled?
The settings I’ve got for C4D are:
HDR Gamma 1
Sub-Poly Displacement = on
Subdiv level 5
All other settings = on
Keep original Edges = off

can software have multiple quick codes?
DECLOAK, yes you can use different Quickcodes for your 3D package and slight changes can have a big effect.
Just a small update for C4D. I’ve finally got a decent result and I haven’t even used DE3 for it.

I didn’t know I could get results like this by simply making and Alpha map with the built in Create DispMap button? I’m worried it was a fluke.
Asaxon,
I have been watching this thread with great interest. You are doing a great job here deciphering this thing. That last render looks very good.
Is it possible that you could provide screen grabs as before of your settings in ZBrush as well as C4?
Thanks
Anyone getting the displacement to work in Maya/Mental Ray?
I’ve tried the same workflow as zb2 (http://www.zbrush.info/site/index.php/ZBrush_To_Maya_Displacement_Guide#Maya_Setup_for_Rendering), but so far the displacement doesn’t show up at all.
DarkEdge, thanks and yes I will go over the steps in the next day or so for you. I need to make sure it works under different cicumstances as I’m still having unpredictable results with various Geometry.
mantella, I’m going to move onto Maya when/if I figure out Cinema 4D so keep your eye on this post.
asaxon,
Did you load the map into the Alpha channel in C4D or the displacement channel? Why are you using the Alpha Channel?
Great results, but please explain what you did here in more detail.
Thanks
Paint guy - yes I am going to try to go over the process in an hour or so, so check back.
I’m managed to get fairly good displacements so far although on more complex models I’m having problems with distorted Geometry when imported into C4D but I’ll keep cracking on at it until I get constant results.
Ok here’s the walkthrough process for ZBrush to Cinema 4D.
I’ll be using ZB 3.1 and Cinema4D 10 for this example. Obviously if you want to use your own model etc, feel free.
[ ]
]
Now on to Cinema 4D

Standard lighting etc and by far not the best we can get from it.

Also note, I’ll try and push this further when I figure out DE3, but for now these results are easy and effective.
Asaxon,
Excellent work mate. Not to be a bother but your C4 settings jpg isn’t showing up.
Thanks. Not a bother mate, don’t know what happened there, should be ok now.
Very Nice.
Thank you much for sharing all of your hard work. 
Not a problem mate, it’s all new to me too. If you find out a better way than I’m doing it, please share. However much I love ZB, it’s useless to me if I can’t export it correctly for rendering.
As far as rendering goes, I really love the way Cinema 4D is simple to use but at the same time, just as powerful as anything else out there.
That’s good to hear. The renders I’ve seen have been very good too. I’m a 2 year old Max user and for the first year it was very over whelming, so I’m looking forward to something that won’t cause brain cramps again.
Can’t wait to try your settings.
Regards