ZBrushCentral

displacement and normal map generation methods and techniques

I’m looking for a good tutorial or some sort of explanation on how others generate their displacement and normal maps for their models to be used in another application such as maya. Are there any sort of typical settings you use as a general starting point or that continually give good results?

Is it normal to have to always tweak and clean up the maps in Photoshop to remove spiking/pitting or other mistakes within the map? I just never seem to be able to really get a good clean displacement or normal map out of Zbrush.

Thanks for any help.

As far as I know, there’s not much out there in the form of a specific tutorial for generating displacement/normal maps within ZBrush. I basically figured most of it out by putting together bits of info from various sources. For displacement, for a 4k map my settings would be to turn on adaptive, smooth uv and 3 channels, set dp sub pix to 2 and mid value to 0.5 and simply click “create dispmap”. Obviously you would have to create a UV map of the relevant size prior to this. The easiest way to export your model and displacement map in programs such as Maya is through the GoZ function, because (provided you have the map already generated) it will automatically send everything with all of the correct settings which can otherwise be a pain. There’s plenty of info around regarding setting up GoZ with your 3D program of choice. As far as normal maps go, Its a similar process but if you are not happy with the quality then check out xNormal. Im assuming you have enough knowledge of Zbrush to figure out the details I may have missed but Im happy to help if you have further issues.

Thanks for the reply Trist! I’ll try your settings on a 4k map next time. I generally use the UV Mapper plugin to generate my uv layout and then tweak the shells in Maya to get the exact desired layout. So I feel that I have a pretty good uv layout already without any major stretching. Maybe making a larger map and then scaling it down to a 2k will help. Also just not sure if it has anything to do with the cage or base mesh that I’m generating the map for.

My general workflow is I create the base mesh in maya and then send it to Zbrush via GoZ, subdivide and sculpt. Unwrap the uvs with the plugin, send back to maya, tweak the uvs into appropriate shells and send back to Zbrush. From there I generate the displacement and normal maps using the multi map exporter plugin. However, no matter what settings I seem to use, I always get weird wavy lines and other issues within the map that need to be cleaned up in Photoshop.

Sounds like you are on the right track. I have basically the same workflow, but use 3ds max instead so I cant really help with the Maya side of things. Not really sure what would make the wavey lines, but I have had trouble getting 32 bit DMs to work in Max so that may be a factor if thats what you are trying to achieve. Unfortunately there’s no right or wrong way to do this sort of thing, most of it is just trial and error depending on the needs of your current project…but in the end its worth the trouble.

Okay, I have some more questions for anyone who may be able to help.

  1. When using the Multi Map Exporter plugin, is it good practice to use the displacement map feature to generate the maps for multiple subtools and combine them to one map?
  2. If yes to number 1, does the scale factor (Get Scale) have issues? From my tests, the alpha gain and offset value works great for one tool but not for the others if using the same material node with connected maps in Maya.
  3. If using the same map for multiple subtools, do you usually use different material nodes/displacement node in maya with different alpha gain/offset?
  4. If no to the above questions, is it better to use a separate displacement map for each subtool so that the correct scale and alpha settings are the same for the entire map for that specific tool?
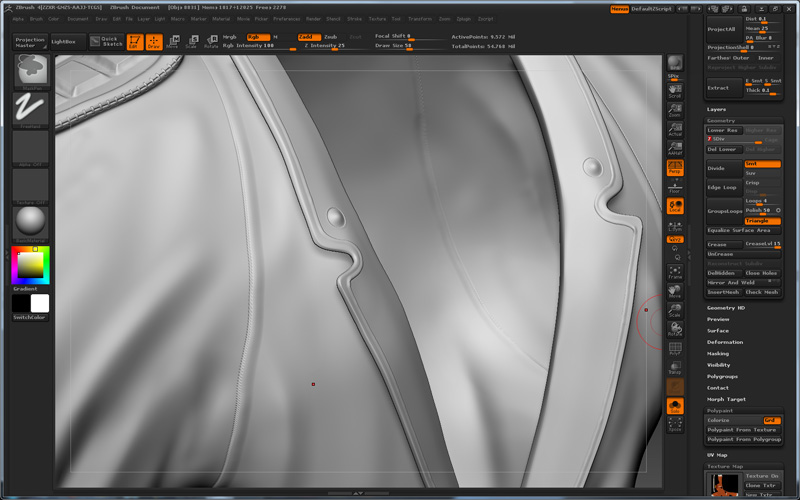
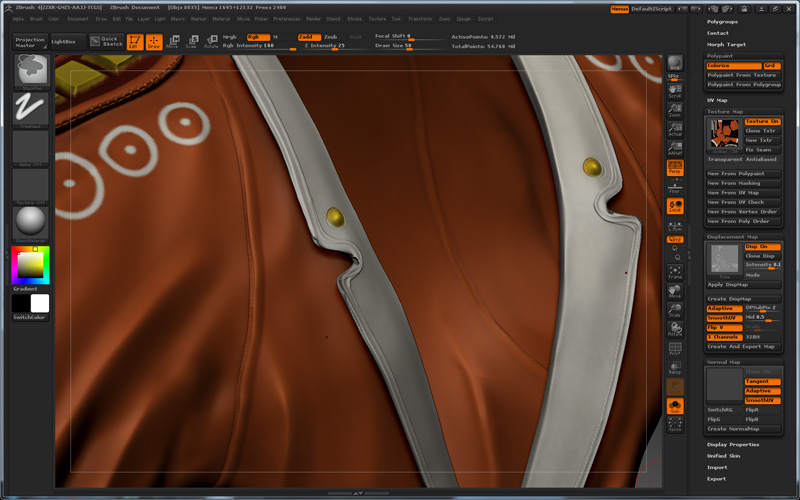
I have also included a few images of one of my subtools I'm currently working on with some of the common issues I'm dealing with. As you can see from the images below:
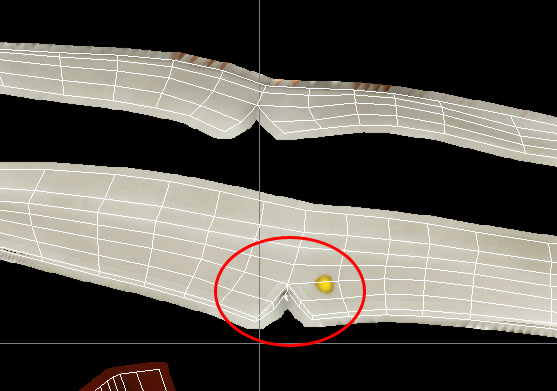
I have my low level mesh which will have the displacement map applied in Maya. Focusing on the split within the collar.
 
 ![robe_low.jpg|800x500](upload://3yXfGEXGFzmVl9cMumg8VNUQ0cI.jpeg)

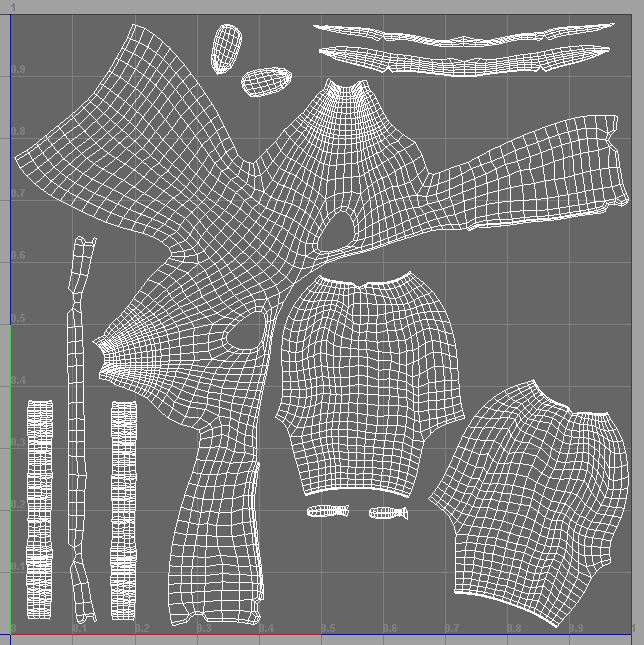
I believe my uv layout is okay but maybe I’m wrong. I don’t really have any issues with stretching/squashing anywhere. What causes the issues depicted in the images above and what do you commonly do to correct them?

Thanks!

Attachments

robe_high.jpg

robe_disp_preview.jpg

uv_color.jpg

uv_disp.jpg

uvs.jpg

Yes, I’ve had similar problems and it’s been difficult to find troubleshooting info. There seems to be a myriad of issues to fine tune and adjust to get a good Disp Map into Maya. Check out Scott Spencer’s ZBrush 2nd edition which goes over the Maya/ZBrush/GoZ workflow, and also look at a good tut by Andrew Klein www.andrewklein.net